12 DIY Fashion Projects Ideas for Beginners
Revamping your personal wardrobe does not require excessive spending at luxury fashion boutiques or a mastery of advanced sewing. Modern fashion trends heavily favor distinct individuality, custom craftsmanship, and sustainable creativity. Many style lovers assume constructing stylish garments demands couture tailoring experience or industrial machinery. In reality, stunning handmade ensembles and fashion refreshes come together using simple techniques, scissors, and common textiles. Repurposing old garments, upcycling thrift store finds, and utilizing flat fabric cuts yields runway-worthy fashion pieces with minimal effort.
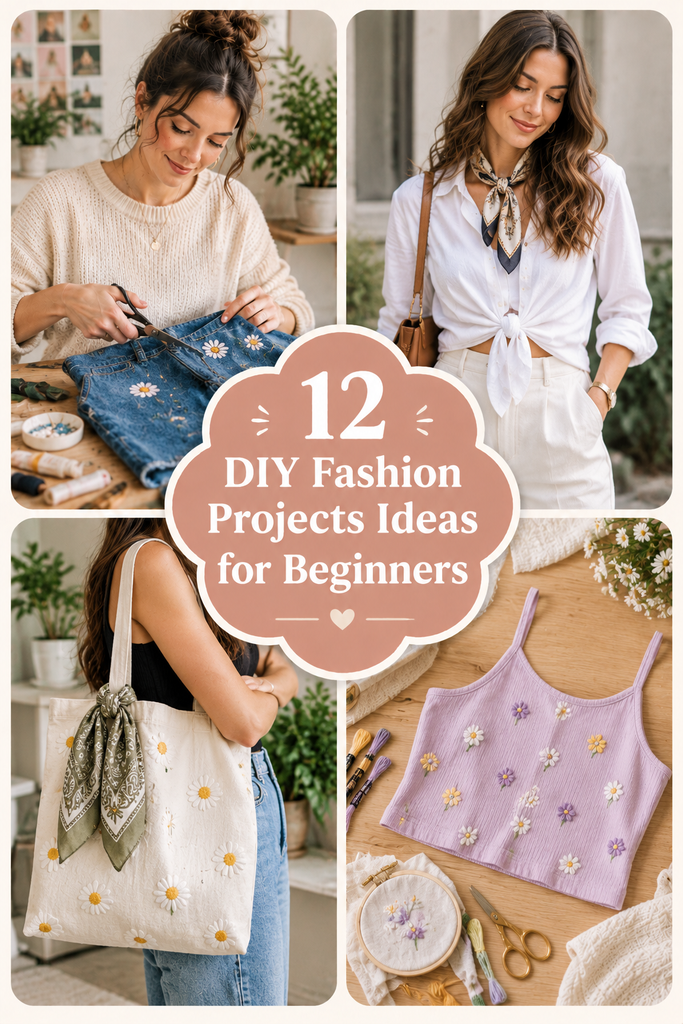
Pinterest feeds are continually buzzing with viral, innovative garment transformations that celebrate sustainable resourcefulness. You can effortlessly recreate these high-end aesthetics in your own bedroom using budget-friendly supplies. Simple weekend refashioning projects immediately breathe vibrant new life into tired fabrics, eliminate dull closet vibes, and sharpen your creativity. Transforming existing and secondhand clothing combines eco-friendly lifestyle choices with modern, runway-inspired personal aesthetics. You can easily alter loose proportions, introduce playful texturing, and custom-tailor pieces to match your exact body curves. Focus on high-impact visual anchors like cropped waistlines, custom dyes, and customized accessories.
Unlocking Breathtaking Style with Creative Customizations
Achieving a high-end designer look depends primarily on proportion, texture, and clean finishes. First, focus on cohesive neutral tones, balanced drape, and sturdy base materials. Linen, structured cotton, and heavy knits naturally look elevated and expensive. You can easily source these budget fabrics from discount textile shops or thrifted pieces. Secondhand stores are treasure troves of oversized vintage garments, such as heavy-weight flannels and patterned dresses, that provide yards of premium cloth. Old oversized men’s shirts and maxi dresses quickly become striking modern sets.
Furthermore, simple finishing touches like pressed hems or deliberate distress immediately elevate your homemade garments. Clean, intentional garment construction mimics high-end boutique clothing sold for hundreds of dollars. Focus on high-impact focal points like dramatic sleeves, cinched waists, or customized patterns. Having a designated crafting surface—such as a large dining table—keeps your creative fashion design process enjoyable and helps you achieve the cleanest, most professional results.
1. Cropped Graphic Tee with Raw Hem

Oversized band and graphic t-shirts often sit neglected inside dresser drawers due to boxy, unflattering cuts. Simply letting a vintage t-shirt hang loosely can hide your figure and make outfits feel unstructured. Slicing an oversized graphic tee cleanly across the natural waistline creates a modern cropped silhouette. Leaving the bottom edge raw introduces an effortless, deconstructed street edge.
Modernizing Vintage Fits with a Clean Raw Crop
Standard oversized t-shirts can visually overwhelm your natural frame, especially when paired with high-waisted bottoms. Cropping the hemline immediately draws the eye to your natural waist, elongating the appearance of your legs. The relaxed, boxy shoulders balance the abbreviated waist for a comfortable, hour-glass silhouette. It transitions effortlessly from casual daytime errands to edgy evening style.
Materials and Notions Needed
- Oversized vintage or graphic cotton t-shirt
- Ultra-sharp fabric dressmaker shears or rotary cutter
- Clear acrylic straight-edge ruler and tailor’s chalk
- Heavy steam iron to set the new hem line
- Safe, flat table surface with a self-healing cutting mat
Step-by-Step Cropped Tee Tutorial
- Try on your t-shirt and identify your desired crop height near your natural waist.
- Mark the target crop line carefully on the fabric using tailor’s chalk.
- Lay the shirt completely flat on your cutting mat, smoothing out any wrinkles.
- Align your acrylic straight-edge ruler precisely with the chalk marking.
- Slice through both front and back cotton layers using sharp fabric shears.
- Check that the cut is even and meets your intended height.
- Gently pull the new raw edge to encourage the jersey to roll natural-looking.
- Press the newly cut hem flat with your hot steam iron for a crisp finish.
- Roll or cuff the sleeves for an extra, intentional relaxed look.
- Style your edgy new crop with high-waisted denim jeans and layered necklaces.
2. Bohemian Bleach-Dipped Cotton Flannel

Thrift store flannel sections are packed with heavy-weight, high-quality shirts in cozy autumn and winter plaids. However, extra-large menswear flannels can sometimes look shapeless and overly casual when worn plain. Slicing or dipping the bottom half in a diluted bleach bath creates an artistic, bohemian ombre fade. This custom pattern refresh immediately gives rugged work shirts a cozy, festival-ready aesthetic.
Transforming Solid Plaids with an Artistic Dipped Fade
Heavy-weight cotton flannels hold deep dyes, making them perfect candidates for chemical color lifting. Dipping the lower portion of the shirt removes dark pigments, revealing warm terracotta, oatmeal, and cream undertones. The gradual ombre transition breaks up the bulky, repetitive pattern with captivating visual drama. It effortlessly elevates a humble five-dollar thrift find into a unique, one-of-a-kind statement layer.
Materials and Notions Needed
- Men’s heavy 100% cotton plaid flannel long-sleeve shirt
- Large plastic bucket and regular household liquid laundry bleach
- Heavy-duty rubber safety gloves and old protective clothes
- Hydrogen peroxide or a bleach neutralizer, and a Basin of cold water
- Plastic hanger and access to an outdoor or well-ventilated washing space
Step-by-Step Bleach-Dipped Flannel Guide
- Put on your protective safety gloves and work in an outdoor or well-ventilated area.
- Mix one part laundry bleach with two parts cold water in your large plastic bucket.
- Mount the dry flannel shirt securely onto a sturdy plastic hanger.
- Lower the bottom half of the shirt into the bleach solution, up to your desired fade height.
- Keep the shirt partially submerged, occasionally checking on the color lifting.
- Watch the dark plaid fade to warm terracotta, oatmeal, or cream (approx. 10–20 mins).
- Lift the shirt slightly for the last few minutes to create a gradual ombre transition.
- Submerge the bleached portion into a cold water and peroxide bath to stop the chemical reaction.
- Rinse the entire shirt thoroughly under cold running tap water until free of bleach.
- Machine wash the shirt on a gentle cycle, then hang outside to air-dry completely.
- Wear your custom bohemian shacket open over simple tank tops and jeans.
3. Spliced Band-Tee Boxy Oversized Dress
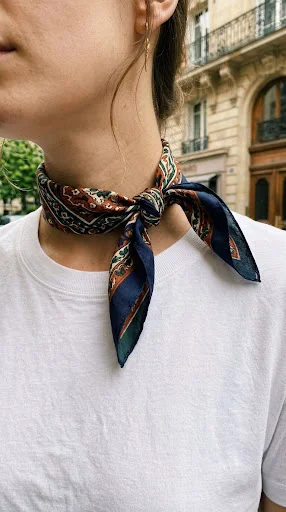
Standard band t-shirts often sit neglected because their boxy cuts can feel predictable and shapeless. Simply wearing oversized shirts can sometimes conceal your style and feel like an afterthought. Splicing two contrasting graphic tees together creates an artistic, asymmetrical streetwear dress. The high-contrast, deconstructed visual lines bring sharp runway intention to everyday jersey cotton.
Reconstructing Masculine Graphic Tees into Deconstructed Streetwear
Oversized jersey t-shirts offer incredible, worn-in comfort that feels fantastic against bare skin. Splicing contrasting graphic panels together creates a bold, custom-designed mosaic across your torso. The exposed, contrasting seams celebrate raw, industrial grunge without needing meticulously tailored lines. It transforms everyday basic tees into an eye-catching, camera-ready mini-dress.
Materials and Notions Needed
- Two oversized vintage or graphic t-shirts of similar size and weight
- Ultra-sharp rotary fabric cutter and a large self-healing cutting mat
- Clear acrylic straight-edge sewing ruler and tailor’s chalk
- Sewing machine with a ballpoint stretch needle and matching thread
- Domestic steam iron to press the spliced seams flat
Step-by-Step Spliced Dress Transformation
- Lay both oversized graphic t-shirts completely flat on your cutting mat.
- Mark a dynamic, asymmetrical or vertical center cut line on both shirts with chalk.
- Slice cleanly along the marked lines on both garments using a rotary cutter.
- Swap the contrasting halves, aligning the opposite graphic panels together.
- Pin the contrasting halves face-to-face along the newly cut center line.
- Sew the center seam using a flexible stretch zigzag or straight machine stitch.
- Try on the combined shirt dress to identify your desired mini-dress length.
- Trim the bottom hem evenly, adding one inch for a neat, double-folded hem allowance.
- Fold the raw bottom edge inward twice, then topstitch flat to hem the dress.
- Press all finished seams flat using a hot steam iron to keep them crisp.
- Rock your deconstructed rock dress with combat boots and fishnet tights.
4. Tie-Dye Swirl Colorful Crewneck Sweatshirt

Plain, worn fleece crewneck sweatshirts can feel overly casual and visually uninspired after seasons of wear. Refreshing faded loungewear with a classic spiral tie-dye pattern breathes vibrant, artistic energy into the fabric. Using soft, pastel dyes adds a modern, streetwear-grade aesthetic to heavy cotton fleece. It allows you to rescue old pullovers from drawer obscurity using fun, accessible color customization.
Breathing Artistic Swirled Color into Heavy Cotton Fleece
Monochromatic fleece often lacks the dynamic visual excitement needed to anchor casual streetwear outfits. A spiral tie-dye pattern injects fluid, multi-toned energy that immediately grabs attention. Safe, home-friendly textile dyes make the custom patterning process completely stress-free. It effortlessly converts a basic daily basic into a colorful, Pinterest-worthy statement pullover.
Materials and Notions Needed
- Faded or plain white 100% cotton crewneck sweatshirt
- Fabric tie-dye kits in complementary colors (e.g., sage, lavender, sky blue)
- Sturdy rubber bands, plastic squeeze bottles, and plastic grocery bags
- Protective plastic table cover and heavy-duty rubber gloves
- Access to a sink or washing machine for rinsing and laundering
Step-by-Step Tie-Dye Swirl Tutorial
- Wash your sweatshirt (leaving it damp) to ensure the dye bonds evenly to fibers.
- Cover your workspace with plastic and put on your rubber safety gloves.
- Lay the damp sweatshirt completely flat on your protected table.
- Pinch the fabric at the center chest, twisting tightly into a flat spiral.
- Wrap multiple rubber bands crisscross around the spiral to secure its circular shape.
- Mix your dye powders with lukewarm water inside the plastic squeeze bottles.
- Apply contrasting dye colors to each “wedge” section created by the rubber bands.
- Flip the spiral bundle over and apply matching colors to the opposite side.
- Place the dyed, rubber-banded sweatshirt into a plastic grocery bag to seal.
- Let the fabric sit undisturbed for 12–24 hours to allow the colors to bond.
- Remove the bands, rinse the sweatshirt under cold water until it runs clear, and launder alone.
5. Menswear Button-Down into Milkmaid Blouse

Massive, high-quality men’s cotton dress shirts found on thrift store racks offer excellent woven fabric. However, wearing them completely loose can look untucked, baggy, and lacking feminine definition. Converting an oversized button-down into a smocked milkmaid crop top introduces romantic, cottagecore charm to stiff tailoring. Using stretchy elastic thread creates comfortable, body-hugging gathers without needing complex patterns.
Turning Stiff Menswear Cotton into Romantic Smocked Tops
Crisp striped men’s dress shirts offer breathable, durable cotton that outperforms flimsy fast-fashion alternatives. Adding rows of gathered elastic across the bodice transforms rigid cotton into flexible, curve-flattering silhouettes. Removing the stiff pointed collar creates a dainty, scooped neckline trimmed with sweet gathered ruffles. It effortlessly updates a two-dollar thrift store staple into a viral, romantic summer date-night blouse.
Materials and Notions Needed
- Men’s large or extra-large 100% crisp cotton button-down shirt
- Spool of elastic sewing thread for hand-winding into your bobbin
- Spool of standard all-purpose cotton thread matching shirt colors
- Sewing machine fitted with standard universal size 80/12 needle
- Flexible sewing measuring tape, sharp tailor shears, and pins
Step-by-Step Milkmaid Blouse Transformation
- Cut straight across the shirt chest, slicing away collars and yokes.
- Cut the sleeves down to three-quarter lengths using sharp scissors.
- Wind your elastic sewing thread onto the machine bobbin by hand.
- Thread regular matching cotton thread into the top needle mechanism.
- Sew parallel horizontal lines spaced half an inch apart down the bodice.
- Watch the flat cotton fabric gather automatically into stretchy smocked texture.
- Continue sewing parallel shirring lines until reaching your lower natural waist.
- Insert elastic bands into the sleeve cuffs to form puffy ruffles.
- Hem the raw top neckline fold neatly using standard straight stitches.
- Steam the shirred cotton fabric thoroughly with irons to maximize shrinkage.
- Slip into your custom milkmaid top and adjust shoulders comfortably.
6. Fringe-Edge Cropped western Plaid Shacket

Long flannel shirts frequently bunch up awkwardly around hips when worn as outerwear layers over sweaters. Slicing off excess length creates a boxy, intentional jacket cut that flatters high-waisted denim trousers. Pulling loose weave threads outward creates authentic, fluffy raw fringe without paying boutique retail prices. It elevates humble lumberjack work shirts into stylish, Pinterest-worthy autumn layering jackets in minutes.
Crafting Western-Chic Shackets from Oversized Plaid Flannel
Long flannel shirts frequently bunch up awkwardly around hips when worn as outerwear layers over sweaters. Slicing off excess length creates a boxy, intentional jacket cut that flatters high-waisted denim trousers. Pulling loose weave threads outward creates authentic, fluffy raw fringe without paying boutique retail prices. It elevates humble lumberjack work shirts into stylish, Pinterest-worthy autumn layering jackets in minutes.
Materials and Notions Needed
- Men’s heavy 100% cotton plaid flannel long-sleeve button-down shirt
- Sharp dressmaker fabric shears or rotary cutting wheel with mat
- Coarse sewing seam ripper or blunt metal embroidery tweezers
- Clear acrylic straight-edge sewing ruler and tailor’s marking chalk
- Sewing machine or needle with matching polyester thread for stay-stitching
Step-by-Step Fringed Shacket Guide
- Try on the oversized flannel shirt over a basic white tee.
- Mark your desired jacket length at hip level with chalk.
- Lay the flannel flat on your table, aligning button plackets.
- Cut straight across marked lines with sharp fabric shears cleanly.
- Sew a straight stay-stitch line half an inch above cut edges.
- This stay-stitch line prevents the fringe from unraveling past target points.
- Use pointed tweezers to pull horizontal weave threads out along hems.
- Continue pulling loose cross-threads outward until reaching the stitched stay-line.
- Fluff the exposed vertical cotton fringe gently using clean dry fingertips.
- Run altered flannel through washing machines to boost fringe fluffiness naturally.
- Style your custom western shacket unbuttoned over ribbed bodysuits and denim.
7. Floral Maxi Dress into Matching Two-Piece Set

Thrift racks regularly feature dated, long-sleeved floral maxi dresses from past decades with unflattering drops. While the vintage floral patterns are enchanting, the dowdy full-length cuts can feel hopelessly frumpy. Slicing a tiered maxi dress in half creates an adorable matching crop top and skirt set. Coordinated two-piece sets dominate summer fashion feeds while offering unmatched versatility to mix and match.
Splitting Dated Modest Maxi Dresses into Playful Coordinates
Wearing a head-to-toe vintage dress can feel overly conservative and lacking youthful energy for modern outings. Separating the garment into two distinct pieces allows tiny glimpses of skin across your midriff. The matching fabric keeps your finished ensemble looking cohesive, intentional, and expensive like boutique resortwear. Furthermore, you can wear the floral crop top separately with jeans for effortless everyday styling.
Materials and Notions Needed
- Outdated vintage floral print maxi dress with a defined waist
- Length of one-inch-wide soft knitted elastic for the skirt waistband
- Spool of all-purpose polyester sewing thread matching the floral print
- Basic domestic sewing machine or needle with safety pin tool
- Tailor’s chalk, clear sewing ruler, fabric shears, and iron
Step-by-Step Two-Piece Set Instructions
- Try on the maxi dress and locate your exact natural waist.
- Mark a cut line two inches beneath your waist using chalk.
- Lay the dress flat and slice cleanly across the chalk line.
- Separate the bodice top section from the lower gathered skirt section.
- Fold the top raw hem upward half an inch, pressing flat.
- Fold once more and stitch along edges to hem the crop.
- Turn the raw skirt top inward by one and a half inches.
- Stitch around the skirt fold, leaving two-inch openings for elastic.
- Pin a safety pin to your elastic and thread through casings.
- Overlap elastic ends by one inch and stitch securely with zigzags.
- Close the casing opening with straight stitches and press seams flat.
8. Denim Patchwork A-Line Mini Skirt

Long, rigid denim midi skirts from secondhand shops can feel conservative, stiff, and restrictive for walking. While the heavyweight vintage denim is incredibly durable, the pencil-straight shape lacks modern playful movement. Slicing the skirt into an abbreviated mini and sewing contrasting denim scrap pockets creates graphic patchwork interest. The frayed raw hem keeps the aesthetic casual, relaxed, and effortlessly cool for warm weekend outings.
Reconstructing Rigid Long Denim Skirts into Playful Minis
Secondhand denim midi skirts often bunch awkwardly across knees due to missing walking slits or rigid fabrics. Shortening the skirt to mid-thigh restores comfortable leg freedom while creating a fresh youthful silhouette. Adding contrasting dark-wash denim pockets crafted from the cut-off scrap fabric introduces high-end reconstructed runway vibes. This accessible refashioning project turns an uninspired ten-dollar thrift skirt into a custom designer showpiece.
Materials and Notions Needed
- Thrifted 100% cotton rigid denim midi or maxi pencil skirt
- Heavy-duty denim fabric shears or sharp rotary cutting wheel
- Pointed seam ripper tool and domestic sewing machine with denim needle
- Heavy-duty gold or navy topstitching thread matching original skirt seams
- Fine-grit sandpaper block and tweezers for fraying raw cut hems
Step-by-Step Patchwork Mini Tutorial
- Try on the long denim skirt, marking your target mini length.
- Add one extra inch beneath markings for natural fraying room.
- Slice across the skirt using heavy-duty shears, saving bottom scrap tubes.
- Cut two rectangular patch pocket shapes from the leftover cutoff fabric.
- Press the outer edges of both cut patch pockets inward neatly.
- Pin patch pockets onto the front of your newly shortened skirt.
- Topstitch pockets down using heavy-duty denim needle and contrast gold thread.
- Scrape the bottom raw skirt hem vigorously using coarse sandpaper blocks.
- Pull exposed white crosswise threads outward using tweezers to create fringe.
- Machine wash the finished skirt to enhance authentic distressed hem fraying.
- Pair your reconstructed patchwork denim mini with vintage tees and loafers.
9. Fleece Blanket Lounge Shorts and Shrug Set

Elevated loungewear continues to dominate everyday casual style and aesthetic Pinterest inspiration boards. Monochromatic fleece sets look chic, cozy, and luxurious when cut with intentional modern proportions. Slicing up an oversized thrifted fleece blanket produces a trendy shrug sweater and shorts. This ultra-plush matching outfit delivers runway-level streetwear vibes while feeling as comfortable as pajamas.
Upcycling Warm Blankets into High-End Streetwear Loungewear
Store-bought fleece sets often feature thin synthetic knits that pill after a single wash. Thrifted plush fleece throws provide thick, cozy warmth at a fraction of fabric costs. The trendy ultra-cropped shrug sweater highlights high-waisted lounge shorts underneath for great balance. It is the ultimate weekend lounging outfit that still looks camera-ready for selfies.
Materials and Notions Needed
- Oversized plush fleece throw blanket or two yards of cotton fleece
- One yard of one-inch-wide soft knitted elastic for the shorts waistband
- Ballpoint jersey sewing machine needle (size 80/12) for stretch fabrics
- Heavy-duty fabric scissors, tailor’s chalk, and ballpoint pins
- Matching stretch polyester thread and flexible fabric measuring tape
Step-by-Step Fleece Set Tutorial
- Fold the fleece blanket flat on your cutting table, smoothing all wrinkles.
- Use a pair of your favorite lounge shorts as a tracing template.
- Trace the front and back shorts patterns with chalk, adding seam allowances.
- Cut the fleece pieces out carefully using sharp heavy-duty fabric shears.
- Stitch the front and back crotch seams using a flexible stretch stitch.
- Sew the inner leg inseam and outer side seams together cleanly.
- Fold the top waist edge over to form a casing for your elastic.
- Thread the wide elastic band through the casing, securing the ends tightly.
- Cut a long curved panel across the fleece to fashion the shrug.
- Stitch the underarm sleeve seams together, leaving the center chest area open.
- Hem all raw outer fleece edges with a wide, gentle zigzag stitch.
10. Reversible Floral and Solid Bucket Hat

Bucket hats continue to be a playful, sun-safe fashion favorite across creative Pinterest mood boards and festival feeds. Standard retail accessories can often carry hefty markups and fail to offer unique, custom aesthetic choices. Handcrafting a reversible bucket hat from colorful floral and solid cotton scrap fabrics ensures zero waste while offering two styles in one.
Double-sided styling options with raw natural patterns
Standard department-store hats often use thin synthetic blends that can lose their structure easily. Handcrafting your sun accessories from durable cotton allows the brim to maintain its shape while providing excellent shade. Combining busy florals with a solid interior lining gives you versatile double-sided styling options in a single piece. Natural cotton absorbs moisture comfortably, making it ideal for warm weekend park outings and picnics.
Materials and Notions Needed
- Unused floral cotton poplin or canvas remnants (at least 1/2 yard)
- Solid contrasting cotton fabric for the reversible lining (1/2 yard)
- Medium-weight fusible iron-on interfacing to give the brim sturdy structure
- Sewing machine with standard all-purpose needle and matching thread
- Paper pattern template, fabric shears, pins, and an iron for pressing
Step-by-Step Bucket Hat Assembly
- Use a standard paper template to cut the crown circle, side bands, and brim panels from both fabrics.
- Iron fusible interfacing onto the wrong side of the floral brim pieces to provide a sturdy structure.
- Pin and sew the ends of the floral side bands together to form a fabric cylinder.
- Attach the floral crown circle to the top of the cylinder, pinning and stitching all around.
- Repeat the process with the solid lining pieces to create the interior hat.
- Sew the curved brim panels together to form a ring for both the outer and lining sides.
- Stitch the floral brim to the bottom of the outer hat, and the lining brim to the lining hat.
- Put the outer and lining hats right sides together, pinning around the circular outer brim edge.
- Sew around the brim, leaving a 3-inch gap, then pull the hat right-side out through the opening.
- Tuck raw edges in, press the entire brim flat with an iron, and topstitch around the outer edge to seal.
- Add parallel rows of topstitching around the brim for that classic, structured bucket hat look.
11. Velvet Spaghetti-Strap Slip and Scrunchie Set

Lingerie and slip dress sections at thrift stores often feature calf-length garments in dated, awkward midi lengths. Silk or polyester slips can sometimes cling awkwardly across hips and feel uninspired for formal occasions. Upcycling bias-cut fabric into an abbreviated mini slip dress and a matching oversized scrunchie creates opulent evening glamour. It transforms plain satin or stretch velvet into an expensive-looking evening set.
Transforming Clingy Fabrics into Glamorous Loungewear and Accessories
Simple slip dresses can sometimes lack visual drama and personal flair when worn as-is. Cutting the hemline creates a flirty mini silhouette, while utilizing leftover scraps ensures zero textile waste. High-temperature steam removes package creases, restoring the luxurious, shimmering quality of the fabric. The matching scrunchie completes the look, offering high-end cohesive styling for nights out or relaxed lounging.
Materials and Notions Needed
- Thrifted midi slip dress (or 2 yards of stretch velvet or satin)
- Spool of matching polyester thread and fine sewing needle (or machine)
- Eight inches of narrow elastic band to construct the matching velvet scrunchie
- Fabric shears, safety pins, tailor’s chalk, and a measuring tape
- Steam clothes iron set to low heat for delicate, velvet-safe pressing
Step-by-Step Velvet Set Instructions
- Put on your slip dress and mark your desired mini-dress hemline with chalk.
- Cut straight across marked lines with sharp shears, saving the bottom fabric scrap.
- Fold the raw bottom edge inward by half an inch twice, then topstitch flat to hem.
- Use a hand slip-stitch or gentle machine hem to keep the satin or velvet looking seamless.
- Take the leftover bottom fabric tube to fashion your matching oversized scrunchie.
- Cut a 3-inch wide by 18-inch long rectangular strip from your cutoff scrap.
- Fold the fabric strip lengthwise, face-to-face, and stitch along the raw edge to form a tube.
- Turn the fabric tube right-side out to conceal the seam, and press flat gently.
- Pin a safety pin to your 8-inch elastic band and thread it through the fabric tube.
- Stitch the two elastic ends together securely, then overlap and sew the fabric ends closed.
- Enjoy your glamorous mini slip dress and its coordinating velvet hair scrunchie.
12. Parisian Silk Neckerchief from Fabric Scraps
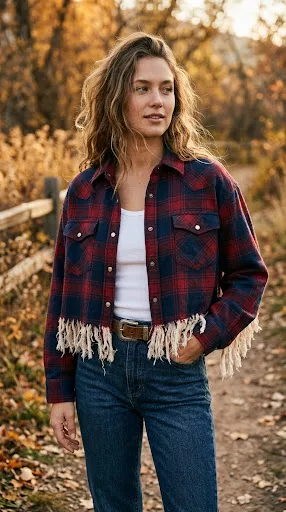
Thrift store accessory bins and home sewing baskets are often packed with tiny, discarded fabric scraps. While many ignore these colorful remnants, they hold incredible potential for chic, warm-weather accessories. Tying or sewing a small silky kerchief around your neck elevates casual everyday basics with Parisian sophistication. It introduces a playful pop of rich color and pattern without requiring advanced tailoring.
Elevating Everyday Casuals with Timeless Silk Accents
Square silk and satin fabrics drape with unmatched fluid softness, catching natural light dynamically. Buying designer silk accessories at retail often costs astronomical prices for minimal fabric. Cutting twenty-inch squares from scraps allows you to customize the prints and hem them smoothly. Tying it loosely around your neck adds an effortless, expensive-looking polish to standard t-shirts and knits.
Materials and Notions Needed
- Square scrap of printed silk, satin, or lightweight cotton (20×20 inches)
- Ultra-sharp rotary fabric cutter with self-healing cutting mat
- Roll of ultra-narrow fusible iron-on hem tape (quarter-inch wide)
- Clear acrylic straight-edge ruler and tailor’s marking chalk
- Steam clothing iron with damp pressing cloth for crisp edges
Step-by-Step Neckerchief Guide
- Measure and cut a clean twenty-inch square from your scrap fabric.
- Ensure all four corner angles form perfect ninety-degree square corners.
- Place narrow fusible iron-on hem tape along the raw fabric edges.
- Fold the fabric edge inward by one-quarter inch over the tape.
- Cover the folded edge with your damp cotton pressing cloth carefully.
- Press with hot steam irons for ten seconds to melt the adhesive.
- Repeat the folding and pressing process along all four perimeter sides.
- Inspect the corners, snipping away tiny excess bulk with sharp shears.
- Fold the completed silk square diagonally into a sleek, slender ribbon.
- Knot loosely around your neck over cozy knit sweaters or basic tees.
- Walk out exuding effortless, timeless Parisian insouciance through the day.