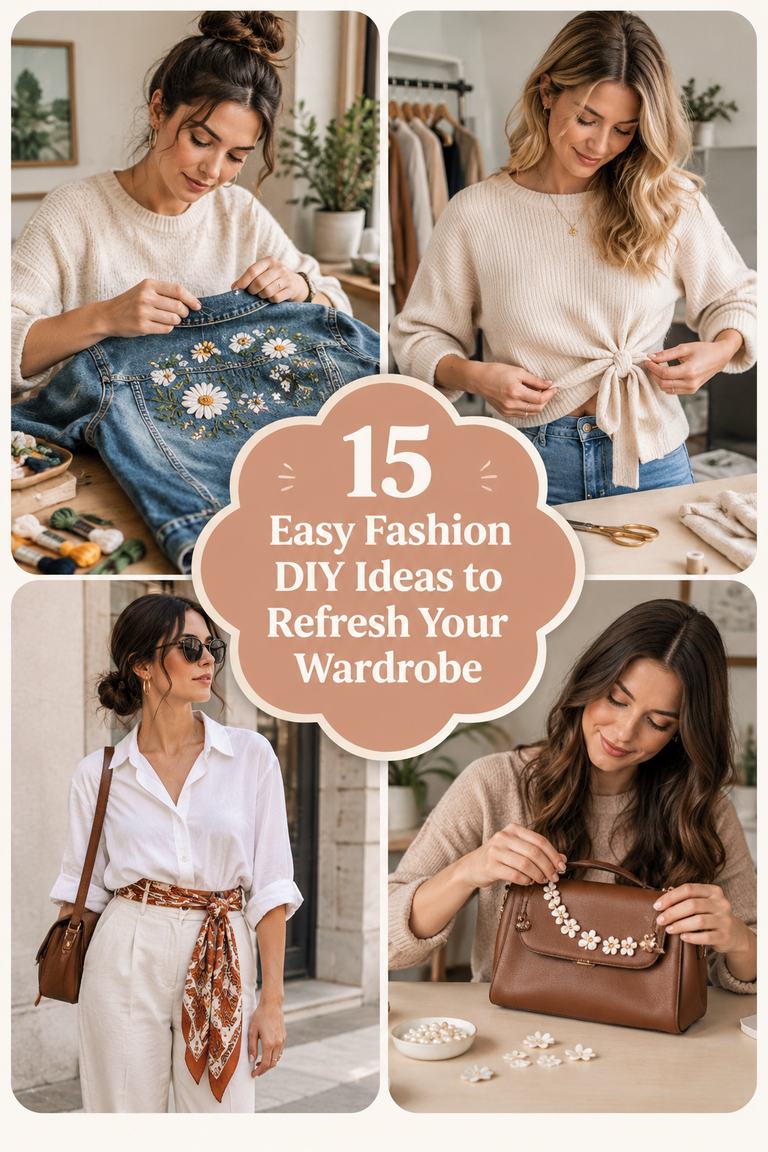
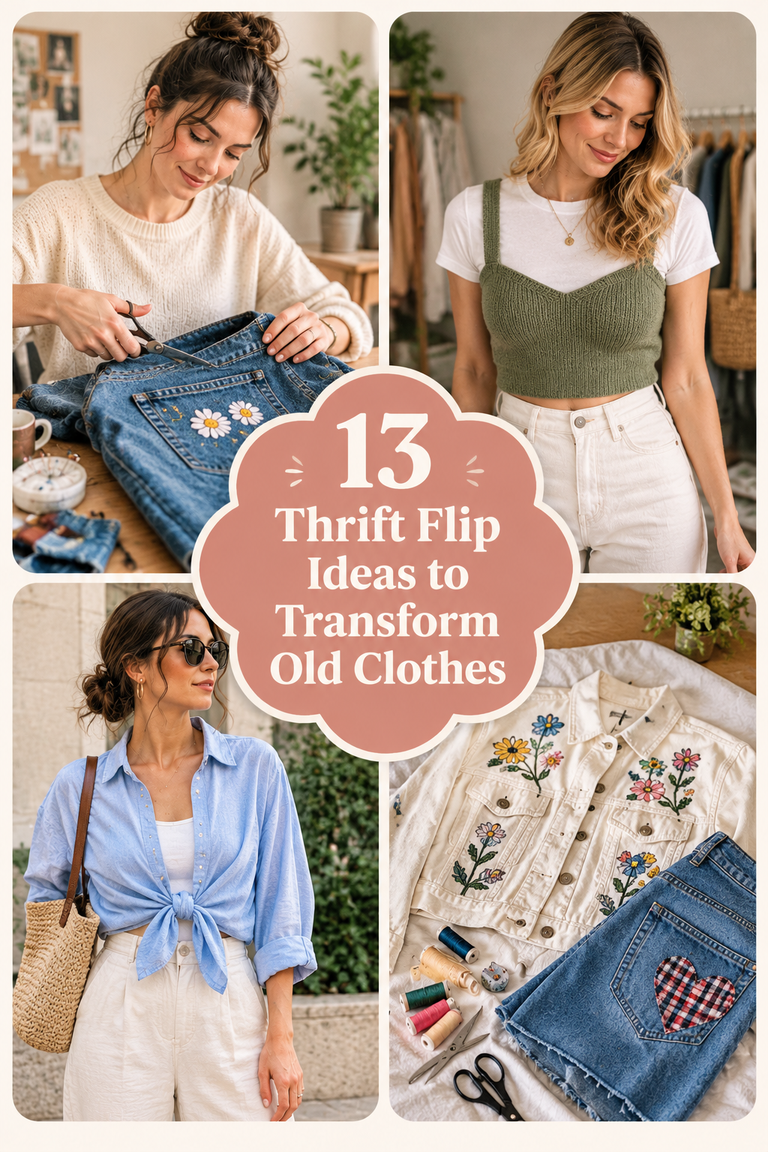
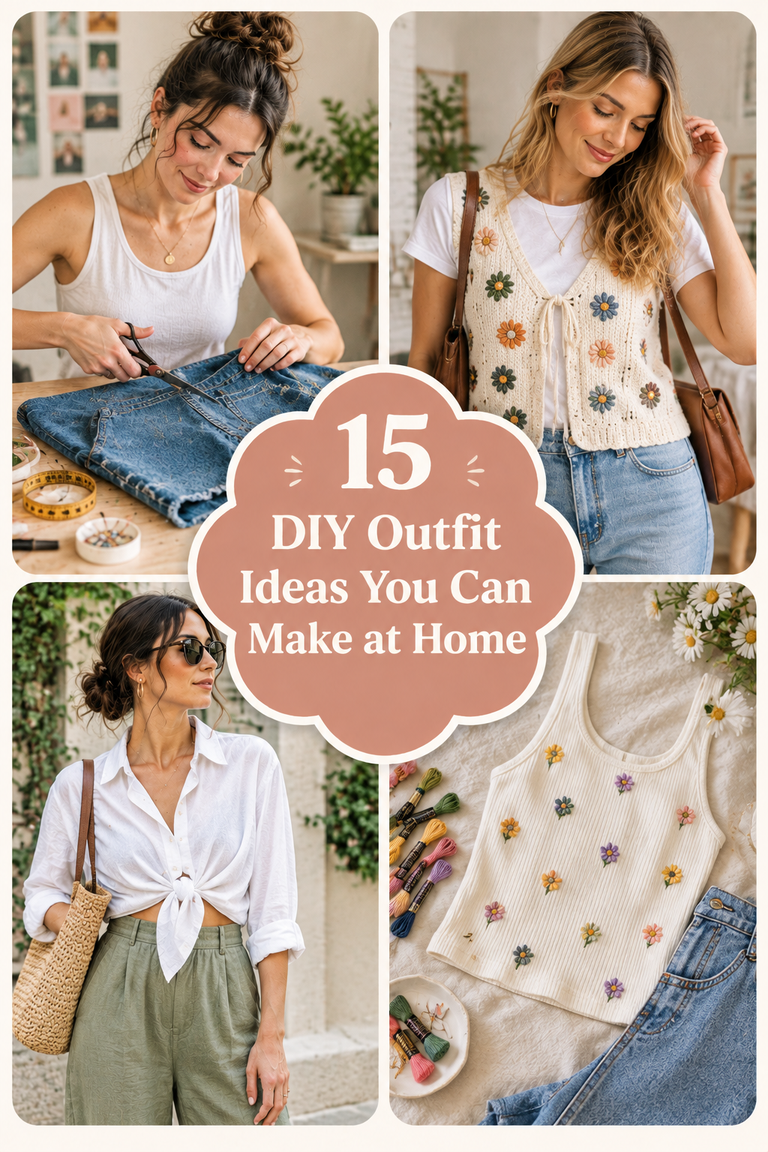
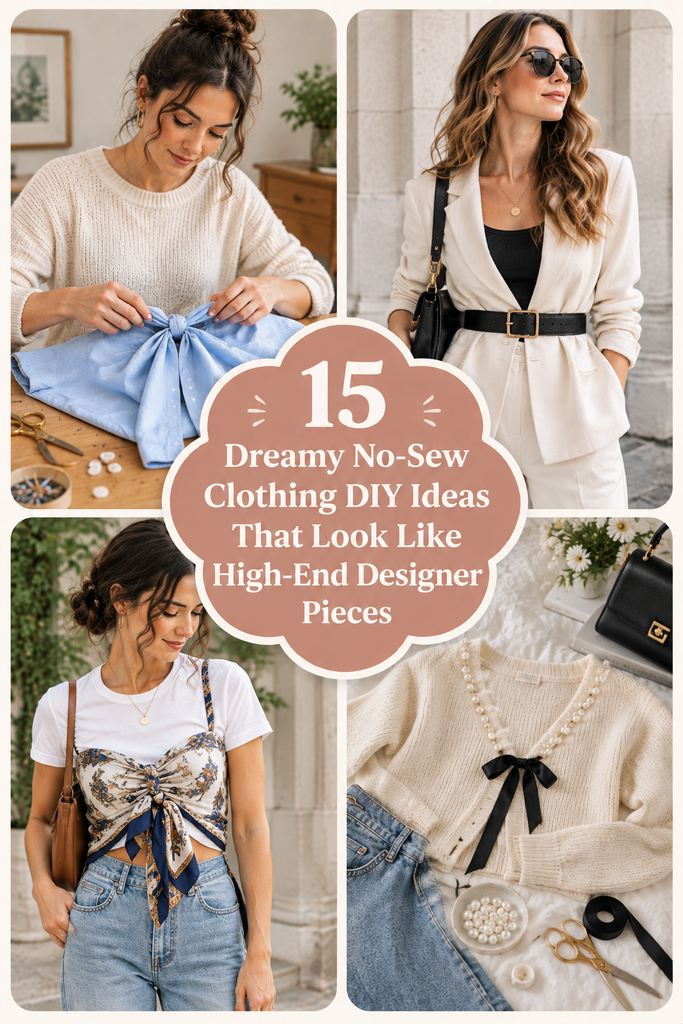
15 Dreamy No-Sew Clothing DIY Ideas That Look Like High-End Designer Pieces
Reinventing your personal style does not require an expensive sewing machine or professional tailoring expertise. In fact, many individuals mistakenly believe that elevated fashion depends entirely on boutique price tags. However, clever no-sew design techniques unlock incredible, runway-worthy transformations using clothes already in your wardrobe. Pinterest feeds continually celebrate viral fashion secrets that solve common wardrobe dilemmas with resourcefulness. You can effortlessly recreate these high-end aesthetics using humble, accessible supplies found around the house. Simple afternoon alterations immediately breathe vibrant new life into tired, forgotten clothing basics. Reimagining existing garments saves significant financial resources while cultivating a distinct, creative personal aesthetic. Furthermore, no-sew fashion methods provide immediate, wearable results without the anxiety of threaded bobbins. Learning purposeful styling tricks naturally boosts your daily dressing confidence before stepping out.
Mastering Designer Silhouettes Without Using Complex Machines
Achieving a high-end designer polish depends primarily on balanced proportions, crisp lines, and drape. Baggy, shapeless garments often feel messy and uninspired without thoughtful structural alterations. In contrast, tailoring loose textiles to highlight your natural waistline creates clean visual harmony. Premium fabrics like heavy cotton poplin, rib knits, and satin naturally convey quiet luxury. You can easily elevate these materials using heat-activated bonding tapes and fabric adhesives. Furthermore, taking proper care to press new folds with steam makes edges look crisp. Crisp hems immediately mimic the composed perfection of European luxury fashion runway pieces. Focus on impactful focal points like architectural necklines, cinched waists, and flared hems. Intentional styling turns humble budget basics into head-turning, custom statement pieces without single stitches.
Why Sustainable No-Sew Alterations Redefine Your Closet
Fast fashion creates endless environmental waste while draining your personal budget on flimsy items. Mass-produced commercial garments are made for generic body types, rarely fitting anyone’s proportions flawlessly. In contrast, customized no-sew adjustments ensure your favorite tops and skirts flatter your shape. You no longer have to pass up vintage thrift finds due to awkward lengths. Additionally, mastering zero-stitch tailoring provides deeply satisfying, mindful creative therapy during relaxing weekends at home. Slicing away bulky collar bands or securing clean hems delivers instant sartorial rewards. Custom no-sew alterations allow you to experiment boldly without risking permanent sewing machine mistakes. You become the visionary creative director of your own distinctive, sustainable daily wardrobe.
Smart Wardrobe Auditing Before Starting Your Projects
A triumphant clothing makeover always begins with a thoughtful, honest evaluation of your closet. First, pull out all plain basics that sit unworn due to awkward lengths. Group together oversized menswear shirts, basic crewneck sweaters, long skirts, and plain denim jeans. Identifying specific fit headaches prevents you from repeating uninspired outfit combinations throughout the week. Next, assemble a compact, dedicated no-sew fashion kit inside your bedroom vanity drawer. Stock it with ultra-sharp fabric shears, heat-bonding hem tape, and clear fabric glues. Keeping versatile alteration notions within arm’s reach makes spontaneous afternoon restyling completely seamless. You will quickly discover that many neglected garments simply needed minor, strategic cuts.
Elevating Casual Basics with Clean Architectural Finishes
Elevated styling relies heavily on combining crisp, sharp finishes with flowing, relaxed garment silhouettes. Contrast an oversized menswear poplin shirt with a sleek, perfectly cropped raw hemline. Similarly, turning long knit skirts into side-slit wraps adds captivating, graceful movement to strides. The secret to expensive-looking no-sew fashion lies in making cuts look deliberate. Using straight-edge acrylic rulers guarantees clean lines that never fray into messy edges. Furthermore, sealing raw edges with invisible liquid fray stoppers preserves sleek boutique quality. Delicate accessories like polished gold jewelry anchor raw-edge garments with refined sophistication. Mindful cutting brings runway-ready intention to your most casual everyday jeans and t-shirts.
Setting Up a Dedicated Workspace for Flawless Cuts
Establishing a clean, well-lit alteration area ensures your garment transformations remain smooth and enjoyable. Spread a wide self-healing cutting mat across a sturdy dining table or hardwood floor. This firm foundation keeps slippery fabrics flat, preventing jagged cuts and uneven hems. Gather essential styling notions like tailor’s chalk, metal straight edges, and bonding tapes together. Clear glass jars keep safety pins, safety clips, and measuring tapes organized. Always keep an electric steam iron plugged in nearby to activate heat-fusible web adhesives. Pressing bonded folds makes handmade alterations look crisp, clean, and commercially manufactured. Neat surroundings keep your creative energy focused toward polished, wearable, luxury-grade fashion statements.
1. Minimalist Raw-Hem Boxy Poplin Crop Top

Crisp men’s button-down shirts found in thrift stores offer durable, high-thread-count woven poplin cotton. However, wearing them completely loose often swallows your frame, looking baggy and overly corporate. Slicing an oversized shirt cleanly across the natural waistline creates a modern cropped silhouette. Leaving the hemline raw introduces an effortless, deconstructed European designer edge to tailoring.
Modernizing Menswear Tailoring with Clean Waistline Crops
Long button-down shirts frequently bunch up awkwardly around hips, disrupting clean, flattering outfit proportions. Cropping the hemline draws the eye directly toward your narrowest waist point instantly. The boxy dropped shoulders balance the cropped waist, creating an architectural, high-fashion street silhouette. It pairs effortlessly with high-waisted tailored trousers, vintage jeans, and sleek leather loafers.
Materials and Notions Needed
- Oversized crisp 100% cotton button-down long-sleeve dress shirt
- Ultra-sharp rotary fabric cutter or professional dressmaker shears
- Clear acrylic straight-edge sewing ruler for marking lines
- Tailor’s chalk pencil or disappearing fabric ink marker
- Domestic steam clothes iron and damp pressing cloth
Step-by-Step Poplin Crop Tutorial
- Put on your oversized button-down shirt and button front plackets.
- Stand straight before a mirror to identify your natural waistline.
- Mark your target crop line carefully using soft tailor’s chalk.
- Lay the shirt completely flat on your self-healing cutting mat.
- Smooth out the front and back fabric layers to remove wrinkles.
- Align your acrylic ruler horizontally along the chalked waist mark.
- Slice across the fabric using your sharp rotary cutter smoothly.
- Unbutton the severed lower fabric section and set it aside.
- Press the freshly cut hem flat with your hot steam iron.
- Roll the sleeve cuffs up your forearms for deliberate relaxed ease.
- Style your boxy designer crop over high-waisted neutral linen trousers.
2. Grecian Draped One-Shoulder Scarf Blouse
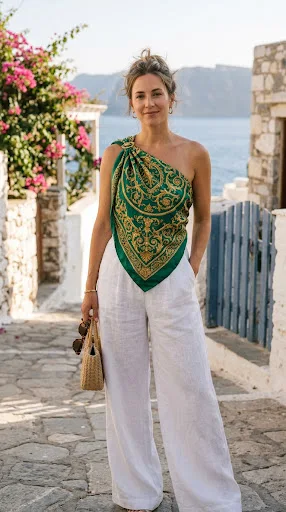
Square printed silk scarves often linger inside vanity drawers, rarely getting worn with outfits. Tying and bonding a large silky scarf creates a daring, high-fashion one-shoulder resort blouse. The fluid, asymmetrical drape flutters gracefully with every breeze, mimicking luxury Parisian runway collections. This simple project requires absolutely zero stitching, relying entirely on clever folds and knots.
Draping Fluid Silks into Asymmetrical Runway Tops
Asymmetrical necklines effortlessly expose delicate collarbones, adding instant feminine allure to simple evening outfits. The lustrous sheen of satin catches natural lighting dynamically, shifting between rich shadows and highlights. A single shoulder tie anchors the garment securely while leaving arms completely free. It converts a forgotten vintage accessory into an opulent, holiday-ready statement blouse in minutes.
Materials and Notions Needed
- Large square printed silk or polyester satin scarf (36×36 inches)
- Small clear silicone hair elastic band or fabric ribbon scrap
- Peel-and-stick double-sided garment tape for secure interior anchoring
- Fine tailor’s measuring tape and small handheld clothes steamer
- High-waisted tailored trousers or wide-leg palazzo pants for styling
Step-by-Step Grecian Blouse Assembly
- Steam your square printed silk scarf to remove all packaging folds.
- Fold the scarf diagonally in half to form a wide triangle.
- Hold the triangle in front of your chest with point down.
- Take the top left corner and drape over your left shoulder.
- Gather the top right corner and wrap beneath your right armpit.
- Pull both corner ends behind your back toward the shoulder blade.
- Secure both corners together using a small clear silicone elastic band.
- Wrap the remaining tail fabric around the knot to conceal elastics.
- Apply double-sided garment tape along inner bust folds for total security.
- Tuck the pointed lower handkerchief hem into high-waisted white trousers.
- Step out radiating effortless Mediterranean resort glamour all evening long.
3. High-End Safety-Pin Spliced Graphic Sweatshirt

Plain oversized cotton fleece crewneck sweatshirts can feel overly casual and visually uninspired for streetwear. Slicing down the front and reconnecting panels with metallic hardware injects bold punk elegance. Luxury fashion houses regularly showcase high-impact safety pin accents across runway outerwear and knitwear collections. This project requires no sewing, transforming basic loungewear into an edgy designer statement.
Injecting Edgy Industrial Hardware into Comfy Loungewear
Monochromatic loungewear often lacks the dynamic visual excitement needed for fashion-forward daily street style. Heavy silver safety pins pierce soft cotton fleece, creating eye-catching, textured metallic focal points. Splicing the neckline creates a relaxed off-the-shoulder drape that reveals collarbones with cool confidence. The shimmering hardware catches ambient room lighting dynamically as you walk and move freely.
Materials and Notions Needed
- Oversized vintage cotton crewneck sweatshirt in black or charcoal
- Box of large heavy-duty nickel or polished brass safety pins
- Sharp dressmaker fabric shears for clean precision slicing
- Tailor’s chalk pencil and clear acrylic straight-edge ruler
- Flat table surface covered with a self-healing cutting mat
Step-by-Step Spliced Sweatshirt Guide
- Lay your cotton sweatshirt flat on your clean cutting mat.
- Draw a diagonal line from the collar down across one chest.
- Slice cleanly along the chalk line using sharp fabric shears.
- Pull the sliced fabric edges apart to create a two-inch gap.
- Mark horizontal pin placement spots every inch along both edges.
- Pierce large silver safety pins horizontally through the left raw edge.
- Bridge the fabric gap by pinning through the opposite right edge.
- Snap every safety pin securely shut, maintaining uniform horizontal spacing.
- Continue connecting the spliced garment from shoulder down to hemline.
- Cut away the thick crewneck ribbed collar band for slouchy drape.
- Wear your industrial chic sweatshirt over slip dresses or leather pants.
4. Heat-Bonded Tailored Flute Hem Midi Skirt

Standard straight midi skirts can sometimes feel conservative, stiff, and lacking fluid movement when walking. Slicing a dramatic side slit and bonding the hem creates an expensive, fluttering silhouette. Heat-activated fusible bonding tape allows you to finish edges without visible thread lines. The resulting clean, seamless hemline looks just like high-end luxury boutique garments.
Creating Seamless Professional Hems with Fusible Webbing
Visible, wobbly hand stitches can quickly reveal a garment as homemade rather than designer-purchased. Fusible web tape melts between fabric layers when ironed, creating an invisible, permanent structural bond. The high side slit allows breezy leg movement while adding modern allure to silhouettes. It instantly elevates a simple thrifted skirt into a bespoke, runway-inspired midi skirt.
Materials and Notions Needed
- Thrifted straight-cut or pencil midi skirt in wool or polyester
- Roll of heavy-duty heat-activated iron-on fusible hem bonding tape
- Ultra-sharp fabric shears or rotary cutter with cutting mat
- Tailor’s chalk, measuring tape, and damp cotton pressing cloth
- Domestic steam clothing iron with high heat setting
Step-by-Step Flute Hem Tutorial
- Try on your midi skirt and identify your desired slit height.
- Mark the top of the slit along the left side seam.
- Remove the skirt and lay it flat on your ironing board.
- Cut vertically up the side seam until reaching your chalk mark.
- Fold the raw slit edges inward by half an inch cleanly.
- Cut strips of fusible bonding tape to match slit edge lengths.
- Slide the adhesive tape strip inside the folded fabric seam edge.
- Cover the folded fabric edge with your damp cotton pressing cloth.
- Press the hot steam iron firmly down for fifteen seconds continuously.
- Allow the bonded seam to cool completely so the adhesive sets.
- Enjoy a crisp, invisible, professionally finished high-fashion side slit.
5. Viral Knotted Ribbon-Tied Open-Front Cardigan
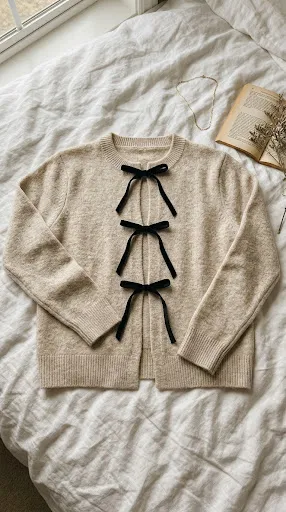
Basic crewneck knit sweaters often feel repetitive, heavy, and overly warm inside heated winter rooms. Converting an ordinary pullover into an open-front cardigan expands your seasonal layering options massively. Slicing down the front and bonding dainty velvet ribbon ties creates an ultra-trendy French aesthetic. The delicate ribbon bows allow you to wear the knit tied loosely over camisoles.
Transforming Basic Pullovers into Dainty French-Girl Knits
Crewneck sweaters often feel boxy and uninspired when paired with high-waisted vintage denim trousers. Slicing the front open creates an airy vertical silhouette that showcases your under-layers gracefully. Soft velvet ribbons eliminate the need for complicated buttonholes while adding romantic, feminine charm. This simple twenty-minute upcycle transforms a modest thrifted knit into a viral Pinterest showstopper.
Materials and Notions Needed
- Secondhand fine-gauge knit crewneck pullover sweater in cream or pastel
- Two yards of narrow black velvet or satin ribbon trim
- Roll of iron-on fusible seam tape or liquid fabric fray stop
- Permanent flexible fabric adhesive or clear fabric glue tube
- Sharp fabric dressmaker shears, measuring tape, and steam iron
Step-by-Step Ribbon Cardigan Guide
- Lay the crewneck sweater flat on a clean table surface.
- Fold the sweater precisely in half vertically to find center fronts.
- Press a light vertical fold crease down the center using irons.
- Cut straight up that vertical center crease through front knit layers.
- Apply iron-on fusible seam tape along both raw cut knit edges.
- Press the tape with a hot iron to prevent yarns from unraveling.
- Fold the taped edges inward by half an inch, pressing flat.
- Secure the folded edges down using flexible clear fabric glue.
- Cut your velvet ribbon into six equal eight-inch tie lengths.
- Glue pairs of ribbons spaced evenly down the inside cardigan plackets.
- Tie the velvet ribbons into sweet bows and wear over lace slips.
6. Architectural Asymmetrical Wrap Trench Vest
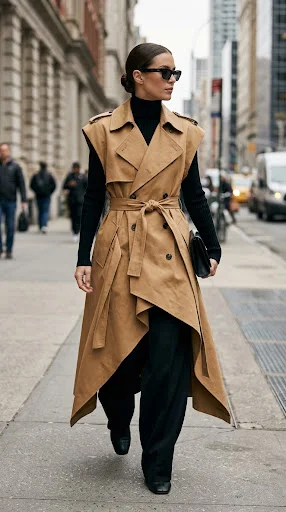
Vintage double-breasted trench coats boast exceptional heavyweight cotton gabardine, durable horn buttons, and timeless tailoring. However, stiff, bulky sleeves can feel restrictive over modern knitwear and bulky hoodies. Removing the sleeves completely transforms a dated overcoat into an architectural, sleeveless longline layering vest. Cinched tightly with an internal tie or belt, it introduces dramatic runway-level sophistication.
Converting Bulky Outerwear into Sleek Longline Layering Pieces
Heavy vintage outerwear often looks frumpy and dated due to oversized, padded 1980s sleeves. Slicing away bulky sleeves instantly lightens the garment’s visual weight, emphasizing fluid vertical lines. The deep armholes allow you to layer chunky knits underneath without awkward underarm bunching. It brings effortless Scandinavian minimalism to your wardrobe while giving durable coats a second life.
Materials and Notions Needed
- Thrifted vintage double-breasted cotton or wool trench overcoat
- Heavy-duty utility craft shears or sharp fabric dressmaker scissors
- Bottle of liquid fabric fray check or clear seam sealant
- Roll of peel-and-stick heavy-duty fabric adhesive tape
- Steam clothing iron with damp pressing cloth for finishing seams
Step-by-Step Trench Vest Conversion
- Turn the vintage trench coat completely inside out on your table.
- Locate the interior armhole seams connecting the sleeves to the coat.
- Slice along the shoulder seams carefully using sharp fabric shears.
- Detach both heavy sleeves entirely without puncturing the inner coat lining.
- Try on the sleeveless coat to verify armhole comfort around underarms.
- Apply liquid seam sealant along the raw cut wool or cotton edges.
- Fold raw armhole edges inward by half an inch all around.
- Secure the folded hem using heavy-duty peel-and-stick fabric tape.
- Press finished armholes through damp cloths using hot steam irons.
- Turn the trench right-side out to inspect clean, tailored armhole edges.
- Layer your architectural longline vest over fitted turtlenecks and wide trousers.
7. Designer Grommet-Pierced Denim Jacket Collar

Structured denim jackets serve as timeless outerwear staples, yet basic washes can sometimes feel predictable. Adding rows of gleaming metallic grommets along the collar points introduces luxurious runway edge. High-end designer brands sell hardware-embellished denim jackets for exorbitant retail prices in luxury department stores. Hand-pressing metal eyelets along the collar requires zero sewing, yielding permanent, striking industrial texture.
Elevating Casual Trucker Jackets with Polished Metal Hardware
Plain denim jackets can sometimes feel overly casual and visually uninspired for evening outings. Polished silver grommets catch ambient restaurant lighting, functioning like built-in metallic jewelry around your neck. The industrial hardware creates captivating contrast against rugged cotton twill weave textures. This accessible hardware project gives your everyday jacket an undeniably expensive, custom-designed aesthetic.
Materials and Notions Needed
- Classic blue or faded black rigid cotton denim trucker jacket
- Complete metal grommet eyelet kit with manual hand-setting anvil tool
- Small household metal hammer and wooden scrap board for support
- Tailor’s chalk pencil and clear acrylic straight-edge ruler
- Pointed craft awl or small embroidery scissors for piercing denim
Step-by-Step Grommet Collar Tutorial
- Lay the denim jacket collar flat upon your wooden scrap board.
- Measure and mark eyelet locations half an inch apart with chalk.
- Keep the marked line a quarter-inch inward from outer collar edges.
- Pierce small holes through the markings using your pointed craft awl.
- Push the hollow metal eyelet barrels up through the denim underside.
- Place the matching metal washer ring over the exposed eyelet barrel.
- Position the setting anvil tool centered over the metal eyelet.
- Strike the setting tool firmly with your hammer several times.
- Ensure the metal barrel curls outward, clamping the denim securely.
- Repeat the process along the entire length of the denim collar.
- Wear your hardware-embellished jacket over slip dresses and combat boots.
8. Parisian Scarf-Twist Halter Neck Bodice

Fine vintage silk scarves feature hand-rolled hems, rich floral patterns, and breathtaking liquid drape. Transforming two contrasting printed silk squares into a halter bodice creates pure Parisian elegance. By knotting the corners around a sleek metal ring, you create an architectural front gather. It pairs exquisitely with high-waisted wide-leg trousers for warm-weather dinner dates and gallery openings.
Merging Vintage Printed Silks with Modern Architectural Rings
Fluid silk twill drapes against the torso with unmatched, luxurious softness that flatters curves. A central metallic ring pulls the vibrant fabric into graceful, organic radiating ripples across busts. Tying the corners behind your neck and back leaves your shoulders completely bare. This quick no-sew styling hack delivers glamorous resort wear for a tiny fraction of boutique costs.
Materials and Notions Needed
- Two matching or complementary vintage printed square silk scarves (28×28 inches)
- One two-inch polished brass or silver metal craft O-ring
- Clear double-sided fashion garment tape for interior modesty hold
- Handheld garment clothes steamer for removing packaging creases
- High-waisted white linen trousers or tailored denim for styling
Step-by-Step Scarf Bodice Instructions
- Steam both silk scarves to remove wrinkles, restoring fluid fabric drape.
- Lay one scarf flat, folding it diagonally into a loose rectangle.
- Thread one corner through the metal craft ring, knotting securely.
- Thread a corner of the second scarf through the same metal ring.
- Knot the second corner firmly, positioning the ring centered on chest.
- Pull the top scarf corners upward, tying them behind your neck.
- Wrap the remaining lower corners around your ribs toward the spine.
- Tie the lower ends in a double knot behind your lower back.
- Apply double-sided garment tape along inner bust edges for modesty.
- Tuck loose side fabric into high-waisted white wide-leg trousers.
- Step out radiating effortless Parisian chic at warm seaside terrace dinners.
9. Bleach-Dye Hand-Painted Botanical Linen Tunic

Monochromatic linen tunics and dark cotton dresses often feel visually uninspired during warm sunny seasons. Using pure household laundry bleach allows you to paint permanent, organic botanical fronds across dark fabrics. The chlorine chemical reaction extracts deep pigments, revealing warm terracotta, oatmeal, and cream undertones. It allows you to transform plain, inexpensive garments into wearable, one-of-a-kind fine art.
Painting Wearable Botanical Fine Art with Everyday Bleach
Plain black or navy linen garments can feel heavy, dark, and repetitive in summer. Bleach painting lifts dye molecules permanently, leaving soft, natural fabric without stiff acrylic residues. The extracted botanical motifs resemble expensive block-printed artisanal textiles from high-end ethical fashion boutiques. Each hand-painted garment carries your unique artistic signature, ensuring nobody wears your duplicate look.
Materials and Notions Needed
- 100% natural cotton or dark linen tunic, dress, or oversized shirt
- Regular household liquid laundry bleach poured into a glass bowl
- Synthetic watercolor paintbrushes with firm, fine pointed tips
- Heavy corrugated cardboard wrapped in clear plastic kitchen wrap
- Basin of cold water mixed with hydrogen peroxide to neutralize bleach
Step-by-Step Bleach Painting Guide
- Slide the plastic-wrapped cardboard inside the tunic to prevent seepage.
- Sketch delicate botanical branches lightly using soft white chalk pencils.
- Dip your synthetic paintbrush lightly into pure liquid laundry bleach.
- Dab excess liquid bleach onto folded paper towels before touching fabric.
- Paint deliberately along chalk lines, watching dark pigment lift away.
- Allow the bleach to react for ten minutes until reaching warm cream.
- Submerge the tunic into the cold water and peroxide neutralizing bath.
- Rinse the garment thoroughly under cold running tap water until clean.
- Machine wash the tunic on a gentle cycle with mild detergent.
- Hang the garment outside to air-dry completely in warm breezy sunshine.
- Style your custom botanical tunic with woven sandals and raffia bags.
10. Flirty Ruched Drawstring Mini Skirt Conversion
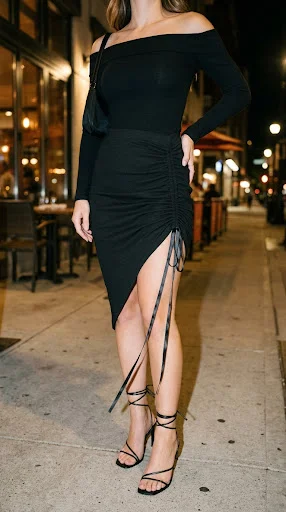
Long knit midi skirts often cling awkwardly around knees, restricting comfortable strides when walking outside. Converting a basic jersey skirt into a ruched mini skirt adds playful, modern movement. Installing an internal adhesive channel lets you thread ribbon to gather the side seam. You can adjust the side ruching dynamically to customize the skirt’s asymmetry and length.
Adding Adjustable Dynamic Ruching with Internal Fabric Tape
Straight-cut knit skirts often lack the youthful energy needed for casual weekend outings. Gathering the side fabric creates flattering diagonal folds that disguise undergarment lines effortlessly. The adjustable hanging drawstring ends add subtle, fluttery movement as you stroll through town. This clever no-sew hack transforms an awkward midi skirt into an alluring party mini.
Materials and Notions Needed
- Plain jersey knit or modal midi-length skirt with elastic waistband
- Roll of permanent flexible fabric adhesive or iron-on bonding tape
- Two yards of narrow satin ribbon or flat cotton cord for ties
- Safety pin for threading the drawstring through narrow channels
- Sharp fabric scissors, measuring tape, and steam clothes iron
Step-by-Step Ruched Skirt Tutorial
- Turn your knit midi skirt completely inside out on your table.
- Locate one interior side seam running from waistband to hemline.
- Cut a one-inch-wide strip of scrap jersey matching the skirt height.
- Lay the fabric strip centered directly over the interior side seam.
- Apply flexible fabric glue along both outer edges of the strip.
- Press the strip down firmly, leaving the center unglued to form channels.
- Allow the flexible adhesive to dry undisturbed for four full hours.
- Attach a safety pin to the end of your long satin ribbon.
- Thread the ribbon up through the internal channel to the top waist.
- Loop the ribbon over the top seam and thread back down.
- Pull the bottom ribbon tails to gather the skirt into ruching.
11. Luxe Faux-Fur Trimmed Wool Overcoat Cuffs
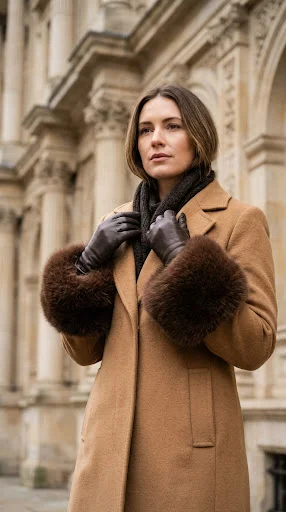
Plain wool winter overcoats can sometimes look drab, utilitarian, and predictable after seasons of wear. Adding plush faux-fur trim along the sleeve cuffs instantly introduces opulent Old Hollywood glamour. High-end designer outerwear regularly features fur-trimmed cuffs that retail for thousands of dollars. You can achieve this opulent vintage aesthetic in under fifteen minutes using fabric adhesives.
Infusing Vintage Old Hollywood Glamour into Basic Outerwear
Winter wardrobes often suffer from an overabundance of plain, dark, utilitarian wool overcoats. Plush faux fur introduces rich tactile softness and luxurious visual contrast against structured wool. Wrapping fur along cuffs draws eyes to gestures while keeping wrists cozy and warm. This elegant no-sew update makes an everyday thrifted coat look like vintage couture.
Materials and Notions Needed
- Tailored wool or cashmere-blend winter overcoat in black or camel
- One yard of premium high-density faux fur trim ribbon (three inches wide)
- Heavy-duty peel-and-stick permanent fabric adhesive strips or fabric glue
- Ultra-sharp utility razor knife for cutting faux fur from the backing
- Measuring tape and metal comb for fluffing cut fur edges
Step-by-Step Fur Cuff Upgrade
- Lay the coat sleeves flat on a clean table, smoothing out creases.
- Measure the exact circumference of the outer sleeve cuff with tape.
- Add half an inch to your measurement for a clean overlap seam.
- Flip the faux fur trim over, exposing the flat woven backing.
- Slice through the backing fabric using a razor knife without cutting hairs.
- Apply heavy-duty permanent fabric tape across the fur strip backing.
- Peel away the protective paper liner to expose the strong adhesive.
- Wrap the fur trim carefully around the coat sleeve cuff edge.
- Press the fur firmly against the wool fabric for thirty seconds continuously.
- Comb the fur fibers gently outward to hide the joining seam cleanly.
- Stroll through chilly city streets exuding timeless, high-fashion European luxury.
12. Modern Ribbed Knit Cut-Out Shoulder Top
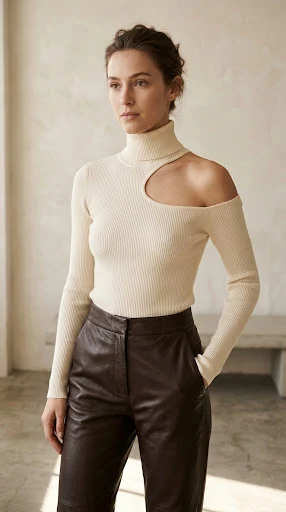
High-neck ribbed knit tops can feel conservative, boxy, and visually heavy across the collarbone. Slicing away one shoulder creates a striking, modern asymmetrical silhouette that flatters the neckline. Luxury designer brands regularly charge premium prices for minimalist, sliced ribbed tops in boutiques. Ribbed modal knits drape cleanly around body contours naturally without fraying or unraveling edges.
Slicing Minimalist Architectural Cut-Outs into Ribbed Knits
Symmetrical tops can sometimes feel predictable, while asymmetrical cuts instantly introduce editorial fashion edge. The exposed clavicle line adds subtle allure while maintaining modest long-sleeve coverage across arms. Treating the raw cut knit edge with liquid seam sealant prevents runs completely. It instantly transforms a basic cold-weather layering turtleneck into an alluring evening date-night top.
Materials and Notions Needed
- Fitted ribbed modal, viscose, or cotton turtleneck long-sleeve top
- Ultra-sharp rotary fabric cutter or pointed embroidery craft shears
- Tailor’s chalk pencil or disappearing ink fabric marking pen
- Bottle of clear liquid fabric seam sealant or fray stopper
- Curved French curve sewing ruler for tracing clean organic shapes
Step-by-Step Cut-Out Top Tutorial
- Put the fitted ribbed turtleneck on and look directly into mirrors.
- Trace an elegant oval cutout shape around one collarbone with chalk.
- Keep the marked line half an inch away from the neckline seam.
- Take off the top and lay it flat upon your cutting mat.
- Slice cleanly along the chalk line using your sharp rotary cutter.
- Ensure you cut through only the front fabric layer during slicing.
- Try the top on again to check size, shape, and drape balance.
- Dab tiny drops of liquid seam sealant along the raw knit cut.
- Allow the liquid sealant to dry fully to prevent unwanted laddering.
- Style your modern architectural top with high-rise faux leather trousers.
- Wear this chic piece to art gallery openings and sleek cocktail lounges.
13. High-End Pearl-Studded Denim Jacket Collar
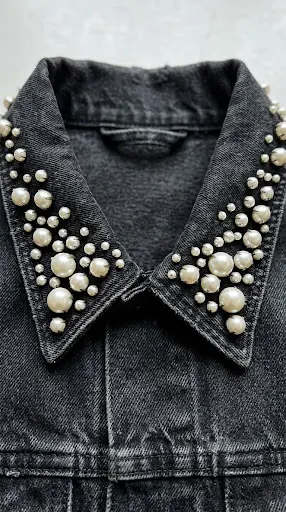
Rugged denim trucker jackets often feel overly casual when layered over feminine evening dresses. Pressing gleaming faux-pearl rivets along the collar wings introduces romantic, high-end designer contrast. Boutique fashion brands sell pearl-embellished outerwear for exorbitant prices in upscale retail stores. Setting no-sew pearl rivets with metal prong backings provides a permanent, rattle-free finish.
Balancing Rugged Denim Twill with Feminine Pearl Accents
Denim jackets can sometimes feel flat and visually heavy across the upper shoulder area. Lustrous ivory pearls catch sunlight and evening lighting, framing your face with glowing elegance. The mechanical pronged studs pierce tough denim fabric cleanly without requiring tedious hand-sewn threads. It transforms a standard thrifted jacket into a breathtaking, heirloom-quality bridal or evening layer.
Materials and Notions Needed
- Classic blue or faded vintage black rigid cotton denim jacket
- Kit of no-sew faux-pearl rivets with four-prong metal backing tacks
- Manual pearl rivet hand-press pliers or specialized setting tool
- Tailor’s chalk pencil and clear acrylic straight-edge sewing ruler
- Clean table surface covered with a protective wooden work board
Step-by-Step Pearl Embellishing Tutorial
- Lay the denim jacket collar flat upon your wooden work board.
- Arrange various pearl bead sizes across collar wings to test layouts.
- Cluster larger pearls near corners while scattering smaller pearls inward organically.
- Mark target stud locations onto denim collar using soft tailor’s chalk.
- Push the sharp four-prong metal tack up through the denim underside.
- Seat the hollow faux-pearl bead over the exposed metal prong tips.
- Squeeze the rivet setting pliers firmly over the pearl and tack.
- Ensure the metal prongs curl inward, locking the pearl tight.
- Continue setting pearl studs across both collar wings in balanced formations.
- Inspect collar underside to confirm all prongs sit completely flush and smooth.
- Wear your bespoke pearl jacket over satin slip dresses and boots.
14. Bohemian Frayed-Edge Ribbon-Trimmed Kimono

Flowing lightweight kimonos instantly elevate plain tank tops and denim cutoff shorts for festivals. Buying breezy bohemian dusters from designer retail boutiques often carries exorbitant price tags. However, a single lightweight rectangular printed scarf easily converts into chic outerwear without sewing. Adhering decorative cotton crochet fringe along hems delivers carefree, effortless movement that turns heads.
Constructing Breezy Resort Dusters from Rectangular Scarves
Summer layering can feel tricky without overheating under heavy, structured jackets or cardigans. Featherlight silky scarves provide effortless sun protection while floating gracefully behind your strides. Constructing armholes requires only two strategic adhesive bonds along folded rectangular edges. It represents one of the easiest, most rewarding no-sew wardrobe transformations imaginable.
Materials and Notions Needed
- Large lightweight rectangular summer scarf, pashmina, or printed sarong
- Two yards of cream cotton crochet ball fringe or tassel trim
- Roll of permanent peel-and-stick fabric adhesive tape or fabric glue
- Sharp tailor’s fabric scissors and flexible measuring tape
- Steam clothing iron with low heat setting for smoothing folds
Step-by-Step Scarf Kimono Tutorial
- Fold your long rectangular scarf exactly in half widthwise evenly.
- Smooth out folds and align outer perimeter edges cleanly together.
- Measure an eight-inch opening from the folded edge down side seams.
- Apply heavy-duty fabric adhesive tape along side edges below that mark.
- Press the glued side seams together firmly to form comfortable armholes.
- Cut a straight vertical slit down the center of the front layer.
- This clean front opening creates an airy, open-front draped duster silhouette.
- Apply fabric adhesive tape along the bottom raw hem perimeter.
- Press decorative cotton crochet tassel trim firmly into the adhesive tape.
- Press finished seams with warm irons to maximize adhesive bond strength.
- Slip your arms through holes and wear over summer festival basics.
15. Chic French-Inspired Silk Neckerchief from Scraps

Fabric scraps left behind from cutting projects should never end up discarded in trash cans. Small leftover remnants of printed silk or silky satin quickly become chic neck scarves. A dainty French-style neckerchief adds instant Parisian sophistication to plain white tees and knitwear. Sealing the edges with clean fusible hem tape ensures a clean, boutique-grade finish without sewing.
Crafting Zero-Waste Silk Accessories with Invisible Fused Hems
Even the smallest leftover fabric pieces hold fantastic decorative potential for chic wardrobe accessories. Tying a small silky kerchief around your neck elevates casual everyday basics effortlessly. It introduces a playful pop of rich color and pattern right near your collarbones. This eco-friendly accessory uses scraps that would otherwise end up rotting in landfills.
Materials and Notions Needed
- Square scrap of printed silk, satin, or lightweight cotton lawn (20×20 inches)
- Ultra-sharp rotary fabric cutter with self-healing cutting mat
- Roll of ultra-narrow fusible iron-on hem tape (quarter-inch wide)
- Clear acrylic straight-edge ruler and tailor’s marking chalk
- Steam clothing iron with damp pressing cloth for crisp edges
Step-by-Step Neckerchief Crafting Guide
- Measure and cut a clean twenty-inch square from your scrap fabric.
- Ensure all four corner angles form perfect ninety-degree square corners.
- Place narrow fusible iron-on hem tape along the raw fabric edges.
- Fold the fabric edge inward by one-quarter inch over the tape.
- Cover the folded edge with your damp cotton pressing cloth carefully.
- Press with hot steam irons for ten seconds to melt the adhesive.
- Repeat the folding and pressing process along all four perimeter sides.
- Inspect the corners, snipping away tiny excess bulk with sharp shears.
- Fold the completed silk square diagonally into a sleek, slender ribbon.
- Knot loosely around your neck over cozy knit sweaters or basic tees.
- Walk out exuding effortless, timeless Parisian insouciance through the day.