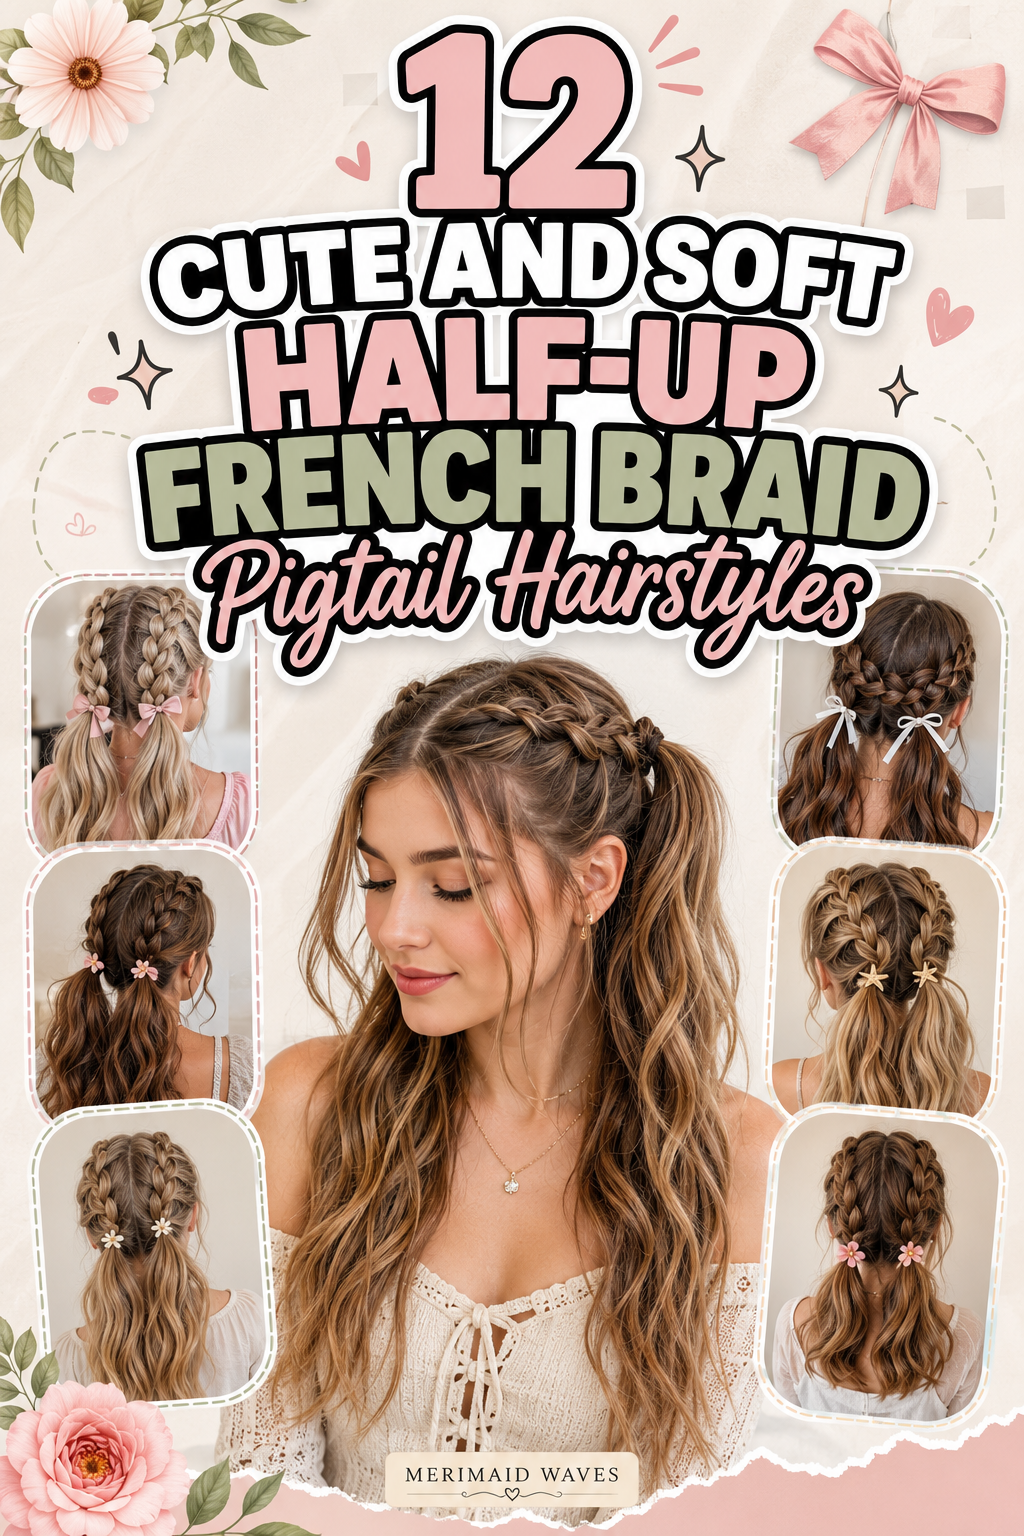
Cute And Soft Half-Up French Braid Pigtail Hairstyles
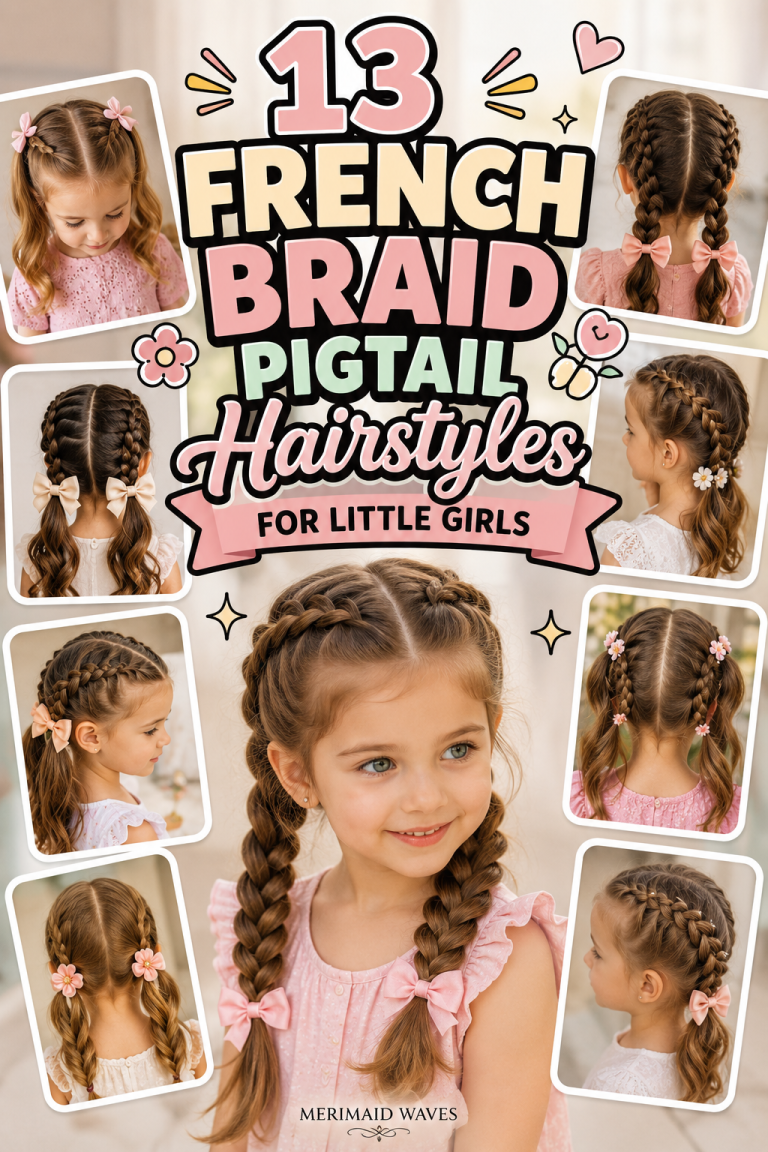
Hairstyles that effortlessly bridge the gap between sweet nostalgia and modern sophistication are rare gems in the beauty world. Among these timeless looks, the Half-Up French Braid Pigtail stands out as an absolute favorite. Combining the structured charm of classic French braiding with the free-flowing elegance of loose, flowing locks, this style delivers a youthful, romantic, and versatile aesthetic suitable for almost any occasion.
Whether you are dressing up for a cozy autumn coffee date, heading to a sunny summer music festival, or simply seeking an easy, cute way to keep hair out of your face during busy workdays, half-up French braid pigtails offer the ideal solution. Unlike full double French braids, which pull all your length into tight plaits, the half-up variation preserves the volume, length, and movement of your natural hair while securing the upper sections in whimsical detail.
This comprehensive guide explores twelve deeply detailed, practical, and breathtaking half-up French braid pigtail hairstyle concepts. You will discover fundamental braiding mechanics, face-framing techniques, seasonal variations, and step-by-step instructions to help you execute these soft, romantic looks with total confidence.
The Anatomic Mechanics of a Soft Half-Up French Braid
Achieving a soft, romantic finish rather than a stiff or slicked-back look relies heavily on how you prepare your hair, manage tension, and finish the braids. Standard French braiding requires pulling hair tightly against the scalp; however, for a cute and soft aesthetic, gentle tension control and strategic “pancake” loosening are essential.
To master the soft half-up foundation, avoid braiding fresh, slippery, bone-straight hair. Instead, prep your strands with a light mist of dry texturizing spray or sea salt spray. This gives your fingers traction, allows the braid sections to hold their shape, and prevents small hairs from popping out abruptly.
1. The Classic Cottagecore Ribbon-Bound Half-Up Pigtails
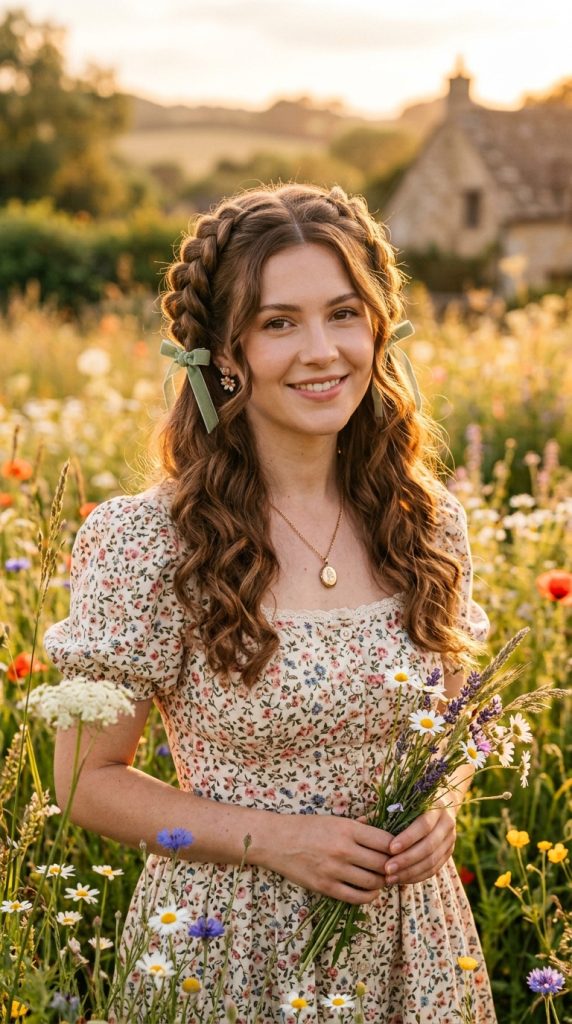
Embracing Vintage Pastoral Whimsy and Soft Velvet Accents
The Classic Cottagecore Ribbon-Bound Half-Up Pigtail is the quintessential romantic look. Drawing inspiration from vintage pastoral fashion and countryside aesthetics, this hairstyle features two soft French braids starting near the temples, traveling along the upper crown, and terminating just behind the ears. The remaining half of the hair flows down in soft, touchable waves.
The hallmark of this style is the addition of delicate velvet or satin ribbon bows tied directly around the clear elastics securing each pigtail tail. It creates a dreamlike, fairytale finish that pairs beautifully with floral dresses, cozy knit sweaters, and sunhats.
Mastering the Edge Pancaking Technique
To achieve that iconic, airy cottagecore softness, you must “pancake” your French braids after securing them with mini elastics. Hold the end of the pigtail elastic with one hand, and use the thumb and forefinger of your other hand to gently tug at the outermost edges of each braid loop.
Work your way from the tail upward toward the forehead, gently pulling the edges outward to expand the braid width. This transforms a tight, narrow plait into a voluminous, lace-like braid.
Essential Supplies for the Cottagecore Pigtails
- Clear silicone mini elastics
- 1/2-inch wide velvet or double-faced satin ribbons (cream, dusty rose, or sage)
- 1.25-inch barrel curling wand
- Dry texturizing spray
- Flexible-hold hairspray
Step-by-Step Implementation Guide
- Prep clean, dry hair by misting dry texturizing spray through the mid-lengths and ends.
- Use a rat-tail comb to create a clean center part running from the forehead to the crown.
- Section off the upper top-half of hair on the left side, clipping the right side out of the way.
- Gather a 1-inch triangular section at the left front hairline and divide it into three equal strands.
- Begin a classic French braid: cross the outer right strand over the center, then the outer left strand over the center.
- As you continue braiding back toward the ear, add small 1/2-inch sections of hair only from the top crown section, leaving the lower half of your hair untouched.
- Stop adding hair once you reach the point directly behind your left ear, then braid three standard passes down the tail.
- Secure the pigtail tail with a clear silicone mini elastic.
- Repeat the exact braiding process on the right side of your head.
- Gently tug at the outer edges of both braids to pancake them into soft, voluminous ribbons of hair.
- Tie your favorite velvet or satin ribbons into neat bows directly over the clear elastics.
- Curl the loose lower half of your hair into soft, undone waves using a 1.25-inch curling wand.
2. The Bohemian Goddess Wand-Curl Half-Up Pigtails
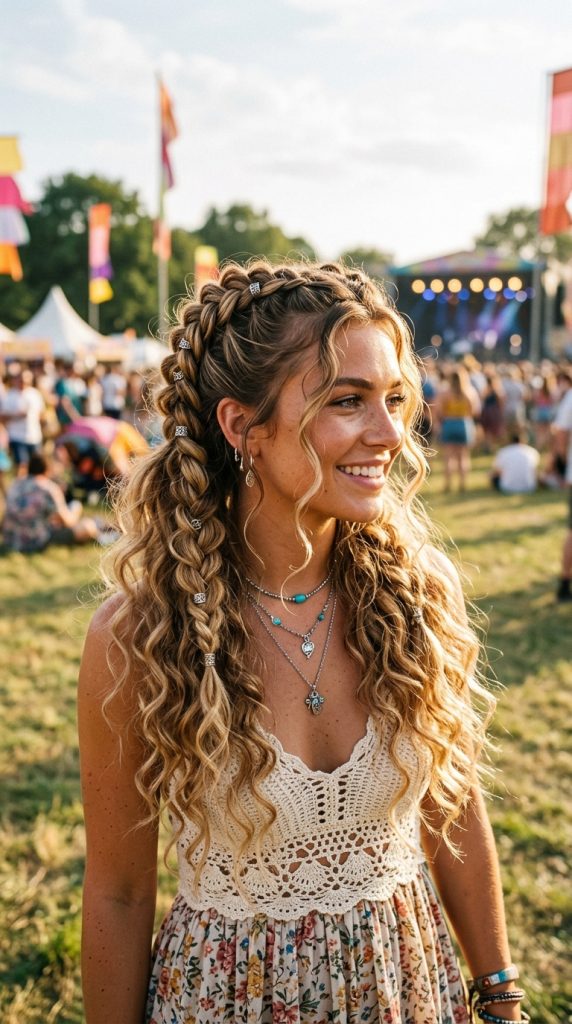
Blending Intricate Plaits with Voluminous Beachy Texture
If you love maximum volume, textured curls, and carefree festival vibes, the Bohemian Goddess Half-Up Pigtail is your ultimate go-to style. This concept pairs two loose, chunky French pigtail braids with a head full of high-density wand curls or deep waves.
Instead of lying completely flat against the scalp, these braids are started slightly higher on the crown, giving the top of your head natural lift and body. Loose curly tendrils are intentionally left out around the face to frame your cheekbones and jawline softy.
Selecting the Ideal Curling Wand Technique
For an authentic bohemian finish, avoid uniform, perfect curls. When curling the loose lower section of your hair, alternate the direction of your curls—wrap one section clockwise and the next counter-clockwise around a conical curling wand.
Leave the last inch of your ends straight and uncurled. Once all strands are curled, rake your fingers through with a drop of hair oil to break the curls into a lush, beachy cloud of hair.
Materials Required for Boho Goddess Pigtails
- Conical ceramic curling wand (0.75-inch to 1.25-inch tapering)
- Nourishing argan or jojoba hair oil
- Volumizing texture powder
- Clear mini elastics
- Boho metal hair rings or feathers (optional accessories)
Step-by-Step Implementation Guide
- Curl your entire head of hair using the alternating wand technique, leaving the ends slightly straight.
- Section out two delicate, wispy tendrils of hair in front of your ears to frame your face.
- Dust a light layer of volumizing texture powder onto your roots at the crown.
- Part your hair down the center, extending the part only to the mid-crown.
- Begin a loose French braid on the left upper section, incorporating generous chunks of hair as you move back.
- Keep your hand angle loose and lifted away from the scalp to maintain natural volume underneath.
- Secure the pigtail at the upper crown level with a clear elastic, leaving the curly tail flowing long.
- Repeat on the right side, ensuring both pigtails align symmetrically.
- Aggressively pancake both French braids until they look thick, textured, and delightfully undone.
- Clamp small metallic boho hair rings onto random loops along the braids for an edgy festival touch.
- Rub a drop of hair oil between your palms and scrunch the loose curly ends for a glossy, frizz-free bounce.
3. The Soft Dutch-French Hybrid Half-Up Pigtails
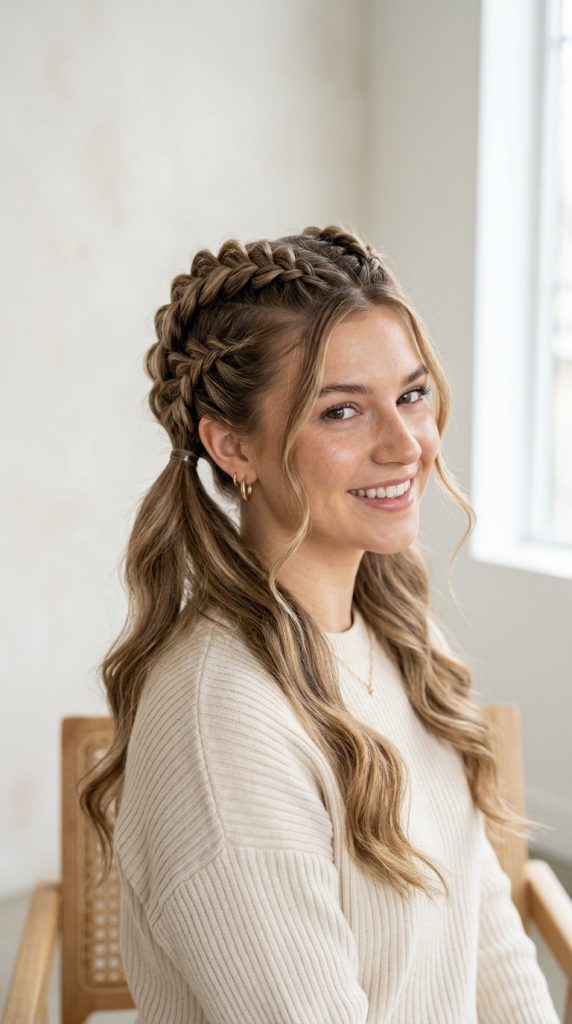
Creating Dimensional 3D Braids with Soft Under-Over Hand Movements
While traditional French braids cross strands over the center, Dutch braids cross strands under the center, creating a raised, 3D braid that sits on top of the hair. The Soft Dutch-French Hybrid blends these two techniques to create an extra-dimensional, eye-catching half-up pigtail style.
By Dutch-braid-crossing the top three passes near the forehead and transitioning into classic French braiding toward the ears, you get instant root height at the front without losing the soft, sweeping lay of a classic French braid along the sides.
Mastering Hand Position Transitions
Transitioning between braiding methods requires steady finger placement. Keep your hands close to your head during the initial Dutch passes to keep the front loop elevated.
When transitioning to French braiding, simply flip your wrist orientation so your thumb feeds strands over the middle strand rather than pulling them underneath.
Dutch-French Hybrid Tools List
- Sectioning clips
- Fine-tooth tail comb for crisp parting
- Clear silicone elastics
- Lightweight gloss spray
- Mini Bobby pins for securing hidden strands
Step-by-Step Implementation Guide
- Part hair down the center using a fine-tooth comb, securing one side with a sectioning clip.
- Take a small section at the front hairline and divide into three equal strands.
- Perform two Dutch braid passes: cross the left strand under the center, then the right strand under the center.
- On the third pass, switch to French braiding: add a small section of hair to the outer strand and cross it over the center strand.
- Continue French braiding along the curve of your crown until you reach the back of your ear.
- Secure the braid tail with a clear elastic.
- Repeat the hybrid braiding technique on the opposite side.
- Pancake the top Dutch section upward for dramatic height, and pancake the side French sections outward for width.
- Smooth a light mist of gloss spray over the top to highlight the multi-dimensional weave.
- Leave the remaining lower half of your hair straight, or style into gentle S-waves.
4. The Y2K Spiky-End Mini Half-Up French Pigtails
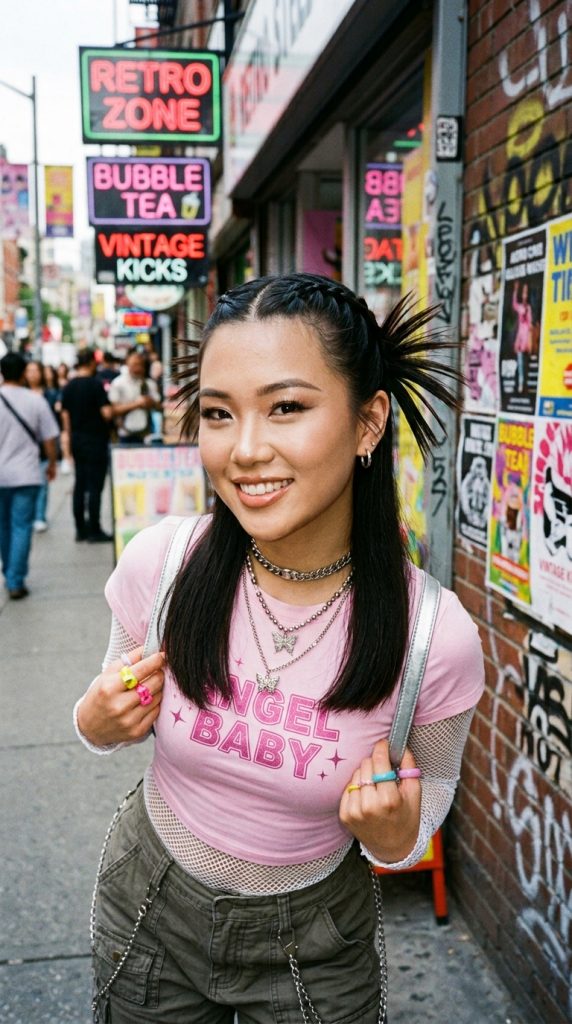
Playful Early-2000s Nostalgia Meets Modern Streetwear Chic
Injecting bold, early-2000s streetwear energy into romantic braiding, the Y2K Spiky-End Mini Half-Up Pigtail style features micro French braids that end in straight, fan-like spiky tails. Popularized by trendsetting pop stars and fashion influencers, this style is energetic, youthful, and fiercely stylish.
Instead of hiding the pigtail ends or curling them softly, the ends of these mini braids are flat-ironed pin-straight and fanned outward behind the ears, creating a playful, geometric contrast against slicked top braids.
Sculpting Sharp, Rigid End Spikes
To keep your braid ends pointing straight out in authentic Y2K fashion, you need a high-temperature mini flat iron and a firm-hold hair wax or freeze spray.
When securing the pigtails with elastics, leave 2 to 3 inches of hair sticking out. Coat these ends in styling wax and pass a hot flat iron over them, flicking your wrist outward to set them into sharp, rigid points.
Y2K Pigtail Supplies Checklist
- Mini ceramic flat iron
- Strong-hold hair wax stick or edge gel
- Colorful or clear mini silicone elastics
- Tail comb for micro-parting
- Shine lacquer spray
Step-by-Step Implementation Guide
- Use a tail comb to create a sharp center part, then section out micro-framing strands at the forehead.
- Take a narrow 1-inch strip of hair along the upper crown on the left side.
- French braid this narrow strip tightly back toward the upper crown, adding small, precise increments of hair.
- Once you reach the upper crown, secure the braid with a mini elastic, leaving 2 to 3 inches of the tail loose.
- Repeat the micro French braid on the right side, ensuring tight, symmetrical placement.
- Smooth the top braids with a touch of edge gel to eliminate any flyaways for a sleek Y2K finish.
- Apply styling wax stick directly to the loose pigtail ends sticking out past the elastics.
- Flat-iron these ends pin-straight, fanning them outward away from your scalp.
- Straighten the loose lower half of your hair completely using a flat iron for a sleek, cohesive look.
5. The Messy Waterfall-French Half-Up Pigtails
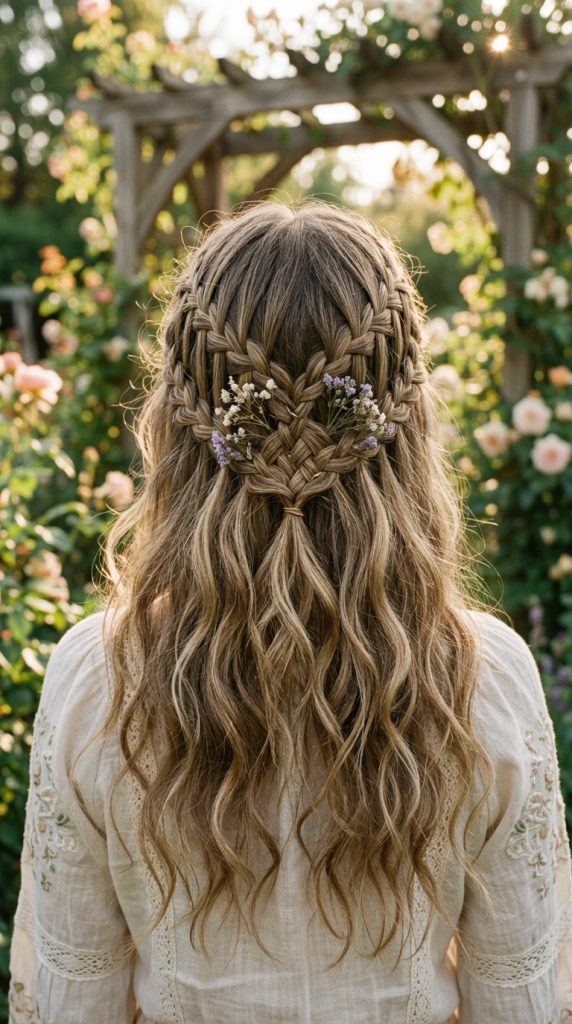
Cascading Strands and Intricate Interwoven Detailing
For a look that appears complex, artistic, and effortlessly bohemian, the Messy Waterfall-French Half-Up Pigtails style is an absolute winner. This variation combines the cascading mechanics of a waterfall braid with the secure structure of a French braid.
As you braid across the crown, the lower strand of each pass is dropped down to blend into the loose lower hair, while a new strand is picked up from underneath to replace it. This creates a sweeping, ladder-like weave of hair that drapes gracefully around the back of your head.
Managing Dropped Waterfall Strands
The key to keeping a waterfall braid clean is organized finger placement. When you drop the lower strand, let it fall completely out of your hands over your shoulder so it does not accidentally get re-caught in your next braiding pass.
Pick up your new replacement strand directly behind the dropped strand to keep the weave pattern seamless and continuous.
Waterfall-French Supplies List
- Sectioning clips
- Lightweight styling lotion or smoothing cream
- Clear silicone mini elastics
- Flexible working hairspray
- Small bobby pins
Step-by-Step Implementation Guide
- Apply a small dollop of styling lotion through dry hair to keep strands manageable.
- Part hair down the center or slightly to one side.
- Gather a 1-inch section at the left temple and divide into three strands.
- Begin a standard French braid pass: cross right over middle, left over middle.
- On the next pass, drop the bottom strand completely, letting it fall into your loose hair.
- Pick up a new section of hair from directly behind the dropped strand to act as your new third strand.
- Add a small section of hair from the top crown to the top strand, and cross it over the middle.
- Repeat this “drop-and-replace” waterfall French sequence until you reach the back center of your head.
- Secure the waterfall pigtail tail with a clear elastic.
- Repeat the waterfall process on the right side, bringing both pigtail ends together at the back center.
- Tie the two pigtail ends together into a small half-up ponytail or join them into a tiny cute bun.
- Gently loosen the waterfall arches with your fingers to create a soft, sweeping, messy texture.
6. The Crown-Wrapped Halo Half-Up French Pigtails
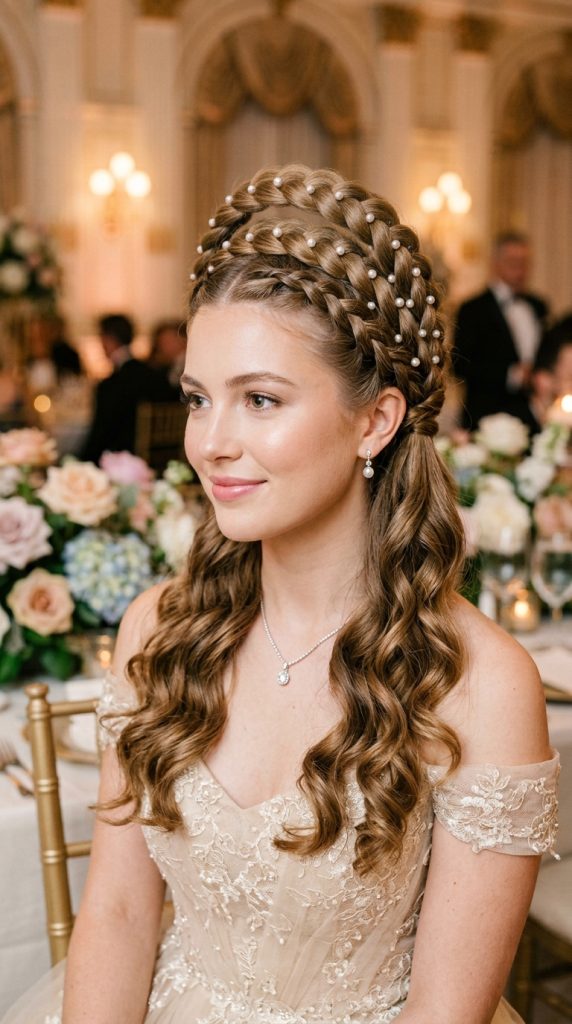
Angelic Regal Curves and Seamless Sweeping Loops
If you are attending a summer wedding, a garden party, or a formal evening event, the Crown-Wrapped Halo Half-Up French Pigtails style delivers understated regal elegance. This look features two French braids that sweep high along the curve of the parietal ridge, wrapping around the head like a glowing braided halo or tiara before securing beneath the crown.
The halo curve lifts your facial features, highlights your eye line, and leaves the back half of your hair falling in luxurious, polished waves.
Engineering the Halo Arch Curve
Achieving a sweeping halo curve rather than a straight diagonal line requires directing your braiding angle upward first before curving down.
When pulling in new sections of hair, pull strands from near the hairline upward toward the top crown, curving the braid trajectory smoothly along the shape of your skull.
Halo Pigtail Accessories Checklist
- Medium-barrel curling iron (1-inch)
- U-shaped hairpin pins and bobby pins
- Clear elastics
- High-shine finishing mist
- Pearl or crystal hair pins (optional for bridal/formal wear)
Step-by-Step Implementation Guide
- Style the loose lower half of your hair into polished 1-inch barrel curls, misting with holding spray to set.
- Part your hair down the center.
- Start your left French braid near the temple, pulling new hair upward to curve the braid over the top of your ear in a high arch.
- Continue braiding toward the back center of your crown, keeping the tension smooth and even.
- Secure the left pigtail with a clear elastic at the back center of your head.
- Repeat on the right side, bringing the right braid to meet the left braid at the back center.
- Cross the two braid ends over each other at the back center, tucking the elastics invisibly underneath the opposite braid.
- Anchor the crossed halo braids securely against your head using U-shaped hairpins.
- Pancake the top of the halo loops gently to increase the crown height and soft volume.
- Slide small pearl or crystal hair pins into the weave of the halo for an angelic, formal sparkle.
7. The Double-Barreled Parallel Half-Up French Pigtails
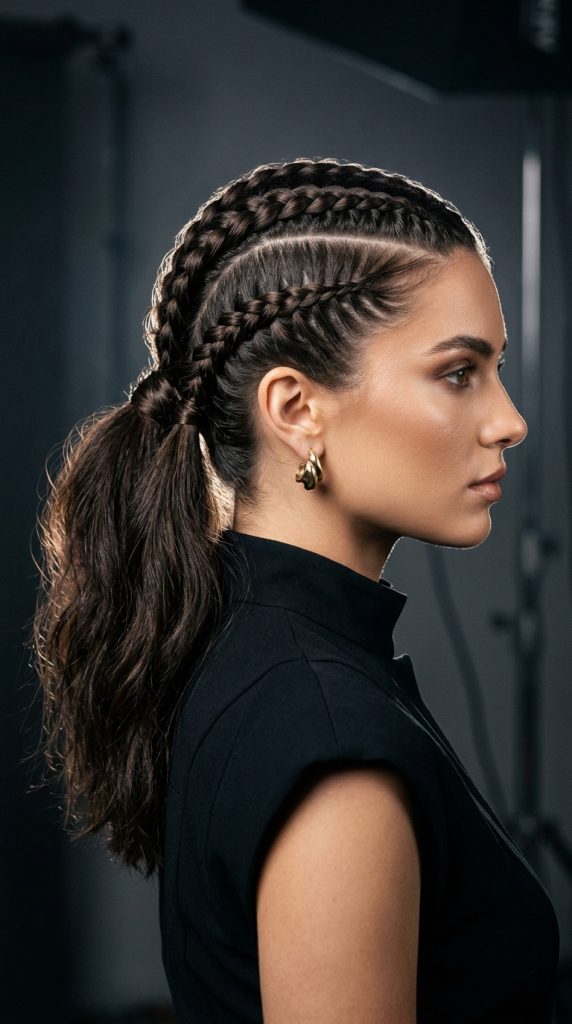
Intricate Multi-Braid Architecture with High Visual Impact
For thick-haired beauties or anyone looking to make a bold, artistic hair statement, the Double-Barreled Parallel Half-Up Pigtail style uses four French braids in total—two parallel braids on each side of the head—feeding into a half-up finish.
This double-braided architecture creates incredible texture and visual depth along the top and sides of your head, making fine hair look twice as thick and giving dense hair organized, high-fashion control.
Precision Parting for Parallel Lines
The success of double-barreled braids relies on ultra-clean parting lines. Use a metal pin-tail comb and styling gel to create two parallel horizontal lanes on each side of your center part before you start braiding.
Keep the upper braid slightly smaller than the lower braid so the top plait highlights the crown while the lower plait frames the temple smoothly.
Double-Barreled Supplies List
- Metal pin-tail comb for clean sectioning
- Strong-hold edge wax or parting pomade
- Four clear silicone mini elastics
- Duckbill sectioning clips
- Glossing finishing spray
Step-by-Step Implementation Guide
- Part hair down the center from forehead to crown using a metal tail comb.
- On the left side, create a second parallel horizontal part from the hairline to the crown, dividing the left upper section into two distinct lanes (top lane and bottom lane). Clip the bottom lane out of the way.
- Apply a touch of parting pomade along the lines to keep them clean.
- French braid the top left lane back toward the upper crown and secure with a mini elastic.
- Unclip the lower left lane and French braid it back parallel to the first braid, securing with a mini elastic.
- Repeat this exact double-lane French braiding process on the right side of your head.
- You will now have four mini pigtail tails at the back of your crown.
- Gather all four pigtail tails together and bind them into a single unified half-up ponytail with one elastic.
- Pancake all four braids evenly to create a rich, ribbed texture across the entire top half of your head.
- Style the loose flowing hair beneath into soft waves or leave straight.
8. The Soft Pull-Through French-Style Pigtails
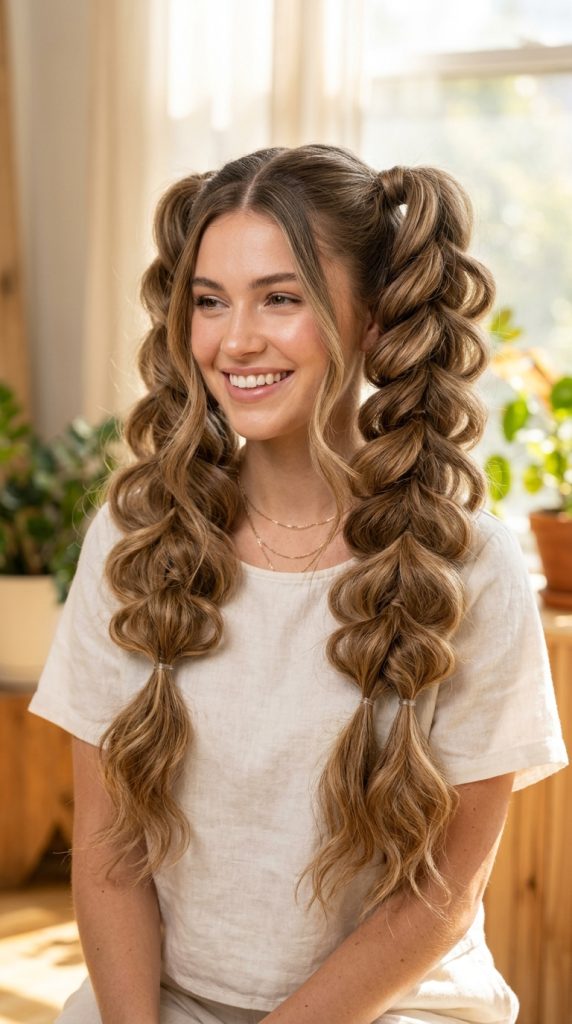
The Ultimate Foolproof Braid Alternative for Beginners
If traditional French braiding feels frustrating, confusing, or exhausting for your arms, the Soft Pull-Through French-Style Pigtail is your dream styling solution. This clever technique uses a series of mini pony tails flipped through one another to create an illusion that looks identical to a thick, voluminous French braid—with zero actual braiding required!
Because each section is anchored by its own mini elastic, a pull-through braid will never unravel, slip out, or lose its shape, making it the most durable soft pigtail style available.
Understanding the Pull-Through Flip Mechanics
To create a pull-through section, you gather a top ponytail, split it into two equal halves, bring the lower ponytail up between those two halves, and secure the split top ends underneath with a new elastic.
When you pancake a pull-through braid, the mini elastics act as permanent internal anchors, allowing you to pull the loops out super wide without risking the braid falling apart!
Pull-Through Supplies Checklist
- Pack of 15-20 clear silicone mini elastics
- Rat-tail parting comb
- Volumizing texture spray
- Sectioning clips
- Shine spray
Step-by-Step Implementation Guide
- Part hair down the center and prep with volumizing texturizing spray.
- On the left top section, gather a small pony near the hairline and secure with a clear elastic (Pony #1).
- Gather a second ponytail directly behind the first one using hair from the upper crown (Pony #2).
- Split Pony #1 into two equal left and right halves.
- Pull Pony #2 upward between the two halves of Pony #1, and clip Pony #2 out of the way on top of your head.
- Bring the two halves of Pony #1 back together underneath Pony #2, add a new small section of loose hair to them, and secure with an elastic (forming Pony #3).
- Unclip Pony #2, split it into two halves, pull Pony #3 up through the middle, and secure Pony #2’s halves underneath with a new elastic.
- Repeat this pull-through process down to the level behind your ear.
- Repeat the entire process on the right side of your head.
- Aggressively pancake all the pull-through loops on both sides—watch them expand into massive, soft, lush mock-French braids!
9. The Autumn Copper Cinnamon-Twist Half-Up Pigtails

Rich Seasonal Earth Tones and Cozy Textured Drapes
As temperatures drop and cozy sweater weather arrives, rich warm hair tones—such as cinnamon, warm copper, chestnut brown, and pumpkin spice—become seasonal beauty favorites. The Autumn Copper Cinnamon-Twist Half-Up Pigtail style is designed specifically to showcase the multidimensional warmth of autumnal hair pigments.
Featuring soft, relaxed French pigtails that transition into twisted cinnamon rolls or mini buns at the crown, this style exudes warm, fireside charm.
Color-Accentuating Styling Sheen
Warm red, copper, and auburn tones look best when they reflect direct light. To prevent warm fall hair colors from looking flat or dry in cool autumn air, finish your braids with a rich, light-reflecting hair oil containing golden mica or argan oil.
This highlights the high-and-low tonal weaves inside the French braid loops, making your copper hair practically glow in late-afternoon autumn sunlight.
Autumn Pigtail Supplies List
- Warm copper or bronze velvet ribbon ties
- Lightweight argan shine serum
- 1-inch curling iron
- Clear mini elastics
- Bobby pins
Step-by-Step Implementation Guide
- Prep hair with a thermal protectant and curl the lower half into rich 1-inch spiral ringlets.
- Apply two drops of argan shine serum through the length to activate copper light reflections.
- Part hair down the center and begin a soft, loose French braid on the upper left section.
- Braid back toward the crown, keeping the tension loose and cozy.
- When you reach the upper crown, twist the remaining tail around its elastic base to form a small, cute cinnamon-roll mini bun.
- Secure the mini bun with two bobby pins.
- Repeat the French braid and mini cinnamon bun construction on the right side.
- Pancake the French braids along the crown so they drape softly toward your forehead.
- Tie bronze or cinnamon velvet ribbons around the bases of the mini buns.
- Pair with a cozy oversized knit turtleneck sweater for the ultimate autumn aesthetic.
10. The Festival Space-Bun Half-Up French Pigtails
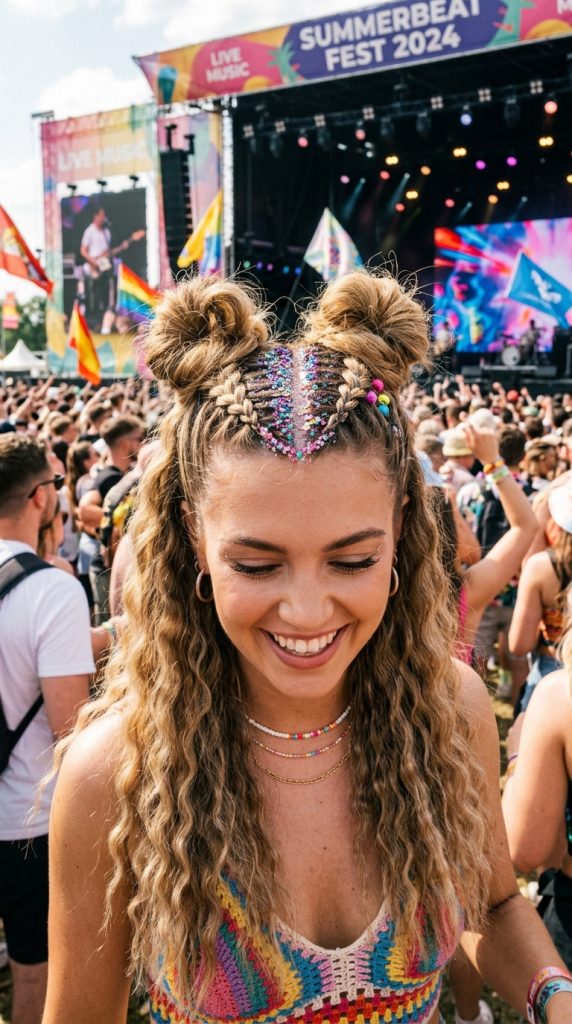
High-Energy Whimsical Buns with Braid-Framed Crown Trails
Combining two of the most popular festival hairstyles in existence—space buns and French braids—the Festival Space-Bun Half-Up Pigtail style is high-energy, fun, and camera-ready. This look features inverted or classic French braids traveling up the crown into two towering, fluffy mini space buns sitting high atop the head.
The remaining lower half of the hair flows long and free, often styled with deep crimps, mermaid waves, or floating glitter highlights.
Securing High Space Buns Without Drooping
High space buns require a rock-solid foundation so they do not flop forward or loosen while you dance at an outdoor festival or concert.
When your French braid reaches the top crown anchor point, secure it firmly with a heavy-duty elastic before twisting the hair into a bun. Twist the tail into a bun over that solid base, and secure with a second elastic and spin pins.
Festival Accessories & Tools
- Heavy-duty hair elastics and mini clear elastics
- Spiral spin pins (far stronger than standard bobby pins)
- Hair glitter gel or hair tinsel strands
- Deep-wave mermaid crimping iron
- Strong-hold freeze hairspray
Step-by-Step Implementation Guide
- Style the loose lower half of your hair using a deep-wave crimp iron for textured mermaid waves.
- Part hair cleanly down the center using a tail comb.
- Begin a French braid at the left front hairline, braiding backward and upward toward the high top crown.
- Once at the high crown, bind the pigtail tail tightly with a heavy-duty elastic.
- Twist the tail hair into a high, voluminous space bun and anchor with spiral spin pins.
- Repeat the upward French braid and space bun setup on the right side.
- Pancake the French braids running up your crown to build dramatic, fluffy height.
- Paint a thin line of hair glitter gel along your center parting line for a magical festival sparkle.
- Mist freeze hairspray across the space buns to lock them in place all day and night.
11. The Romantic Bridal-Rose Half-Up French Pigtails
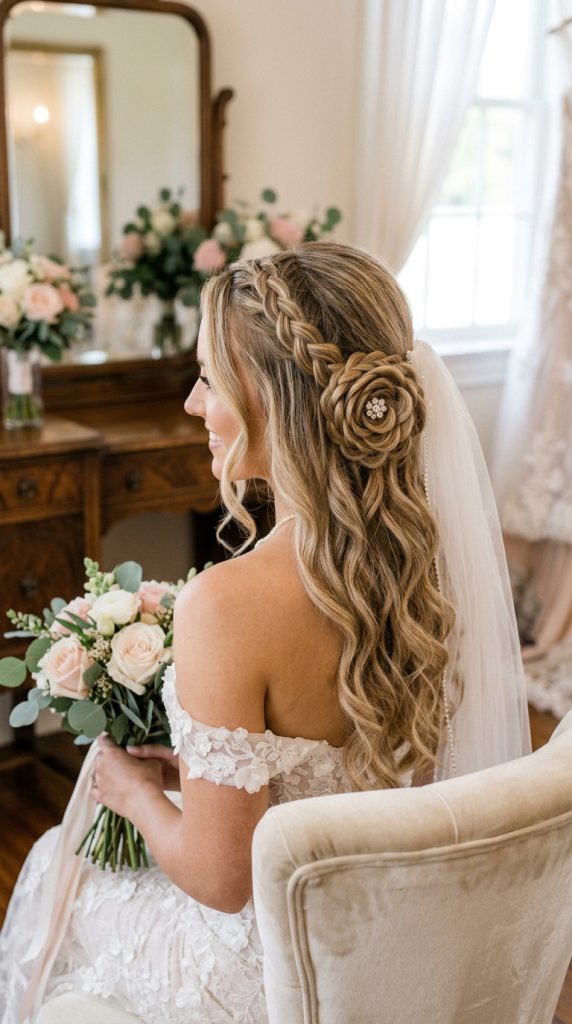
Floral Braid Artistry for Weddings and Elegant Affairs
For brides, bridesmaids, or anyone attending a formal gala, the Romantic Bridal-Rose Half-Up French Pigtail transforms standard braiding into breathtaking floral hair art. This sophisticated concept features delicate French pigtails that weave gracefully from the temples to the back center of the head.
Instead of securing the tails into simple ponytails, the tails are coiled horizontally in a circular spiral, forming intricate, rose-like flower blossoms crafted entirely out of your own hair!
Sculpting Hair Roses Step-by-Step
To sculpt a realistic hair rose, pancake one single side of your pigtail tail braid aggressively (this becomes the outer flower petals), leaving the other side tight (this becomes the flower core).
Roll the braid in a tight circle with the pancaked side facing outward, pinning flat against your head as you coil. The result is a stunning, three-dimensional rose petal blossom.
Bridal Rose Materials Checklist
- Medium U-shaped hairpins and mini bobby pins
- Strong-hold aerosol hairspray
- Fine-tooth tail comb
- Pearl or rhinestone accent hair pins
- 1.5-inch large barrel curling iron
Step-by-Step Implementation Guide
- Style the lower half of your hair into loose, romantic Hollywood waves using a 1.5-inch curling iron.
- Part hair down the center or with a soft side part.
- French braid the left upper section smoothly back toward the center nape, keeping the weave neat and elegant.
- Once behind the ear, continue braiding the tail in a standard three-strand braid down to the ends and secure with a mini clear elastic.
- Pancake only the left edge of this tail braid, pulling the loops out wide to represent rose petals.
- Roll the tail braid into a flat circular coil against the back of your head, keeping the pancaked loops on the outside.
- Anchor the hair rose flat against your scalp using U-shaped hairpins.
- Repeat the exact French braid and hair-rose coiling process on the right side so the two hair roses sit side-by-side at the back of your head.
- Insert a single pearl or rhinestone pin into the center of each hair rose to act as a sparkling flower stamen.
- Mist with aerosol hairspray to lock this delicate bridal masterpiece in place.
12. The Sporty-Sleek Gym-Ready Half-Up French Pigtails
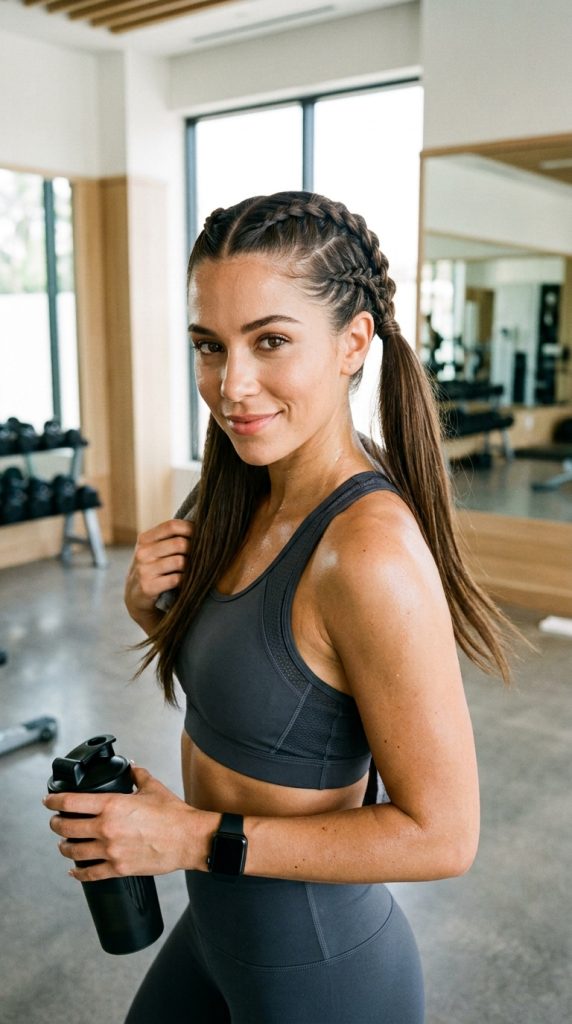
High-Tension Performance Styling for Active Lifestyles
Rounding out our guide is a style designed for athletic women who refuse to sacrifice cute style during workouts. The Sporty-Sleek Gym-Ready Half-Up French Pigtail provides high-tension control that locks sweat-prone front layers and baby hairs away from your face during workouts, yoga sessions, or tennis matches.
By applying sweat-resistant pomade before braiding and keeping the French passes tight and flat against the scalp, your hair stays pristine and secure through heavy cardio while looking effortlessly stylish.
Sweat-Resistant Prep & Anchor Tricks
Standard water-based hair gels can break down and turn sticky when mixed with sweat. To prevent this, swap standard gel for a sweat-resistant styling wax stick or edge pomade containing beeswax or synthetic resins.
Double-wrap your pigtail elastics to ensure that active movement, running, or jumping does not cause your half-up pigtails to loosen or slide down.
Gym-Ready Supplies List
- Beeswax-based styling wax stick or sweat-resistant edge pomade
- Heavy-duty mini elastics (double-wrapped)
- Boar-bristle edge brush
- Fine-tooth tail comb
- No-slip athletic headband (optional accessory)
Step-by-Step Implementation Guide
- Apply a light layer of wax stick along your hairline, center part, and temples.
- Use a boar-bristle brush to smooth down all baby hairs and flyaways flush against the scalp.
- Part hair sharply down the center using a tail comb.
- Begin a firm, neat French braid on the left side, keeping high tension as you add hair.
- Braid smoothly along the upper scalp toward the back crown.
- Secure the pigtail tail tightly with two double-wrapped mini elastics.
- Repeat the firm, high-tension French braid on the right side.
- Do not pancake these braids—keep them sleek, compact, and sweat-proof for maximum athletic security.
- Pull the loose lower hair back into a high ponytail if desired during heavy workouts, or leave flowing for low-impact yoga.
- Step into your workout with zero hair distraction and 100% style confidence!