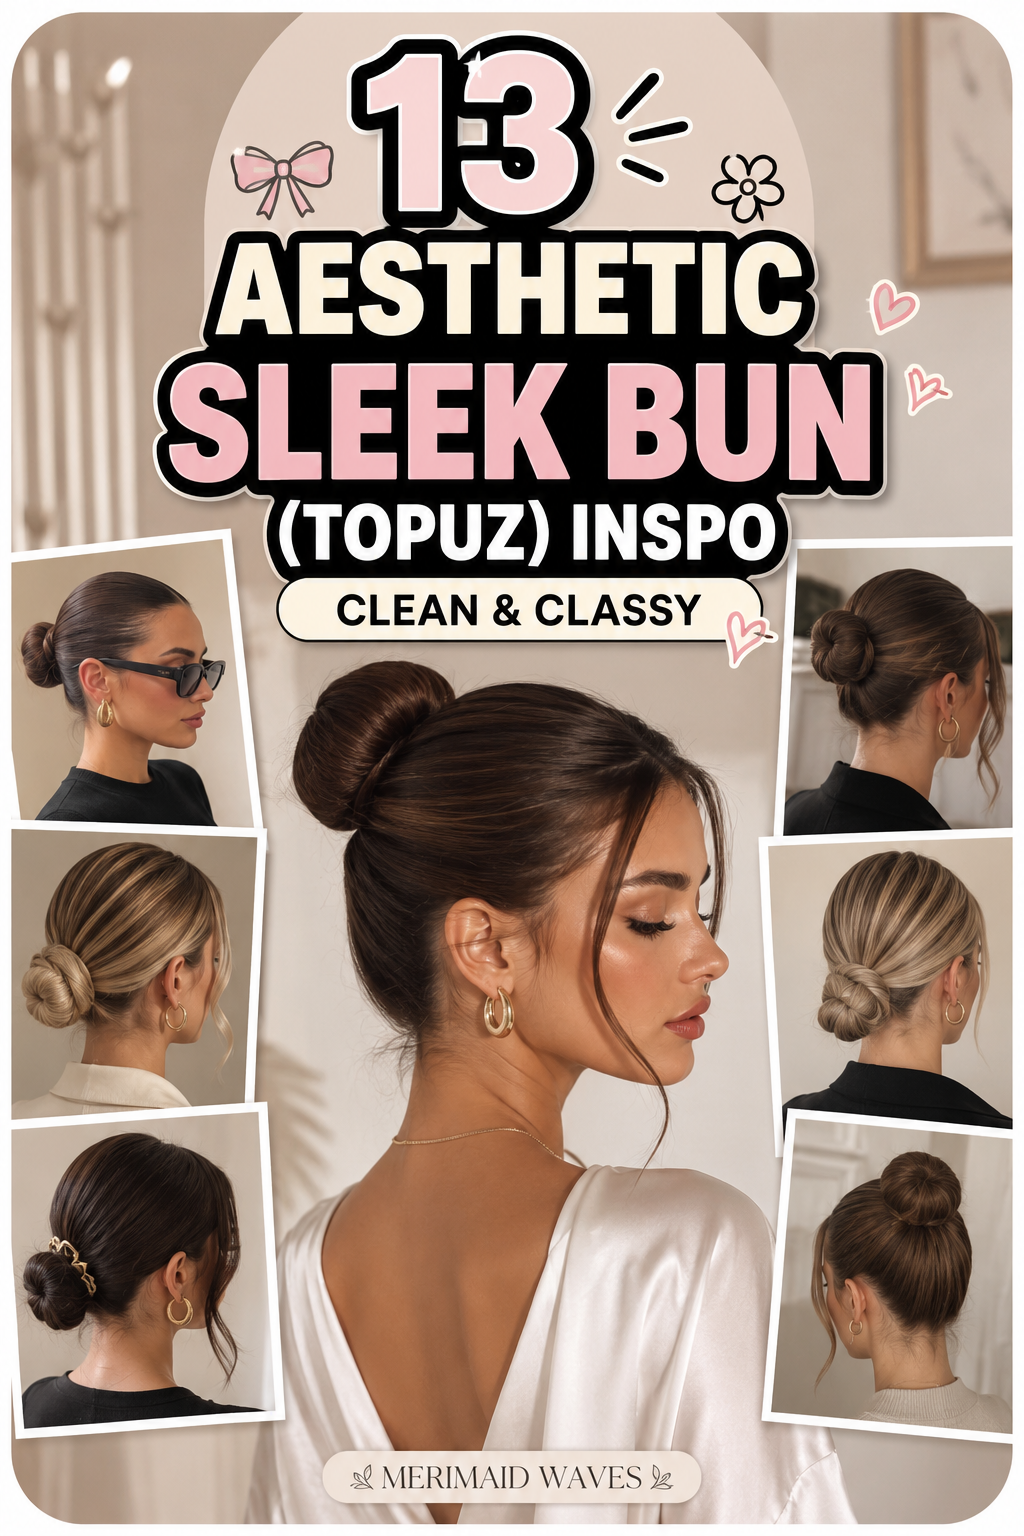
13 Aesthetic Sleek Bun (Topuz) Inspo | Clean & Classy
The modern beauty landscape has undergone a profound shift toward intentional minimalism, quiet luxury, and refined polish. At the absolute epicenter of this movement is the sleek bun—known classically in European and Turkish beauty culture as the “Topuz.” Far from a rushed, messy arrangement held together by an old hair tie, the aesthetic sleek topuz is an architectural masterpiece. It lifts the cheekbones, elongates the neck, highlights your facial structure, and projects an aura of effortless elegance whether paired with a tailored blazer, an evening gown, or modern athleisure.
Achieving a pristine topuz requires an understanding of hair tension, scalp preparation, product layering, and structural anchors. Whether you prefer a razor-sharp middle part, a high-altitude ballet crown, or an intricate braided loop, mastering the sleek bun elevates your entire personal style.
This comprehensive guide explores thirteen deeply detailed, practical, and breathtaking aesthetic sleek topuz ideas designed to help you execute the clean and classy look with total confidence.
The Clean Girl Foundation & Product Arsenal
To achieve that signature mirror-like sheen without making your hair look greasy or stiff, strategic product layering is essential. Start with a lightweight leave-in conditioner on damp hair to lock down the cuticle, followed by an alcohol-free firm-hold styling wax at the roots during the brushing phase. Always utilize a bungee elastic hook or spiral spin pins rather than a standard circular hair tie; bungee fasteners wrap the base with maximum tension without crushing hair volume, securing a rock-solid anchor that will not sag throughout the day.
1. The Classic Model-Off-Duty Middle-Part Low Topuz
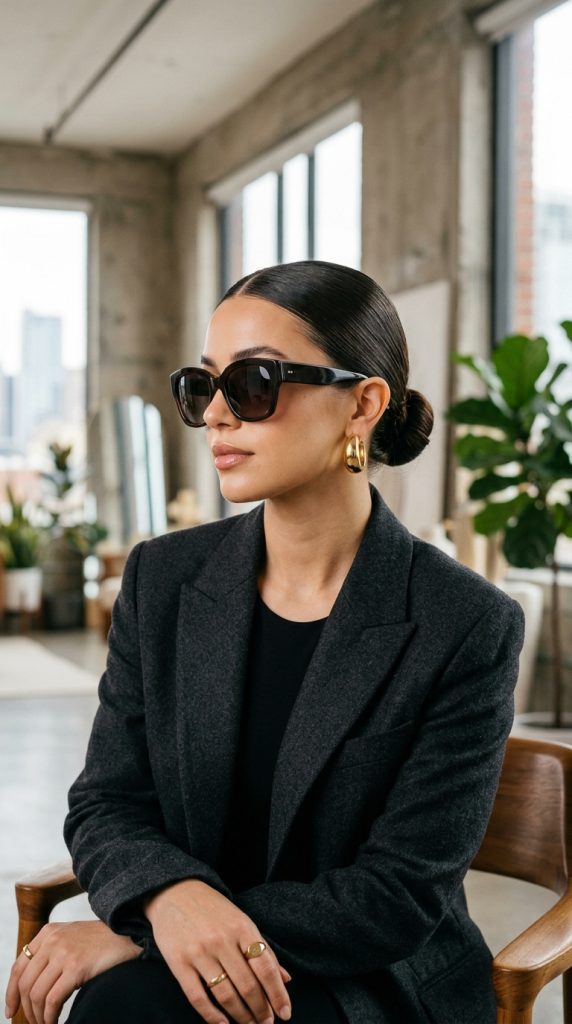
Achieving Razor-Sharp Symmetry and Minimalist Elegance
The quintessential staple of contemporary streetwear and high-fashion minimalism is the low middle-part topuz. Popularized by runway models and modern style icons, this look relies on a razor-sharp center part that splits the front hairline before sweeping tightly around the ears into a neat, twisted donut low bun at the nape of the neck.
This style provides an immediate visual lift to the eyes while maintaining a grounded, sophisticated profile. It pairs effortlessly with oversized sunglasses, gold hoop earrings, and structured outerwear.
Mastering the Dual-Brush Smoothing Sequence
To eliminate micro-bumps along your crown, a single brush is rarely enough. You must use a two-step brushing sequence. First, use a dense boar-bristle paddle brush to distribute your styling wax and sweep the hair backward toward the nape.
Follow this immediately with a fine-toothed bristle edge brush, smoothing the surface layers in microscopic strokes. This catches even the shortest baby hairs, locking them flat into the gel matrix before securing the base.
Essential Supplies for the Middle-Part Low Topuz
- Metal pin-tail parting comb
- Alcohol-free strong-hold styling wax stick
- Dense boar-bristle smoothing brush
- Bungee cord elastic fastener
- U-shaped hairpins and spin pins
Step-by-Step Implementation Guide
- Mist clean, dry hair lightly with water to make the strands pliable.
- Use a metal pin-tail comb to create a razor-sharp center part running from your forehead back to the mid-crown.
- Apply a strong-hold styling wax stick directly along the parting line and front hairline.
- Tilt your head slightly backward to keep the scalp skin taut along the nape.
- Brush your hair backward and down toward the nape using a boar-bristle brush, keeping the center part crisp.
- Secure the gathered ponytail tightly at the nape using a bungee cord fastener.
- Twist the ponytail tail firmly into a tight rope, wrap it continuously around the base to form a neat donut, and insert spin pins to secure.
- Mist the entire head with a light glossing spray and press down any stray hairs with your fingertips.
2. The High-Altitude Ballet Royal Topuz
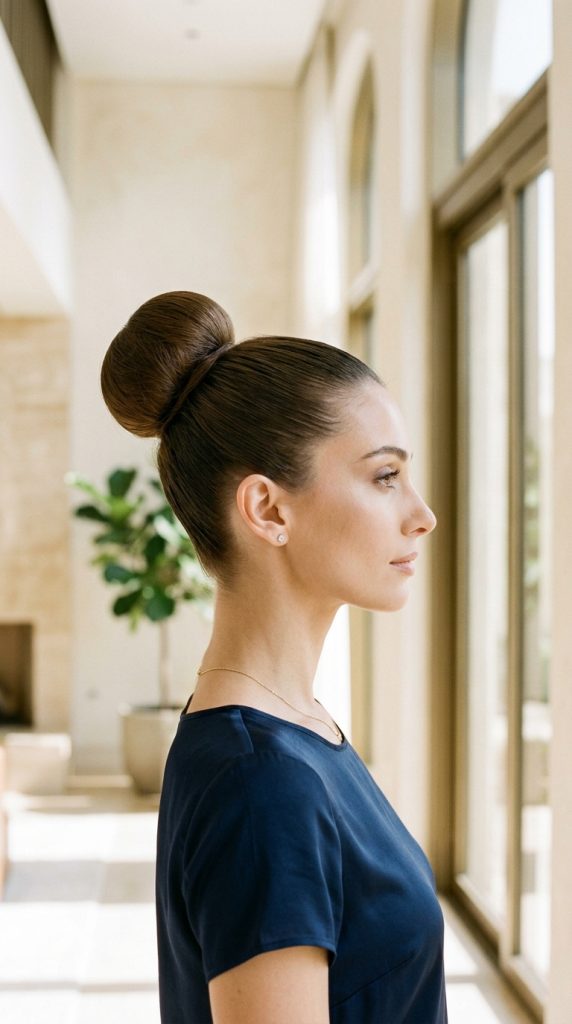
Elongating the Neck with High-Crown Precision
Drawing inspiration from classical ballet companies and regal court fashion, the high-altitude ballet royal topuz positions the bun at the very crown of the head. Positioned at a precise 45-degree angle aligned upward from the jawline, this high bun creates a striking vertical silhouette that elongates the neck and draws visual focus to your jawline.
This style eliminates all parting lines, sweeping every strand upward smoothly into a perfectly symmetrical, rounded sphere. It is an exceptional choice for formal galas, black-tie events, or whenever you want to project regal authority.
Constructing a Rock-Solid High Anchor Point
The primary challenge of a high-crown bun is gravity—without proper anchoring, a high bun can sag or tilt backward over time. To prevent this, apply styling gel while brushing your hair upward in two vertical sections.
First, gather the top half of your hair into a high half-ponytail and secure it. Then, brush the bottom half upward to meet the first ponytail, securing both together with a second elastic. This double-anchor method distributes weight evenly and prevents sagging.
Materials Required for the Ballet Topuz
- Firm-hold styling gel or pomade
- Boar-bristle paddle brush
- Two heavy-duty bungee cord fasteners
- Mesh bun donut shaper (optional for thin hair)
- High-shine finishing lacquer
Step-by-Step Implementation Guide
- Apply a generous layer of styling gel throughout your roots and crown.
- Tilt your head completely upside down to allow gravity to assist your upward brushing.
- Brush all hair smoothly toward the top crown, eliminating all bumps along the nape and sides.
- Return to an upright position and use a fine-edge brush to refine the perimeter.
- Secure the gathered hair tightly at the crown using a bungee cord.
- Roll the ponytail tail around a mesh bun shaper (or twist tightly into a sphere) and anchor with U-pins around the entire perimeter.
- Mist a high-shine finishing lacquer across the crown to lock in a glassy finish.
- Smooth baby hairs along the temples upward toward the bun.
3. The Sculpted French Twist Topuz
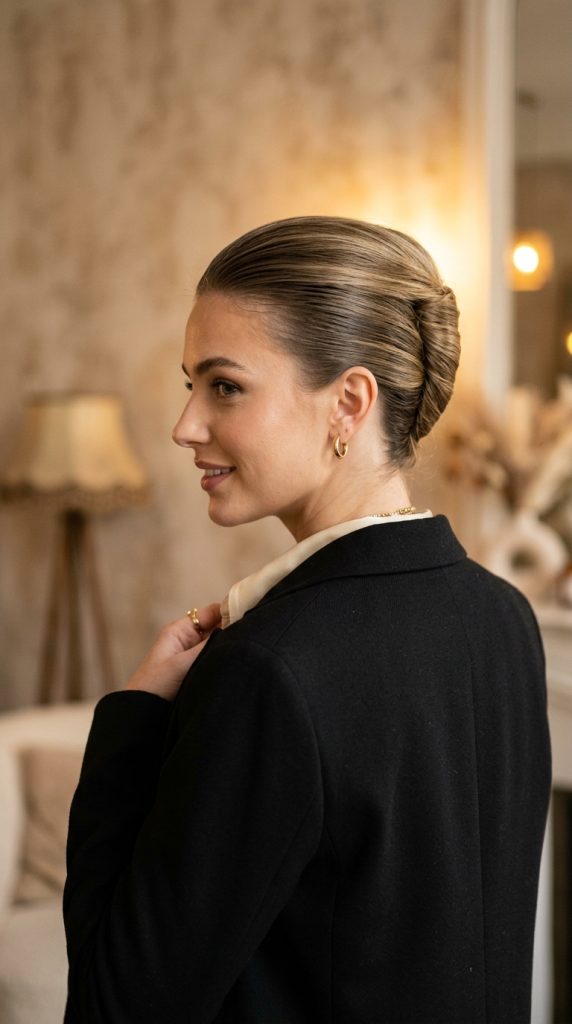
Merging Vintage Parisian Charm with Clean Modern Aesthetics
For individuals who love traditional French tailoring and effortless Parisian style, the sculpted French twist topuz offers an elegant variation on the classic round bun. Instead of a circular donut shape, this style rolls the hair vertically along the back of the head, tucking the ends inward to form a sleek, vertical seam.
It combines the structured polish of a vintage updo with the clean, flat roots of modern minimalism, making it a favorite for business meetings, gallery openings, and formal dinners.
Executing the Seamless Vertical Roll
The secret to a long-lasting French twist is creating a sturdy cross-pinned foundation along the center line of your nape before rolling the hair.
Brush all hair over to the left side of your head and insert a vertical row of interlocking bobby pins down the center line. Then, sweep the hair back over to the right, roll it inward toward the center, and tuck the ends into the vertical seam, securing directly into the bobby-pin anchor line.
French Twist Accessories List
- Vertical french twist hair comb or large metal claw
- Interlocking bobby pins
- Boar-bristle smoothing brush
- Nourishing styling wax
- Flexible-hold working hairspray
Step-by-Step Implementation Guide
- Apply styling wax to your roots and smooth all hair backward, keeping a soft or slicked surface according to preference.
- Gather all hair at the nape of the neck as if creating a low ponytail.
- Insert a vertical column of bobby pins down the center of your back head to create a secure anchor wall.
- Twist the hair tightly upward in a single direction, lifting the roll against the back of your head.
- Tuck the loose tail ends of the twist neatly inside the top cavity of the roll.
- Secure the vertical seam by sliding french twist hair pins horizontally through the roll into the hidden bobby-pin anchor wall.
- Smooth any surface flyaways along the sides with a touch of wax on your palms.
- Mist with a flexible-hold working hairspray to set the vertical updo.
4. The Slicked Side-Part Old-Money Topuz
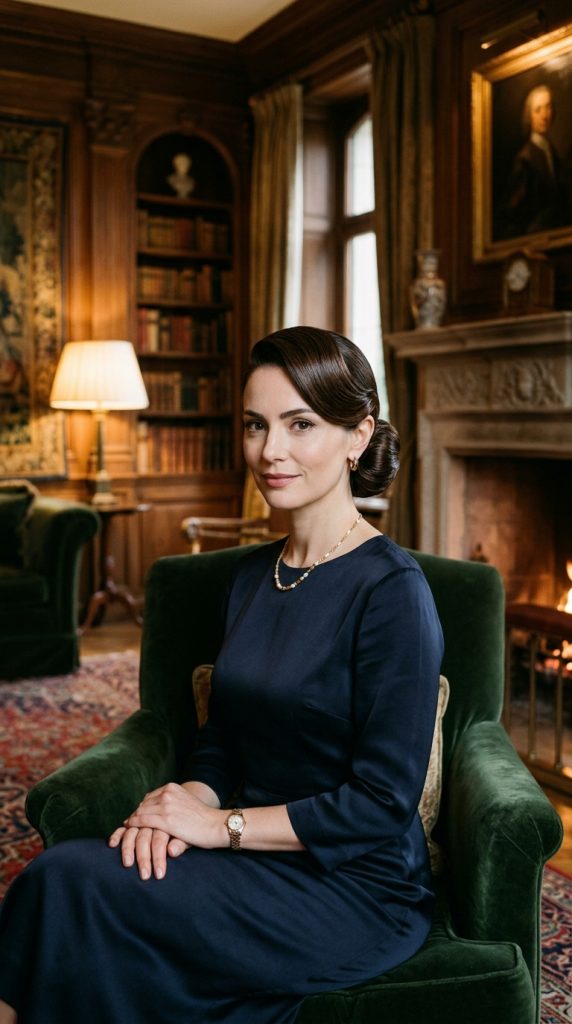
Asymmetrical Sophistication and Continental Glamour
Stepping away from centered symmetry, the slicked side-part old-money topuz introduces dynamic asymmetrical line work. Inspired by classic European fashion houses and vintage continental glamour, this style features a dramatic side part that sweeps smoothly across the forehead before wrapping into a low, polished bun at the nape.
It soft-focuses sharp facial angles, frames the eyes beautifully, and pairs extraordinarily well with tailored suits, silk blouses, and pearl or diamond jewelry.
Engineering the Deep Side Sweep
Finding your ideal side part is crucial for facial balance: align your part line directly above the highest arch of your eyebrow.
When smoothing the heavy side across your forehead, use a fine-tooth comb to create a soft, sweeping arc rather than a flat, harsh diagonal. This maintains a gentle, luxurious contour over the temple before the hair merges into the low bun anchor.
Old-Money Topuz Materials
- Precision metal tail comb
- Smoothing styling wax stick
- Boar-bristle polishing brush
- Low-profile spin pins
- Lightweight glossing serum
Step-by-Step Implementation Guide
- Use a metal tail comb to create a deep side part aligned with the arch of your eyebrow.
- Apply styling wax stick along the parted sections and front hairline.
- Sweep the heavier section of hair smoothly across your forehead in a soft, elegant curve.
- Brush all hair—including the sweeping front section—downward toward the nape of the neck.
- Secure the asymmetrical ponytail tightly with a bungee cord at the nape.
- Twist the ponytail into a sleek, compact spiral and anchor it flat against the nape using spin pins.
- Rub a drop of glossing serum between your palms and glide it over the sweeping forehead section.
- Check your profile view in a mirror to confirm a smooth, uninterrupted curve from temple to bun.
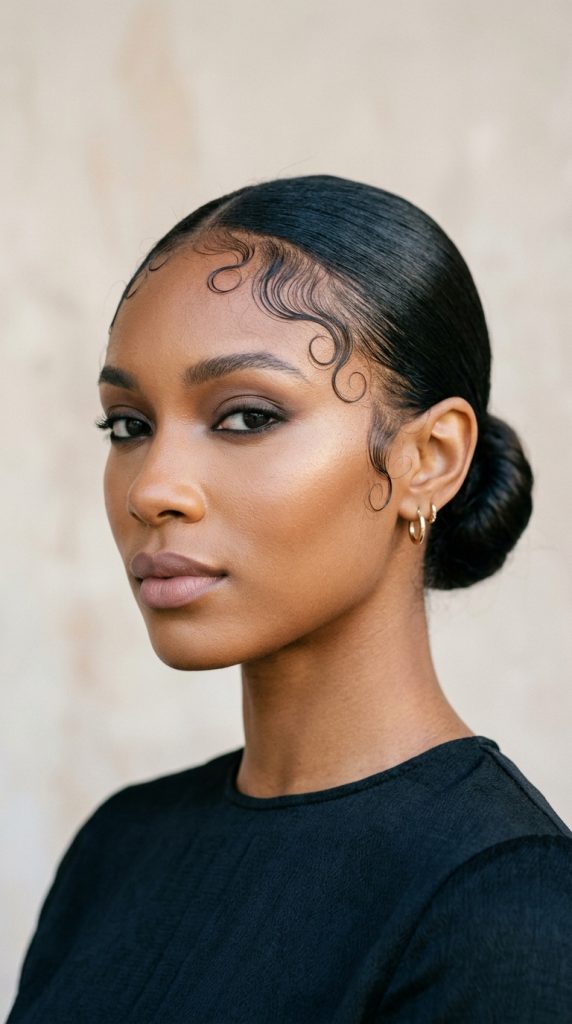
5. The Sculpted Baby-Hair Artistry Topuz
Frame-Filling Calligraphy and Editorial Flourish
Taking the clean girl aesthetic into an artistic, editorial space, the sculpted baby-hair artistry topuz pairs a glass-smooth crown and low bun with meticulously designed, artful baby hairs along the forehead and sideburns. This style pays homage to urban beauty culture while maintaining the crisp, high-end polish of contemporary fashion.
Rather than letting stray hairs fuzz up your hairline, you celebrate your natural hair texture by molding tiny perimeter hairs into precise, sweeping arcs that frame your face like fine calligraphy.
Shaping and Setting Delicate Swirls
To create baby hairs that hold their sculpted shape all day without flaking or lifting, you need a specialized edge styler and a fast-drying, non-flaking edge control wax. Use the tail end of a rat-tail comb to tease out a delicate, wispy veil of hair along your hairline.
Apply a tiny dot of edge wax to your fingertips, press the hair against your skin in a C-curve or S-curve motion, and clean up the surrounding skin with a cotton swab dipped in micellar water for crisp contrast.
Materials Required for Baby-Hair Sculpting
- Firm-hold edge control wax (clear, non-flaking formula)
- Metal rat-tail parting comb
- Double-ended edge brush with fine comb
- Micellar water and cotton swabs for clean edges
- Silk wrapping strip for setting
Step-by-Step Implementation Guide
- Gather your hair into a sleek low or mid-height topuz following standard smoothing methods, securing with a bungee cord.
- Use the metal tail of your comb to gently pick out a very fine, wispy layer of hair along your hairline and sideburns.
- Apply a pea-sized amount of edge wax to the roots of these delicate baby hairs.
- Using the brush end of your edge tool, swoop the hair near your left temple downward and inward toward your eye in a C-curve.
- Sculpt a second delicate wave along your right temple, mirroring the left or creating an asymmetric S-curve.
- Clean up any excess wax smudged on your skin using a cotton swab moistened with micellar water.
- Tie a silk wrapping strip gently over your hairline for five minutes to press the baby hairs flat into final position.
- Remove the strip and spritz a light holding mist over the edges to lock them in place.
6. The Braided Rope-Loop Architectural Topuz
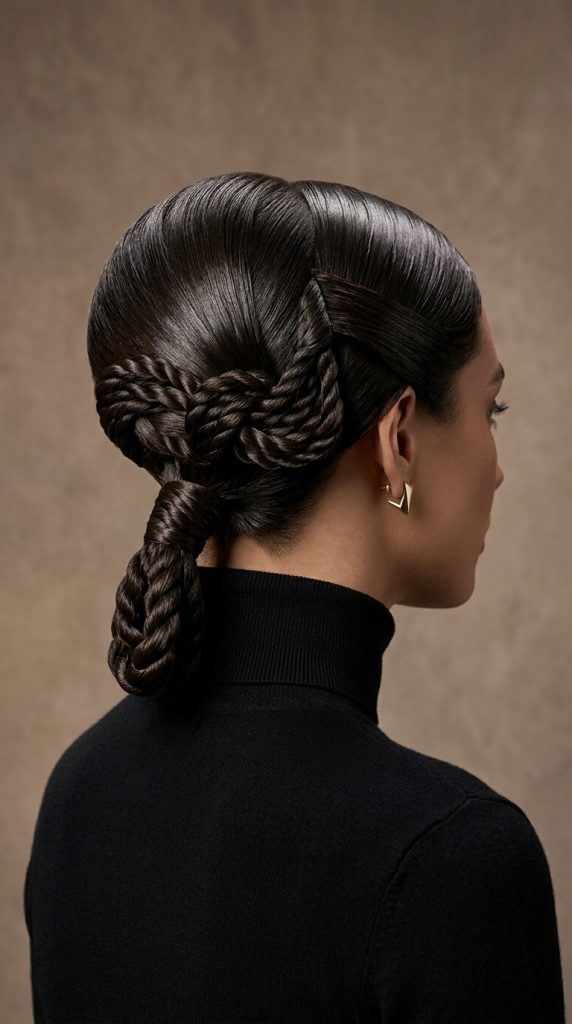
Structural Dimension and Modern Tactile Craft
Texture play within clean girl minimalism is a rapidly growing trend. The braided rope-loop architectural topuz combines ultra-sleek, glass-smooth roots with a dramatic, structural braided bun. By weaving the ponytail tail into a tight rope twist or three-strand braid before looping it into geometric shapes, you create a striking sculptural focal point at the back of your head.
This look adds unexpected tactile dimension to an updo, making it look as though you spent hours with a high-end editorial stylist when it can actually be executed in under fifteen minutes.
Executing Clean Braids on Slicked Strands
When braiding hair that has been coated in styling gel or wax, strands can sometimes feel slippery. To combat this, apply a small amount of dry texturizing paste or braider’s gel to the ponytail tail before weaving.
This gives your fingers instant grip, allowing you to create a tight, uniform braid or two-strand rope twist that maintains its crisp structure when folded and pinned into loops.
Braided Topuz Accessories List
- Texturizing paste or braider’s gel
- Clear silicone mini elastics
- Boar-bristle smoothing brush
- Strong-hold styling wax
- Heavy-duty U-shaped hairpins
Step-by-Step Implementation Guide
- Slick your hair back into a sleek mid or low ponytail and secure with a bungee cord.
- Apply a small amount of braider’s gel through the length of the ponytail tail.
- Divide the tail into two equal sections and twist each section tightly clockwise, then cross them counter-clockwise to form a rope braid.
- Secure the end of the rope braid with a clear silicone mini elastic.
- Fold the rope braid upward and loop it over the base, tucking the tail through the center to form an architectural knot.
- Insert heavy-duty U-pins through the loops into the base to lock the geometric shape in place.
- Smooth any surface flyaways along your crown using your boar-bristle brush and wax.
- Mist the entire style with a shine-enhancing finishing spray for a cohesive, polished finish.
7. The Soft-Framing Tendril Topuz
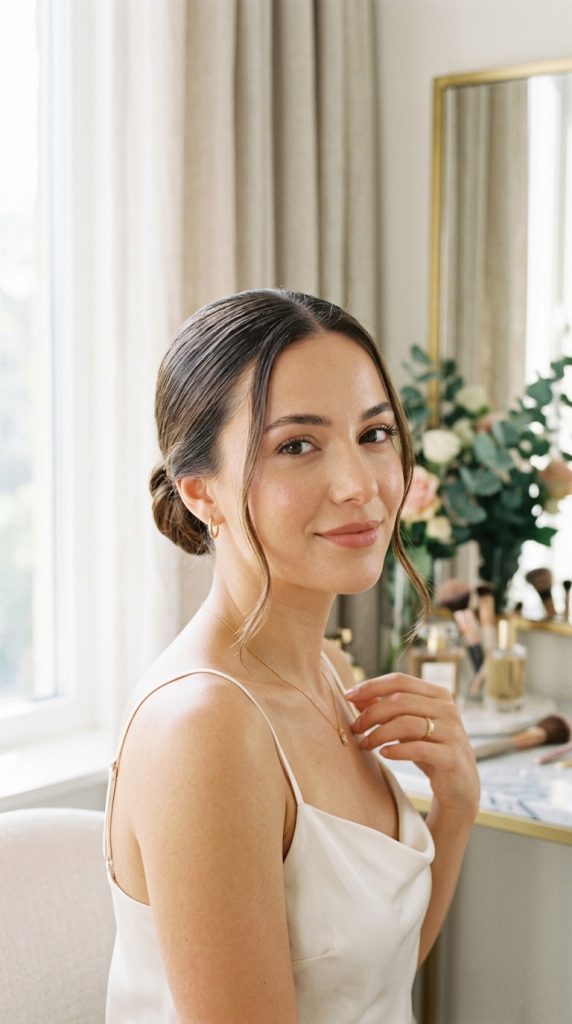
Softening High-Impact Sleekness with Romantic Front Strands
For individuals who love the lifted elevation of a sleek topuz but feel overly exposed when all hair is pulled completely away from the face, the soft-framing tendril topuz offers a romantic alternative.
This style features a smooth, slicked crown and low bun, while two delicate, silky face-framing tendrils are left out to graze the cheekbones or jawline. It offers a softer, ultra-feminine presentation that bridges the gap between strict structure and relaxed charm.
Precision Parting and Tendril Weight Control
Getting your face-framing tendrils right requires careful sectioning with a metal pin-tail comb. Your tendrils should be selected from the very front hairline, directly in front of the ears or along a center part.
Keep these tendrils thin and lightweight. Heavy, thick chunks of hair hanging down destroy the sleek minimalist aesthetic; they should look delicate, silky, and deliberate.
Tendril Topuz Accessories Checklist
- Metal pin-tail parting comb
- Mini ceramic flat iron (for polishing tendrils)
- Lightweight argan or jojoba hair oil
- Firm-hold styling wax
- Alligator sectioning clips
Step-by-Step Implementation Guide
- Section out a thin, quarter-inch tendril of hair on each side of your front hairline using a pin-tail comb.
- Clip the two face-framing tendrils safely out of the way with sectioning clips.
- Apply styling wax to the rest of your hair and brush all remaining sections backward toward a low or mid-height bun point.
- Secure the main ponytail base tightly with a bungee cord and wrap into a sleek topuz.
- Release your face-framing tendrils and mist them with a heat protectant spray.
- Pass a mini ceramic flat iron smoothly down each tendril, curving the very tips inward slightly toward your jawline.
- Rub a single drop of argan oil between your palms and glide it over the tendrils for high-gloss shine.
8. The Spiky Y2K Futuristic Sleek Topuz
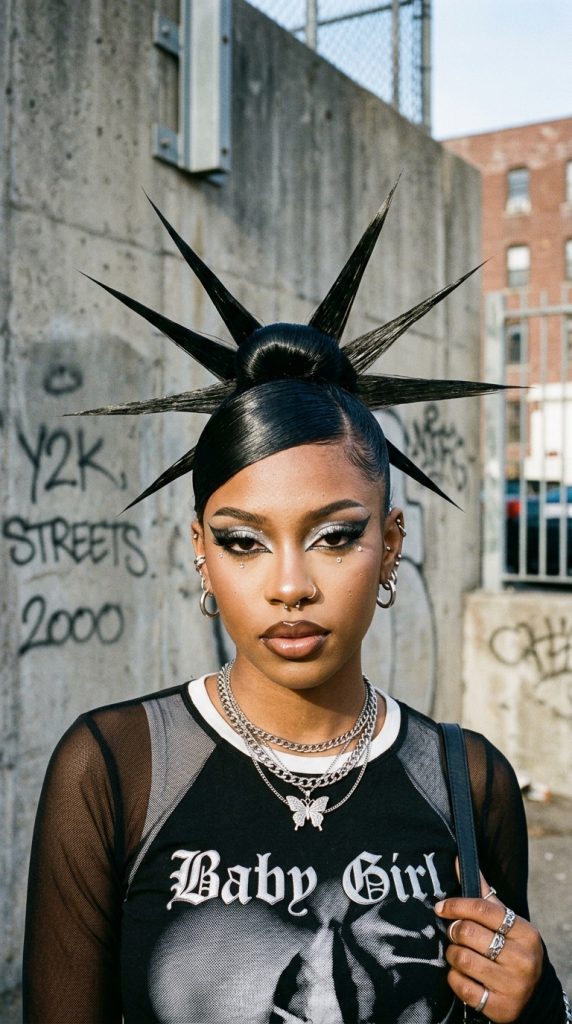
Playful Edgy Spikes Meets High-Gloss Polish
Injecting bold, nineties and early-2000s energy into modern beauty culture, the spiky Y2K futuristic sleek topuz pairs a glass-smooth crown with sharp, fan-like hair ends sticking out dramatically from the bun base.
This playful, edgy style creates a dynamic visual fan effect behind your head while maintaining a pristine, slicked front profile. It has become a favorite for fashion-forward streetwear looks, music festivals, and late-night events.
Sculpting Sharp, Rigid Hair Spikes
The key to achieving distinct Y2K spikes that hold their pointed shape without drooping is utilizing a heat-activated straightening iron combined with maximum-hold hairspray or edge gel on the ends.
When wrapping your ponytail into a bun, leave two to three inches of the hair ends sticking straight out out of the top or sides. Apply strong-hold hairspray to these exposed ends, then pass a flat iron over them to freeze them into rigid, razor-sharp points.
Spiky Topuz Supplies Checklist
- Mini flat iron for shaping spikes
- Maximum-hold aerosol freeze hairspray
- Strong-hold clear styling gel
- Boar-bristle smoothing brush
- Spin pins or hair elastics
Step-by-Step Implementation Guide
- Slick your hair backward into a high or mid-level ponytail using clear styling gel.
- Twist the ponytail into a central bun base, but leave 2 to 3 inches of the tail ends unwrapped and sticking upward.
- Secure the central bun base firmly with spin pins, keeping the loose ends free.
- Separate the loose ends into 3 or 4 distinct, pointed spike sections.
- Mist maximum-hold freeze hairspray generously onto the first spike section.
- Pass a hot flat iron quickly over the spike from base to tip to set it completely rigid.
- Repeat the spray-and-iron process for the remaining spikes, fanning them out symmetrically behind the bun.
- Apply a final coat of gloss spray across the front crown for a mirror-like finish.
9. The Clean Girl Low Loop Origami Topuz
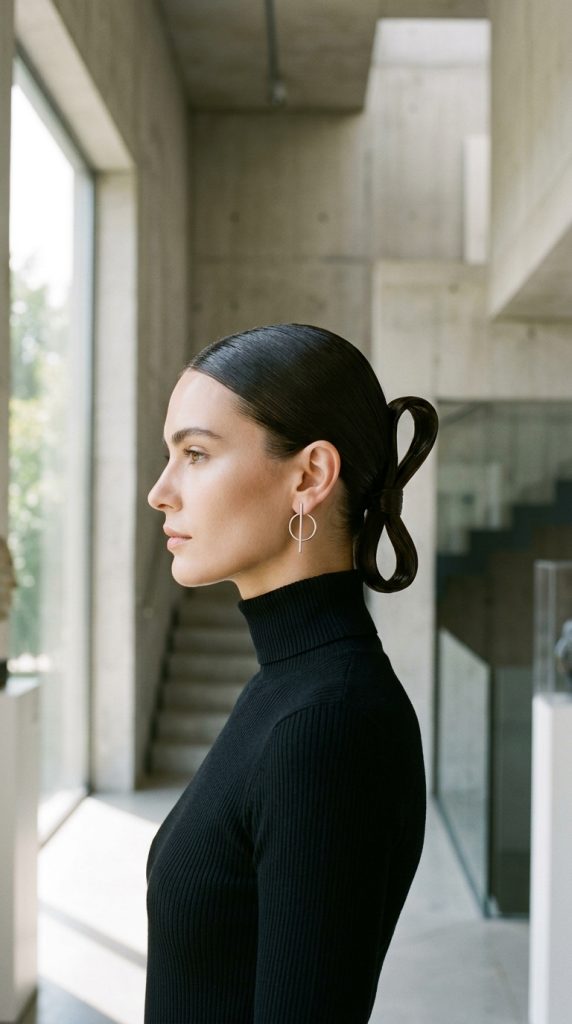
Minimalist Modern Artistry with Folded Hair Loops
If traditional round donut buns feel repetitive, the clean girl low loop origami topuz offers a sleek, modern architectural alternative. Inspired by Japanese origami paper folding, this style folds a low ponytail into a flat, elongated vertical loop rather than wrapping it into a circle.
It sits flat against the nape of the neck, offering a understated, high-fashion profile that looks exceptionally chic with turtleneck sweaters, backless dresses, and minimal jewelry.
Executing a Flat Folded Hair Loop
Achieving a clean origami loop requires working with a smooth, well-conditioned ponytail tail that has zero internal tangles.
Instead of twisting the ponytail tail, fold it directly upward toward your crown, secure it flat against the base with a mini elastic, then fold the remaining tail downward to create a second flat loop. Wrap the very ends around the center joint to conceal the elastics completely.
Origami Topuz Materials Checklist
- Clear silicone mini elastics
- Smoothing hair cream or lightweight wax
- Fine-tooth tail comb
- Flat metal bobby pins
- Anti-humidity finishing mist
Step-by-Step Implementation Guide
- Apply smoothing hair cream through your hair and brush backward into a sleek low ponytail at the nape.
- Secure the ponytail base with a thin elastic band.
- Fold the ponytail tail upward four inches, holding it flat against the back of your head.
- Secure this folded loop at the base using a clear silicone mini elastic.
- Fold any remaining tail length back down over the base to form a clean, double-layered vertical loop.
- Wrap the loose tips around the central elastic joint and anchor underneath with flat bobby pins.
- Smooth the front and sides of your crown with your fine-tooth comb.
- Mist with an anti-humidity finishing spray to keep the origami loop crisp and flyaway-free.
10. The Wet-Look Glass-Finish Topuz
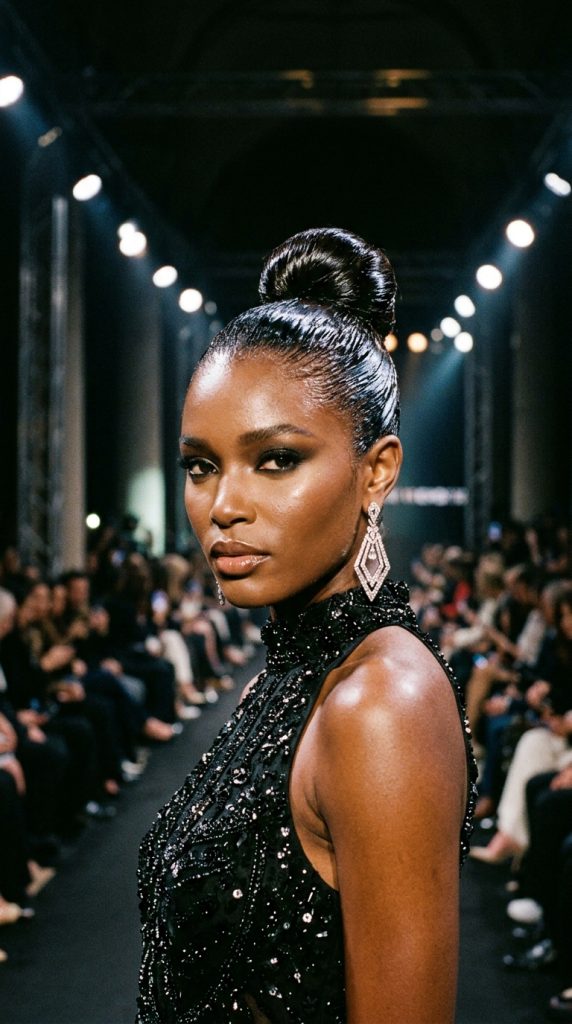
Runway-Inspired High-Shine Dewy Aesthetics
Directly off international fashion runways, the wet-look glass-finish topuz takes shine to its absolute maximum limit. This style eliminates all dry, matte textures, utilizing high-shine glossing gels, hair oils, and silicone serums to create a perpetual “just-stepped-out-of-the-water” aesthetic.
It projects an ultra-modern, high-fashion vibe that looks breathtaking under evening lighting, making it a go-to choice for red-carpet appearances, rooftop dinners, and summer galas.
Maintaining the Wet Appearance Without Drying
The primary challenge with wet-look hairstyles is that water-based gels evaporate over time, leaving hair feeling stiff, flaky, or dry. To keep your topuz looking continuously wet for hours, you must combine a moisturizing leave-in cream, an alcohol-free gel, and a generous coat of hair oil or silicone serum.
The oil traps the moisture underneath, preventing the gel from hardening into a dry shell while maintaining a reflective, glassy sheen.
Wet-Look Supplies List
- Alcohol-free high-shine styling gel
- Silicone-based high-gloss hair serum or hair oil
- Wide-tooth comb and fine-tooth smoothing comb
- Spray bottle with water and leave-in conditioner
- Silk head scarf for setting
Step-by-Step Implementation Guide
- Dampen your hair thoroughly using a spray bottle filled with water and leave-in conditioner.
- Apply a generous amount of high-shine styling gel from roots to ends.
- Comb your hair backward smoothly using a fine-tooth comb, pressing strands flat against the scalp.
- Gather the wet hair into a mid-height or low ponytail and secure with a bungee cord.
- Twist the tail into a tight, slick bun and anchor securely with spin pins.
- Coat your palms with silicone gloss serum or hair oil and smooth it generously across your entire crown and bun.
- Tie a silk head scarf tightly over your head for 10 minutes to set the wet layers completely flat.
- Remove the scarf and apply a final light layer of gloss serum for a reflective finish.
11. The Athletic Gym-Sleek Sweat-Proof Topuz

Performance-Driven Elegance for Active Lifestyles
The clean girl aesthetic was forged in the wellness studio, making the athletic gym-sleek sweat-proof topuz an essential daily styling option. Designed to withstand high-intensity workouts, hot yoga, and heavy cardio sessions without loosening or frizzing, this style prioritizes rock-solid grip and moisture resistance.
By utilizing sweat-resistant styling pomades formulated with synthetic resins or natural waxes, your topuz stays locked in place through your toughest workouts while looking effortlessly chic.
Sweat-Resistant Styling Mechanics
Standard water-based hair gels can break down and turn sticky when mixed with heavy sweat during a workout. To prevent this, swap standard gel for a sweat-resistant styling pomade or edge wax.
Furthermore, double-securing your bun base using a bungee cord followed by spiral spin pins prevents the weight of your hair from loosening your tension during high-impact movement.
Gym-Sleek Supplies Checklist
- Sweat-resistant styling pomade or wax stick
- Two heavy-duty bungee cord fasteners
- Spiral spin pins (far stronger than standard bobby pins)
- Dry shampoo powder (for post-workout refresh)
- Microfiber sweat-wicking headband (optional)
Step-by-Step Implementation Guide
- Apply a sweat-resistant pomade or wax along your hairline, temples, and nape.
- Brush your hair backward into a tight ponytail at your preferred height using a firm brush.
- Secure the base with your first bungee cord tightly.
- Twist the tail into a dense, compact coil and anchor it with 3 or 4 spiral spin pins turned clockwise into the base.
- Wrap a second bungee cord or elastic around the outside of the finished bun for a double-locked anchor.
- Post-workout: If sweat dampens your roots, dust a small amount of dry shampoo powder along the crown.
- Use a blow dryer on the cool setting to evaporate sweat moisture without disturbing your sleek styling.
- Smooth any minor post-workout flyaways with a dab of pomade on your fingertips.
12. The Textured Braided-Crown Hybrid Topuz
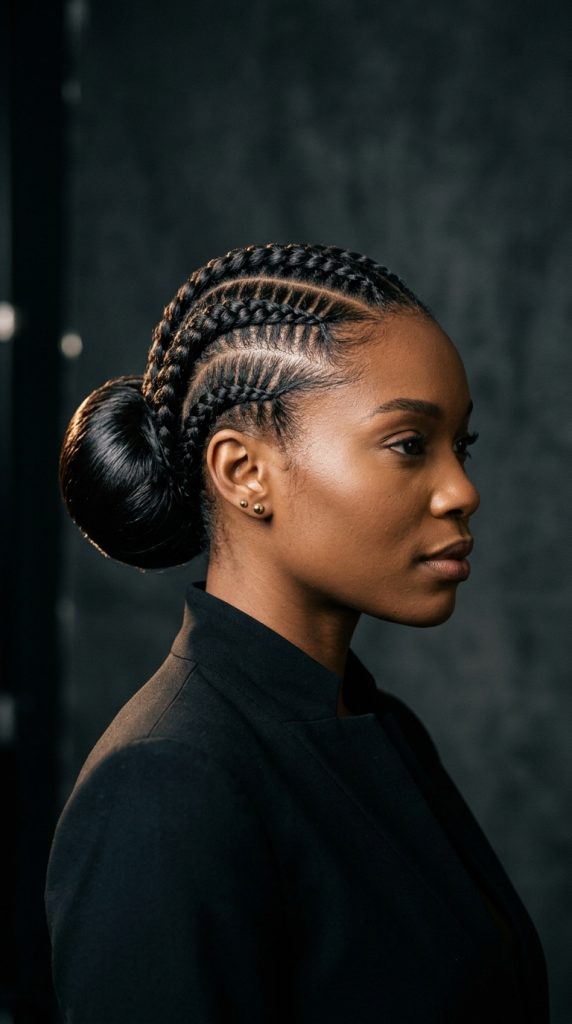
Intricate Scalp Braids Merging into a Smooth Bun Anchor
Combining traditional braiding artistry with sleek updo architecture, the textured braided-crown hybrid topuz features neat, flat cornrows or Dutch braids along the scalp that feed cleanly into a smooth, slicked bun at the crown or nape.
This hybrid approach offers breathtaking visual detail from the front and sides, showcasing intricate line work while keeping the main bun compact and polished. It is an exceptional choice for cultural celebrations, summer festivals, and protective styling.
Ensuring Smooth Transitions from Braids to Bun
The transition point where scalp braids meet the main bun base must look clean and flat. When braiding your scalp sections toward the anchor point, ensure you braid all the way to the ponytail base before securing.
Apply a generous amount of edge gel or braid pomade along the parting lines between braids to keep the exposed scalp lines crisp and clean.
Braided-Crown Hybrid Supplies List
- Braid pomade or strong-hold edge gel
- Precision metal pin-tail comb for clean parting
- Clear mini silicone elastics
- Boar-bristle polishing brush
- Spin pins or U-shaped hairpins
Step-by-Step Implementation Guide
- Use a metal pin-tail comb to section 3 to 5 clean vertical or curved parting lanes across your crown.
- Apply braid pomade along each parting lane to ensure crisp line visibility.
- Braid each section into a neat, flat cornrow or Dutch braid moving backward toward your desired bun location.
- Gather the braid tails together at the anchor point along with any unbraided lower hair.
- Secure all hair together tightly into a single ponytail using a bungee cord.
- Twist the combined ponytail into a smooth, compact bun and anchor with spin pins.
- Apply a light coat of edge gel over the braids and smooth flyaways using an edge brush.
- Mist the entire style with a sheen spray to highlight the intricate braided line work.
13. The Velvet-Ribbon Regal Topuz
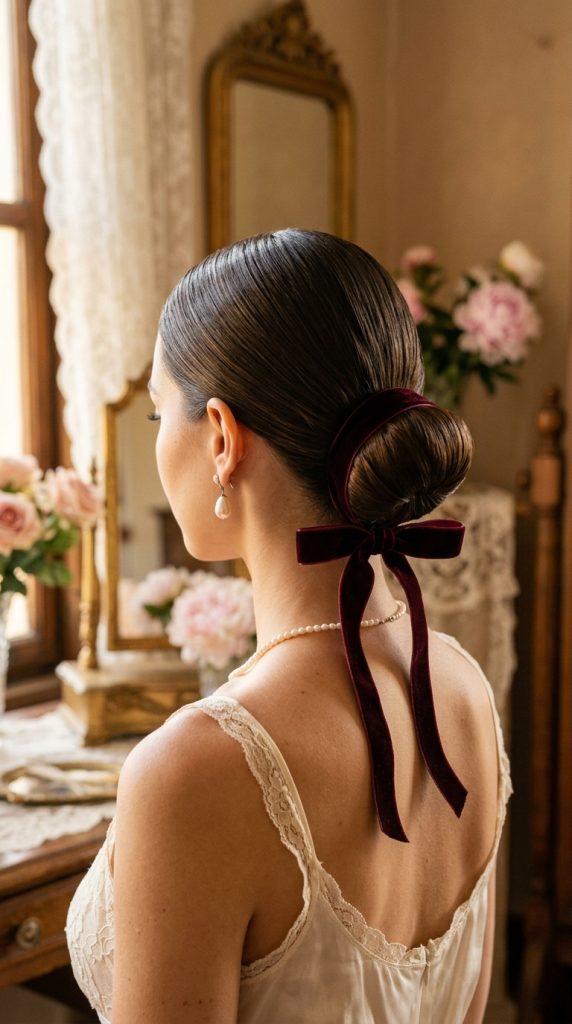
Timeless Coquette Luxury with Velvet Hardware
Rounding out our aesthetic topuz guide is the velvet-ribbon regal topuz—a look that introduces soft, luxurious hardware to a sleek updo. Featuring a pristine, glass-smooth bun wrapped at its base with a rich velvet or silk ribbon, this style bridges the gap between clean girl minimalism and romantic coquette fashion.
The contrast between slicked, reflective hair and the soft, matte texture of velvet creates an expensive visual aesthetic that looks stunning for holiday gatherings, autumn weddings, and formal evening dinners.
Choosing and Securing Hardware Accents
When selecting a ribbon for your topuz, choose high-quality velvet or double-faced satin ribbon that measures between one-half inch to one inch in width.
To keep the ribbon from sliding off the smooth hair surface throughout the night, slide a bobby pin through the center knot of the ribbon bow and push it directly into the base of the bun anchor.
Velvet-Ribbon Topuz Supplies Checklist
- 1-inch wide black, burgundy, or emerald velvet ribbon
- Strong-hold styling wax stick
- Boar-bristle smoothing brush
- Spin pins for bun anchor
- Flat bobby pins for securing ribbon knot
Step-by-Step Implementation Guide
- Slick your hair backward into a pristine mid or low ponytail using a styling wax stick and boar-bristle brush.
- Secure with a bungee cord and twist the tail into a tight, symmetrical donut bun using spin pins.
- Wrap your velvet ribbon snugly around the base elastic of the bun twice.
- Tie the ribbon into a clean, crisp bow or a sleek flat knot with cascading tails hanging down your neck.
- Slide a flat bobby pin through the back of the ribbon knot and push it firmly into the bun anchor.
- Smooth any surface flyaways along your crown using your edge brush and a touch of wax.
- Pass a flat iron over the cascading ribbon tails to ensure they hang crisp and smooth.
- Step back and admire your romantic, regal, and impeccably clean aesthetic topuz.