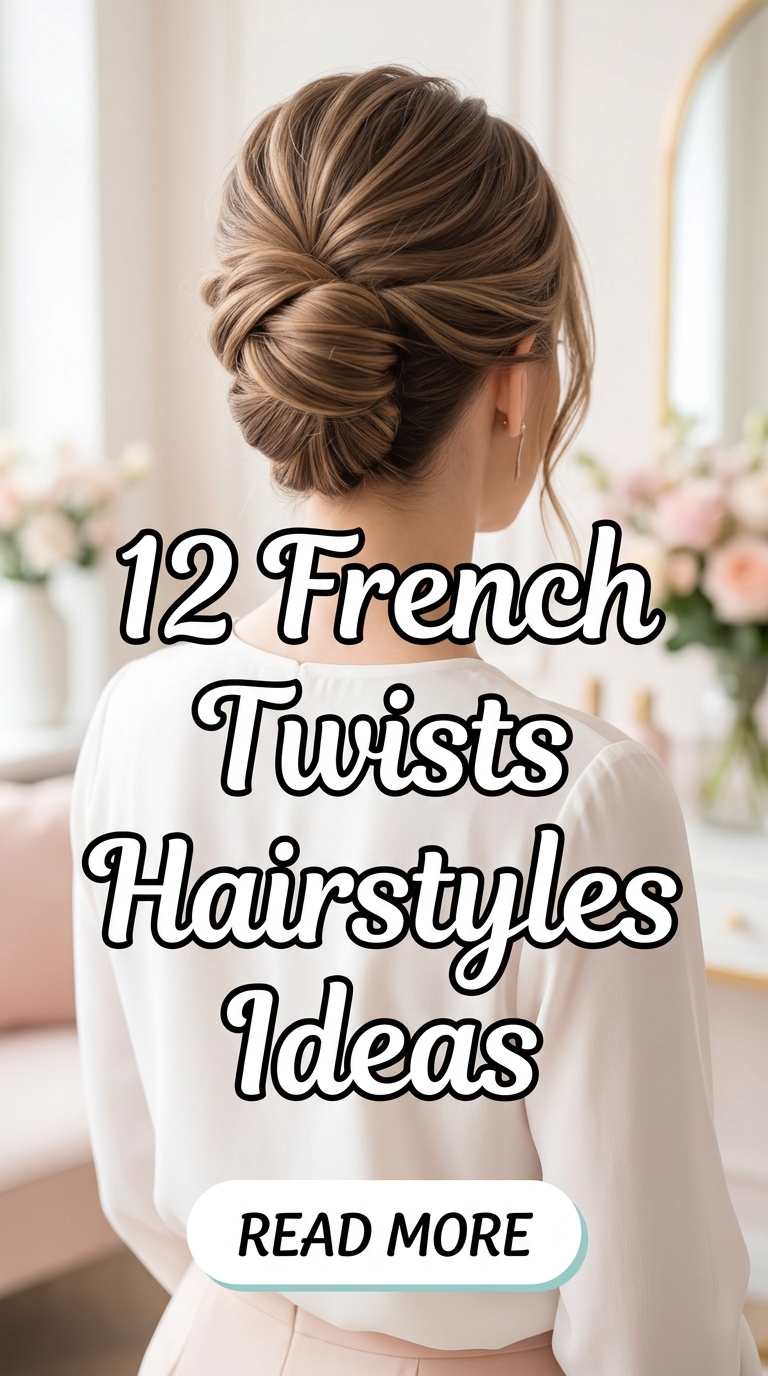
12 French Twists Hairstyles Ideas
Updos have always held a special place in the world of beauty and fashion. Among them, the classic French twist stands out as an absolute symbol of timeless sophistication. However, many people mistakenly believe this stunning look is only meant for formal galas or weddings.
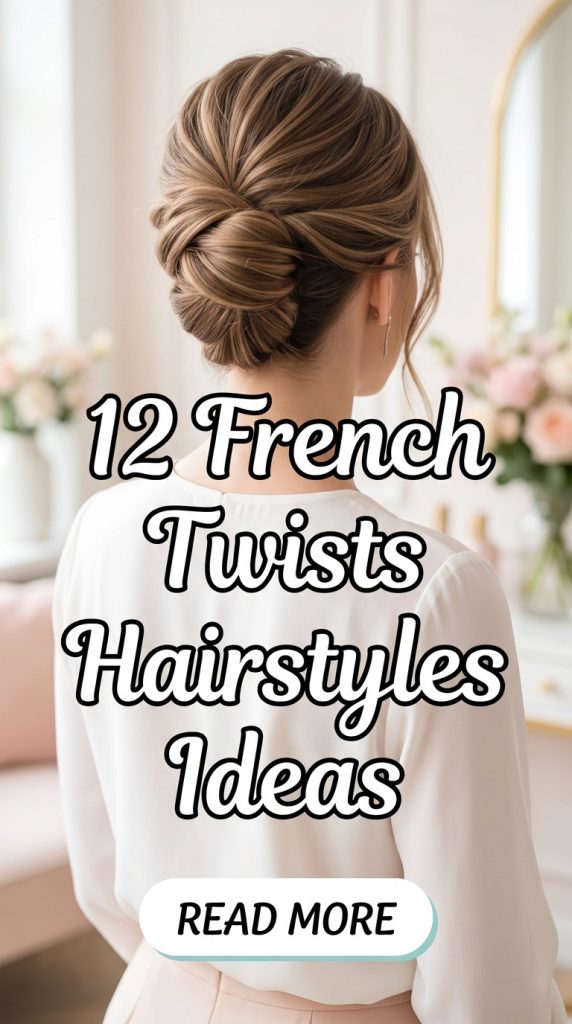
Modern styling techniques have completely transformed this traditional updo into a versatile, everyday hair solution. Today, you can wear a twist to the office, grocery store, or a casual dinner date easily. This comprehensive guide will explore twelve fresh, beautiful, and beginner-friendly ways to style a French twist.
The Basics of Modern Hair Sculpting
Achieving the perfect updo requires an understanding of your hair texture, volume, and mechanical support. Before you begin styling, you must prepare your hair strands to hold their shape throughout the day. Clean hair can often be too slippery, causing pins to slide out of place constantly.
+-------------------------------------------------------+
|                Updo Foundation Checklist              |
+--------------------------+----------------------------+
| Hair Texture             | Add Grip with Dry Shampoo  |
| Primary Support          | U-Shaped Heavy Bobby Pins  |
| Modern Accent            | Minimalist Acetate Claw    |
| Finishing Touch          | Flexible Medium-Hold Spray |
+--------------------------+----------------------------+
Using a light texturizing spray gives your hair the necessary grip to lock the twist securely. Furthermore, choosing the right hair pins makes a massive difference in your comfort levels. Modern U-shaped hair pins distribute weight evenly, preventing painful scalp tugging while maintaining a flawless hold.
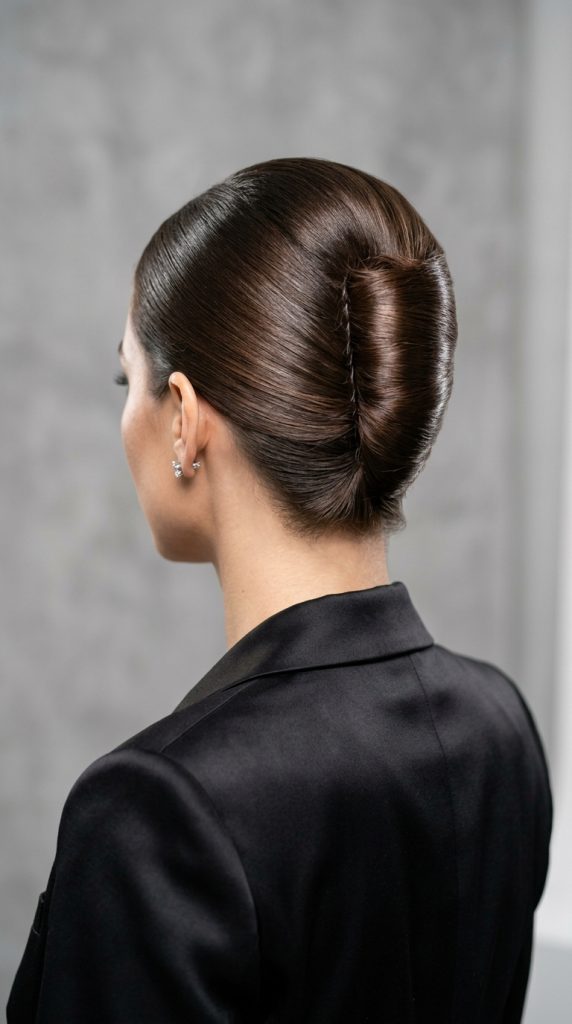
1. The Undone Casual Everyday Twist
Embracing Effortless Texture for Daily Wear
A messy, undone aesthetic breathes fresh life into traditional, stiff updos quite effortlessly. This style celebrates natural flyaways, soft face-framing tendrils, and a relaxed silhouette. It is perfect for busy mornings when you want to look polished but completely effortless.
When you remove the pressure of achieving mathematical perfection, styling becomes incredibly fun and fast. This relaxed version relies heavily on building a soft, airy foundation before twisting your strands. It works beautifully on second-day hair that already possesses natural, lived-in body and movement.
Selecting the Right Everyday Texturizers
The secret to a secure casual updo is creating friction between your hair strands. Without proper friction, your everyday casual twist will simply slide down within an hour. Therefore, always avoid heavy silicone serums when aiming for an undone, casual look.
Instead, opt for lightweight chalky powders, dry shampoos, or matte texture sea salt mists. These products coat the hair slightly, making it feel thicker and significantly easier to control. They give your pins something sturdy to grip onto deep inside the hair structure.
Essential Supplies for Relaxed Styling
- Dry texturizing spray or sea salt mist
- Standard matte finish medium bobby pins
- Boar bristle teasing brush for volume
- Flexible hold finishing hairspray
- Decorative tortoiseshell mini side combs
Step-by-Step Implementation Guide
- Mist your roots generously using a dry texturizing spray for instant volume.
- Massage your scalp gently using your fingertips to distribute the product evenly.
- Gather your hair loosely at the nape of your neck into a ponytail.
- Twist the hair upwards tightly, pointing the ends toward the ceiling surface.
- Tuck the loose ends gently inside the rolling vertical hair fold neatly.
- Secure the structure by sliding bobby pins horizontally along the seam.
- Pull out a few soft strands around your ears to frame your face.
- Lock the messy crown shape using a light mist of flexible hairspray.
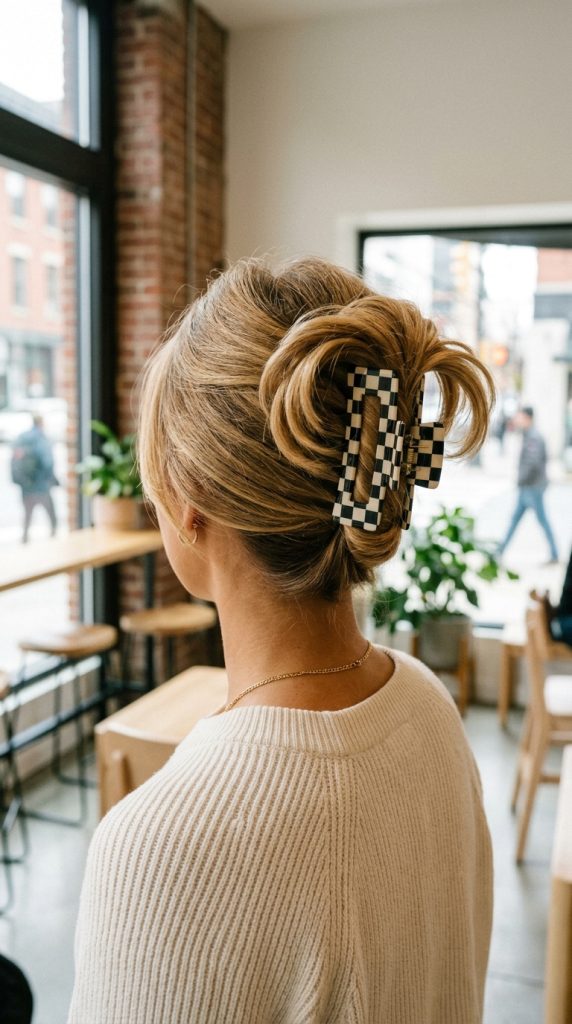
2. The Sleek Red-Carpet Executive Polish
Achieving Flawless Smoothness for Formal Events
When you need to project absolute authority and precision, a high-shine finish is necessary. This variation eliminates all frizz, creating a smooth, glassy shell that catches light beautifully. It works exceptionally well for corporate meetings, professional headshots, or upscale evening events.
This structured look requires a completely different preparation method than our previous casual style. Here, you want maximum alignment of every single hair strand from roots to ends. Any hidden bumps or stray tangles will ruin the clean, aerodynamic lines of this roll.
Mastering the High-Shine Smoothing Process
To achieve a mirror-like shine, you must seal your hair cuticles using targeted heat. Using a quality flat iron on low heat helps straighten out stubborn kinks safely. Make sure to apply a lightweight thermal protectant before using any hot styling tools.
Once straight, a premium hair oil or pomade adds that expensive, red-carpet editorial finish. Apply the product using your palms, smoothing it over the surface of your head. This forms a protective shield that blocks humidity and prevents midday frizz entirely.
Materials Required for Smooth Finishes
- Argan oil smoothing anti-frizz hair serum
- Fine-tooth rat tail styling comb
- Heavy-duty professional U-shaped hair pins
- Strong hold high-shine aerosol hairspray
- Ceramic tourmaline flat iron styling tool
Step-by-Step Implementation Guide
- Apply two drops of smoothing serum through your damp hair evenly.
- Blow dry your hair straight using a round ceramic brush carefully.
- Run a flat iron through your lengths to eliminate hidden kinks.
- Comb all your hair smoothly toward the left side of your head.
- Insert a vertical row of bobby pins to lock the back section down.
- Wrap the remaining hair back over the pins toward the right side.
- Roll the hair inward tightly and pin the smooth seam securely.
- Spray generously with a high-shine aerosol hairspray for absolute hold.
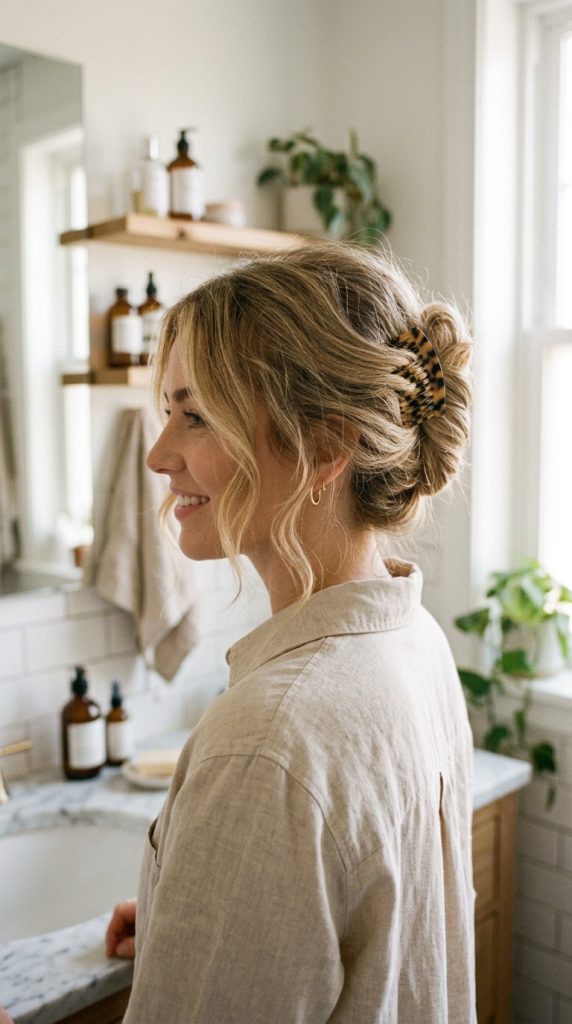
3. The Modern Acetate Claw Clip Shortcut
Fast Styling Solutions for Busy Professionals
Traditional pins can take time to master, especially if you have very thick hair. Utilizing a trendy, large acetate claw clip speeds up the process significantly. This modern approach takes less than sixty seconds but looks incredibly stylish, trendy, and intentional.
Claw clips have made a massive comeback in contemporary modern urban fashion circles. They offer a playful, retro-chic vibe while remaining completely practical for everyday desk work. Plus, they cause significantly less hair breakage than standard metallic elastic bands.
Choosing the Correct Clip Size for Hair Density
Not all claw clips are created equal when it comes to holding thick hair. If your clip is too small, your twist will painfully burst open mid-day. Conversely, an oversized clip will slide right off fine, silky hair strands effortlessly.
Fine hair requires clips with tightly interlocking teeth and strong interior silicone grips. Thick or curly hair needs extra-large rectangular designs with deep, wide interior cavities. Investing in quality acetate ensures the clip claws will not snap under pressure.
Tools for the Quick Claw Upgrade
- Large rectangular acetate checkerboard claw clip
- Wide-tooth detangling comb
- Volumizing root lifting powder dust
- Lightweight satin shine hair mist
- Boar bristle smoothing edge brush
Step-by-Step Implementation Guide
- Detangle your hair completely using a wide-tooth comb from roots to ends.
- Sprinkle root lifting powder at your crown area for extra height.
- Massage the powder in to activate the long-lasting root volume instantly.
- Gather your hair at the back as if making a low ponytail.
- Twist the hair upward firmly until it rolls against your scalp.
- Clamp your large acetate claw clip securely over the entire twist.
- Allow the top ends to cascade over the clip opening naturally.
- Mist the exterior with a satin shine spray for an elegant finish.
4. The Messy Crown Boho Twist

Incorporating Romantic Volume and Soft Waves
Bohemian style focuses on soft movement, romantic textures, and whimsical charm. This version incorporates a gently teased crown section to create beautiful height and dimension. It is a gorgeous option for outdoor brunch dates, music festivals, or spring weddings.
The boho twist looks best when it possesses a soft, cloud-like airy texture. It should look like you just took a stroll through a beautiful sunny meadow. This style pairs exquisitely with linen dresses, delicate gold jewelry, and fresh outdoor settings.
Creating Hidden Structural Volume Safely
Teasing your hair does not mean you have to cause painful structural damage. The key to safe backcombing is using a gentle, repetitive downward stroking motion. Never brush up and down frantically, as this creates tiny, destructive hair knots.
Use a dedicated boar bristle brush to pack volume gently at the roots. Leave the very top layer of hair smooth to drape over the teased section. This covers the messy texture underneath, resulting in a clean yet voluminous look.
Romantic Styling Elements Needed
- Volumizing ceramic crimping iron tool
- Clear elastic mini hair bands
- Decorative pearl-embossed long hair U-pins
- Medium-hold flexible working styling wax
- Paddle brush with flexible nylon bristles
Step-by-Step Implementation Guide
- Crimp the under-layers of your hair at the crown for hidden volume.
- Gently tease the top layer of hair using your styling brush.
- Smooth the hair back lightly, keeping the elevated volume intact perfectly.
- Gather your lengths and roll them into a loose vertical twist shape.
- Insert decorative pearl U-pins along the seam line for visual charm.
- Spray lightly with working wax to define your soft, wavy ends.
- Gently tug at the twist sides to widen the roll silhouette slightly.
- Secure any loose lower pieces using hidden matte finish bobby pins.
5. The Double Vertical Twin Twist

Creating Intricate Visual Patterns with Sectioning
If you have exceptionally thick or long hair, a single twist can feel heavy. Creating two smaller parallel twists distributes the weight evenly while looking incredibly intricate. This design shows off dimensional hair color, highlights, and lowlights beautifully.
The double twist creates a unique architectural seam down the center of your head. It looks far more complex than it actually is, confusing onlookers in a fun way. It is a brilliant option for formal dinners where you want to stand out.
Mastering Clean Vertical Parting Lines
The success of this hairstyle relies entirely on a perfectly straight center part line. A crooked part will make your twin twists look uneven and sloppy from behind. Therefore, always use a sharp metal rat-tail comb to divide your hair clean.
Take your time tracing a line from your forehead straight down to your neck. Use a double mirror setup to check your work before pinning anything down. Keeping the two sections completely equal ensures balanced volume on both sides.
Components for Double Sectioning
- Sectioning alligator clips for hair control
- Double-ended parting tail comb
- Small black matte bobby pins
- Firm-hold styling gel or pomade
- Nylon bristle smoothing smoothing brush
Step-by-Step Implementation Guide
- Part your hair vertically down the exact center using your tail comb.
- Clip the right side away securely to work on the left side first.
- Apply a small amount of styling gel along the left hair perimeter.
- Roll the left section inward toward the center line and pin it tightly.
- Unclip the right side and smooth it using a little styling pomade.
- Roll this second section inward, meeting the first twist seamlessly.
- Interlock bobby pins down the middle crease to secure both sides.
- Check the back symmetry using a convenient small handheld mirror device.
6. The Textured Curly Girl French Roll
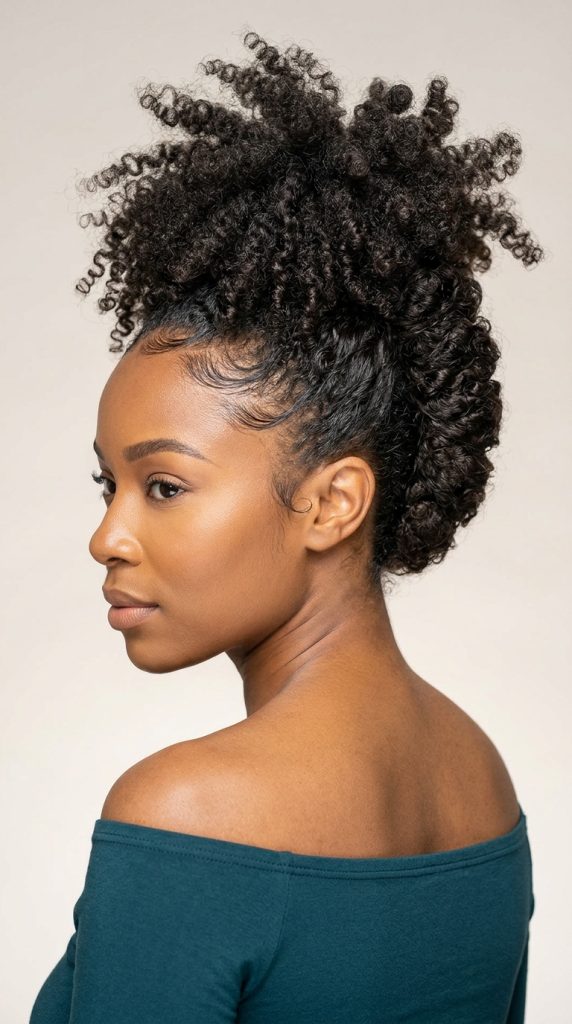
Honoring Natural Ringlets with Protective Styling
Natural curls offer incredible built-in volume and texture that makes updos look majestic. You do not need to straighten your hair to achieve a beautiful French roll. This method protects your curl pattern while keeping your hair safely off your neck.
Curly hair actually holds an updo significantly better than fine, straight hair does. The natural twists and turns of your ringlets create a strong interlocking mesh structure. This means you need far fewer pins to keep the hairstyle locked all day.
Retaining Crucial Moisture During Styling
Curly hair is naturally prone to dryness, making moisture protection an absolute priority. Before manipulating your curls, you must prep them with a rich leave-in cream. This keeps your curls soft, defined, and completely free from frizzy friction damage.
Avoid using fine-tooth combs, as they break up your beautiful natural curl pattern. Instead, use only your fingers to guide your curls into position gently. This preserves the organic texture while forming a gorgeous, voluminous roll shape.
Curly Hair Essential Products
- Moisturizing leave-in conditioner cream treatment
- Extra-large heavy-duty long bobby pins
- Satin scrunchie for temporary holding
- Alcohol-free curl defining edge gel
- Microfiber hair drying wrap towel
Step-by-Step Implementation Guide
- Apply leave-in conditioner to damp curls to lock in essential moisture.
- Airlift your curls upward from the nape using your fingers gently.
- Guide the mass of curls into a loose, wide vertical roll shape.
- Slide extra-large bobby pins deep into the roots to support weight.
- Allow your natural curly ends to burst out at the top beautifully.
- Smooth your delicate baby hairs along the hairline using edge gel.
- Adjust any uneven curls using a plastic afro hair pick tool.
- Set the look under a warm diffuser dryer for five minutes.
7. The Sleek Low-Slung Demi Twist

Adapting Classic Shapes for Shorter Hair Lengths
People with shoulder-length bob haircuts often think they cannot wear a twist updo. A low-slung demi twist solves this problem by starting much lower on the head. This clever placement catches shorter layers easily before they fall out of place.
Shorter hair requires a tighter, more compact twisting technique to prevent unwanted dropping. By shifting the bulk of the look downward, you work with your hair’s natural length. It creates an incredibly chic, modern French look that feels sophisticated.
Securing Shorter Layers with Texture Pastes
Fine, short layers have a tendency to slip out of standard updos very quickly. To combat this, you need a product that adds immediate structural density and tack. A high-quality matte styling paste or clay is ideal for this specific task.
Rub a small amount of paste between your fingers to warm it up. Apply it directly to the lower half of your hair before twisting. This binds the short pieces together, allowing them to roll as a single unit.
Short Hair Accessories Checklist
- Miniature sizing black bobby pins
- Strong grip texture paste pomade
- Boar bristle smoothing edge brush
- Thermal heat protectant styling spray
- Sleek metal minimalist barrette clip
Step-by-Step Implementation Guide
- Warm a nickel-sized amount of texture paste between your palms thoroughly.
- Run your hands through your short layers to add hidden grip.
- Brush the sides smooth using a boar bristle edge brush neatly.
- Gather your hair very low, right at the neck crease line.
- Twist upward tightly, keeping the shape small and highly compact.
- Secure the base firmly using multiple miniature sizing bobby pins.
- Mist with hairspray to lock shorter side layers down completely.
- Clip a sleek metal barrette right over the pins for decoration.
8. The Woven Silk Ribbon Accent
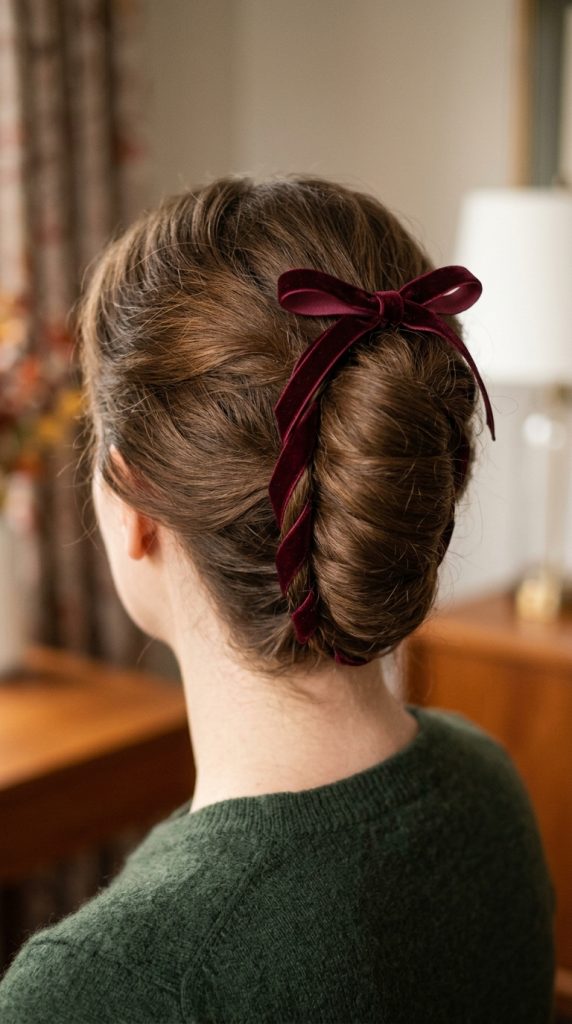
Elevating Simple Styles with Luxurious Fabrics
Adding a colorful silk ribbon injects instant personality and vintage charm into your hairstyle. The fabric weaves through the hair roll, creating an elegant pop of color. This styling trick looks incredibly high-end, artistic, and perfect for autumn fashion looks.
The ribbon acts as an additional structural strand within your French updo setup. As you roll your hair, the fabric creates a beautiful contrasting spiral pattern. It is an easy way to match your hairstyle directly to your outfit.
Selecting Fabrics that Gentle on Hair Strands
When choosing a ribbon, always prioritize smooth materials like silk, satin, or velvet. Avoid rough, synthetic fabrics that can snag your hair cuticles and cause split ends. A high-quality ribbon can be washed and reused for years to come.
The width of the ribbon should match the density of your hair strands. Fine hair looks best with skinny, delicate velvet or silk ribbons. Thick, long hair can easily handle a wider ribbon for a bolder statement.
Ribbon Styling Supplies List
- Three-foot strip of skinny silk or velvet ribbon
- Hair parting metal tail comb
- Clear silicone mini elastic hair bands
- Dry texturizing volumizing styling powder
- Flexible hold gloss finishing spray
Step-by-Step Implementation Guide
- Tie the silk ribbon around a small section of hair at base.
- Gather the rest of your hair together with the ribbon strand.
- Begin twisting your hair upward, wrapping the ribbon along with it.
- Ensure the ribbon color peeks through the vertical hair fold neatly.
- Pin the twist from the inside so you do not cover ribbon.
- Tie the remaining ribbon ends into a dainty bow at top.
- Tuck any frayed ribbon edges away cleanly into the hair seam.
- Apply a light mist of gloss spray over the finished style.
9. The Voluminous Red-Carpet Retro Pompadour
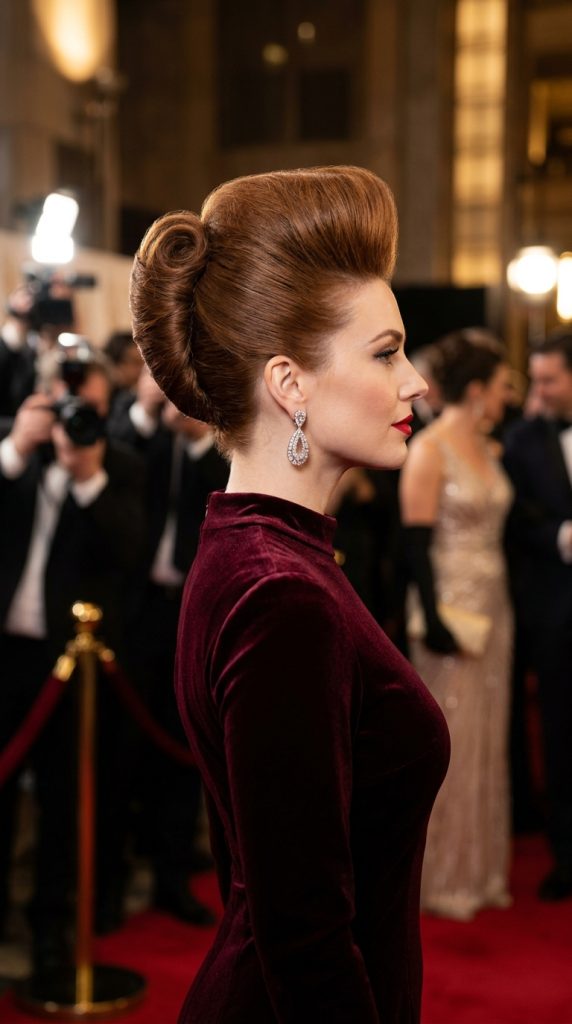
Channelling Hollywood Glamour with Extra Height
This dramatic variation combines a classic vertical roll with a bold, voluminous front pompadour. It draws inspiration from iconic vintage styles but keeps the textures modern and soft. This look is a showstopper for galas, red carpets, and creative parties.
The key to keeping this look modern is ensuring it doesn’t look stiff. You want incredible structural height, but the hair should still look touchably soft. It creates a stunning profile view that elongates your neck beautifully and elegantly.
Building a Strong, Gravity-Defying Front Section
Achieving a lasting pompadour requires creating a solid foundation right at your front hairline. You must use a high-quality volumizing mousse while your hair is still damp. This sets the memory of the hair roots to point upward.
When blow drying, pull the front section forward and up using a round brush. Once dry, backcomb the root area gently to lock in that dramatic height. Smooth the top surface lightly to hide the backcombing underneath cleanly.
High-Volume Tools Needed
- Professional hair backcombing teasing comb
- Volumizing foam mousse styling primer
- Invisible nylon mesh hair hairnet
- Extra-firm freezing hold aerosol spray
- Large ceramic thermal round brush
Step-by-Step Implementation Guide
- Apply volumizing mousse to your front bangs section before blow drying.
- Blow dry the section upward using a large ceramic round brush.
- Tease the front section heavily to create a high pompadour shape.
- Pin the ends of the pompadour at the upper crown area.
- Gather your remaining back hair and smooth it toward the side.
- Roll the back hair into a majestic, tall French twist shape.
- Lock the entire dramatic structure using extra-firm freezing spray carefully.
- Check for any loose hairs using a small hand mirror setup.
10. The Braided Inverted French Roll
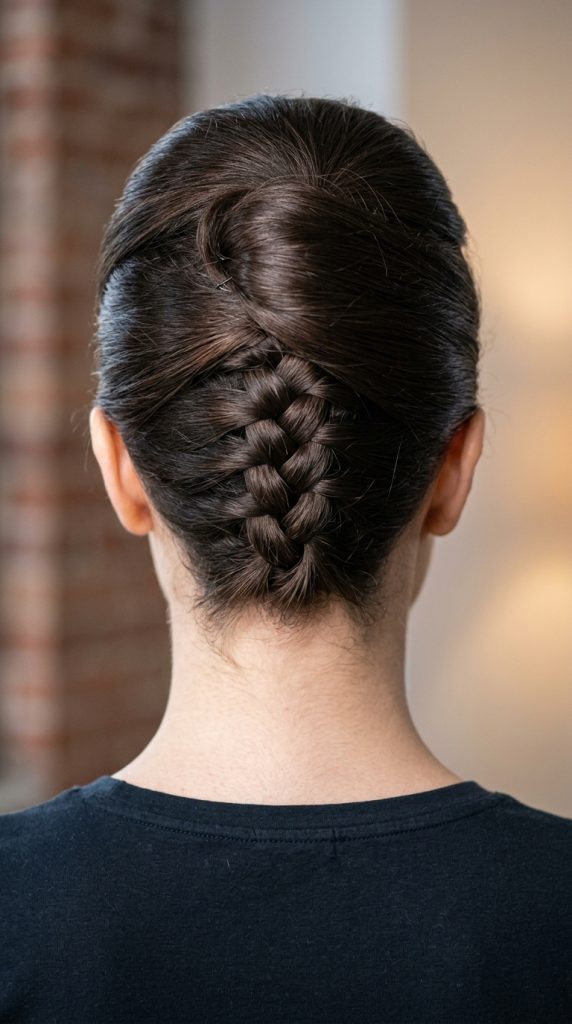
Blending Intricate Braids with Timeless Rolls
Combining two different styling techniques creates a truly unique, eye-catching visual masterpiece. This design features an inverted Dutch braid that climbs up the back of your head. The remaining hair ends then transition into a flawless classic twist seamlessly.
This style looks absolutely breathtaking when you tilt your head forward slightly. It is a fantastic option for active days when you need extra security. The tight lower braid prevents any short neck hairs from falling out completely.
Mastering the Art of Upside-Down Braiding
Braiding the back of your own head can feel disorienting at first. The trick is to keep your hands close to your scalp as you work. This maintains high tension, ensuring the braid stays tight and neat over time.
Take clean, even sections of hair from each side as you climb upward. Once you reach the crown, stop adding new sections of hair immediately. Now, you are ready to transition into the classic twisting motion smoothly.
Braided Updo Materials List
- Moisture-rich smoothing styling cream pomade
- Sturdy metal U-shaped hair pins
- Handheld mirror for back view checking
- Shine-enhancing lightweight finishing spray
- Clear silicone elastic hair ties
Step-by-Step Implementation Guide
- Flip your head upside down completely to access your neck hairline.
- Apply a small amount of smoothing cream pomade to your fingertips.
- Begin weaving a tight Dutch braid upward toward your crown area.
- Stop braiding once you reach the middle back of your head.
- Secure the braid temporarily using a clear mini elastic band safely.
- Flip your head right side up and twist remaining hair down.
- Tuck the ends inside the roll and secure with sturdy pins.
- Finish with a generous spray of shine-enhancing lightweight hair mist.
11. The Minimalist Metal Hair Pin Shield
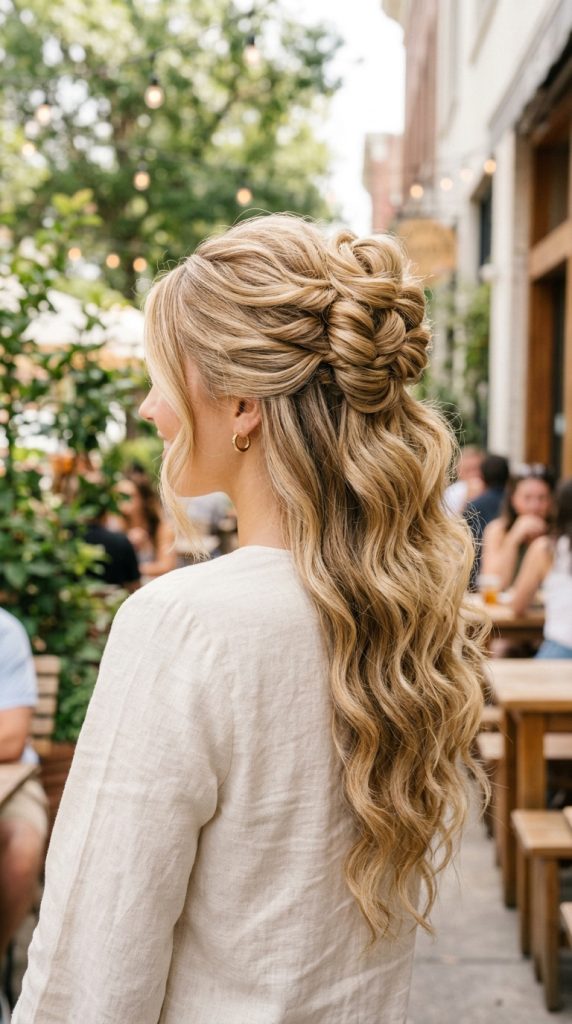
Utilizing Industrial Hardware for Modern Aesthetics
Modern minimalism values clean metal lines over traditional hidden plastic bobby pins. Using a single, striking geometric metal hair fork or pin makes a bold statement. It shows that your hair accessories are an intentional part of your outfit.
These architectural metal pins work by creating structural tension against your scalp roots. When inserted correctly, a single metal pin can hold thick hair all day. It eliminates the need for dozens of annoying plastic bobby pins.
Finding Quality Weighted Hair Hardware Pieces
When shopping for hair forks, avoid cheap metals that bend under pressure easily. Look for solid brass, stainless steel, or high-grade aluminum hardware accessories instead. The tips should be smooth and rounded so they do not scratch your scalp.
A matte finish offers a more modern, understated look than shiny finishes. Choose a color that contrasts beautifully against your natural hair tone for visibility. Silver looks stunning on dark or cool-toned hair, while gold flatters warm blondes.
Industrial Accessory Materials List
- Two-pronged matte gold or silver metal hair fork pin
- Nourishing gloss-enhancing hair treatment oil
- Fine-tooth smoothing comb accessory
- Anti-humidity flexible shield spray
- Boar bristle smoothing polishing brush
Step-by-Step Implementation Guide
- Smooth your hair back using a few drops of gloss oil.
- Brush the sides completely flat using a polishing brush for neatness.
- Roll your hair into a firm, tight classic vertical twist structure.
- Hold the twist flat against your scalp using your left hand.
- Insert the metal hair fork prongs backward through the outer edge.
- Flip the pin forward, pushing it flat against your scalp roots.
- Push it all the way through to lock the style instantly.
- Mist with an anti-humidity shield spray to prevent halos of frizz.
12. The Cascading Fountain Twist Updo

Letting Your Lengths Shine with Half-Up Layouts
If you love the look of a twist but hate hiding your length, try this. The cascading fountain twist locks the base of your hair but lets the ends free. It creates a stunning waterfall effect that looks incredibly youthful, dynamic, and fun.
This hybrid style offers the best of both worlds for long-haired individuals. You get the clean, sophisticated profile of an updo from the side views. However, you still get to display your beautiful hair length from behind.
Creating Perfect, Uniform Red-Carpet Waves
To make the fountain effect look intentional, you should curl your hair first. Using a quality ceramic curling wand helps create smooth, bouncy beach waves easily. Let the curls cool completely before touching them to ensure they lock.
When twisting, only gather the hair from the lower half of your head. Leave the top crown layers loose so they can drape over your work. This creates a seamless transition that looks highly professional and editorial.
Waterfall Twist Supplies Checklist
- Pro-grade ceramic curling wand iron
- Medium-hold flexible styling hair mousse
- Long curved plastic bobby pins
- Glossy finish texturizing fiber paste
- Wide-tooth styling comb for wave definition
Step-by-Step Implementation Guide
- Create loose beach waves through your hair using a curling wand.
- Let the curls cool completely for maximum longevity and hold power.
- Gather only the lower half of your hair near the neck.
- Twist this lower section upward, pinning it firmly along the seam.
- Stop pinning three inches before you reach the top hair ends.
- Let the curled top lengths drape over the twist base freely.
- Fluff the cascading curls with your fingers for beautiful volume.
- Apply a touch of texturizing fiber paste to define the wave tips.