14 Cute & Easy Crochet Braid Ideas for Every Season
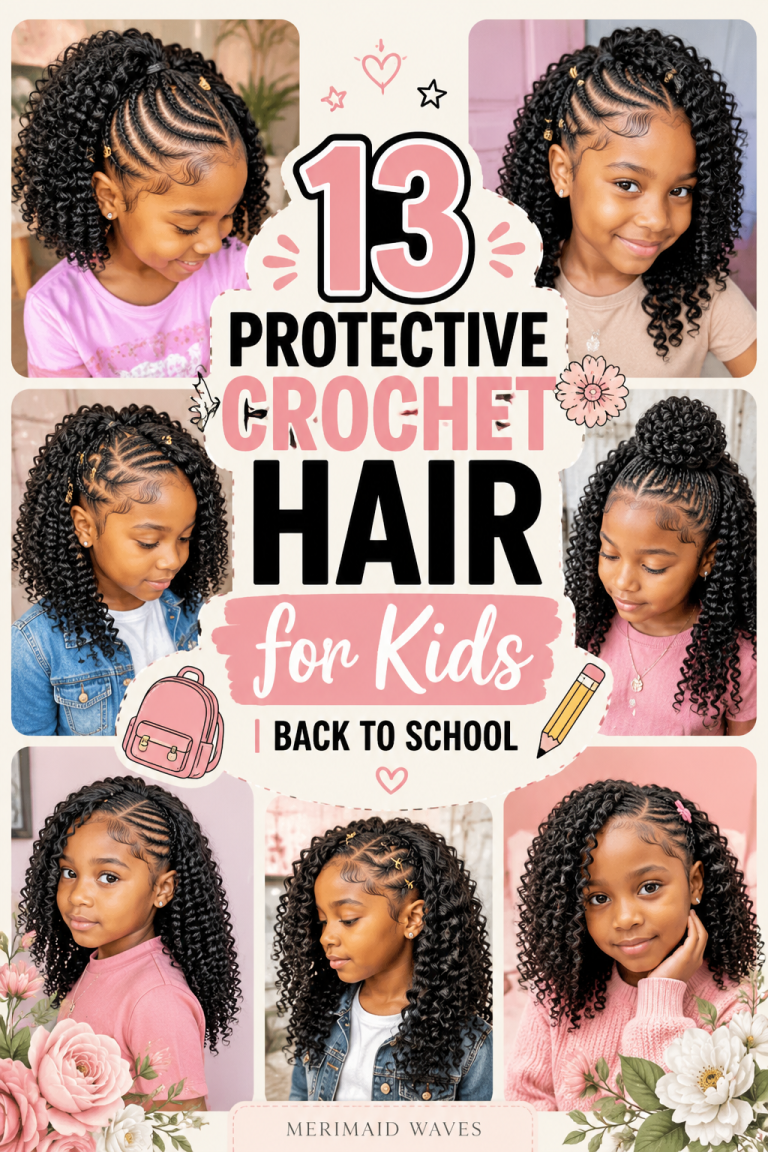
Protective hairstyles Crochet Braid have revolutionized how we care for, style, and celebrate natural hair textures. Among the most popular, time-efficient, and versatile styling techniques available today, crochet braids hold a special place. By looping pre-braided, pre-twisted, or loose synthetic and human hair extensions through a simple cornrow base using a small latch hook, this method delivers the visual grandeur of intricate box braids, bohemian waves, or faux locs in a fraction of the installation time.
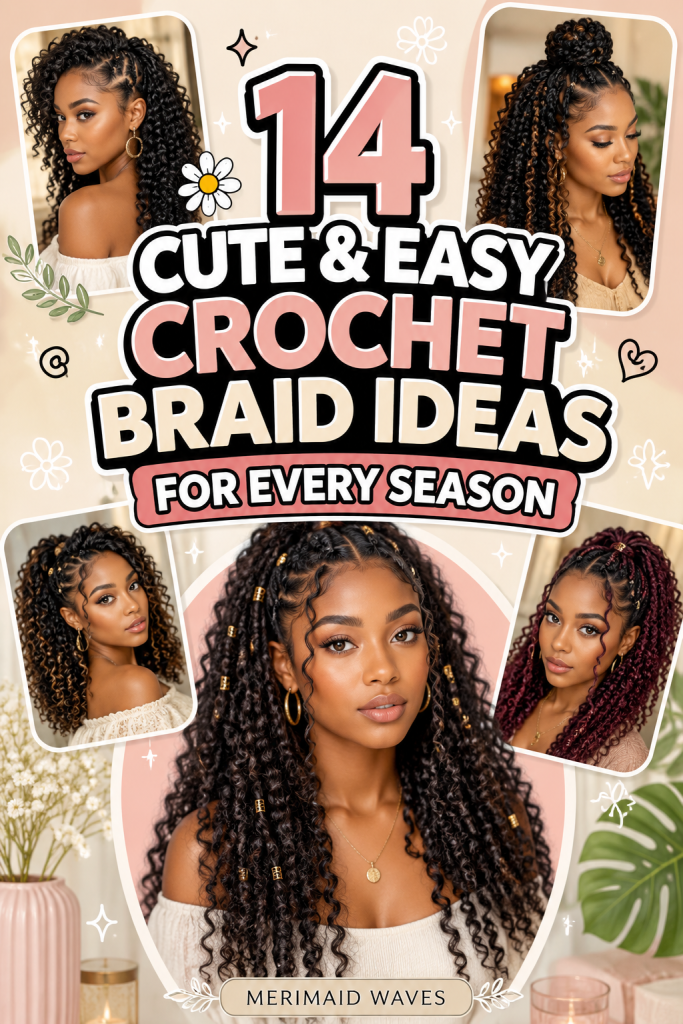
Beyond saving hours in the stylist’s chair, crochet styles offer unprecedented flexibility. They minimize tension on fragile hair follicles, allow direct access to your scalp for routine cleansing and hydration, and seamlessly adapt to shifting weather patterns throughout the year. Whether you want airy, moisture-resistant curls to survive humid summer beach trips, rich copper-toned passion twists for cozy autumn sweater weather, or sleek protective locs to shield natural strands from harsh winter frost, there is a crochet look tailored for every calendar month.
This comprehensive guide explores fourteen incredibly cute, beginner-friendly, and deeply detailed crochet braid hairstyle ideas. Each concept includes seasonal styling insights, required materials, and step-by-step installation instructions to help you achieve salon-quality results from the comfort of your home.
The Anatomic Mechanics of a Flawless Crochet Base
Achieving an undetectable, long-lasting, and comfortable crochet hairstyle relies heavily on your underlying cornrow foundation. Without a secure, well-planned braid pattern, your installation can feel overly bulky, slide out of place, or place unnecessary tension on delicate hair edges.
When planning your braid base, aim for a hybrid foundation pattern. Creating individual box braids or twists along your front hairline allows you to loop the crochet extension through the center of the braid, creating a seamless 360-degree illusion. Meanwhile, the interior can be braided into flat, interconnected cornrows to distribute extension weight evenly across the entire scalp.
1. The Spring Blossom Soft Wand-Curl Bob
Embracing Airy Braidless Extensions for Spring Renewal
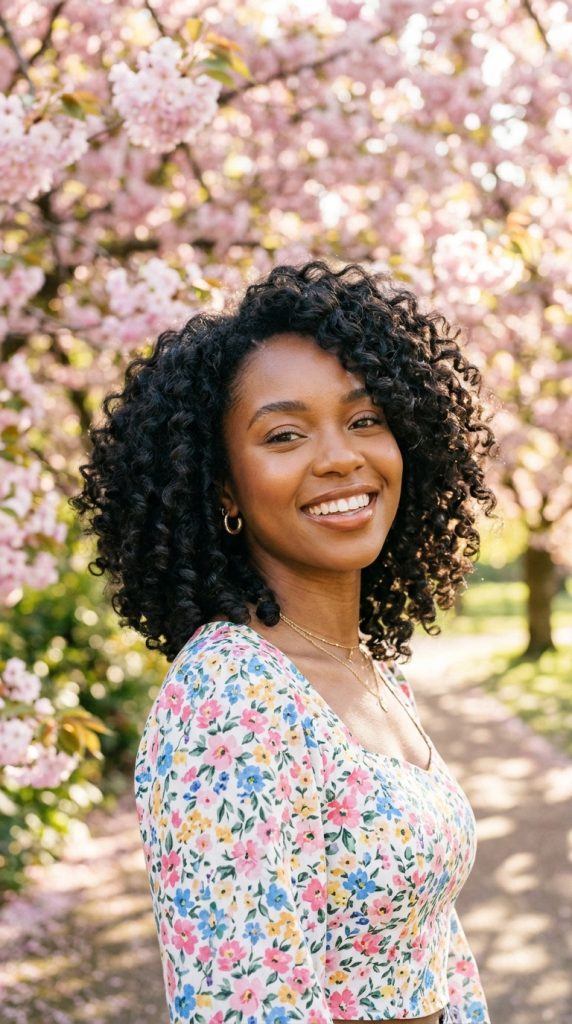
Spring is the season of fresh starts, floral blooms, and lighter wardrobes. The Soft Wand-Curl Bob captures this youthful, buoyant energy by utilizing medium-length, voluminous synthetic or human wand-curl extensions. Cut to graze the collarbones or jawline, this bouncy shoulder-length style frames your face with soft, romantic spirals that catch gentle spring breezes.
Because spring weather fluctuates between cool mornings and warm afternoons, a lightweight, mid-length curl prevents heat retention around the neck while keeping your hair looking vibrant and full. The texture mimics a fresh, defined flexi-rod set on natural hair without requiring daily morning heat tools.
Selecting Spring-Friendly Curls and Volume
Opt for water-wave or pre-curled wand-curl synthetic fibers made from lightweight, heat-resistant kanekalon or toyokalon materials. These fibers hold their spiral memory even during unexpected spring rain showers.
To keep the bob from looking overly round or triangular, install the extensions using a staggered “brick-layer” pattern across the mid-crown, spacing the loops closer together near your natural part line for full, realistic density.
Essential Supplies for the Wand-Curl Bob
- 3-4 packs of 10-inch wand-curl crochet hair extensions
- Ergonomic latch hook needle
- Lightweight curl-defining mousse
- Hair shears for shaping and tapering ends
- Satin bonnet and silk pillowcase
Step-by-Step Implementation Guide
- Braid your natural hair into 8 to 10 flat, interconnected cornrows, leaving a small U-shaped perimeter around your hairline for individual leave-out if desired.
- Moisturize your scalp thoroughly using a light jojoba or almond oil blend.
- Insert the latch hook needle underneath a cornrow, hook the loop of a single wand-curl strand, and close the latch.
- Pull the extension loop halfway underneath the cornrow, create a open loop with your fingers, and pull the curl tail through twice to secure a non-slip knot.
- Repeat this installation process across the head, spacing strands roughly half an inch apart in the back and a quarter-inch apart near the top part line.
- Once fully installed, use sharp shears to cut and taper the ends, creating an angled bob shape that flatters your cheekbones.
- Apply a generous palmful of lightweight styling mousse to tame flyaways and separate individual curl clumps.
- Fluff the roots gently with your fingers to build natural volume.
2. The Summer Beach Goddess Passion Twists
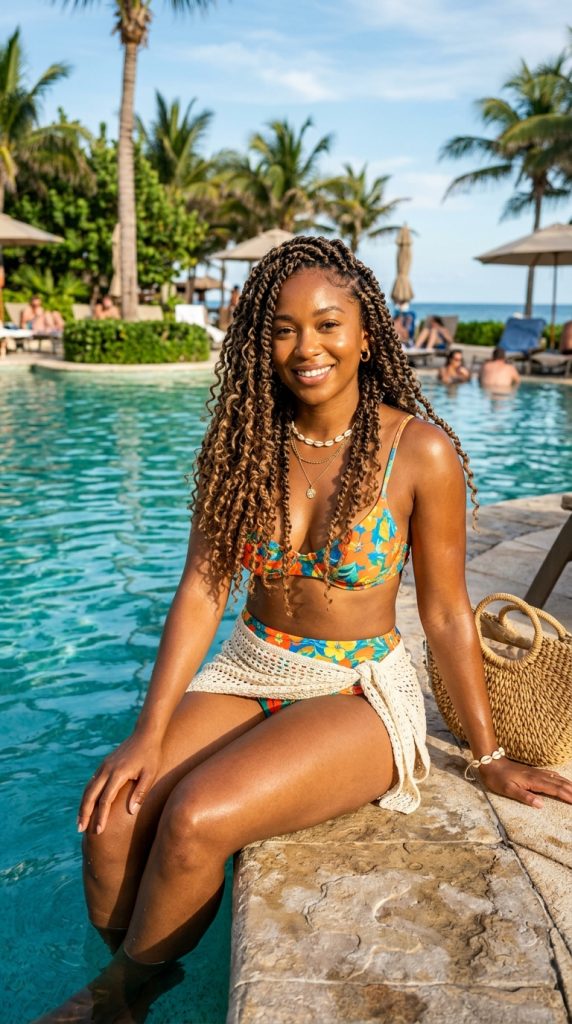
Crafting Water-Safe Bohemian Texture for Sunny Getaways
Summer calls for sun-drenched beach days, pool parties, and low-maintenance hairstyles that thrive around water. Passion twists—a hybrid style combining the textured look of Senegalese twists with the soft, distressed wave of boho curls—are the ultimate summer vacation choice. Using pre-twisted crochet passion twist strands eliminates hours of manual twisting while yielding a beach-ready look.
The distressed, silky-textured synthetic fibers used for passion twists handle moisture, sea salt, and humidity with ease. Rather than ruining the hairstyle, slight frizz actually enhances the rustic, bohemian allure of the twists over time.
Preventing Unraveling in High Humidity
When installing pre-twisted crochet passion twists, selecting the right loop size is critical. Look for pre-made passion twists that feature tight, reinforced top loops.
If the loops feel slightly loose, double-knot each extension around your cornrow base during installation. This locks the twist securely against your scalp, allowing you to swim, workout, and tie your twists into high buns without fear of slippage.
Materials Required for Passion Twists
- 5-6 packs of 18-inch pre-twisted passion twist crochet hair
- Latch hook needle
- Anti-frizz braid control gel for hairline edges
- Sea salt texturizing spray for bohemian texture
- Large hair elastics and scrunchies for updos
Step-by-Step Implementation Guide
- Braid your natural hair into a sturdy 10-cornrow pattern, incorporating an overlapping beehive shape in the center for even distribution.
- Dip the latch hook under the first cornrow, catch the pre-made loop of a passion twist, and pull it through.
- Pass the tail end of the passion twist through the loop, pulling firmly to secure the first knot.
- Tie a second simple loop knot around the cornrow for extra security on thick summer extensions.
- Install the twists closely together along your front hairline to completely cover the cornrow foundation.
- Space the remaining twists roughly three-quarters of an inch apart throughout the interior sections to prevent excessive head weight.
- Gather the top half of the twists into a high, effortless half-up bun, letting the back length flow over your shoulders.
- Slick your baby hairs using an edge control gel and a soft edge brush for a clean, poolside-ready finish.
3. The Autumn Warm Copper Passion-Loc Fusion
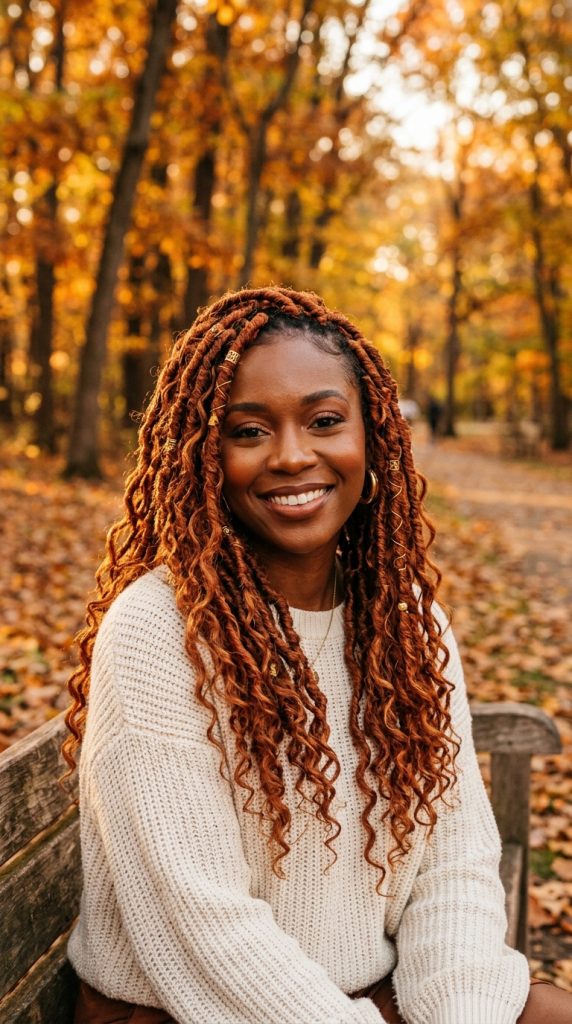
Infusing Coppery Earth Tones into Fall Wardrobes
As leaves change color and temperatures drop, rich warm hair tones—such as cinnamon, burnt orange, warm copper, and rich auburn—become seasonal favorites. The Autumn Copper Passion-Loc Fusion blends distressed faux loc extensions with loose copper-toned wavy tendrils, creating a textured, dimensional updo perfect for fall fashion.
The contrast between rich dark roots and glowing copper mid-lengths adds instant warmth to your complexion, pairing beautifully with cozy knit sweaters, scarves, and fall trench coats.
Color-Blending Strategies for Natural Depth
To prevent a bright copper style from looking artificial, utilize the “color-melt” crochet technique. Select pre-distressed faux locs that feature a dark brown or jet-black root (#1B or #2) that gradually transitions into copper (#350 or #30) toward the ends.
When installing, loop dark-rooted locs along your hairline. The dark base creates a natural shadow against your scalp, giving the illusion that the rich copper hair is growing directly from your roots.
Supplies for the Copper Loc Fusion
- 4-5 packs of 14-inch distressed butterfly or soft faux locs in a copper Ombré shade
- 1-2 packs of loose water-wave crochet braiding hair in matching copper tones
- Latch hook tool
- Scalp-soothing peppermint and tea tree oil blend
- Golden metal hair cuffs and wire accents
Step-by-Step Implementation Guide
- Cornrow your natural hair flat, applying tea tree oil directly to the scalp parts to combat dry autumn skin.
- Install the distressed faux locs across your head using the standard loop-and-pull-through crochet method.
- Every three to four locs, insert a strand of loose copper water-wave hair instead of a loc to create curly, bohemian tendrils.
- Focus the loose wavy tendrils around the face and top crown for maximum visual softness.
- Wrap decorative gold jewelry wire around selected locs along your cheekbones for a metallic autumn pop.
- Slide golden metal hair cuffs onto random loc strands throughout the crown.
- Gather three locs from each side of your temples and tie them loosely behind your head for a soft half-up drape.
- Mist the loose curly tendrils with a light sheen spray to keep the copper pigment glowing.
4. The Winter Protective Jumbo Box Braid Illusion
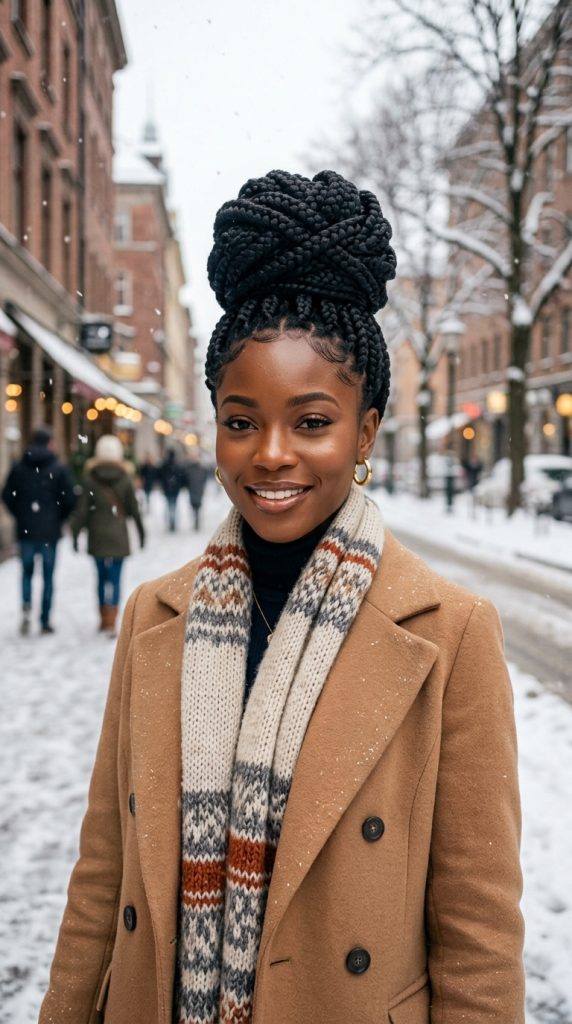
Defending Natural Ends Against Cold Dry Frost
Winter brings cold outdoor air and dry indoor heating, both of which strip natural hair of essential moisture, leading to brittle ends and breakage. The Winter Protective Jumbo Box Braid Illusion offers ultimate cold-weather protection by completely tucking your natural hair away underneath thick, insulated synthetic box braids.
While traditional jumbo box braids can feel heavy when installed directly onto individual hair sections, using a crochet cornrow foundation distributes the weight evenly. You get the striking, nineties-inspired aesthetic of thick jumbo braids without straining your scalp or hairline edges.
Maximizing Moisture Retention Under Winter Styles
Because your hair will remain tucked away for four to six weeks during winter, prepping your natural strands with heavy moisturizers is non-negotiable. Practice the L.O.C. method (Liquid, Oil, Cream) before cornrowing your natural hair.
Apply a rich leave-in conditioner (Liquid), seal it with a dense oil like castor or jojoba oil (Oil), and lock it in with a shea-butter-based styling cream (Cream). This ensures your natural hair stays hydrated underneath the crochet protective barrier all season.
Jumbo Box Braid Materials Checklist
- 4-5 packs of pre-braided jumbo box braid crochet extensions (22-24 inches)
- Latch hook tool
- Heavy shea butter leave-in moisture cream
- Jamaican black castor oil for scalp care
- Jumbo silver or wooden decorative braid beads
Step-by-Step Implementation Guide
- Prep your hair using the L.O.C. method, then braid natural strands into 10-12 close, sturdy cornrows.
- Apply Jamaican black castor oil along each exposed scalp part.
- Insert the latch hook under the first cornrow, attach the loop of the jumbo pre-braided extension, and pull through.
- Open the pre-made loop with your fingers, pull the thick braid tail through, and pull taut.
- Space the jumbo braids tightly along the perimeter so the cornrow base is completely hidden.
- Space interior braids slightly wider apart, as jumbo braids offer high built-in coverage.
- Add jumbo silver or wooden beads to the ends of the braids surrounding your face for a winter accessory accent.
- Style the jumbo braids into a high, regal top-knot bun to keep ends off wool coat collars and prevent friction.
5. The Playful Spring Afro-Puff Curly Updo
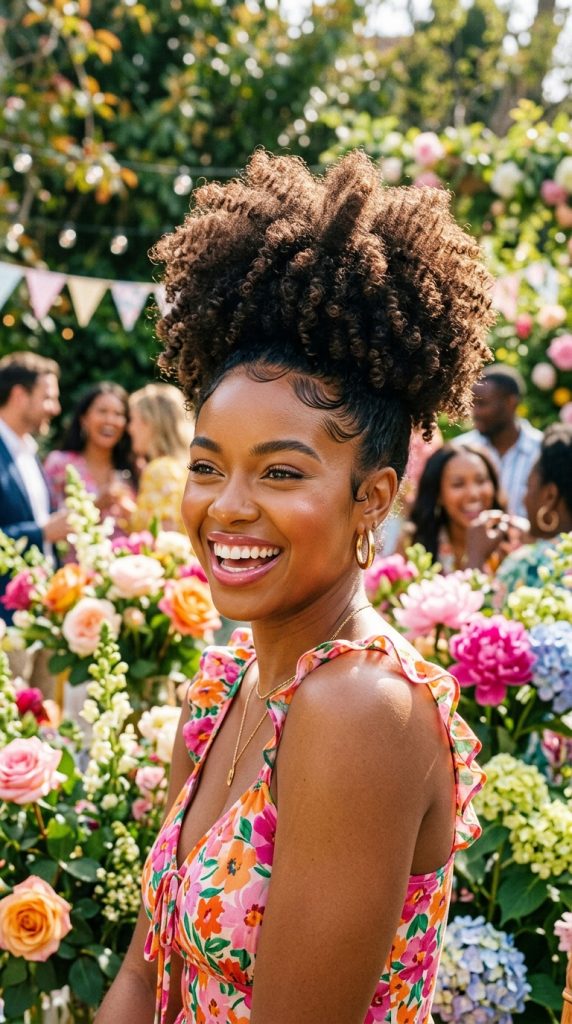
Celebrating High-Volume Coils for Festivals and Sunshine
As warmer weather arrives, celebratory spring festivals, outdoor brunches, and garden parties demand playful, high-volume hairstyles. The Afro-Puff Curly Updo uses springy, afro-textured crochet curls (such as Jamaican bounce or marly curls) to build a towering, majestic pineapple updo or high double puff.
This style places minimal weight on your neck while showcasing tight, authentic-looking coil patterns. It is an amazing option for naturalistas who love big afro volume without the shrinkage or maintenance of a natural blowout.
Shaping Afro-Textured Crochet Fibers
Afro-textured synthetic hair behaves differently than silky curls. When fluffing and picking out an afro-textured crochet updo, work with light oil on your hands to prevent harsh friction frizz.
Gently separate each installed curl coil into two or three smaller sections using your fingers, then use a wide-tooth hair pick to lift the roots. This hides all crochet knots while building a continuous, cloud-like afro shape.
Components for the Afro-Puff Updo
- 3 packs of 8-inch short afro-bounce or marly curl crochet hair
- Latch hook needle
- Wide-tooth metal afro pick comb
- Sturdy satin-covered headbands or hair ties
- Nourishing scalp edge pomade
Step-by-Step Implementation Guide
- Braid your natural hair into a circular perimeter cornrow pattern that sweeps inward toward the center crown.
- Install the short afro-curl extensions densely around the entire head foundation.
- Separate each curl coil into smaller pieces to create a full, seamless afro texture.
- Use a wide-tooth metal pick at the roots to lift and blend the extensions together, obscuring all base knots.
- Gather all the hair up toward the top of your crown using your hands.
- Slide a long, satin-covered stretchy headband over the ends, wrapping it around the base to form a tall high-puff.
- Smooth your nape and hairline baby hairs upward using a firm edge pomade and an edge brush.
- Spritz the high puff with a light gloss spray for a healthy, sun-lit sheen.
6. The Summer Splash Wet-and-Wavy Deep Wave
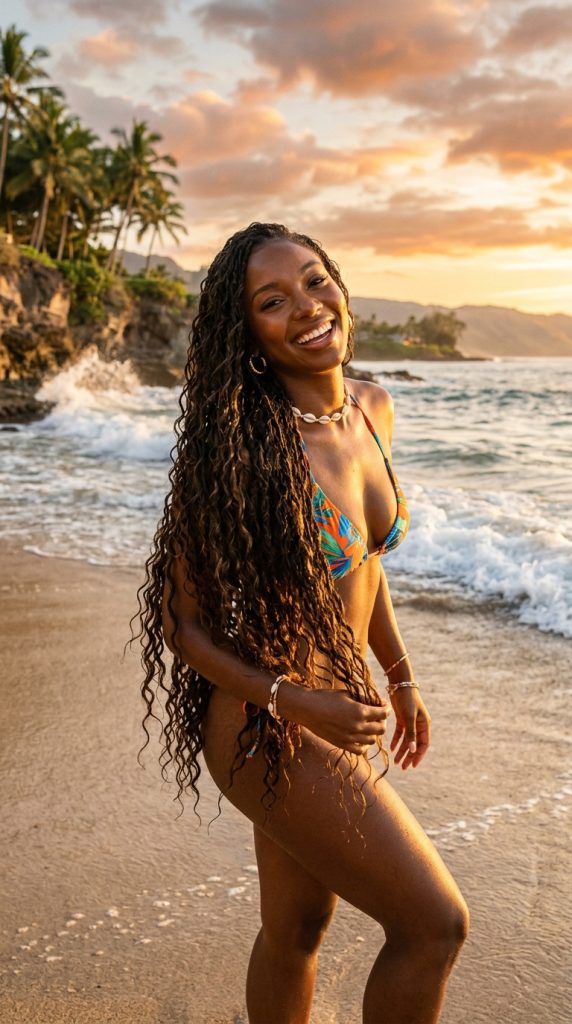
Effortless Humidity-Proof Waves for Tropical Climates
High summer humidity can turn heat-styled natural hair frizzy in seconds. The Wet-and-Wavy Deep Wave crochet style embraces lush, ocean-dipped textures that actually look better when exposed to moisture and heat. Featuring long, cascading deep waves that drape past your mid-back, this style offers a romantic, mermaid-like aesthetic.
Whether you are lounging poolside or exploring a tropical island, this style requires almost zero hot-tool styling. A simple mist of water and leave-in conditioner instantly revives the wave definition.
Taming Long Synthetic Wave Flyaways
Long curly or wavy synthetic hair can tangle near the nape of the neck due to friction against summer dresses and skin. To combat matting, practice daily “finger-detangling.”
Keep a spray bottle filled with 80% water and 20% liquid fabric softener or curl conditioner. Spritz the nape area daily and run your fingers through the waves from ends to roots to release small snags before they form stubborn mats.
Wet-and-Wavy Supplies List
- 4-5 packs of 22-inch deep-wave synthetic or human-hair blend crochet extensions
- Latch hook tool
- Spray bottle filled with water and leave-in conditioner
- Wide-tooth detangling comb
- Lightweight hair serum for shine
Step-by-Step Implementation Guide
- Braid your natural hair into 10 flat, straight-back cornrows, joining the ends into a flat horizontal base at the nape.
- Install the deep-wave hair using single knots in the back and double knots along the top part line.
- Install strands very close together along your main parting area for a realistic, dense crown look.
- Trim any stray, overly long factory ends using sharp haircutting shears for a natural tapered silhouette.
- Spritz the entire installation thoroughly with your water and leave-in conditioner mixture.
- Scrunch the hair upward with your hands to activate the deep-wave pattern.
- Apply a small drop of lightweight serum through the canopy to seal in a wet, glossy look.
- Part the waves down the middle or sweep them over one shoulder for an effortless summer drape.
7. The Autumn Golden-Hour Senegalese Twists
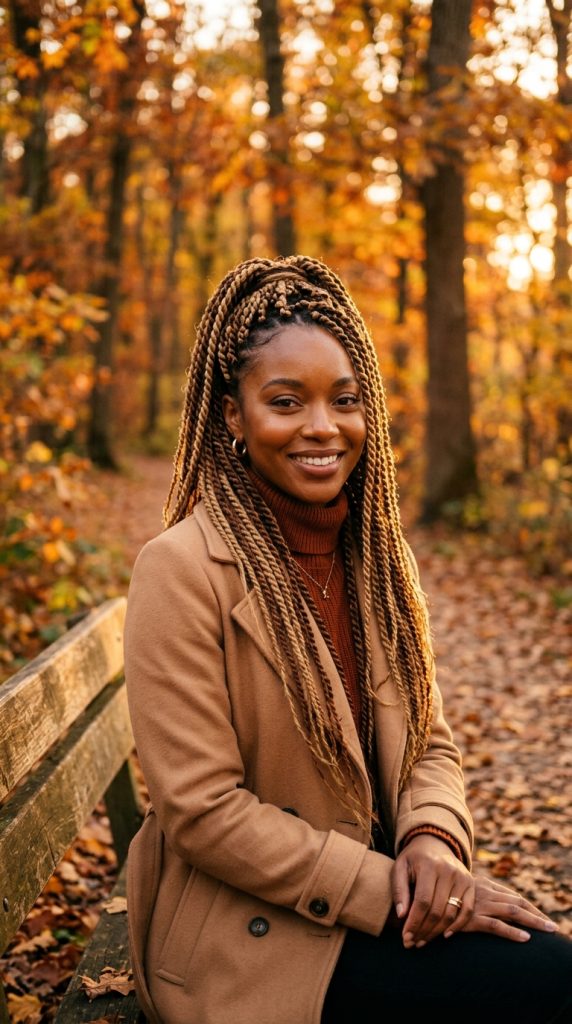
Golden Tones Meets Sleek Rope-Twist Precision
Capture the magical, warm glow of autumn sunsets with Golden-Hour Senegalese Twists. This protective style features sleek, smooth rope twists in a blend of honey blonde (#27), warm chocolate (#4), and dark chestnut (#2) tones. The uniform, smooth texture of Senegalese twists offers a clean, sophisticated line that pairs effortlessly with tailored autumn fashion.
The subtle golden highlights woven throughout dark twists catch late-afternoon sunlight, creating a glowing multidimensional effect without requiring chemical bleach on your natural hair.
Maintaining Tension-Free Hairlines
Because long Senegalese twists carry length, installing them around fragile temple edges requires extra care. Avoid hooking heavy extensions onto thin perimeter cornrows.
Instead, create 4-6 individual natural box braids along your front hairline. Loop the crochet needle through the middle of each individual braid base, pull the extension through, and wrap the natural braid around the twist to blend. This technique eliminates tension on delicate baby hairs.
Senegalese Twist Accessories
- 5-6 packs of pre-twisted micro or medium Senegalese twists (18-20 inches) in a blonde/brown mix
- Latch hook needle
- Nourishing scalp oil with rosemary and mint
- Satin hair bonnet for nighttime protection
- Bronze or wooden accent hair cuffs
Step-by-Step Implementation Guide
- Create 4 individual box braids along your front hairline, then braid the remaining hair into flat straight-back cornrows.
- Install the pre-twisted Senegalese extensions onto the cornrow base using standard latch-hook knotting.
- For the front individual braids, pass the crochet hook through the root of your natural braid, loop the twist through, and pull.
- Wrap your natural individual braid around the crochet twist base seamlessly.
- Space the remaining interior twists evenly to achieve full coverage without excessive weight.
- Apply rosemary and mint scalp oil along your parts to stimulate circulation in cool autumn weather.
- Slide bronze accent cuffs onto selected golden-highlighted twists around your face.
- Pull the top section into a sleek half-up ponytail, letting the golden twists cascade down your back.
8. The Winter Cozy Soft Butterfly Locs

Soft Distressed Texture for Cold-Weather Layering
Butterfly locs have taken the beauty world by storm thanks to their bohemian, textured, and delightfully distressed loops. The Winter Cozy Soft Butterfly Locs style offers a chunkier, softer variation of traditional faux locs. The signature “wing” loops along the body of each loc give the hairstyle a touchable, cozy feel that pairs seamlessly with winter hoodies, beanies, and coats.
Unlike stiff traditional locs, soft butterfly locs are lightweight, flexible, and squishy. They bend easily, allowing you to wrap them into oversized buns or tuck them neatly inside winter hats without feeling restrictive.
Protecting Loc Ends from Winter Friction
Winter coats, heavy wool scarves, and high collars create constant friction against the ends of long hair extensions, leading to premature fraying. Selecting a collarbone or mid-chest length (12 to 14 inches) keeps butterfly locs hovering safely above rough coat fabrics.
Additionally, because butterfly locs are intentionally distressed, any minor friction from winter scarves simply blends into the rustic texture of the locs.
Butterfly Locs Materials Checklist
- 5-6 packs of pre-made butterfly loc crochet hair (12-14 inches)
- Latch hook tool
- Anti-itch scalp spray with aloe vera
- Satin-lined winter beanie cap
- Decorative silver wire or loc rings
Step-by-Step Implementation Guide
- Braid your natural hair into 8 to 10 flat, secure cornrows.
- Spritz your scalp with an anti-itch aloe vera spray to prepare for winter wear under hats.
- Insert your latch hook under a cornrow, catch the pre-made loop of a butterfly loc, and pull it through.
- Thread the loc tail through its own loop and pull firmly to secure the base knot.
- Repeat across the entire head, ensuring perimeter locs sit closely together to hide cornrow lines.
- Gently tug on the signature “butterfly wings” (loops) along each loc to fluff and customize the distressed volume.
- Decorate a few face-framing locs with spiral silver wire or minimalist silver rings.
- Style into a loose low side pony or wear down underneath a satin-lined winter beanie for ultimate cozy protection.
9. The Spring Refresh Dimensional Tapered Pixie
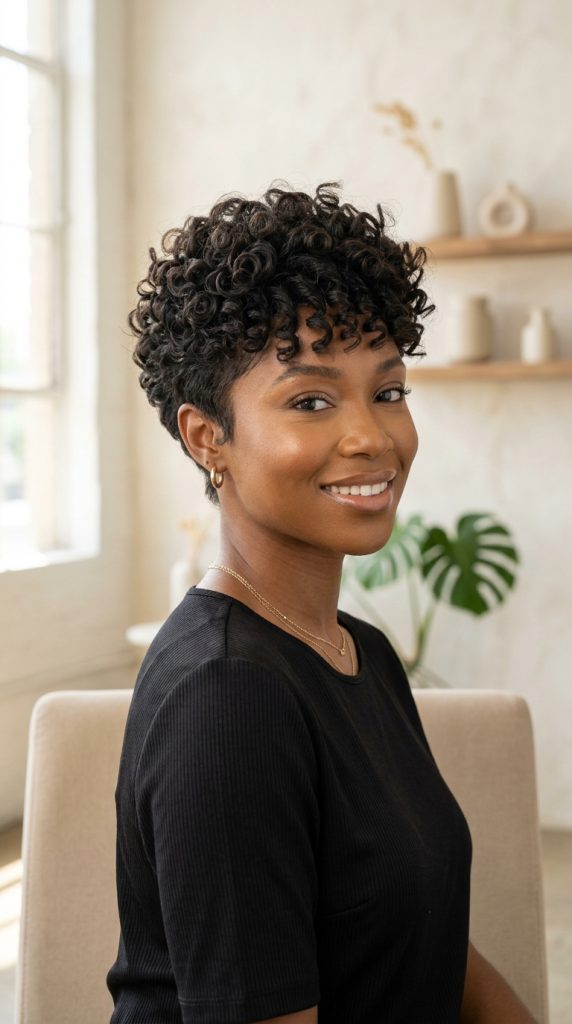
Crisp Short Cuts for Vibrant Sunny Mornings
As spring sunshine returns, short, cropped haircuts offer an invigorating sense of freedom and elegance. The Spring Refresh Dimensional Tapered Pixie utilizes short, layered crochet curls to build a precision-cut pixie silhouette with a longer, voluminous crown and closely cropped nape and sides.
This style is perfect for naturalistas looking to try a daring short cut without cutting a single strand of their natural hair. The dimensional layers highlight your neck, collarbones, and jawline, providing a chic, polished aesthetic.
Sculpting a Seamless Pixie Silhouette
Achieving a realistic pixie shape with crochet extensions requires strategic strand density. You need very thin, small extension loops near the nape and temples, building to fuller, longer curls at the top crown.
Use sharp hair shears to hand-sculpt the curls after installation. Trim the sides and back close to the head while leaving the top curls long and piecey to mimic a professional salon tapered cut.
Tapered Pixie Materials List
- 2-3 packs of short (4 to 6-inch) tapered pixie curl crochet extensions
- Latch hook tool
- Hair sculpting shears and razor comb
- Styling mousse with medium hold
- Satin edge wrap scarf
Step-by-Step Implementation Guide
- Braid natural hair into very small, ultra-flat cornrows, keeping the nape and temple braids extra fine.
- Install the short curl extensions onto the cornrow base using single small knots.
- Place extension loops very close together at the crown to build height, and space them farther apart at the nape.
- Use sharp sculpting shears to cut the sides and nape close to the scalp, angling the blades for feathered ends.
- Leave the top crown curls longer, trimming only stray ends to maintain a defined, bouncy shape.
- Apply medium-hold styling mousse across the entire pixie cut.
- Tie a satin wrap scarf tightly around the sides and nape for 10 minutes to press the perimeter flat.
- Remove the scarf, fluff the top curls with your fingers, and enjoy a fresh spring crop.
10. The Summer Sunset Ombré Water-Wave Lengths

Radiant Color Transitions for Sun-Drenched Outdoor Style
Capture the vibrant hues of a summer sunset with a long, flowing Ombré Water-Wave crochet style. This design transitions seamlessly from deep jet-black roots (#1B) into warm honey blonde (#27) and soft rose-gold or strawberry blonde tips. The cascading water-wave texture mimics natural wet curls, glistening beautifully under bright sunlight.
Ombré coloring adds visual movement and depth to long hair without requiring flat irons or chemical bleach. It gives your summer wardrobe an instant pop of sunset-inspired color.
Preserving Vibrant Synthetic Ombré Colors
Sun exposure and saltwater can dull synthetic hair fibers over time. To keep your sunset ombré colors vibrant throughout summer outings, use a UV-protectant hair spray or lightweight leave-in conditioner containing sun filters.
Avoid applying heavy greasy oils to light-colored synthetic tips, as oil attracts environmental dust and can make blonde and rose-gold extensions look dingy or dark over time.
Sunset Ombré Supplies List
- 4-5 packs of 20-inch water-wave crochet hair in a 1B/27/Rose-Gold Ombré transition
- Latch hook tool
- UV-protectant leave-in shine spray
- Wide-tooth finger comb
- Silky satin scrunchies
Step-by-Step Implementation Guide
- Braid your natural hair into flat, sturdy cornrows, curving the side braids back away from the face.
- Install the ombré water-wave extensions using the latch hook tool across the entire head.
- Use smaller extension pieces near your front hairline to create a soft, natural hairline transition.
- Finger-comb the waves gently to blend the color blocks into a smooth gradient.
- Trim any uneven ends to create a soft V-shape silhouette down your back.
- Spritz the waves with a UV-protectant shine spray before heading outdoors.
- Gather the top section into a high, playful side ponytail using a silky satin scrunchie.
- Allow the sunset-colored wave tips to drape over your shoulder for photos and beach walks.
11. The Autumn Auburn Chunky Braid-Out

Rich Fall Textures with Deep Crimped Definition
Replicate the cozy, textured look of a natural braid-out with the Autumn Auburn Chunky Braid-Out crochet style. This look utilizes pre-crimped or zigzag textured crochet hair in deep auburn (#33) and burgundy tones. The thick, crinkled pattern offers massive volume, dramatic depth, and a touchable, rustic feel that aligns with autumn fashion trends.
The crinkled braid-out texture holds its shape in brisk fall winds, resisting flattening or losing bounce. It provides a striking, majestic frame for autumn turtlenecks and dark lipstick shades.
Building Volume Without Overweighting Scalp
Thick, crinkled braid-out extensions offer high visual coverage, meaning a little hair goes a long way. To avoid creating a heavy or uncomfortably hot installation, space your crochet loops intentionally.
Install hair every half-inch in the back, reserving dense placement only for the top crown and front hairline. This keeps the hairstyle lightweight and breathable while maintaining a voluminous, full-bodied look.
Braid-Out Style Materials
- 3-4 packs of 14-inch chunky braid-out or crimped crochet hair in deep auburn
- Latch hook tool
- Anti-frizz sheen mist
- Wide-tooth styling pick
- Plush velvet hair bow or scrunchie
Step-by-Step Implementation Guide
- Braid your natural hair into 8 to 10 flat, secure cornrows.
- Install the crimped auburn hair across the cornrow foundation using the latch hook needle.
- Separate each crinkled extension strand once or twice gently to activate the full, fluffy braid-out texture.
- Use a wide-tooth pick at the roots to lift and blend the hair, concealing all interior cornrows and knots.
- Trim the ends into a soft, rounded shape that falls just past your shoulders.
- Apply a light mist of anti-frizz sheen to keep the auburn pigments rich and lustrous.
- Sweep the front section over to one side and secure it with a plush velvet autumn hair bow.
- Rock a voluminous, touchable crimped afro-style silhouette all autumn long.
12. The Winter Sleek Fulani-Crochet Hybrid
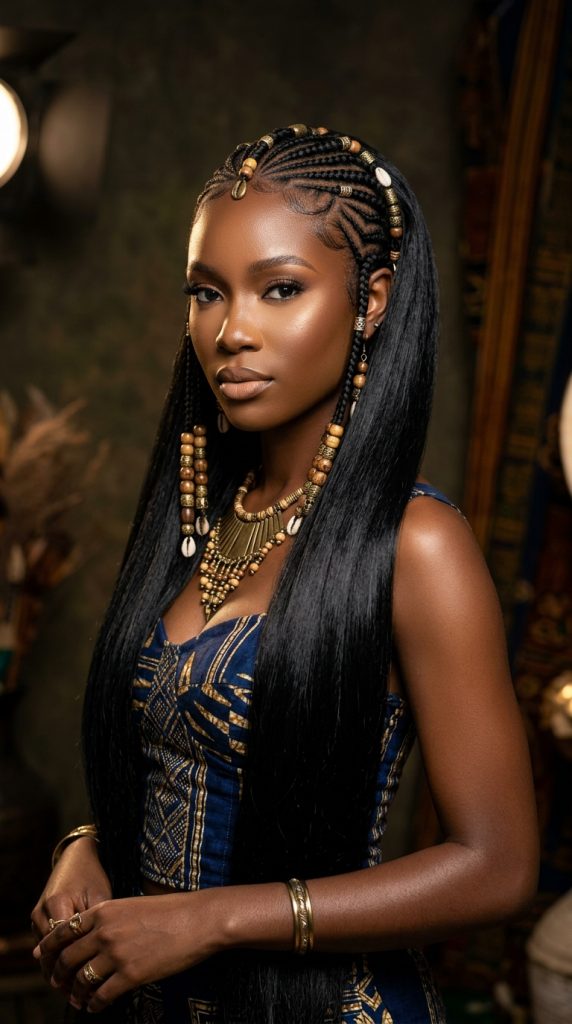
Melding Ancient Braided Artistry with Protective Lengths
Combine the intricate facial framing of traditional West African Fulani cornrows with the cozy protection of a long crochet quick-weave base. The Winter Sleek Fulani-Crochet Hybrid features neat, geometric feed-in cornrows braided along the front half of the head, embellished with beads or cuffs. The back half is braided into flat cornrows and filled with long, bone-straight or body-wave crochet extensions.
This hybrid approach gives you the polished, artistic aesthetic of a braided style around your face while keeping your natural ends protected under flowing lengths down your back.
Seamlessly Blending Front Cornrows with Crochet Extensions
The transition line between the front Fulani cornrows and the back crochet extensions must look smooth and continuous. Braid your front cornrows so they end precisely at your mid-crown.
When installing the back crochet extensions, place the first row of crochet loops directly against the ends of your front cornrows. This creates a flat overlap that hides the transition point completely.
Fulani-Crochet Hybrid Supplies Checklist
- 2 packs of pre-stretched kanekalon braiding hair (for front Fulani cornrows)
- 3-4 packs of 24-inch sleek straight or body-wave crochet hair extensions
- Latch hook needle
- Wooden, bone, or metallic Fulani beads and bead threader
- Strong-hold edge control wax
Step-by-Step Implementation Guide
- Section your hair into two halves from ear to ear.
- Braid the front half into a Fulani cornrow pattern (central braid, side cornrows, and forward-facing temple braids).
- Braid the back half into flat, horizontal anchor cornrows for the crochet base.
- Thread traditional Fulani beads onto the ends of the front temple braids using a bead threader, securing with small elastics.
- Install the long straight or body-wave crochet extensions onto the back cornrow base using the latch hook.
- Ensure the top row of crochet hair sits flush against the back edge of the front cornrows.
- Flat-iron or steam the back extensions so they fall smoothly down your back.
- Apply edge control wax along your hairline to lay down baby hairs in smooth, decorative swirls.
13. The Spring Pastel Festival Loc-and-Curl Mix
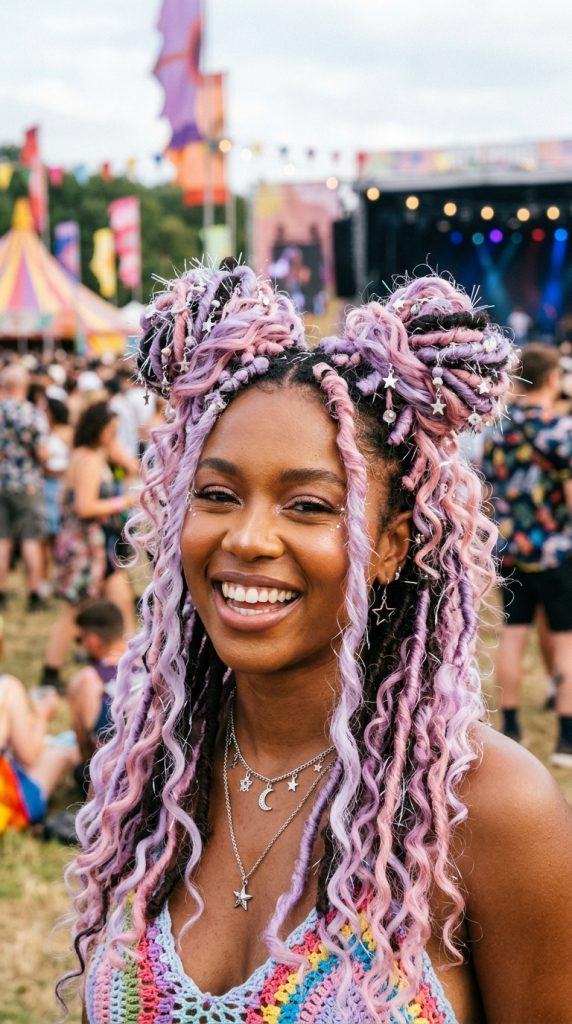
Whimsical Color Pops and Romantic Boho Texture
Spring is music festival season, making it the perfect time to experiment with pastel colors, playful textures, and bohemian hair art. The Spring Pastel Festival Loc-and-Curl Mix combines soft faux locs with loose, bouncy wavy strands in delicate pastel shades like lavender, soft rose pink, or mint green mixed with natural dark bases.
This whimsical hybrid style radiates creative energy. The combination of structured locs and loose, airy curls creates a dynamic multidimensional look that stands out in crowd photos and outdoor festival lighting.
Incorporating Subtle Pastel Highlights
If you are hesitant to wear full pastel hair, practice the “peek-a-boo” color placement technique. Install 80% natural dark-toned locs and curls across your head, reserving pastel extensions for the under-layers and a few face-framing strands.
When you walk, dance, or catch the wind, the soft pastel lavender or pink highlights pop through the dark hair, adding a subtle play of color.
Festival Loc Mix Materials List
- 3 packs of soft faux locs in natural dark brown/black
- 2 packs of loose water-wave crochet hair in pastel lavender, rose, or mint
- Latch hook tool
- Glitter hair spray or hair tinsel threads
- Festival hair rings and charm accessories
Step-by-Step Implementation Guide
- Braid your natural hair into a flat, sturdy 10-cornrow base.
- Alternate installing soft faux locs and loose wavy strands across the back and mid-sections.
- Place a higher concentration of pastel-colored curls around your face and top crown for bright color visibility.
- Finger-separate the loose wavy strands to integrate them smoothly with the structured locs.
- Weave silver hair tinsel threads around a few face-framing locs for sparkling shine under the sun.
- Attach small festival charms (like moon or star pendants) to the hair rings and clamp them onto the locs.
- Gather the top crown section into double space-buns, leaving loose pastel curls cascading down.
- Finish with a light dusting of glitter hair spray across the buns for a magical festival aesthetic.
14. The Year-Round Classic Medium Box Braid Crochet
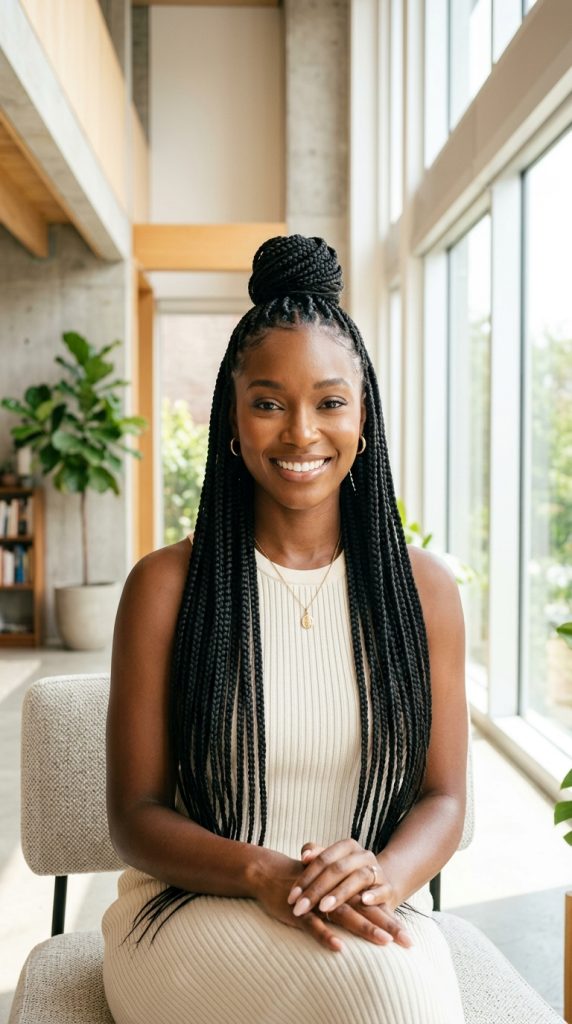
The Ultimate Timeless, Low-Maintenance Protective Staple
Rounding out our seasonal guide is the undisputed queen of protective styling: the Classic Medium Box Braid Crochet. This style delivers the iconic, symmetrical look of traditional mid-back box braids without spending 6 to 8 hours in a salon chair. Utilizing pre-braided medium box braid extensions, this style installs in under two hours while lasting up to six weeks with proper care.
Because of its classic profile, medium box braids transition effortlessly through every season of the year. Wear them down with heavy coats in winter, sweep them into a high bun for spring weddings, wrap them with colorful headscarves for summer beach trips, or style them half-up for autumn outings.
Achieving a 360-Degree Realistic Hairline
To ensure your crochet box braids look like individual braids growing directly from your scalp, utilize the “Individual Perimeter Method.”
Instead of cornrowing your entire head, create individual box braids along your front hairline and nape. Thread your latch hook through the base of each individual braid, loop the pre-made crochet box braid through, and wrap your natural hair braid around the extension to blend seamlessly.
Classic Box Braid Supplies Checklist
- 6-7 packs of pre-braided medium box braid crochet extensions (20-22 inches)
- Latch hook needle
- Rubber bands or edge gel for individual perimeter boxes
- Nourishing scalp oil
- Flexible hair elastics and large hair cuffs
Step-by-Step Implementation Guide
- Create individual boxed sections along your front hairline and nape, braiding your natural hair into small individual braids.
- Braid the remaining interior hair into flat, sturdy interconnecting cornrows.
- Install pre-braided crochet extensions onto the interior cornrows using standard latch-hook knotting.
- For the individual perimeter braids, insert the latch hook through the root of your natural individual braid.
- Hook the pre-made loop of the crochet box braid, pull it through the root, and thread the braid tail through its loop.
- Wrap your natural individual braid tightly around the base of the crochet braid to conceal it.
- Apply scalp oil along all exposed parting lines to maintain hydration.
- Style into a high sleek ponytail, a half-up bun, or wear cascading down your back for a timeless, year-round protective look.