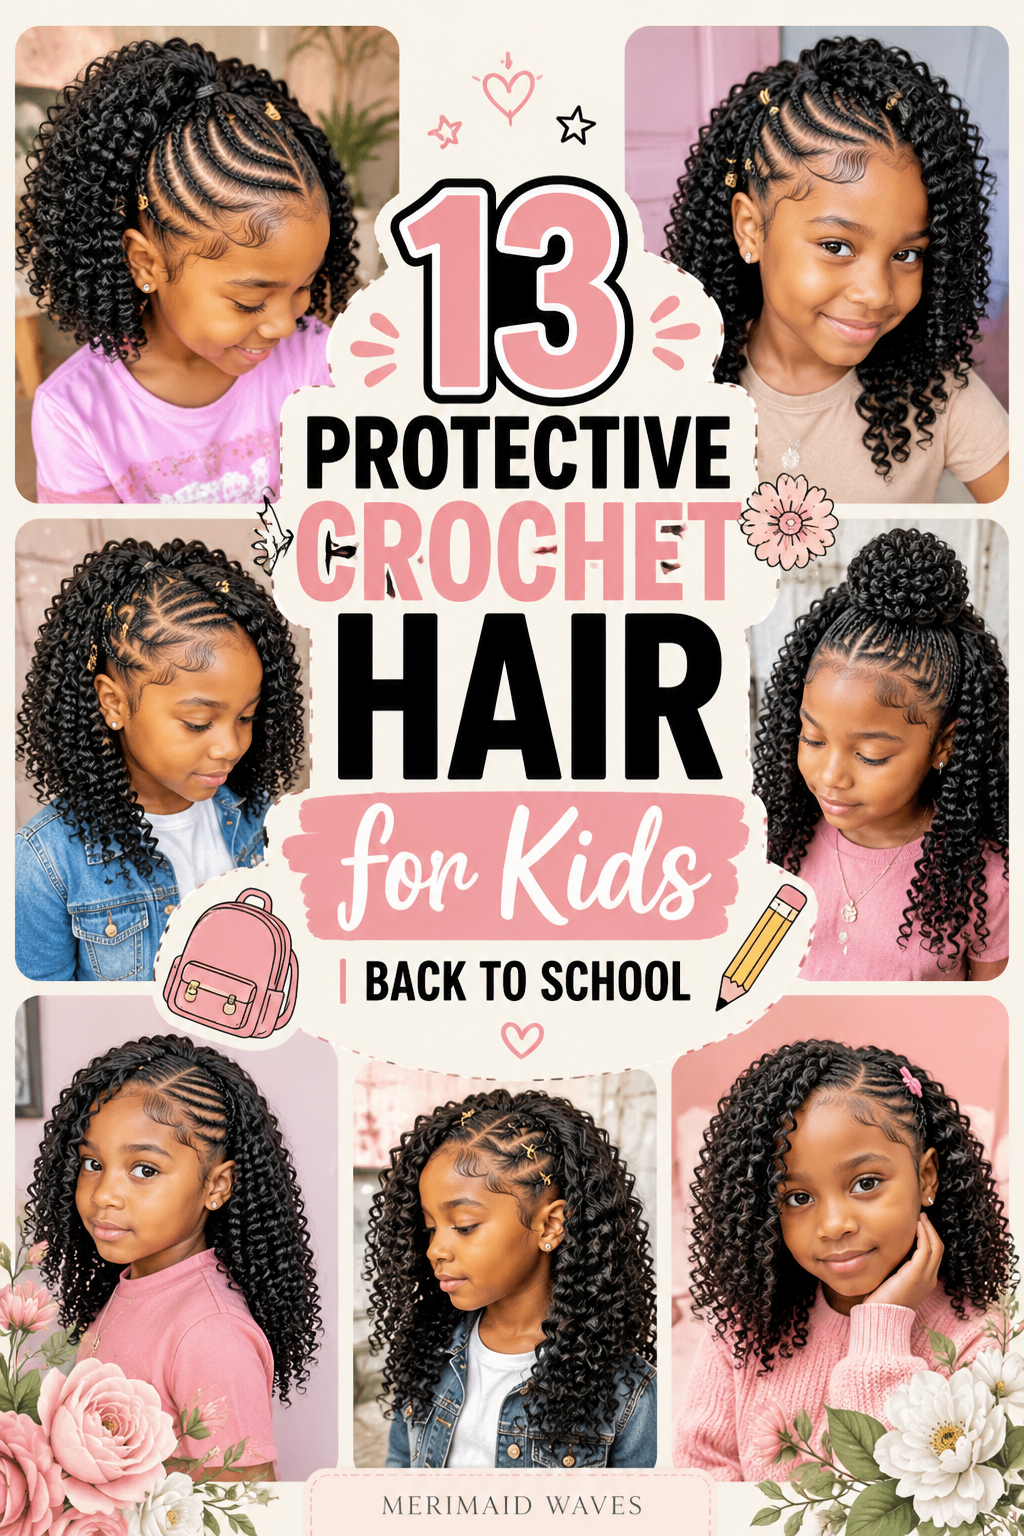
13 Protective Crochet Hair for Kids | Back to School
Preparing your child Crochet Hair for the new school year requires thoughtful planning. Finding the perfect back to school hairstyle can feel tricky. You need a style that looks cute and protects natural hair. Furthermore, mornings become much easier with low-maintenance protective styles. Crochet hairstyles offer an incredible, versatile solution for busy parents. They are lightweight, stylish, and gentle on delicate young scalps. In this comprehensive guide, you will discover stunning crochet hair ideas. These protective styles will keep your child looking fresh all semester.
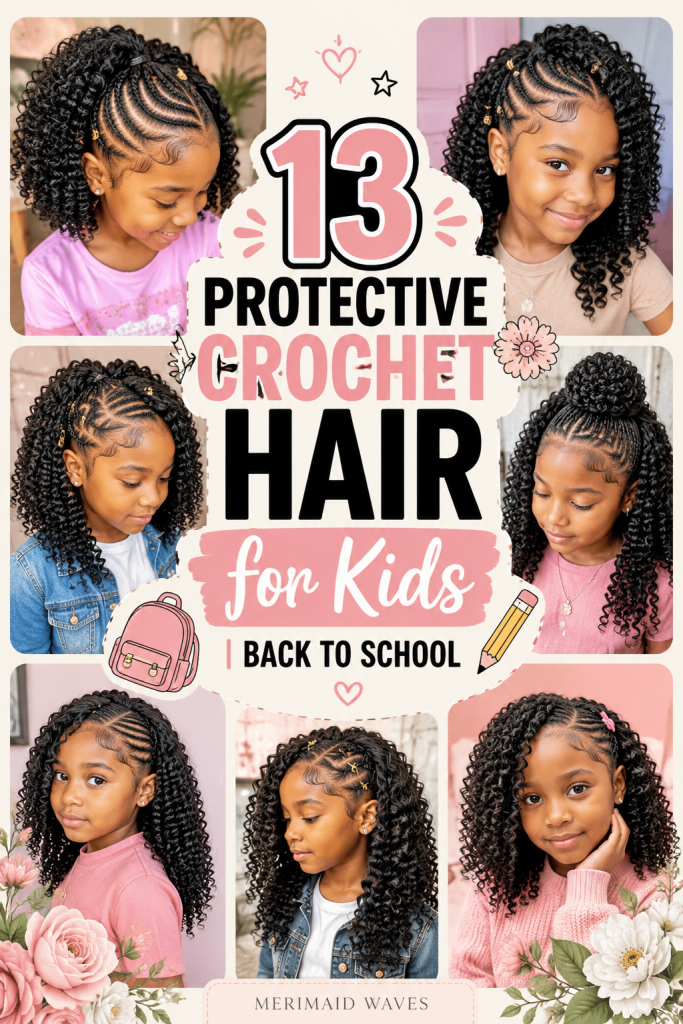
Understanding proper hair protection will completely transform your morning routine. Kids are active on playgrounds, during sports, and in classrooms. Therefore, their hair needs protection from daily friction and tension. Crochet styles shield natural curls while keeping hair neat and secure. Furthermore, installation takes significantly less time than traditional individual braids. You can choose soft curls, neat twists, or colorful braids. Consequently, your child stays confident, stylish, and comfortable every day.
Modern protective styles focus heavily on comfort, durability, and fun. Short box braids offer a classic look with easy maintenance. Passion twists bring a trendy, fluffy texture that kids love. Furthermore, shoulder-length curls create a bubbly, cheerful appearance effortlessly. Combining colorful beads with crochet styles adds a playful touch. These styles reduce daily manipulation, promoting healthy natural hair growth. As a result, your child’s hair stays moisturized and protected.
Many parents worry about tension and heavy extensions on young heads. Too much weight can easily damage sensitive edges and scalps. Consequently, selecting lightweight, kid-friendly extension hair is essential for success. Pre-braided and pre-twisted crochet hair speeds up installation dramatically. Furthermore, soft synthetic fibers prevent itching and scalp irritation throughout the day. Using proper tension-free braiding patterns protects fragile edges from pulling. Proper installation ensures your child enjoys their cute style comfortably.
Before starting the installation process, prepare your child’s natural hair. First, cleanse natural hair thoroughly using a gentle moisturizing shampoo. Next, apply a deep conditioner to ensure maximum moisture retention. After that, blow-dry hair gently using low heat settings. Furthermore, install a tension-free cornrow base pattern for crochet attachment. Using lightweight oils keeps the scalp healthy and hydrated under braids. As a result, the protective style remains fresh and long-lasting.
Choosing cute crochet styles allows for fun, creative self-expression. Whether your child prefers vibrant colors or classic black braids, options abound. You can match hair accessories with school uniforms or favorite outfits. Moreover, protective hair ideas perform exceptionally well on Pinterest boards. Sharing your child’s back to school hairstyle will inspire other parents. Therefore, exploring these detailed protective options is great for parents.
In this guide, we will explore thirteen distinct protective crochet styles. Each idea includes a clear explanation, materials list, and guide. You will learn how to install, style, and preserve these looks. Additionally, these quick ideas suit various hair lengths and textures. So, grab your crochet needle, secure your extensions, and begin. Let us dive directly into these cute back to school hairstyles.
1. Short Curly Crochet Bob with Beads
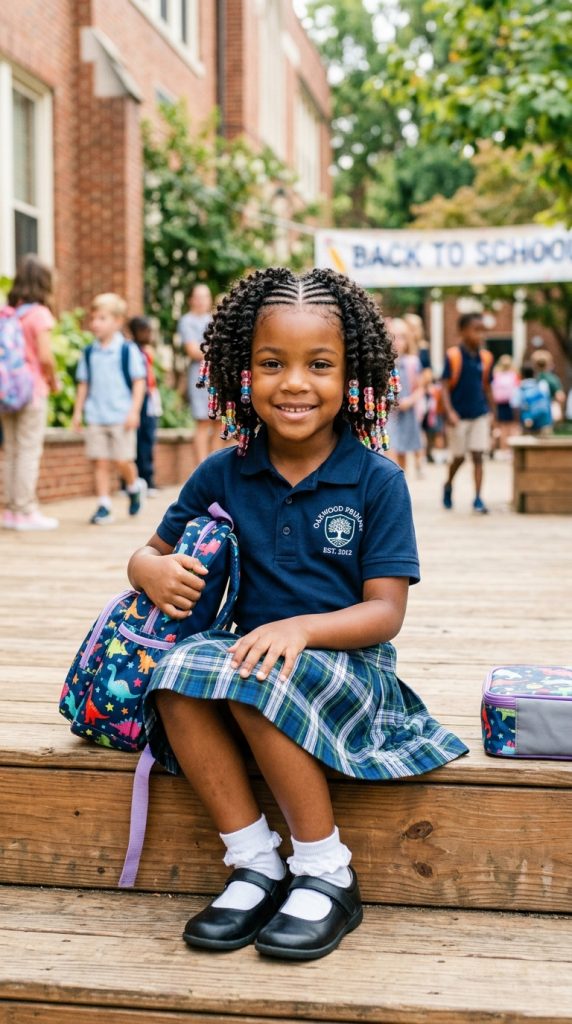
The short curly crochet bob is a adorable, age-appropriate choice. It features soft, bouncy curls cut into a neat bob. Furthermore, adding colorful clear beads along edges brings playful charm. This style keeps hair off shoulders, preventing tangling during school.
Short bobs are lightweight and extremely easy to manage daily. They do not weigh down small heads or cause neck strain. Furthermore, pre-looped curly hair installs quickly, saving valuable time. Consequently, your child gets a cute, bouncy look without long installation hours.
Gentle Scalp Prep
Preparing a young scalp ensures maximum comfort during protective styling. Using a soothing tea tree spray relieves tightness after braiding. Furthermore, avoiding heavy gels keeps the scalp clean and breathable. Consequently, your child experiences zero itching or discomfort during school hours.
Materials Needed
- Pre-Looped Short Curly Crochet Hair
- Latch Hook Crochet Needle
- Colorful Plastic Hair Beads
- Bead Threader Tool
- Light Scalp Oil Spray
Step-by-Step Guide
First, braid natural hair into six sturdy, flat cornrow tracks. Connect the ends of cornrows securely at the nape area. Next, moisturize the braided base using a light oil spray. Consequently, you create a flat, comfortable foundation for crochet attachment.
Second, insert the crochet needle under a natural cornrow braid. Loop the pre-curly extension hair onto hook, closing latch firmly. Next, pull extension hair through, creating a secure knot loop. Consequently, the curly strand anchors tightly without pulling natural scalp hair.
Third, repeat the looping process across the entire braided cornrow foundation. Space curly loops evenly to maintain a lightweight, natural volume. Additionally, slide colorful beads onto random front curls using threader tools. Finally, trim stray frizz lightly for a neat, fresh look.
2. Jumbo Passion Twists with Colored Cuffs
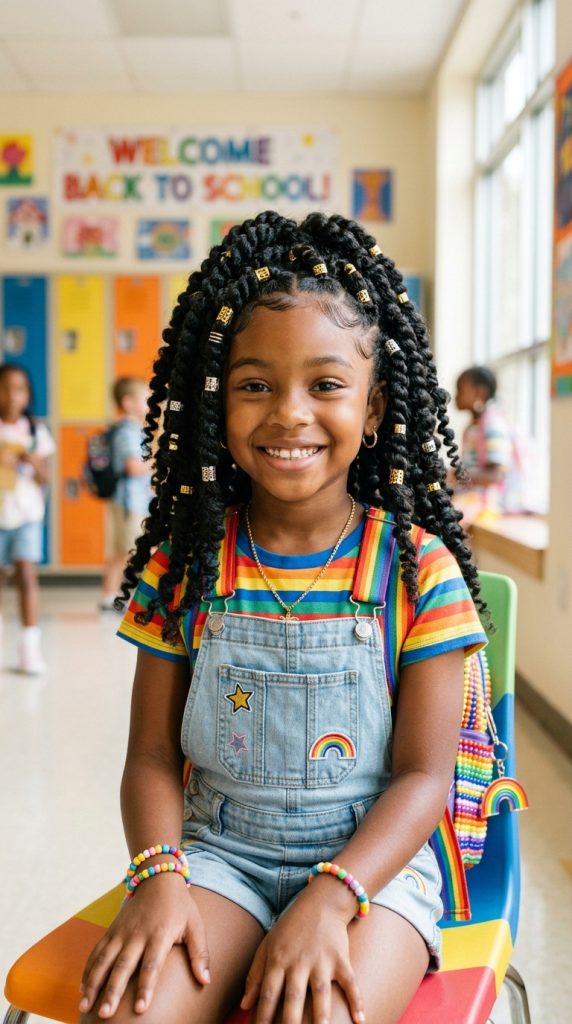
Jumbo passion twists offer a trendy, fluffy texture kids adore. They feature soft, twisted extensions that look full yet feel light. Furthermore, decorating twist ends with metallic cuffs adds festive style. This look brings effortless cool-girl vibes to back to school wardrobes.
Passion twists are fantastic because they look better as they age. Their textured nature hides natural hair frizz exceptionally well over time. Furthermore, using pre-twisted passion hair speeds up installation significantly today. Consequently, your child spends less time sitting and more time playing.
Lightweight Hair Selection
Choosing the right extension fiber prevents unwanted weight on young heads. Water wave synthetic hair offers maximum volume with minimal physical weight. Furthermore, soaking synthetic hair in apple cider vinegar prevents itching. Consequently, the twists remain comfortable, soft, and completely irritation-free all week.
Materials Needed
- Pre-Twisted Passion Twist Crochet Hair
- Crochet Latch Hook
- Gold and Silver Hair Cuffs
- Satin Bonnet for Sleep
- Edge Control Gel
Step-by-Step Guide
First, braid natural hair into a basic grid cornrow pattern. Ensure the perimeter braids are installed loosely to protect fragile edges. Next, apply a small dab of edge control to smooth baby hairs. Consequently, the foundation remains neat, sturdy, and completely painless for kids.
Second, pull pre-twisted crochet strands through natural cornrow tracks gently. Loop the twist through its anchor loop twice for security. Next, slide the crochet knot flat against natural cornrow base. Consequently, the passion twists stay locked without sliding or coming loose.
Third, attach metallic gold and silver hair cuffs along random twists. Space accessories evenly across front twists for a balanced, shiny look. Additionally, cover twists with a satin bonnet every night before bed. Finally, refresh edges daily using a soft bristle toothbrush.
3. Shoulder-Length Box Braids with Heart Partings
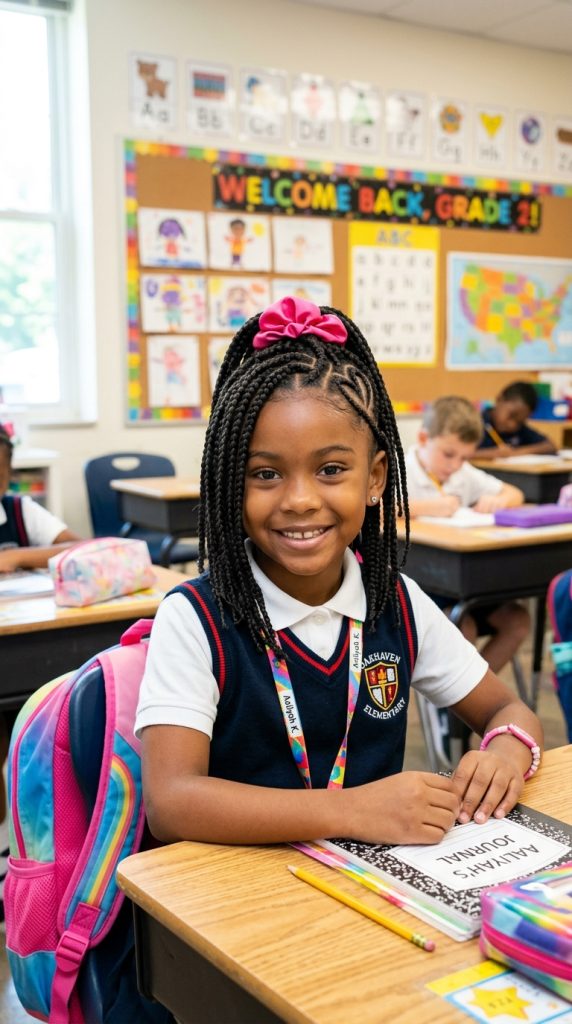
Shoulder-length box braids provide a classic, polished look for school. They feature neat, uniform braids that hang softly near shoulders. Furthermore, adding a cute heart-shaped part design brings unique flair. This protective style keeps natural hair safe while showcasing creative artistry.
Box braids offer incredible versatility for simple daily styling options. You can pull them into half-up ponytails or cute buns. Furthermore, shoulder length prevents braids from getting caught in backpack straps. As a result, hair stays tidy throughout busy school days.
Heart Parting Precision
Creating cute heart parts requires patience, steady hands, and gel. Using a metal rat-tail comb ensures sharp, clean parting lines. Furthermore, applying jam gel along parts keeps geometric shapes crisp. Consequently, the heart accent stands out beautifully within protective braid patterns.
Materials Needed
- Pre-Braided Shoulder-Length Crochet Hair
- Metal Rat-Tail Comb
- Braiding Jam or Gel
- Crochet Needle
- Pink Satin Scrunchie
Step-by-Step Guide
First, section a two-inch area near temple to carve heart. Use rat-tail comb and braiding jam to outline clear heart. Next, braid remaining natural hair into neat, flat individual cornrows. Consequently, you establish a stunning, custom parting pattern for crochet insertion.
Second, attach pre-braided crochet hair along all cornrow tracks smoothly. Pull braid loops through natural hair loops gently, securing knots flat. Next, fill the heart-shaped section using small individual crochet braids. Consequently, the heart pattern displays clear, beautiful definition on front.
Third, gather top braids into a cute half-up ponytail style. Secure ponytail loosely using a soft pink satin scrunchie today. Additionally, dip braid ends in hot water if needed for softness. Finally, mist with braid spray for a healthy, lasting shine.
4. Half-Up Curly Top Knot Bun

The half-up curly top knot combines fun curls with structure. It features soft crochet curls on bottom with a top bun. Furthermore, this style keeps front hair away from active faces cleanly. It brings a cheerful, vibrant, and neat aesthetic to classrooms.
Top knot styles are ideal for physical education and recess activities. Securing front curls prevents hair from blocking sight while reading or playing. Furthermore, the loose back curls bounce naturally, adding fun movement. Consequently, your child enjoys the best of both worlds daily.
Preventing Curl Tangling
Curly crochet hair requires simple daily maintenance to prevent severe tangling. Spritzing curls with water and leave-in conditioner preserves soft bounce. Furthermore, gently separating curls with fingers prevents matting behind the neck. Consequently, the curly top knot stays fluffy, defined, and fresh long.
Materials Needed
- Soft Water Wave Curly Crochet Hair
- Large Elastic Hair Band
- Crochet Latch Hook
- Leave-In Conditioner Spray
- Hair Shears
Step-by-Step Guide
First, braid natural hair into horizontal cornrows across back scalp. Braid the crown area in small circular cornrows for bun support. Next, secure all natural hair ends flat using a weaving thread. Consequently, you create a balanced foundation for two distinct style zones.
Second, install curly crochet hair densely around top circular cornrows. Gather those top curls together into a high, firm ponytail base. Next, wrap curly ponytail around itself, forming a soft top bun. Consequently, you create a cute, elevated focal point on crown.
Third, attach remaining curly crochet hair across back horizontal cornrows. Use leave-in conditioner spray to define and soften loose back curls. Additionally, trim any uneven curl ends using sharp hair shears. Finally, lay front edges smoothly using a soft silk scarf.
5. Soft Spring Twists in a Low Double Bun

Spring twists in double buns offer an adorable, youthful look. They feature lightweight, bouncy twists wrapped into two low side buns. Furthermore, colorful elastic bands add a cheerful pop of bright color. This style protects natural ends completely while keeping kids looking cute.
Double buns, often called space buns, are hugely popular on Pinterest. Wrapping spring twists into low buns keeps hair secured against neck friction. Furthermore, spring twist extensions are incredibly soft, flexible, and easy to handle. Consequently, this style remains comfortable even during naptime at preschool.
Friction-Free Bun Wrapping
Securing buns without causing scalp tension requires gentle wrapping methods. Avoid pulling spring twists too tightly when forming low circle shapes. Furthermore, using soft fabric scrunchies holds buns without snapping synthetic fibers. Consequently, the double buns look fluffy while remaining completely pain-free.
Materials Needed
- Pre-Twisted Spring Twist Crochet Hair
- Soft Fabric Scrunchies
- Crochet Needle
- Scalp Soothing Serum
- Colorful Hair Clips
Step-by-Step Guide
First, part natural hair down middle into two equal side sections. Braid each side into flat, circular cornrows aimed toward lower nape. Next, apply soothing scalp serum along the middle part line. Consequently, you create two distinct bases for low side bun placement.
Second, crochet spring twists onto cornrow bases, starting from outer edges. Fill both side sections completely until natural braids are fully covered. Next, gather left side twists into a loose low ponytail bundle. Consequently, you prepare the spring twists for smooth bun wrapping.
Third, twist left ponytail gently into a soft, round low bun. Secure bun using a soft fabric scrunchie and hair clips. Additionally, repeat the wrapping process on right side for symmetry. Finally, add decorative hair clips along front hairline for charm.
6. Goddess Locs with Wooden Beads

Goddess locs combine bohemian style with ultimate natural hair protection. They feature textured crochet locs with soft, wavy, loose curly ends. Furthermore, threading earthy wooden beads onto loc ends adds natural warmth. This style looks stylish, earthy, and exceptionally cool for school.
Goddess locs are lightweight and offer a beautiful, natural appearance effortlessly. The wavy curly ends add playful texture that kids love showing off. Furthermore, crochet goddess locs eliminate hours of traditional manual wrapping time. Consequently, your child achieves a stunning bohemian look in minutes.
Wooden Bead Installation
Adding wooden beads transforms standard locs into artistic hair masterpieces. Using a simple wire bead threader makes application fast and easy. Furthermore, securing beads with tiny clear elastics prevents slipping during playtime. Consequently, the wooden accents remain firmly attached through active school days.
Materials Needed
- Pre-Made Goddess Locs Crochet Hair
- Natural Wooden Hair Beads
- Wire Bead Threader
- Crochet Needle
- Anti-Itch Scalp Spray
Step-by-Step Guide
First, braid natural hair into straightforward, back-to-front cornrow tracks. Keep cornrows medium-sized to ensure comfortable, flat attachment space. Next, spray the entire scalp with anti-itch tea tree mist. Consequently, you establish a fresh, comfortable base for loc installation.
Second, loop goddess locs onto cornrows using standard crochet latch needle. Space locs evenly, ensuring full coverage over natural braid tracks. Next, pull wavy curly ends gently to free them from tangles. Consequently, the locs cascade naturally with soft, wavy movement throughout.
Third, thread two wooden beads onto random locs using wire tools. Push beads up near ends and secure with clear elastic bands. Additionally, check that loc weight feels balanced and comfortable across head. Finally, mist style with braid sheen spray for healthy radiance.
7. Short Afro Puff Crochet Style
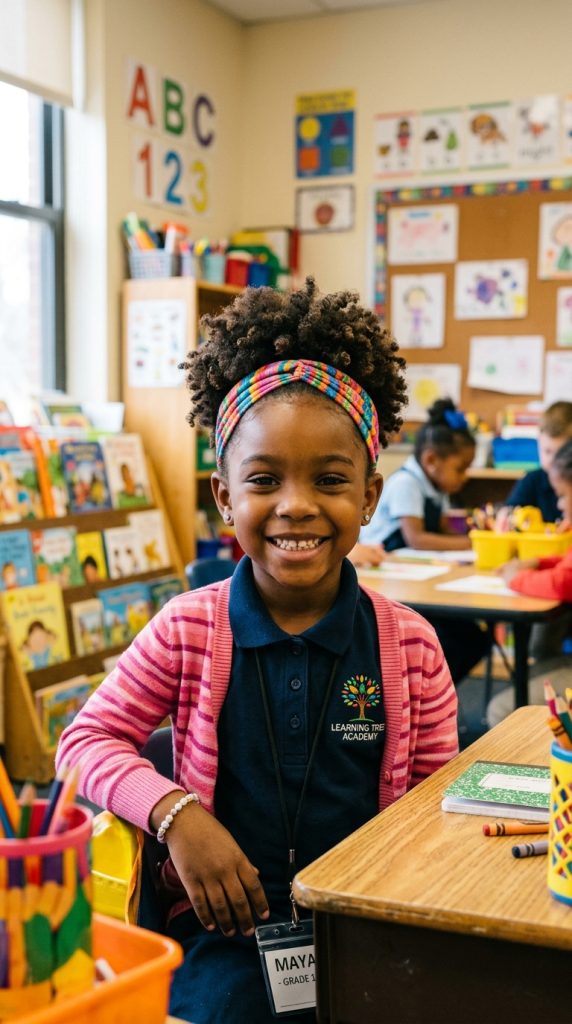
The short afro puff crochet style celebrates natural, fluffy textures. It features soft, coily crochet hair shaped into a high puff. Furthermore, adding a colorful headband keeps front hair neat and secure. This style offers a quick, stylish look for textured hair.
Afro puffs are classic, timeless, and deeply loved by young kids. Using crochet hair for afro puffs adds incredible volume and length. Furthermore, natural ends remain safely braided underneath the big soft puff. Consequently, your child gets a big, beautiful afro without shrinkage.
Preserving Coil Definition
Maintaining coily crochet hair requires zero heat and very little product. Fluffing coils gently with a wide-tooth pick creates cloud-like volume. Furthermore, sleeping in a satin bonnet prevents coils from flattening overnight. Consequently, the afro puff stays big, round, and bouncy every morning.
Materials Needed
- Short Coily Afro Puff Crochet Hair
- Wide Stretch Cloth Headband
- Afro Pick Comb
- Crochet Needle
- Shea Butter Cream
Step-by-Step Guide
First, braid natural hair into small, tight cornrows towards head center. Pull all cornrow ends together into a small central flat bun. Next, apply shea butter cream to natural edges for deep moisture. Consequently, you construct a high, centralized anchor point for puff.
Second, attach coily afro crochet hair densely around central cornrow bun. Ensure loops are placed closely together to build maximum rounded volume. Next, gently pick out coily fibers using an afro comb. Consequently, the crochet hair transforms into a seamless, giant fluffy puff.
Third, slide a soft stretch cloth headband over front natural edges. Push headband back slightly to reveal smooth edges and accent puff. Additionally, fluff top coils until desired round shape is achieved fully. Finally, enjoy a quick, energetic hairstyle perfect for school pictures.
8. Layered Wand Curl Crochet Shoulder Cut

The layered wand curl style offers glamorous, bouncy shoulder-length curls. It features defined, glossy wand curls cut into face-framing layers. Furthermore, a side part adds sophisticated volume to the overall silhouette. This protective style looks bouncy, polished, and ready for school events.
Wand curls provide a sleek, uniform curl pattern that holds shape. The layered cut prevents hair from looking bulky around small faces. Furthermore, synthetic wand curls bounce back easily after gentle finger combing. Consequently, morning styling takes less than two minutes before school runs.
Layered Cutting Techniques
Trimming synthetic curls into layers requires sharp shears and patience. Cutting curls at an angle creates soft, natural-looking cascading layers. Furthermore, avoiding blunt straight cuts prevents helmet-like shapes from forming. Consequently, the wand curls frame young faces with airy, light volume.
Materials Needed
- Pre-Curled Wand Curl Crochet Hair
- Professional Hair Shears
- Crochet Latch Hook
- Mousse for Synthetic Hair
- Silk Head Scarf
Step-by-Step Guide
First, braid natural hair into a side-part cornrow base pattern. Ensure the heavy side of part has extra cornrow tracks for volume. Next, tie cornrow ends down securely with soft weaving thread. Consequently, you lay the foundation for a side-swept curly look.
Second, attach wand curl crochet strands along all cornrows using needle. Place loops closer together along the side part for seamless coverage. Next, separate individual wand curls gently into two thinner strands today. Consequently, you double the volume while maintaining soft, glossy definition.
Third, trim front curls shorter using sharp shears to create layers. Shape side curls to frame cheeks and shoulders naturally and softly. Additionally, apply lightweight styling mousse over curls to eliminate small frizz. Finally, wrap front part with silk scarf for ten minutes.
9. Colorful Micro Twists with Pink Highlights

Micro twists with pink highlights offer a vibrant, playful expression. They feature thin, neat crochet twists mixed with soft pink strands. Furthermore, thin twists can be styled into endless updos and ponytails. This look brings creative, fun energy to back to school season.
Kids love adding pops of color to their protective school hair. Using subtle pastel pink highlights adds fun without violating school codes. Furthermore, pre-twisted micro crochet hair provides an incredibly neat, detailed finish. Consequently, your child enjoys detailed twists without long braiding sessions.
Color Placement Balance
Positioning colored extensions thoughtfully creates a subtle, stylish highlight effect. Interspersing pink strands evenly behind ears adds peek-a-boo color dynamics. Furthermore, placing black twists along crown keeps style looking uniform and neat. Consequently, the colorful highlights pop beautifully whenever hair moves naturally.
Materials Needed
- Black and Pastel Pink Micro Twist Crochet Hair
- Crochet Latch Hook
- Rubber Hair Bands
- Satin Edge Band
- Scalp Oil
Step-by-Step Guide
First, braid natural hair into thin, flat cornrows running straight back. Ensure parting lines are small to accommodate thin micro twist loops. Next, apply nourishing scalp oil along exposed natural scalp lines. Consequently, you establish a neat, comfortable grid for thin micro twists.
Second, crochet black micro twists across main central cornrow base tracks. Switch to pastel pink twist strands around sides and lower nape. Next, loop micro twists tightly to ensure they do not slide. Consequently, you create a beautiful peek-a-boo color highlight effect throughout.
Third, pull top micro twists into a cute half-up high pony. Secure ponytail using a soft rubber band wrapped with pink twist. Additionally, smooth front baby hair using edge control and satin band. Finally, let remaining highlighted twists cascade freely over back shoulders.
10. Distressed Butterfly Locs Bob

The distressed butterfly locs bob is a stylish, textured protective look. It features shoulder-length locs with cute, bubbly, distressed wing loops. Furthermore, the bob length keeps locs light, bouncy, and manageable. This style brings artistic, bohemian charm to traditional school hairstyles.
Butterfly locs have taken Pinterest beauty trends by storm recently. Their signature messy, bubbly loops create a thick, soft texture. Furthermore, pre-made crochet butterfly locs install in under an hour easily. Consequently, your child gets a high-fashion look without long sitting.
Preventing Loop Snagging
Distressed loops require gentle care during active physical education activities. Tying locs into a low ponytail prevents loops from catching backpacks. Furthermore, using smooth satin scrunchies keeps distressed texture from fraying fast. Consequently, the butterfly locs retain their signature bubbly look longer.
Materials Needed
- Pre-Made Distressed Butterfly Locs (10 inch)
- Crochet Latch Hook
- Pink and Purple Thread
- Satin Hair Bonnet
- Braid Sheen Spray
Step-by-Step Guide
First, braid natural hair into six sturdy cornrows connected at nape. Keep braid tension light to protect young scalp and edges. Next, tuck loose braid ends under flat using small hair pins. Consequently, you complete a flat, secure base for butterfly locs.
Second, loop distressed butterfly locs onto cornrows using crochet needle hook. Ensure the bubbly texture faces outward for maximum volume effect today. Next, fill perimeter cornrows densely to hide natural braid foundation underneath. Consequently, the bob looks full, thick, and completely natural overall.
Third, wrap decorative pink and purple thread around two front locs. Tie small secure knots at thread ends for cute colorful accents. Additionally, spray locs with sheen spray to enhance soft texture shines. Finally, protect the style overnight using a soft satin bonnet.
Nighttime Care Routine
Establishing a proper nighttime routine keeps kids’ protective styles fresh for weeks. Before bed, gently gather locs or braids into a loose, high ponytail. Next, cover hair completely with a soft, edge-protecting satin bonnet. Sleeping on a satin pillowcase provides extra protection if bonnets slip off. Consequently, natural hair retains essential moisture while synthetic fibers stay frizz-free. In the morning, simply remove the bonnet and shake hair out gently. This simple routine saves precious time during busy morning school rushes.
11. Cornrow Front with Curly Crochet Back
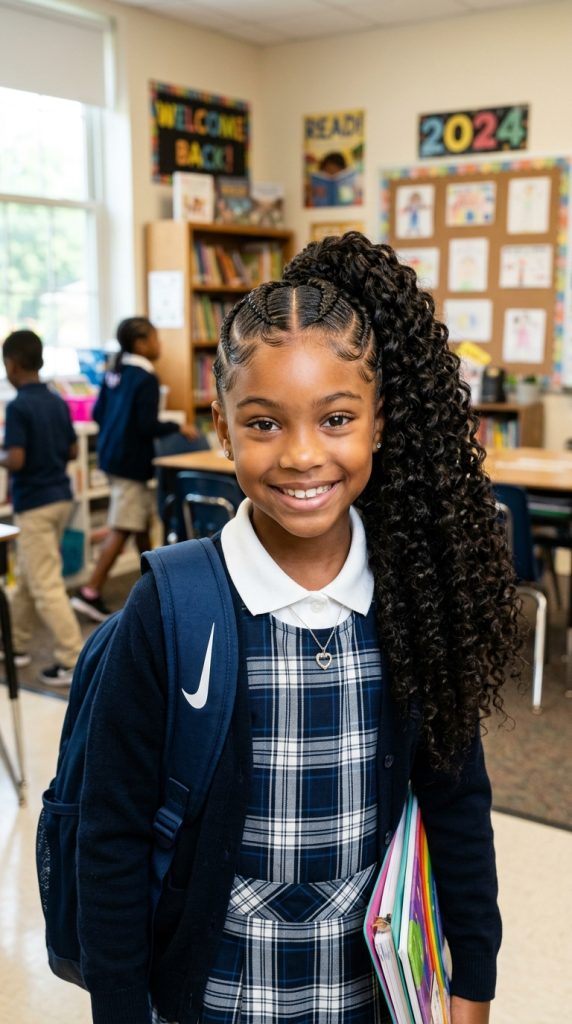
This hybrid style combines structured front cornrows with bouncy back curls. It features neat stitch cornrows leading into a full curly back. Furthermore, colorful hair beads on front braids add traditional, cute style. This look provides long-lasting front neatness with playful curly volume.
Combining cornrows and crochet offers maximum durability for active school kids. The braided front keeps hair away from faces completely all day. Furthermore, the curly back adds fun texture that feels light and bouncy. Consequently, this style stays pristine even through intense recess fun.
Stitch Braiding Neatness
Creating crisp front cornrows requires clean parting and smoothing braiding jam. Braiding natural hair tightly enough for neatness without causing pain is key. Furthermore, adding small beads to braid ends adds weight and swing. Consequently, the front section looks artistic, clean, and beautifully finished.
Materials Needed
- Kinky Curly Crochet Extension Hair
- Colorful Plastic Hair Beads
- Braiding Jam or Edge Gel
- Crochet Needle
- Rubber Bands
Step-by-Step Guide
First, part front scalp from ear to ear using rat-tail comb. Braid front natural hair into six neat stitch cornrows heading back. Next, braid remaining back hair into simple horizontal cornrow tracks. Consequently, you divide hair into a neat front and curly back.
Second, install curly crochet hair onto all back horizontal cornrows. Loop curls closely together to create a thick, seamless curly mane. Next, attach colorful beads to the hanging ends of front cornrows. Consequently, the front braids feature fun, clinking colorful bead accents.
Third, apply braiding jam along front stitch parts for lasting neatness. Tie small rubber bands right below beads to lock them tight. Additionally, mist back curls with water to activate bouncy curl shape. Finally, enjoy a durable, versatile style that lasts for weeks.
12. Two Feed-In Braids with Crochet Curly Ponytail
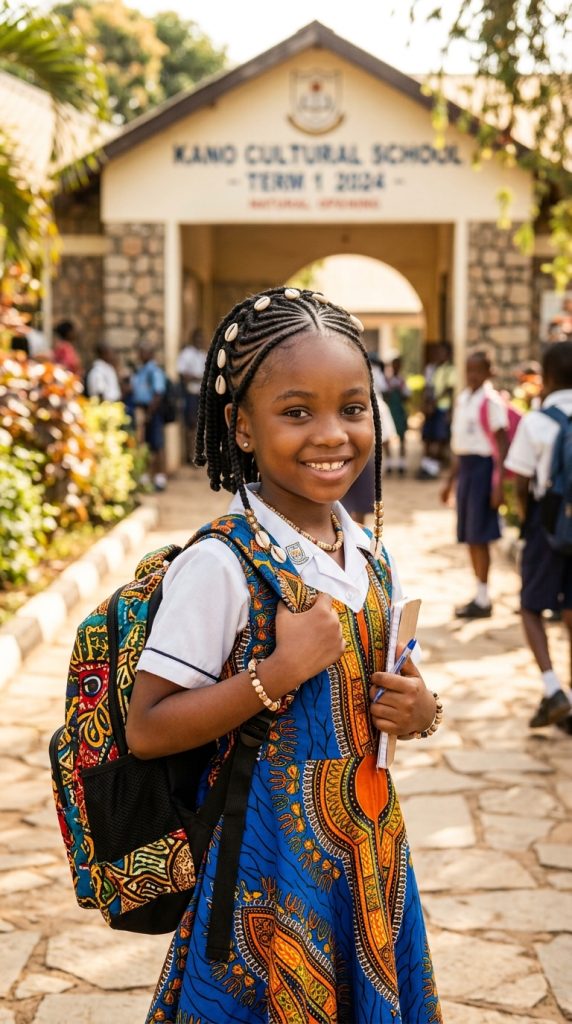
The feed-in braid with curly ponytail offers sleek elegance instantly. It features two clean Dutch cornrows leading into a curly ponytail. Furthermore, crochet hair creates a massive, bouncy ponytail without natural strain. This style brings a sporty, polished, and sophisticated look to school.
Two cornrow styles are incredibly popular for picture days and sports. Adding crochet extension hair to the back ponytail creates impressive volume. Furthermore, the natural scalp remains protected inside two neat, secure braids. Consequently, your child looks polished, athletic, and ready for anything.
Securing the Curly Ponytail Base
Creating a secure anchor for the crochet ponytail prevents slipping during play. Braid natural hair ends into a small, tight bun at nape. Furthermore, wrapping weaving thread around the bun creates a sturdy base. Consequently, the curly crochet ponytail stays firmly anchored all day long.
Materials Needed
- Deep Wave Curly Crochet Hair
- Braiding Gel or Wax
- Hair Extension Thread and Needle
- Large Hair Scrunchie
- Edge Brush
Step-by-Step Guide
First, part natural hair cleanly down middle into two equal halves. Apply braiding gel along center part line to ensure sleek precision. Next, braid each side into a thick, sleek feed-in cornrow. Consequently, you create two clean, elegant braids running toward nape.
Second, combine the ends of both feed-in braids into one bun. Secure the bun tightly using weaving thread to build strong anchor. Next, attach deep wave crochet hair densely all over bun base. Consequently, the small bun transforms into a huge, bouncy curly ponytail.
Third, wrap a section of curly hair around ponytail base elastic. Smooth baby hairs along front hairline using edge brush and gel. Additionally, spritz ponytail with shine spray for a glossy, healthy finish. Finally, secure edges with a satin strip for ten minutes.
13. Fulani Inspired Crochet Braids with Cowerie Shells
Fulani inspired crochet braids offer cultural beauty and protective strength. They feature traditional forward-braided side cornrows with a central braid. Furthermore, cowrie shells and beads along front cornrows add regal elegance. This style brings a proud, stunning, and artistic look to school.
Fulani styles showcase rich cultural heritage through beautiful geometric braiding patterns. Combining front cornrows with long back crochet braids reduces installation time. Furthermore, lightweight cowrie shells add unique, authentic charm kids love showing off. Consequently, your child stands out with a royal, breathtaking hairstyle.
Shell Accessory Attachment
Attaching cowrie shells securely requires small jump rings or hair wire. Opening jump rings, sliding through shells, and looping onto braids is simple. Furthermore, placing shells at braid ends creates a gentle, pleasing sound. Consequently, the traditional accessories remain firmly secured throughout daily school activities.
Materials Needed
- Pre-Braided Long Crochet Braids
- Natural Cowrie Shells with Jump Rings
- Metallic Braid Cuffs
- Rat-Tail Comb
- Edge Control Gel
Step-by-Step Guide
First, section front scalp for traditional Fulani cornrow layout patterns. Braid one central cornrow straight back, and side cornrows sweeping forward. Next, braid back natural hair into straight-back cornrow tracks. Consequently, you establish an authentic, regal Fulani braiding foundation layout.
Second, attach pre-braided crochet hair across all back cornrow tracks. Space crochet braids closely to cover natural hair completely behind ears. Next, attach cowrie shells to forward-hanging side cornrow braid ends. Consequently, traditional shell accents frame child’s face with cultural beauty.
Third, place metallic braid cuffs along the central top cornrow braid. Smooth front edges using edge control gel and soft edge brush. Additionally, wrap front cornrows with satin strip to set style flat. Finally, admire a breathtaking, culturally rich back to school protective style.