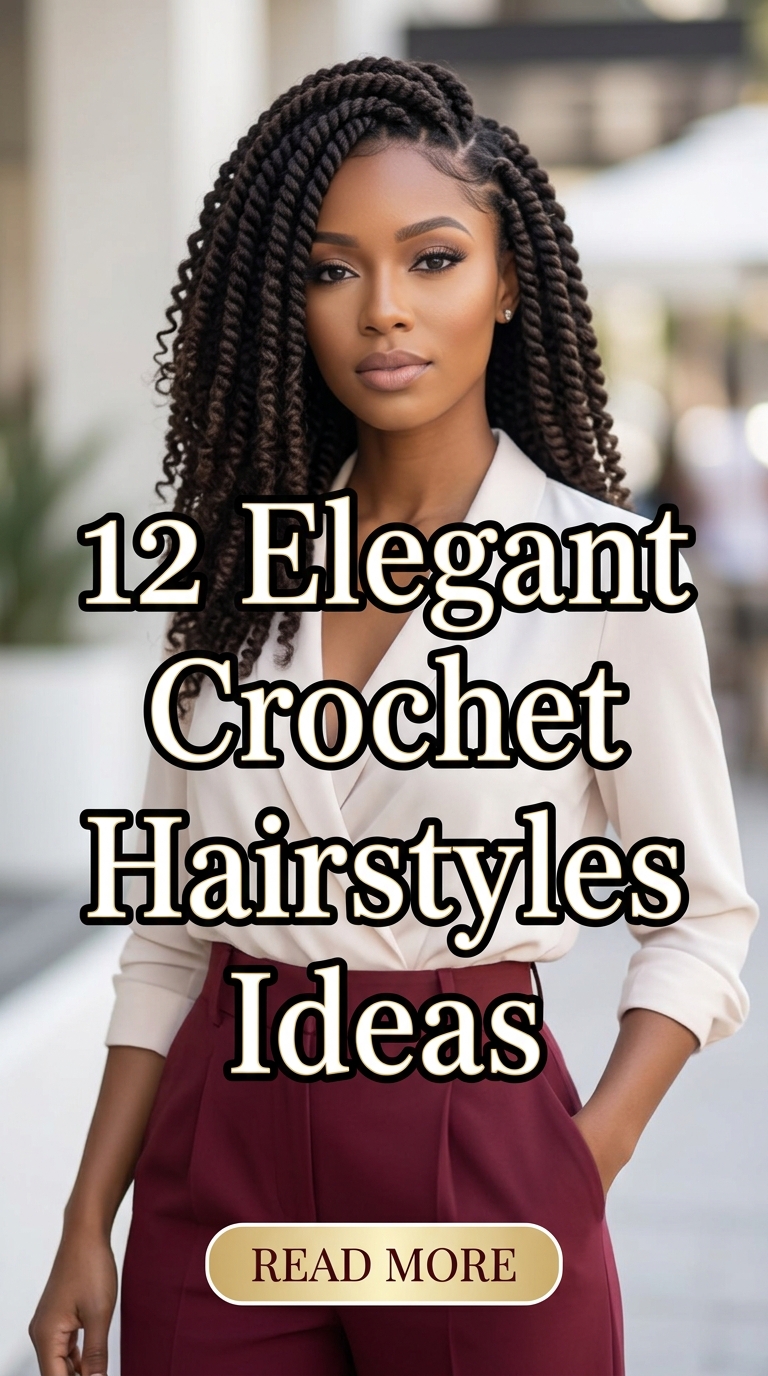
12 Elegent Crochet Hairstyles Ideas
Crochet hairstyles have completely revolutionized the modern protective styling landscape, beautifully blending unmatched versatility with timeless, elegant sophistication. Celebrating the gorgeous textures of natural curls, waves, and locs, this protective installation method allows you to achieve stunning volume without placing excessive tension on your delicate scalp. Many individuals worry that a crochet install might look synthetic or overly bulky around the front hairline boundaries. However, modern looping techniques paired with premium pre-curled fiber palettes tailors the style specifically to framing your facial structure flawlessly. It provides a lightweight, highly secure canvas that allows your natural hair to rest, grow, and thrive beautifully.
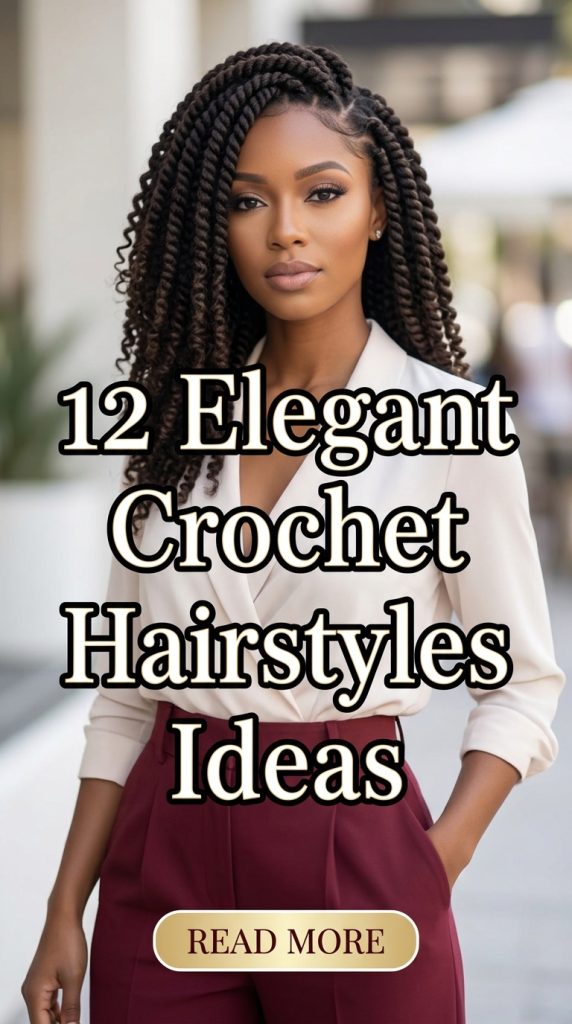
The Innovation of Crochet Interlocking
Choosing an elegant crochet hairstyle over standard traditional sew-ins or heavy box braids offers immense styling speed and scalp health advantages. First, the pre-looped design allows your stylist to complete a full head installation in a fraction of the traditional time. This minimizes the grueling hours spent sitting in a salon chair, making it highly practical for busy modern women. Second, the interlocking loop system distributes the weight of the extensions evenly across your cornrow base foundation, preventing localized traction hair loss. Lastly, it offers easy scalp access, allowing you to seamlessly hydrate your natural roots with soothing oils throughout the wear.
Selecting the Perfect Fiber Texture Palette
The absolute secret to executing a flawless, natural-looking crochet style lies in matching the premium extension fiber to your desired aesthetic. Synthetic fibers featuring advanced heat-resistant technologies provide a gorgeous, long-lasting bounce that maintains its shape even through high humidity cycles. Human hair premium blends offer a softer, touchable matte finish that mimics natural hair movement and flow with extreme precision. For a highly dramatic, luxurious look, choosing deep wave patterns adds massive dimension, while micro-loc textures exude a modern, bohemian elegance. Always prioritize lightweight, finger-detangled fibers to keep your elegant installation looking fresh, bouncy, and completely free from matting.
Planning Your Cornrow Base Grid Architecture
Before using the latch hook tool, you must carefully engineer the hidden cornrow foundation grid beneath the style. The pattern of your protective braids dictates exactly how the crochet hair will fall, frame your face, and part naturally. Will your look feature an ultra-realistic, illusion-style front perimeter that allows for a versatile, deep side part configuration? Or do you prefer a continuous, zig-zag anchor pattern designed for maximum volume and total camouflage of the base? The density of your braids also heavily influences the final silhouette; smaller, neater rows prevent unwanted lumps.
Gathering the Essential Installation Toolkit
You will need a specific set of tools to ensure a smooth, professional-grade crochet installation journey right at home. It is highly recommended to invest in a sturdy ergonomic latch hook needle featuring a smooth, snag-free locking mechanism. You will also need high-quality sectioning clips to hold the loose extensions away while you anchor individual loops tightly. Keep a lightweight moisturizing foam mouse handy to set the finished style and tame any early surface flyaways. Collect premium scalp care oils, like jojoba or peppermint oil, to apply directly onto your cornrow tracks before starting.
Mastering the Seamless Illusion Knotting Technique
Many beginners struggle with crochet installations because the knots remain visibly exposed along the parting lines, ruining the realism. In these cases, you will find the loops slide around, making the style look artificial near the front hairline. Start by sliding your closed latch hook needle directly underneath a single cornrow track, then open the latch hook mechanism safely. Loop the middle of the extension strand onto the hook, close the latch, and pull it gently beneath the braid. Slide the hair ends completely through the resulting loop hole twice, pulling downward firmly to create a hidden, secure knot.
Idea 1: The Deep Wave Classic Side-Swept Goddess
This iconic runway-inspired look features a deep, luxurious side part that drapes a cascade of highly defined deep wave curls over one shoulder. It utilizes high-end, silky-textured synthetic fibers to achieve a soft sheen finish that reflects ambient light beautifully from every angle. This setup protects your natural hair completely while exuding an air of effortless, high-fashion glamour and timeless elegance. It serves as the perfect styling choice for upscale evening galas or professional black-tie corporate networking events.

Understanding the Side-Swept Goddess Silhouette
The Side-Swept Goddess focuses on achieving maximum volumetric bounce and asymmetry to frame the jawline and cheekbones beautifully. Instead of letting the curls hang evenly, you sweep the top crown layers diagonally across the forehead to create drama. This gives you a striking, polished profile view while ensuring the underlying cornrow foundation tracks remain perfectly concealed. It uses lightweight, voluminous wave strands that bounce gracefully with your every physical movement.
Step-by-Step How-to Guide
Braid the Asymmetric Anchor
First, create a tight cornrow base pattern featuring a deep side part line extending from your forehead to the crown.
Prepare the Deep Wave Fiber
Next, separate your deep wave extension strands into smaller, texturized pieces to prevent a heavy blocky look along the part.
Install the Back Foundation Rows
Then, use your latch hook needle to secure the waves across the back head area, spacing loops an inch apart.
Execute the Illusion Part Knotting
After that, switch to the invisible knotting method along the side part line, ensuring the loops pull fully flat down.
Sweep and Style Over Shoulder
Finally, gather the voluminous waves gently, sweeping them diagonally to one side and setting with a lightweight texturizing mist.
Materials List
- Deep Wave Extension Fiber: Provides the crucial, high-density luxurious wave texture needed to build the voluminous goddess shape.
- Latch Hook Needle: Essential for pulling the pre-looped hair strands smoothly underneath the protective cornrow base tracks.
- Texturizing Mist: Adds a soft, flexible hold that keeps the side-swept dynamics perfectly in place all evening long.
- Sectioning Clips: Holds loose extension strands away cleanly while you focus on detailing the precise illusion part line.
- Scalp Hydration Oil: Applied directly along the exposed side parting line to keep the skin looking healthy and moisturized.
Idea 2: The Ultra-Sleek Modern Pre-Stretched Box Braid
This sophisticated design brings the clean, geometric precision of micro box braids into a lightweight, time-saving crochet installation format. It features perfectly uniform, pre-braided synthetic strands that drop into a clean, minimalist silhouette extending long past the shoulders. It looks incredibly polished, neat, and professional, making it the ultimate protective choice for contemporary workplace environments.

The Efficiency of Pre-Braided Textures
This concept relies on creating a flawless, highly detailed braided look without spending countless hours manually weaving individual hair sections. By looping pre-made, lightweight box braids onto a secure foundation, you protect your natural edges from the typical pulling damage. The challenge lies in ensuring the root connections look completely seamless and tight against the scalp surface.
Step-by-Step How-to Guide
Crafting the Perimeter Braid Base
First, execute a neat, low-profile cornrow pattern, ensuring the front perimeter rows sit very close to your natural hairline.
Threading the Micro Box Braids
Next, insert your latch hook tool beneath the first braid row, anchoring a pre-made micro box braid strand tightly.
Managing Root Connection Density
Then, slide the end of the long braid straight through its own pre-made loop hole, pulling firmly to secure it.
Balancing the Crown Spacing
After that, repeat the process across the scalp, spacing the braids tightly near the front to completely hide the tracks.
Applying the Setting Foam Mousse
Finally, coat the top root connections with a generous palmful of styling mousse, tying down with a silk scarf.
Materials List
- Pre-Made Crochet Box Braids: The essential time-saving component that provides uniform, neat, and highly detailed geometric braided strands instantly.
- Ergonomic Latch Hook Needle: Designed with a comfortable grip to allow for smooth, repetitive interlocking across the head.
- Styling Foam Mousse: Flatters down any tiny surface flyaways at the roots while setting the braid loops firmly.
- Silk Scarf: Used to compress the front hairline connections flatly during the final styling stage for realism.
- Clear Mini Bands: Placed optionally at the very ends of the braids to ensure the tips remain sealed tightly.
Idea 3: The Romantic Bohemian Water Wave Shag
This whimsical, texture-heavy design incorporates ultra-soft water wave curls cut into a modern, multi-layered shag silhouette with face-framing curly bangs. It focuses heavily on soft volume, touchable textures, and a relaxed, bohemian aesthetic that moves beautifully. It is perfect for individuals who want an effortless, artistic style that looks completely natural and full of life.
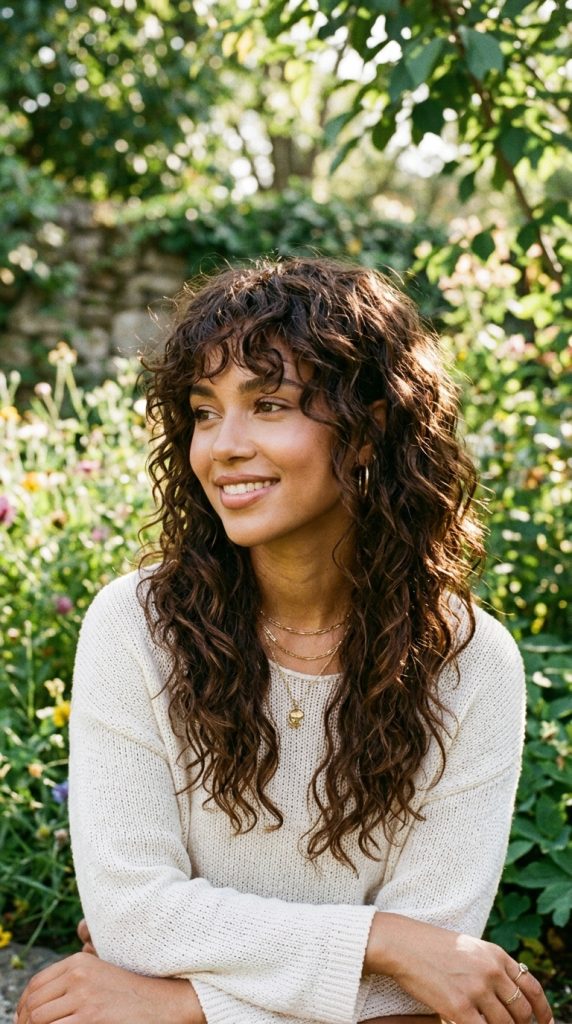
The Softness of Water Wave Shag Lines
This build transforms a traditional crochet install into a contemporary, organic masterpiece by utilizing dry-cutting layer techniques after the loop application. By analyzing how each water wave curl cluster drops naturally around your face, you eliminate the risk of a boxy shape. It provides a highly personalized, modern aesthetic that feels incredibly lightweight and breezy to wear daily.
Step-by-Step How-to Guide
Braiding the Multi Directional Grid
First, create a cornrow base grid that flows backward, leaving a small section loose at the front for bangs.
Interlocking the Water Wave Fiber
Next, loop the soft water wave extension strands evenly across the entire head, maintaining consistent volume levels throughout.
Building the Face Framing Fringe
Then, crochet shorter curl pieces directly onto the front hairline row, letting them drape naturally over your eyebrows.
Snapping the Dry Shag Layers
After that, use professional shears to snip individual curl clumps at an angle, building soft, texturized interior shag layers.
Crunching with Lightweight Mousse
Finally, work a flexible-hold curl mousse through the layered ends using a gentle scrunching motion to encourage vertical bounce.
Materials List
- Water Wave Crochet Hair: Offers an incredibly soft, lightweight, and organic curl pattern that simulates natural texture beautifully.
- Professional Styling Shears: Crucial for executing the precise, angled dry cuts needed to shape the face-framing shag layers.
- Flexible-Hold Mousse: Enhances pattern definition across the layers without making the soft water wave strands feel crunchy.
- Wide-Tooth Comb: Used gently during the initial sectioning process to manage the extension bundles safely before looping.
- Water Spray Bottle: Dampens the curly fringe pieces lightly to reactivate the bounce during the final shaping stage.
Idea 4: The Regal Micro-Loc Goddess Updo
This majestic, high-fashion design combines the rich texture of faux micro-loc extensions with a structural, elegant high bun updo configuration. It features a beautiful harmony between thin, detailed dreadlock lines and an opulent, clean topknot silhouette that commands immediate attention. It is the definitive ultimate statement style for formal gala events, weddings, or artistic showcase celebrations.

The Grandeur of Sculptural Loc Updos
Integrating micro-locs into a crochet format expands your styling versatility into the realm of complex, high-end sculptural hair art. By gathering the detailed, texturized loc strands upward to the crown of your head, you create an elongated, regal silhouette. This setup keeps your neck completely cool while showcasing intricate geometric wrapped structures.
Step-by-Step How-to Guide
Executing a High Circular Base
First, braid your natural hair into a tight cornrow grid that spirals inward toward the absolute crown center.
Looping the Faux Micro Locs
Next, anchor the thin micro-loc crochet strands densely along the spiral tracks, ensuring full coverage of the scalp.
Gathering into a High Ponytail
Then, pull all the installed micro-loc strands upward gently, securing them at the crown with a long hair tie.
Wrapping the Architectural Bun
After that, twist the loc lengths smoothly, coiling them into a wide, structural topknot ring over the elastic base.
Anchoring with Heavy Duty Pins
Finally, push long bobby pins deeply into the wrapped loc loops to lock the regal updo firmly against your head.
Materials List
- Faux Micro-Loc Crochet Hair: Provides the rich, highly texturized, and lightweight dreadlock strands needed to build the updo.
- Long Elastic Hair Tie: Offers the extreme grip necessary to gather the dense loc bundle securely at the crown.
- Heavy-Duty Bobby Pins: Specifically designed to penetrate through thick loc layers to provide ultimate structural security.
- Latch Hook Needle: Used to interlock the thin loc loops seamlessly onto the circular spiral braid tracks.
- Shine Spray: Adds a brilliant, healthy gloss over the intricate wrapped loc textures for a high-end finish.
Idea 5: The Sophisticated Pixie Cut Curly Crop
This daring, chic design brings the ultra-short, texturized crop of a classic pixie cut into a quick, low-maintenance crochet styling format. It features tight, springy micro-curls layered closely around the ears and nape, building into a full, bouncy top crown shape. It looks incredibly modern, artsy, and sophisticated, highlighting your facial features.

The Minimalism of Cropped Textures
The pixie cut curly crop completely redefines crochet hair by proving that short styles can look just as luxurious as long tresses. This design creates an intentional, high-fashion look that showcases your eyes and jawline while requiring zero daily styling effort. It uses tightly coiled, short fiber bundles that hold their shape permanently.
Step-by-Step How-to Guide
Designing a Flat Low Profile Base
First, braid your natural hair into very thin, flat cornrows that lay completely flush against your head shape.
Looping the Tight Micro Coils
Next, interlock short, tightly coiled curl bundles onto the tracks, starting from the lowest point of the neck nape.
Layering the Nape and Sides
Then, place the loops very close together around the ears and neck to create a neat, tapered crop effect.
Building Volumetric Crown Height
After that, space the curl loops slightly further apart at the top crown to encourage vertical height and volume.
Defining Individual Curl Clumps
Finally, apply a drop of argan hair oil to your fingertips, gently separating the micro-coils to add piecey texture.
Materials List
- Short Micro-Coil Crochet Hair: The key component used to create the tight, springy, and short curly pixie layers instantly.
- Argan Hair Oil: Adds a gorgeous, lightweight sheen while helping to separate the tight coils without causing unwanted frizz.
- Latch Hook Needle: Crucial for anchoring the short fiber bundles safely onto the thin, low-profile cornrow base.
- Styling Scissors: Used optionally to trim any stray fibers around the ears to keep the crop line pristine.
- Satin Bonnet: Protects the structural shape of the short micro-coils perfectly during overnight sleeping hours.
Idea 6: The Wet-Look Liquid Kinky-Curly Bob
This high-shine, contemporary design pairs a classic asymmetrical bob haircut length with a glossy, liquid-like kinky-curly texture finish. It is ideal for modern fashion enthusiasts who want a sleek look with zero dry frizz texture along the perimeter. It offers an unparalleled air of sharp, high-fashion edge and crisp architectural styling.

The Aesthetic of Liquid Texture Definition
The wet-look curly style relies heavily on using non-drying styling gels and glosses that lock moisture into the extension strands permanently. This build capitalizes on that highly reflective finish to create a heavy, perfectly clumped curly bob that frames the jawline cleanly. It keeps your crochet fibers looking intensely hydrated, defined, and sharp.
Step-by-Step How-to Guide
Braiding a Clean Bob Foundation
First, create a flat cornrow pattern that tapers downward toward the nape, establishing a clean foundation for a bob.
Interlocking the Kinky Curly Bundles
Next, loop the dense kinky-curly extensions onto the tracks, building volume around the sides and back neck areas.
Cutting the Asymmetric Bob Angle
Then, hold your shears vertically and slide-cut the installed curls to form a sharp, slanting asymmetrical bob length line.
Saturating with High Shine Gel
After that, rake a generous amount of alcohol-free defining gel through the damp curls from the roots down to the tips.
Sealing the Glossy Glaze Cast
Finally, coat the entire surface of the shaped bob with a liquid gloss spray, allowing it to air dry rigid.
Materials List
- Kinky-Curly Crochet Hair: Provides the rich, high-density curly volume necessary to build a full structural bob silhouette.
- Alcohol-Free Defining Gel: Creates the signature wet-look glaze cast that locks in definition permanently without flaking.
- Liquid Gloss Spray: Offers the final, highly reflective coating that keeps the curls looking soaking wet all day.
- Professional Shears: Used to execute the clean, sharp slanting asymmetrical cuts along the perimeter of the bob layout.
- Latch Hook Needle: Essential for anchoring the dense curly bundles smoothly onto the tapered base cornrows.
Idea 7: The Asymmetrical Romantic Curly Side-Ponytail
This soft, elegant concept sweeps a voluminous cloud of premium crochet curls entirely to one side, gathering them into a polished low ponytail. It is tailored for individuals who love soft, dynamic lines that complement tilted evening necklines and modern fashion aesthetics. It feels highly sophisticated, unique, and fresh.

Embracing Asymmetric Evening Lines
Side-swept curly styling creates a gorgeous visual dynamic by leaving one temple area clean while adding a detailed, voluminous focal point to the other. By ensuring the underlying braid base is completely flat and hidden, the resulting side ponytail looks incredibly natural and rich. It looks gorgeous from every camera angle profile.
Step-by-Step How-to Guide
Directing the Braid Foundation
First, execute a cornrow base grid where all the rows curve diagonally toward the back of your left or right ear.
Looping the Premium Curls Density
Next, interlock the bouncy crochet curl bundles densely onto the curved tracks, maximizing volume near the chosen ear side.
Gathering into a Side Base
Then, gather all the installed curls gently behind the ear, securing them loosely with a soft silk scrunchie holder.
Arranging the Face Framing Wisps
After that, let a few loose curl wisps escape around the opposite temple to soften the asymmetrical forehead line.
Diffusing with Shine Mist Coating
Finally, mist the entire side-swept curly cloud with a lightweight shine spray to enhance definition and stop frizz.
Materials List
- Premium Loose Curl Crochet Hair: Delivers a soft, bouncy, and highly elegant curl texture perfect for a voluminous ponytail.
- Silk Scrunchie: Holds the side ponytail loosely and securely without crushing the structure of the premium curls.
- Lightweight Shine Spray: Adds a gorgeous gloss that highlights the shifting texturized lines of the side-swept layout.
- Latch Hook Needle: Used to anchor the curl strands seamlessly along the diagonally directed base cornrow rows.
- Bobby Pins: Placed secretly behind the ear to tuck away any loose root connections neatly under the ponytail.
Idea 8: The Ombre Caramel Sun-Kissed Layered Look
This vibrant, high-contrast design incorporates a stunning caramel ombre color transformation over a beautifully layered long curly crochet shape. It is perfect for trendsetters who want to add an extra layer of visual depth and warm dimension to their protective style. It features bright highlights that make individual curl patterns pop.

Enhancing Layer Depth Through Color
Coloring your crochet style with warm caramel tones changes how light interacts with your tresses, making individual layers look much more distinct. This design combines dark roots with bright, golden tips to create a natural, sun-kissed look with plenty of contemporary edge. It keeps your style looking intensely multi-dimensional.
Step-by-Step How-to Guide
Mapping the Two Tone Grid
First, create a standard, secure front-to-back cornrow base pattern, ensuring the rows lay completely flat across the scalp.
Looping the Dark Root Fiber
Next, interlock the dark-rooted sections of the ombre curls near the scalp area, ensuring full coverage of the tracks.
Extending the Bright Caramel Tips
Then, allow the bright caramel colored ends of the extension strands to cascade down naturally over your shoulders.
Snapping Cascading Interior Layers
After that, use your styling shears to cut short interior layers into the crown area, letting the colors blend.
Sealing with Leave In Serum
Finally, apply a drop of lightweight silicone serum to the layered caramel tips to lock in moisture and prevent frizz.
Materials List
- Ombre Caramel Crochet Hair: The key component used to introduce warm golden tones and high-contrast color depth instantly.
- Styling Shears: Crucial for cutting the cascading interior crown layers to ensure the two-tone colors blend fluidly.
- Silicone Hair Serum: Coats the extension tips smoothly to eliminate friction frizz and maintain optimal pattern bounce.
- Latch Hook Needle: Essential for pulling the dark-rooted ombre strands securely beneath the protective base braids.
- Sectioning Clips: Holds separate color sections away cleanly while you map out the layer adjustments across the crown.
Idea 9: The Ultra-Long Minimalist Twist Columns
This elegant design utilizes long, pre-twisted senegalese extension strands installed tightly to create a clean, minimalist silhouette extending to the waist. It focuses heavily on length, geometric symmetry, and a sleek modern aesthetic that looks incredibly statuesque. It is perfect for individuals who love low-maintenance luxury.

The Statuesque Allure of Long Twists
Long twist columns completely transform the dynamics of crochet hair by adding a dramatic length element that sways elegantly with your every step. This design features thin, uniform rope-like cords that frame your torso beautifully while keeping your natural hair fully insulated from friction. It requires minimal daily upkeep.
Step-by-Step How-to Guide
Braiding a High Density Base
First, execute a neat, high-density cornrow base grid, ensuring the rows run straight back from your front hairline.
Looping the Pre Twisted Cords
Next, use your latch hook needle to anchor the long, pre-twisted senegalese strands tightly onto the first row.
Sliding the Twist Lengths Safely
Then, pass the entire waist-length twist tail straight through its own root loop hole, pulling firmly to secure.
Densifying the Parting Lines
After that, repeat the process across the head, placing the twists closer together along your primary parting zone for realism.
Freezing the Roots with Mousse
Finally, coat the top root connections with a firm-hold styling mousse, compressing flat with a silk scarf wrap.
Materials List
- Pre-Twisted Senegalese Crochet Hair: Provides uniform, sleek, and waist-length rope twist columns that look incredibly statuesque and clean.
- Ergonomic Latch Hook Needle: Allows for smooth, high-speed interlocking of the long twist strands across the dense base tracks.
- Firm-Hold Styling Mousse: Locks the root connections into a flat, polished configuration that completely camouflages the braids.
- Silk Scarf Wrap: Used to compress the front parting lines flatly during the final drying stage for enhanced realism.
- Scalp Care Spray: Applied directly between the twist columns weekly to keep the underlying skin feeling fully refreshed.
Idea 10: The Modern Half-Up Topknot Hybrid
This chic concept installs a full cloud of premium water wave curls, gathering the top crown section into a sleek, tightly wrapped topknot bun while the rest flows down. It features a beautiful harmony between a clean structured updo and rich cascading length. It is the definitive ultimate casual-chic weekend styling project.

Balancing Structure with Flowing Length
Half-up styling creates a gorgeous visual dynamic by keeping the hair pulled flatly away from your face while celebrating massive volume at the back. By ensuring the upper topknot is tightly coiled and the lower curls drape loosely over your shoulders, you gain immense depth. It looks highly fashionable and youthful.
Step-by-Step How-to Guide
Splitting the Base Architecture
First, braid your natural hair into a grid that allows the top half to be gathered separately from the lower rows.
Looping the Water Wave Strands
Next, interlock the bouncy water wave extensions across the entire head, ensuring full coverage of all the underlying tracks.
Sectioning the Crown Cluster
Then, gather the Installed curls from the upper crown area gently, pulling them into a tight high ponytail base.
Coiling the Tail into a Bun
After that, wrap the upper curl lengths smoothly around the ponytail elastic, forming a neat, compact topknot ring.
Securing the Half Down Lengths
Finally, secure the bun with bobby pins, letting the remaining lower curls cascade freely down over your back.
Materials List
- Water Wave Crochet Hair: Delivers a soft, highly voluminous texture that builds a full, rich half-up silhouette beautifully.
- Elastic Hair Tie: Anchors the upper crown section firmly into a high ponytail before the structural bun wrapping.
- Bobby Pins: Placed strategically into the topknot ring to lock the wrapped hair loops securely against the scalp.
- Latch Hook Needle: Essential for anchoring the extension strands smoothly onto the split base cornrow layout.
- Shine Mist Spray: Adds a lightweight, radiant coating that highlights the shifting textures of the flowing lower curls.
Idea 11: The Vintage Glamour Hollywood Soft Waves
This romantic, vintage-inspired design incorporates large, uniform roller-set crochet curls cut into a clean, sophisticated classic Hollywood pageboy silhouette. It features a beautiful harmony between historic traditional glamour and cozy protective warmth. It is the perfect choice for high-profile red-carpet evening gala hosting.
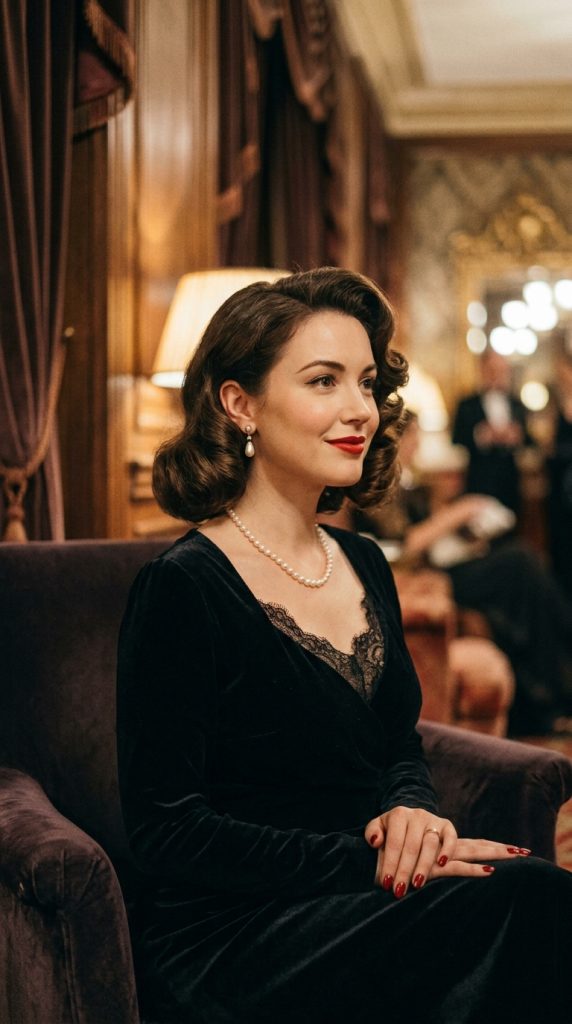
The Radiance of Retro Pageboy Shapes
Classic Hollywood styling relies on using large, soft structural wave patterns paired with clean symmetrical borders to simulate timeless cinematic heritage. This build capitalizes on that elegant aesthetic by using perfectly uniform curl definitions that hold their bounce permanently without flattening. It elevates your look instantly.
Step-by-Step How-to Guide
Braiding a Symmetrical Grid Base
First, create a tight, symmetrical front-to-back cornrow base pattern, keeping the rows perfectly flat and low-profile.
Looping the Large Roller Curls
Next, use your latch hook needle to anchor large, uniform roller-set crochet curls evenly across all the tracks.
Shaping the Pageboy Silhouette
Then, use your professional shears to gently trim the bottom perimeter of the curls into a clean, inward-curving line.
Smoothing with Lightweight Pomade
After that, smooth a tiny dab of lightweight styling pomade over the crown surface to flatten down any tiny flyaways.
Setting with Extra Hold Spray
Finally, mist the entire vintage structured wave canvas with a firm hairspray to lock the cinematic shape permanently.
Materials List
- Roller-Set Crochet Hair: Provides large, uniform, and perfectly structured soft waves reminiscent of classic Hollywood glamour.
- Professional Shears: Used to sculpt the clean, inward-curving pageboy silhouette line perfectly along the bottom hair perimeter.
- Lightweight Styling Pomade: Smooths out surface flyaways on the crown to ensure the style looks flawlessly polished.
- Firm Hairspray: Instantly seals the vintage structured wave shape into place for long-lasting red-carpet durability.
- Latch Hook Needle: Essential for pulling the large roller curl loops securely beneath the protective base braids.
Idea 12: The Crown-Wrapped Halo Goddess Braid Updo
This advanced, regal variation installs long, pre-braided crochet extension strands before wrapping them upward and pinning them flat across the top of your head like a crown. It features an incredibly detailed, woven halo effect circling your scalp that looks deeply intricate, historic, and tailored. It is the definitive ultimate updo for weddings.

The Majesty of Woven Halo Updos
Wrapping your long crochet braids around your head transforms the style into a classic, timeless crown updo that completely clears your neck line. By ensuring each loop is pinned flatly and securely, the resulting halo pattern looks like a custom piece of architectural hair art. It offers a beautiful, unexpected design twist.
Step-by-Step How-to Guide
Looping the Long Braided Strands
First, use your latch hook needle to anchor long, pre-braided crochet extension strands densely across your cornrow base tracks.
Pancaking the Installed Braid Loops
Next, pull gently at the outer edges of the long installed braids to expand their width and volume before wrapping them.
Sweeping the Left Column Upward
Then, take the left braid strand, sweep it vertically upward over the top of your head, and pin it flat across the crown.
Overlapping the Right Braid Strand
After that, take the right braid strand, sweep it upward in the opposite direction, overlapping the first braid to complete the circle.
Locking and Hiding the Tail Tips
Finally, tuck the very ends of both braids underneath the opposite woven layers, locking the entire halo down with bobby pins.
Materials List
- Long Crochet Braid Extensions: Provides the essential, uniform braided strands needed to wrap the grand halo crown updo shape.
- Bobby Pins: Placed strategically every two inches along the halo path to lock the braids flat against the crown.
- Latch Hook Needle: Crucial for anchoring the long braided fiber loops securely onto the base cornrow tracks.
- Smoothing Paste: Provides a high level of grip and shine as you stretch the braids over the top of your head.
- Strong Hairspray: Seals the completed crown updo layout into place, preventing any loose layers from shifting out.