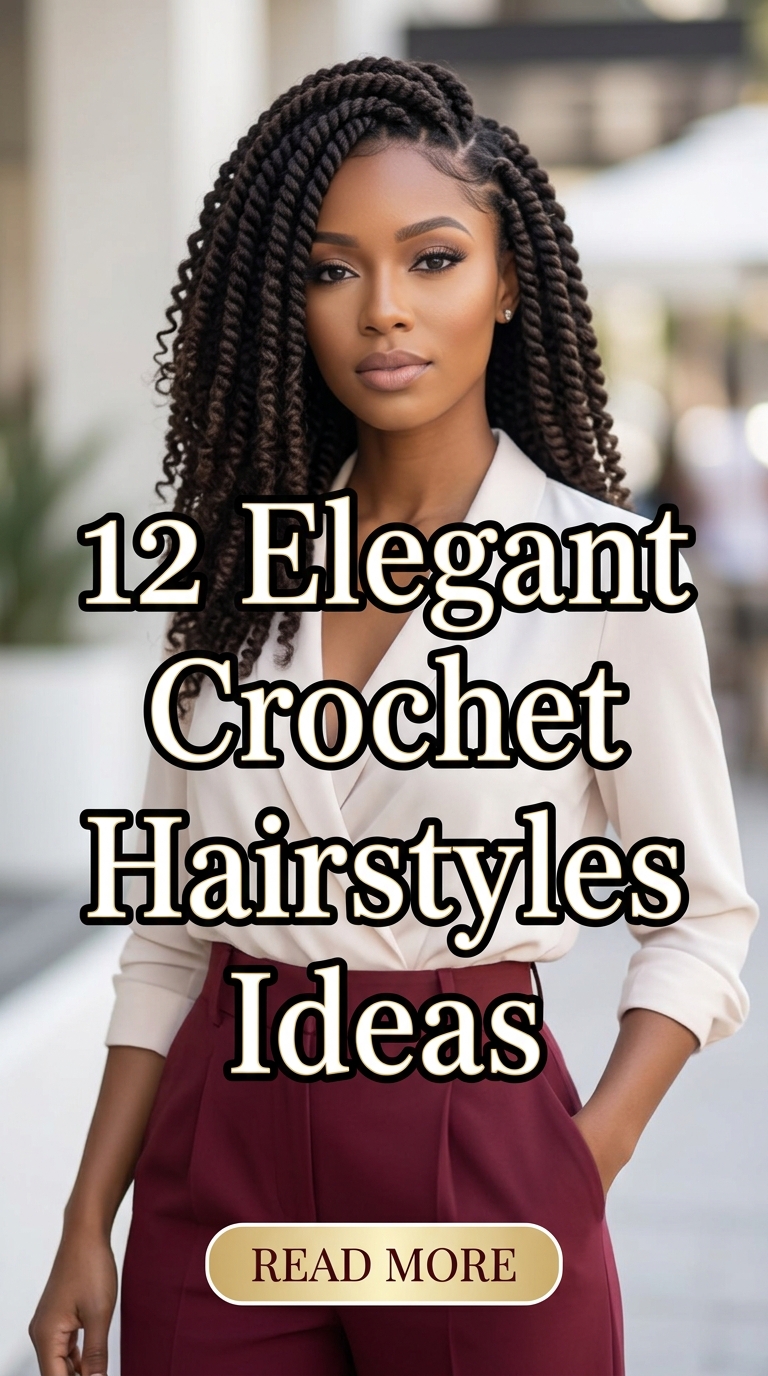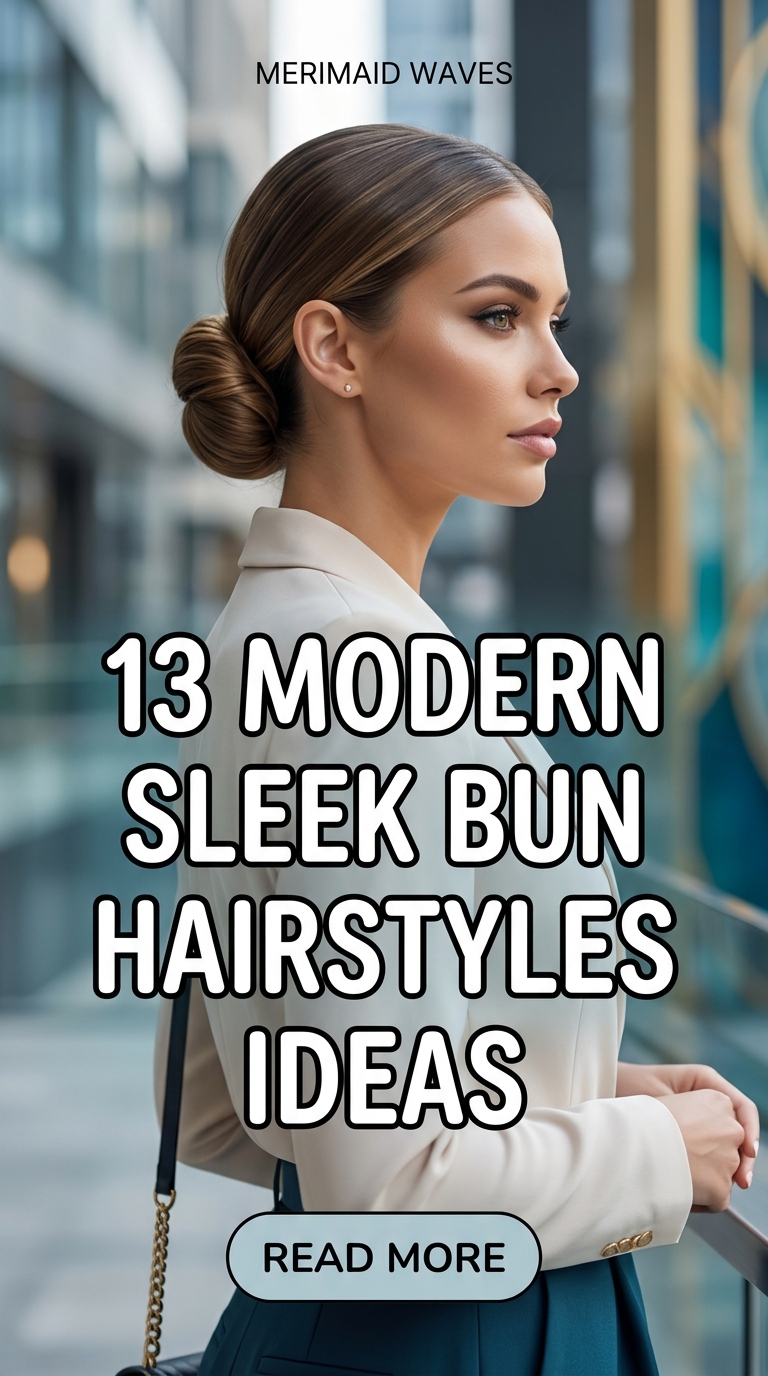
13 Modern Sleek Bun Hairstyles Ideas
The modern sleek bun has officially taken over the beauty world, cementing itself as the ultimate blend of sophistication, elegance, and minimalist style. Whether you are scrolling through curated lifestyle feeds or heading into a high-powered business meeting, this hairstyle offers a polished look that complements any outfit. Many people believe achieving that flawless, mirror-like shine requires professional salon styling. However, with the right techniques, products, and a bit of patience, you can easily master this iconic look right at home. It provides a clean canvas that accentuates your facial structure and highlights your features effortlessly.
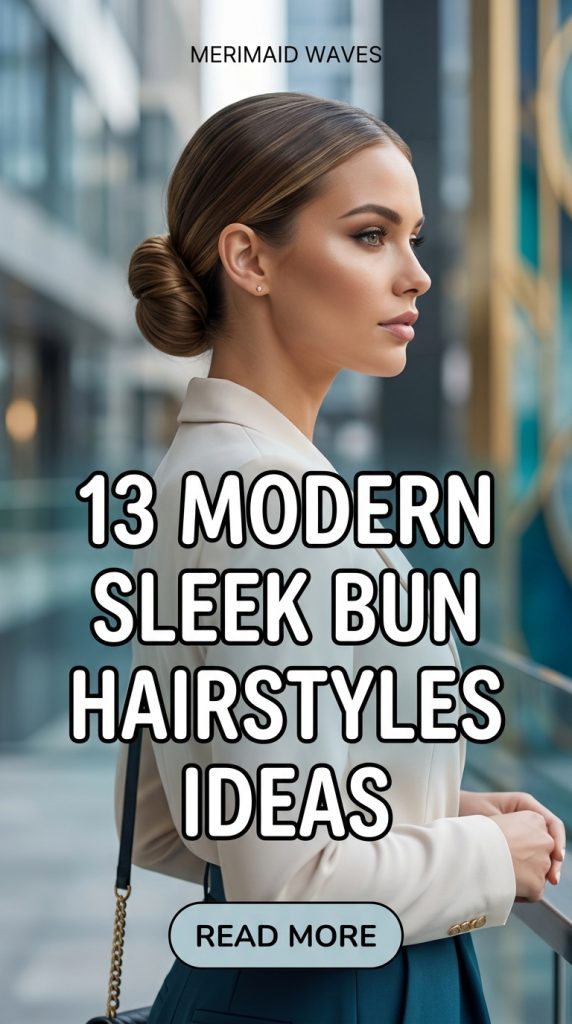
Why Choose a Sleek Bun?
Opting for a sleek bun over a standard messy topknot offers several distinct fashion and styling advantages. First, the clean structure instantly elevates your overall appearance, making even a casual sweat-suit look intentional and incredibly chic. Second, it is a fantastic way to manage second- or third-day hair, utilizing your natural oils to achieve that coveted glossy finish. Lastly, it keeps your hair securely in place throughout the entire day, protecting your ends from friction while keeping you cool. It allows you to showcase statement jewelry, such as bold gold hoops or elegant drop earrings, without any loose strands blocking the view.
Finding the Right Product Formula
The real secret to a perfectly smooth bun lies in the product combination you choose for your specific hair texture. Heavy gels provide maximum hold for thick or coily hair, ensuring that every single strand remains perfectly flat. Lightweight pomades and styling creams work beautifully for fine or medium hair, offering control without making the hair look overly stiff. If you want to achieve a healthy, reflective shine, incorporating a high-quality hair oil or a glossing serum is absolutely essential. Always look for alcohol-free formulas to prevent your hair from drying out or flaking throughout the day.
Planning Your Parting and Placement
Before applying any styling products, you must determine the exact placement and parting line for your bun. Will your look feature a sharp, laser-precise center part that screams modern runway elegance? Or will you opt for a dramatic, deep side part for a more vintage, glamorous aesthetic? The height of the bun also completely changes the vibe of the hairstyle. A high bun positioned at the crown creates an elongated, youthful silhouette that lifts the face. Conversely, a low bun sitting right at the nape of the neck offers an understated, timeless sophistication.
Gathering the Essential Tools
You will need a specific set of tools to achieve that ultra-smooth, bump-free finish before securing your hair. It is highly recommended to invest in a boar bristle smoothing brush, which distributes products evenly and flattens stubborn flyaways. You will also need heavy-duty elastic bands that won’t snap under tension, along with plenty of sturdy U-shaped bobby pins. Keep a fine-tooth rat tail comb handy for creating perfectly straight parting lines across your scalp. Collect a few silk scrunchies to secure the actual bun gently, minimizing breakage when you take the style down.
Mastering the Dynamic Smoothing Technique
Many beginners make the mistake of trying to smooth their hair after they have already tied it into a ponytail. In these cases, you will find that bumps and bubbles form near the elastic band, ruining the sleek effect. Start by applying your styling cream through the lengths of your hair while it is still damp or dry. Work in sections, brushing from the roots toward the destination of your ponytail with your boar bristle brush. Hold the hair tightly in one hand while using the brush with the other to smooth out any remaining imperfections.
Idea 1: The High-Gloss Center-Parted Low Bun
This classic runway-inspired look features a razor-sharp middle part that frames the face symmetrically before gathering into a neat low knot. It utilizes high-shine pomades to achieve a wet-look finish that reflects light beautifully from every angle. This setup protects your hair completely while exuding an air of effortless high-fashion authority. It serves as the perfect styling choice for upscale evening events or professional corporate settings.
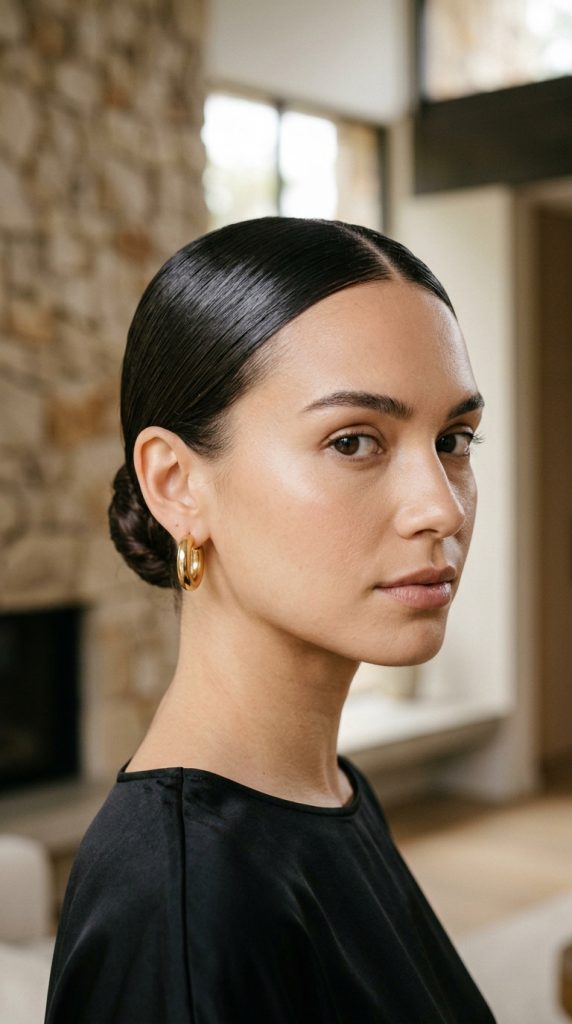
Understanding the High-Gloss Low Bun Concept
The High-Gloss Low Bun focuses on achieving maximum smoothness and symmetry without adding unnecessary volume to the scalp. Instead of gathering the hair loosely, you pull it back tightly against the contours of your head. This gives you a striking, polished profile while ensuring that short layers are pinned down securely. It uses strong-hold products that keep your hair completely locked in place from morning until night.
Step-by-Step How-to Guide
Creating the Perfect Center Part
First, use the sharp tip of a rat tail comb to draw a perfectly straight line down the center of your scalp. Extend this part from your forehead down to the exact crown of your head for symmetry.
Applying the Smoothing Product
Next, distribution a generous amount of high-shine gel or styling cream from your roots to the mid-lengths of your hair. Ensure the product is applied evenly across the top and sides.
Brushing into a Tight Ponytail
Then, use a boar bristle brush to smooth the hair downward toward the nape of your neck, removing all bumps. Secure this smooth base tightly with a strong elastic band.
Twisting into the Sleek Knot
After that, twist the length of your ponytail tightly until it naturally begins to coil around the base of the elastic. Wrap it smoothly to create a compact, circular bun structure.
Securing and Setting the Style
Finally, insert several U-shaped bobby pins around the perimeter of the bun to lock it firmly against your head. Spray a generous mist of strong-hold hairspray to finish.
Materials List
- High-Shine Pomade: Used to create the mirror-like, glossy finish and flatten down stubborn baby hairs.
- Rat Tail Comb: Essential for drawing a laser-precise, perfectly symmetrical middle parting line.
- Boar Bristle Brush: Smooths out bumps and distributes product evenly across the scalp surface.
- Strong Elastic Band: Holds the heavy ponytail securely at the nape of the neck.
- U-Shaped Bobby Pins: Secures the twisted bun structure tightly without slipping out out place.
Idea 2: The Ultra-Elevated Topknot Sleek Bun
This statement design pulls every single strand of hair upward to the absolute crown of the head for a dramatic look. It creates an instant lifting effect for your facial features, offering a bold, energetic, and commanding aesthetic. It looks incredibly striking when paired with modern streetwear or elegant backless evening gowns.
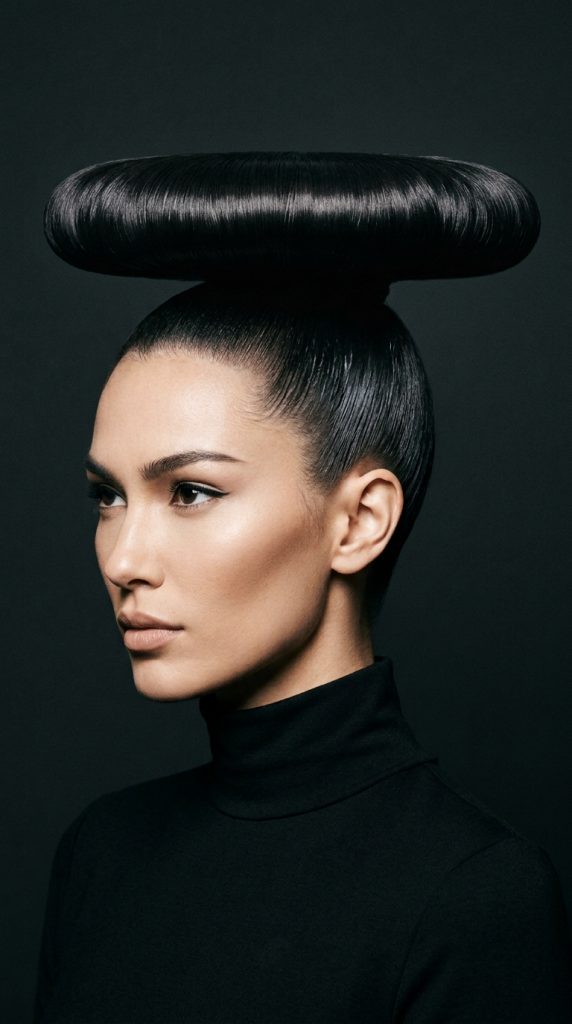
The Dynamics of High-Topknot Designs
This concept relies on creating a perfectly vertical silhouette that adds height and elongates your neck beautifully. By positioning the bun at the highest point of your head, you create a dramatic focal point. The challenge lies in smoothing the hair upward from the absolute nape of the neck without creating saggy pockets.
Step-by-Step How-to Guide
Flipping and Brushing Upward
First, flip your head upside down to let gravity assist you in gathering your hair toward the crown. Use your smoothing brush to guide the hair upward seamlessly.
Securing the High Base
Next, stand upright and check your profile in a mirror to ensure the ponytail sits at the correct height. Secure it tightly with a non-slip elastic band.
Coating the Lengths for Shine
Then, apply a lightweight glossing serum throughout the entire length of the exposed ponytail to ensure maximum sleekness. Brush through the ponytail one more time to distribute.
Wrapping the Architectural Coils
After that, wrap the hair flatly around the elastic band, creating a wide, disc-like shape rather than a bulbous sphere. Keep the tension firm as you wrap.
Tucking and Pinning the Ends
Finally, tuck the very ends of your hair underneath the base of the bun and pin them securely. Use a toothbrush coated in gel to smooth the back.
Materials List
- Glossing Serum: Adds an intense, healthy sheen to the hair lengths before wrapping them up.
- Non-Slip Elastic Band: Provides the extreme grip necessary to keep a high ponytail from slipping down.
- Boar Bristle Brush: Essential for smoothing the hair upward from the neck to the crown.
- Bobby Pins: Used to anchor the wide, flat bun structure firmly to the top scalp.
- Styling Gel: Applied with a toothbrush to clean up tiny hairs at the nape.
Idea 3: The Deep Side-Parted Origami Knot
This artistic design incorporates a sharp, dramatic side part paired with a structural, geometric folded bun at the back. It is perfect for fashion-forward individuals who view hairstyling as a form of modern sculptural art. It offers a beautiful balance of classic sophistication and contemporary asymmetry.
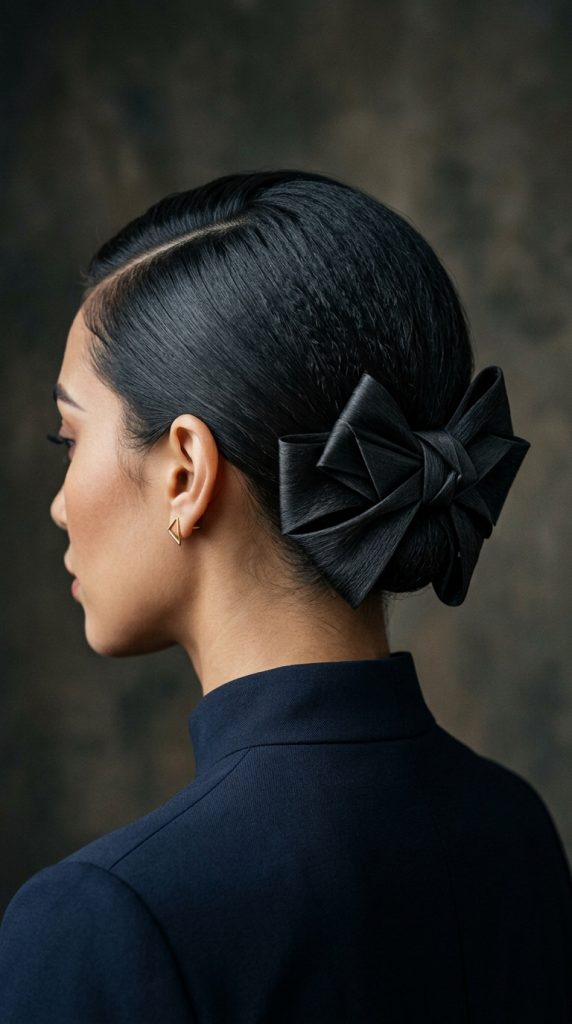
The Structural Side-Parted Approach
This build transforms a traditional low bun into a complex-looking geometric masterpiece by altering how you fold the hair. It uses matte-finish styling clays to create a clean, architectural hold without looking greasy or wet. It provides an excellent option for showcase events, gallery openings, or creative workplace environments.
Step-by-Step How-to Guide
Sectioning the Deep Part
First, align your rat tail comb with the arch of your eyebrow to create a deep, dramatic side part line. Comb the hair cleanly across your forehead.
Smoothing the Asymmetrical Sides
Next, apply a firm-hold styling clay to both sides of the part, brushing the hair flatly around your ears. Gather the hair into a low ponytail off-center.
Creating the Origami Fold
Then, instead of twisting the hair, loop the ponytail halfway through a second elastic to create a flat, neat loop. Let the remaining hair ends hang down.
Wrapping the Tail Neatly
After that, take the loose tail of hair and wrap it precisely over the middle of the loop to hide the elastic band. This creates a structural knot appearance.
Setting the Architectural Edges
Finally, pin the sides of the loop flat against your head so it resembles a tailored bow or origami fold. Spray with an ultra-matte finishing spray.
Materials List
- Firm-Hold Styling Clay: Provides a strong, matte grip that holds structural geometric folds perfectly.
- Rat Tail Comb: Crucial for measuring and executing the sharp, deep side parting line.
- Elastic Bands: Used to create the initial loop foundation for the geometric fold.
- Bobby Pins: Placed strategically to pin the loop edges flat against the head.
- Matte Finishing Spray: Seals the artistic style in place without adding artificial-looking shine.
Idea 4: The Clean Braided Sleek Bun
This elegant and intricate design combines the neatness of a slicked-back base with the beautiful texture of a tightly braided wrap. It focuses heavily on durability, making it an incredible choice for long days or active events. It looks beautiful, sophisticated, and deeply intentional from every angle.
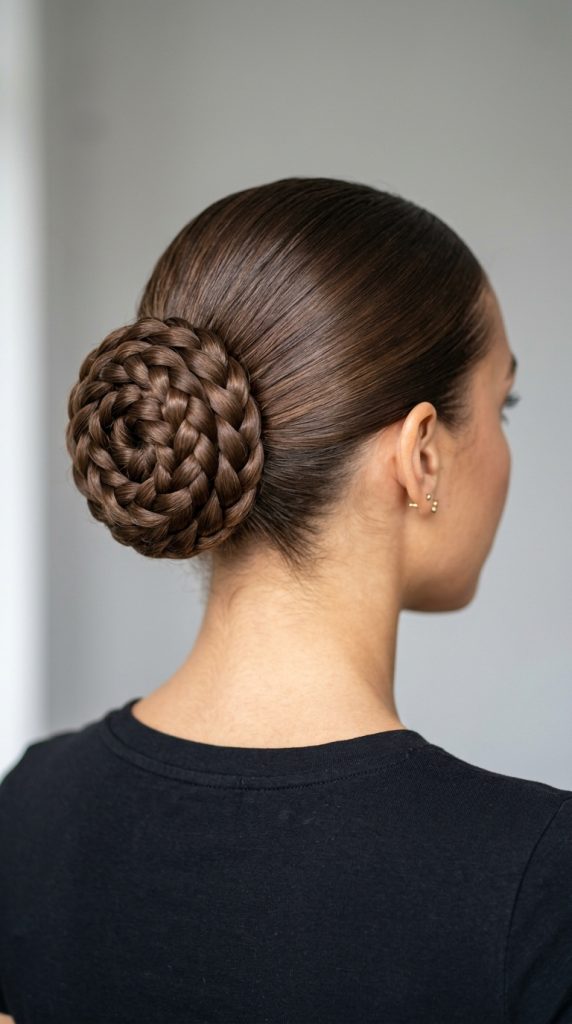
The Durability of Braided Accents
Braiding the ponytail before coiling it into a bun adds a layered, multi-dimensional element that catches the eye immediately. This style ensures that no loose ends can escape from the bun, providing ultimate longevity throughout strenuous activities. It pairs beautifully with both minimalist athletics and ornate formal dresses.
Step-by-Step How-to Guide
Slicking Back the Foundation
First, apply your favorite smoothing cream generously throughout your hair, brushing it back completely into a mid-height ponytail with zero part lines.
Braiding the Ponytail Length
Next, divide the secured ponytail into three perfectly equal sections. Braid the hair tightly all the way down to the very ends of the strands.
Securing the Braid End
Then, use a small, clear mini elastic band to tie off the bottom of the braid. This prevents the intricate woven pattern from unraveling later.
Coiling the Woven Texture
After that, wrap the tight braid flatly around the main ponytail base, allowing the woven texture to face outward visibly. Keep the placement very uniform.
Anchoring the Finished Braid
Finally, tuck the clear elastic tip under the bun and secure the entire structure with heavy-duty bobby pins. Mist with shine spray for radiance.
Materials List
- Smoothing Cream: Eliminates all surface frizz to create a flawless, uniform base foundation.
- Clear Mini Elastics: Used to secure the end of the braid discretely without adding bulk.
- Heavy-Duty Bobby Pins: Designed to hold the weight of a thick, braided bun easily.
- Shine Spray: Adds a lightweight, reflective coating over the intricate braided texture details.
- Boar Bristle Brush: Smooths the initial hair back into the perfect mid-height position.
Idea 5: The Futuristic Spiky Sleek Bun
This edgy, Y2K-inspired design leaves the sharp ends of your hair deliberately sticking out of the bun to create fan-like spikes. It is perfect for trendsetters who want to inject a rebellious, retro-futuristic energy into their sleek hairstyles. It features high contrast between polished roots and sharp texturized ends.
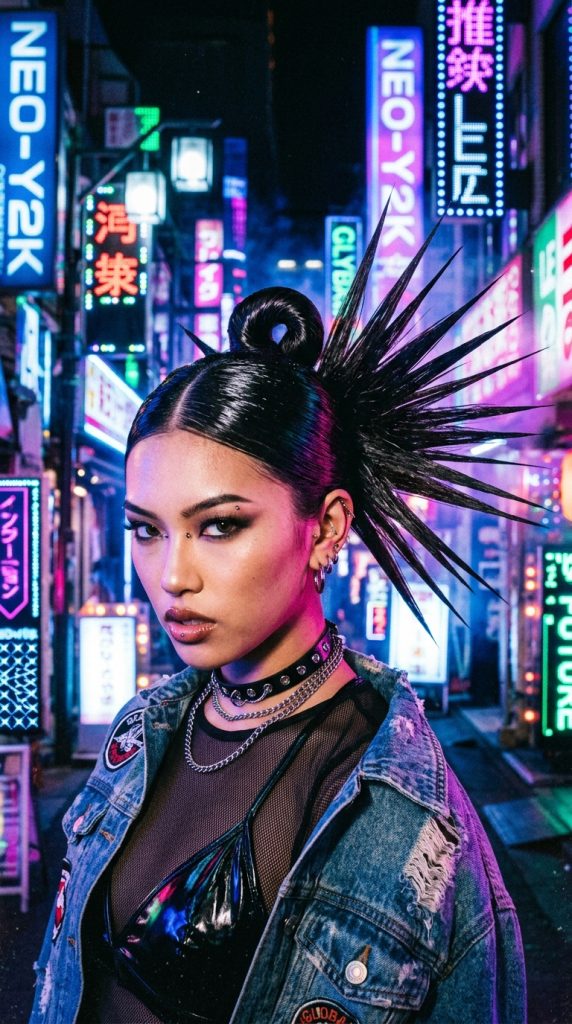
Merging Polish with Punk Energy
The spiky bun looks incredible because it defies traditional hair expectations by celebrating raw, sharp geometric lines at the finish. This design makes it look like you have stepped right out of a futuristic styling studio. It utilizes ultra-strong freeze gels to make the hair ends stiff.
Step-by-Step How-to Guide
Prepping for Ultimate Control
First, saturate your roots with a maximum-hold styling gel, brushing the hair back smoothly into a high or mid-height position on your head.
Creating the Twist Loop
Next, wrap your hair elastic around the base, but on the final pass, pull the hair only halfway through to create a secure loop.
Directing the Sharp Spikes
Then, point the remaining loose ends of your hair upward or outward to one side, forming a clean, fan-like shape next to the loop.
Flat Ironing the Ends
After that, use a mini flat iron on the exposed hair ends to make them completely straight, crisp, and dramatically sharp looking.
Freezing the Spikes Rigid
Finally, coat the exposed fan of hair with an extra-strength freeze gel or hairspray. Hold them in place for seconds until they dry rigid.
Materials List
- Maximum-Hold Styling Gel: Keeps the root foundation flat while giving the spiky ends structural stiffness.
- Mini Flat Iron: Crucial for making the exposed hair ends perfectly straight and needle-sharp.
- Elastic Bands: Used to form the central loop while leaving the ends exposed.
- Freeze Hairspray: Instantly locks the spiky fan shape into place so it won’t droop.
- Comb: Used to spread the spiky ends evenly into an aesthetic fan configuration.
Idea 6: The Wet-Look Liquid Low Loop
This minimalist, editorial-style bun relies on an abundance of hair oil to create a drenching, liquid-like appearance that looks freshly stepped out of water. It is ideal for contemporary fashion enthusiasts who want a sleek, modern look with zero dry texture. It offers unparalleled sleekness and edge.

The Aesthetic of the Liquid Finish
The wet-look style relies heavily on using non-drying oils and glosses that simulate moisture without actually leaving your hair wet and cold. This build capitalizes on that glossy sheen to create a highly reflective, low-profile loop at the neck. It keeps your hair completely flat and saturated.
Step-by-Step How-to Guide
Saturating with Hair Oil
First, apply a generous mix of leave-in conditioner and high-grade hair oil from your roots entirely to your tips until saturated.
Creating a Flat Parting
Next, use a comb to create a clean center part, brushing the saturated hair flatly down behind your ears without any volume.
Forming the Low Loop
Then, gather the oiled hair at the absolute nape of your neck and secure it into a simple, neat loop using an elastic.
Wrapping the Tail Securely
After that, take the remaining tail of the loop and wrap it smoothly around the elastic band to keep the mechanics hidden completely.
Sealing the Wet Gloss
Finally, coat the entire surface of the style with a generous layer of high-shine liquid gloss spray. This maintains the wet illusion all day.
Materials List
- Hair Oil & Leave-in Conditioner: Blended together to saturate the hair strands and create a lasting wet look.
- Rat Tail Comb: Used to layout the flat, precise parting line before brushing back.
- Elastic Bands: Anchors the low loop safely at the lowest point of the neck.
- Liquid Gloss Spray: Provides the final, highly reflective coating that locks in the moisture aesthetic.
- Bobby Pins: Tucks away any remaining loose ends smoothly under the liquid loop.
Idea 7: The Double-Knot Space Bun Duo
This playful yet sophisticated design splits your hair down the center to create two perfectly symmetrical, ultra-sleek buns on top. It brings a modern, clean twist to a classic festival hairstyle, making it look incredibly polished and chic. It is perfect for adding whimsical symmetry.
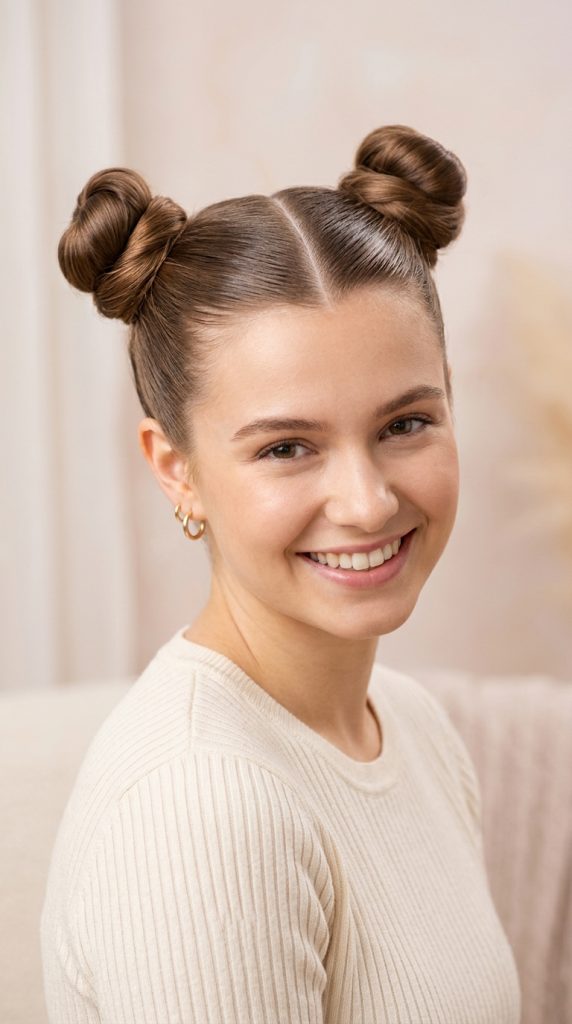
The Balance of Symmetry and Playfulness
Space buns look incredible when executed with absolute precision, transforming a casual look into a sharp, geometric style statement. This design features flawless parting lines and compact, neatly coiled knots that sit balanced on either side of the head. It keeps the hair secure while looking highly energetic.
Step-by-Step How-to Guide
Splitting the Hair Evenly
First, use a rat tail comb to draw a perfect parting line from the front hairline all the way down to the back neck.
Securing Twin High Pigtails
Next, brush the right section upward into a high pigtail and secure it tightly. Repeat this exact process on the left side symmetrically.
Smoothing with Styling Paste
Then, apply a firm styling paste around the base of both pigtails to eliminate any stray hairs or bumps on the sides.
Coiling the Twin Knots
After that, twist the right pigtail tightly and wrap it into a neat, compact bun. Repeat the same tight wrapping pattern on the left.
Balancing and Pinning Flat
Finally, check the front mirror to ensure both buns are sitting at the exact same height and angle. Secure both with pins.
Materials List
- Rat Tail Comb: Essential for creating the continuous front-to-back center parting line smoothly.
- Firm Styling Paste: Offers excellent control for smoothing the sides up into the twin bases.
- Elastic Bands: Used to create the twin high pigtail foundations before coiling them up.
- Bobby Pins: Anchors both space buns tightly to the scalp for a compact silhouette.
- Hairspray: Lock in the dual symmetry and prevents any sagging throughout the day.
Idea 8: The Asymmetric Side-Swept Sleek Bun
This romantic yet modern concept sweeps the hair smoothly to one side, gathering it into a polished bun nestled elegantly behind one ear. It is tailored for individuals who love soft, asymmetrical lines that complement tilted necklines and off-the-shoulder outfits. It feels sophisticated and unique.
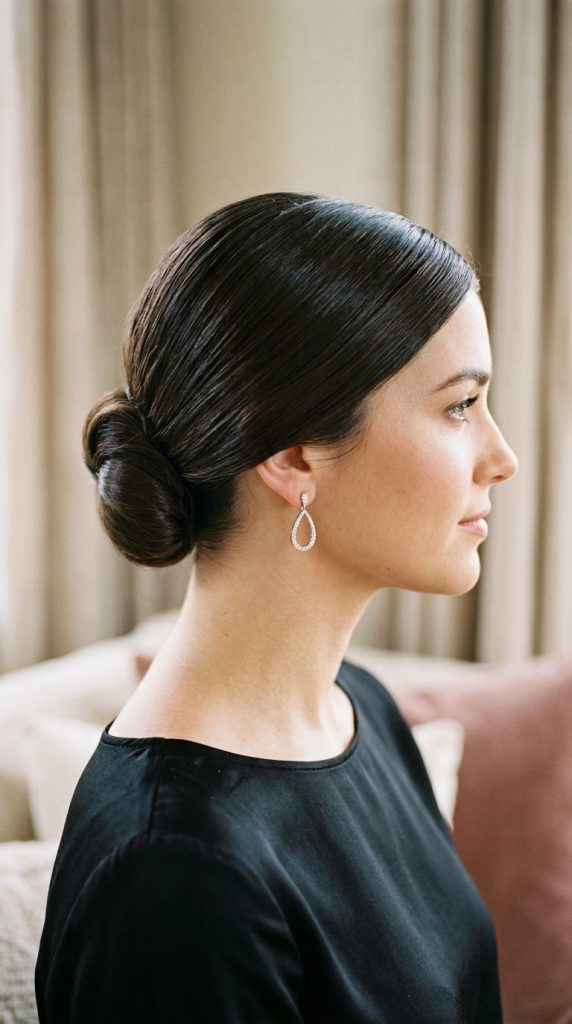
Embracing Asymmetric Modern Elegance
Side-swept styling creates a beautiful dynamic by leaving one side of the neck completely exposed while adding a detailed focal point to the other. By ensuring the root foundation is completely flat and sleek, you maintain a high-fashion, intentional finish. It looks gorgeous from every camera profile.
Step-by-Step How-to Guide
Directing the Hair Flow
First, apply a lightweight smoothing gel throughout your hair, brushing all strands diagonally toward the back of your left or right ear.
Securing the Side Ponytail
Next, use a strong elastic band to tie the hair into a neat ponytail positioned directly nestled behind your chosen ear side.
Twisting the Elegant Coil
Then, twist the ponytail length smoothly, coiling it into a classic donut-shaped bun right over the side elastic band base.
Smoothing the Opposite Side
After that, use your boar bristle brush to ensure the opposite side of your head is pulled completely taut, sleek, and flat.
Securing with Discret Pins
Finally, insert bobby pins deeply into the bun, hiding them completely within the hair coils. Mist with setting spray for durability.
Materials List
- Lightweight Smoothing Gel: Allows for easy diagonal brushing without drying out too quickly during styling.
- Boar Bristle Brush: Crucial for pulling the opposite side of the head completely taut and smooth.
- Strong Elastic Band: Holds the asymmetrical side ponytail firmly behind the ear without slipping.
- Bobby Pins: Inserted secretly into the hair coils to maintain the clean visual illusion.
- Setting Spray: Secures the side-swept dynamics against wind or movement throughout the evening.
Idea 9: The Twisted Rope Detail Sleek Bun
This intricate design involves twisting the hair into a two-strand rope braid before coiling it into a low, sophisticated bun structure. It features a beautiful, spiral texture that elevates the bun from a simple knot into a detailed luxury hairstyle. It tells a story of craftsmanship.

Texturing Through Rope Braiding
Rope twisting relies on crossing two separate strands of hair over each other tightly to create a clean, rope-like cord effect. When this glossy cord is wrapped into a bun, it creates a gorgeous spiral pattern that looks complex yet remains simple to execute. It offers incredible visual depth.
Step-by-Step How-to Guide
Prepping a Flawless Base
First, slick your hair back entirely into a low ponytail at the nape of your neck, using a strong pomade for smoothness.
Dividing into Twin Strands
Next, split the exposed ponytail into two completely equal sections. Apply a drop of hair oil to each section for shine.
Executing the Rope Twist
Then, twist both individual sections clockwise, then cross them over each other counter-clockwise tightly all the way down to the ends.
Tying the Rope Cord
After that, secure the bottom of the completed rope twist with a small clear elastic band to keep the spiral structure locked.
Wrapping the Spiral Wheel
Finally, wrap the glossy rope cord flatly around the main ponytail base. Anchor the spiral wheel firmly with sturdy U-shaped pins.
Materials List
- Strong Pomade: Creates the ultra-smooth, flyaway-free base foundation before the rope work begins.
- Hair Oil: Coated onto the twin strands to give the rope twist a liquid, high-shine effect.
- Clear Mini Elastic: Ties off the bottom of the rope twist discretely without breaking the lines.
- U-Shaped Pins: Perfect for securing the thick, rope-braided coils flatly against the head structure.
- Hairspray: Offers the final sealing layer to prevent the rope twists from expanding or fraying.
Idea 10: The Modern Wrapped-Ribbon Sleek Bun
This chic project incorporates a minimalist satin or leather ribbon wrapped directly into the sleek bun structure for a high-end designer finish. It features a beautiful contrast between natural glossy hair and luxurious fabric textures. It is the definitive ultimate fashion bun project.
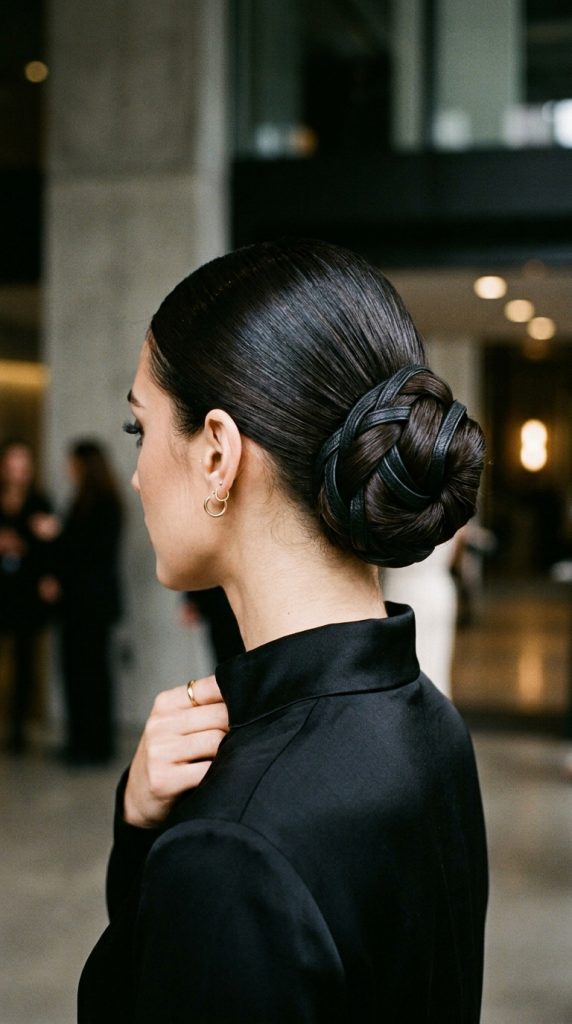
Enhancing Hair with Minimalist Fabrics
Integrating a sleek ribbon into your bun expands the hairstyle into the realm of custom accessory coordination. By choosing a ribbon that matches your outfit’s color palette or texture, you create an incredibly cohesive, curated style aesthetic. It elevates the entire look instantly.
Step-by-Step How-to Guide
Slicking a Mid Height Base
First, pull your hair back smoothly into a mid-height ponytail, using a high-hold smoothing cream to ensure zero surface bumps exist.
Knotting the Ribbon Base
Next, tie a long, thin satin or leather ribbon directly around the elastic band of your ponytail, leaving two equal fabric tails.
Intertwining Hair and Fabric
Then, blend the fabric tails into your hair strands as you twist the ponytail down, ensuring the ribbon remains visible externally.
Coiling the Fabric Bun
After that, wrap the combined hair and ribbon strand tightly around the base, letting the ribbon peek out between the hair layers.
Tying a Minimalist Finish
Finally, secure the bun with bobby pins, then take the remaining ribbon ends and tie them into a neat, tiny knot underneath.
Materials List
- High-Hold Smoothing Cream: Provides the clean, smooth canvas necessary to showcase a luxury fabric accessory.
- Thin Satin or Leather Ribbon: The key accessory used to weave high-end texture directly into the bun coils.
- Elastic Bands: Secures the initial mid-height ponytail foundation firmly before the ribbon application.
- Bobby Pins: Holds the combined hair and fabric structure securely against the scalp without moving.
- Shine Spray: Adds a gorgeous gloss that matches the reflective quality of a satin ribbon beautifully.
Completing the Collection: The Final Modern Sleek Buns
Executing the ultimate sleek bun collection requires mastering a few more specialized styling variations. These final three ideas focus on advanced geometric shapes, hidden extensions, and unique loop methods. They ensure you have a comprehensive playbook for any fashion occasion. It is always important to remember that preparation is key to stopping product flaking. By keeping your hair well-hydrated before applying gels, you achieve a flawless finish every time. Let us dive straight into the remaining three sleek bun configurations to complete your masterlist.
Idea 11: The Architectural Loop Bun
This hyper-modern variation leaves the loop of your ponytail fully exposed, creating a bold, drop-shaped silhouette at the back of the head. It is heavily favored by minimalist designers who appreciate clean lines, negative space, and industrial fashion aesthetics. It offers an incredible alternative to traditional spherical buns.
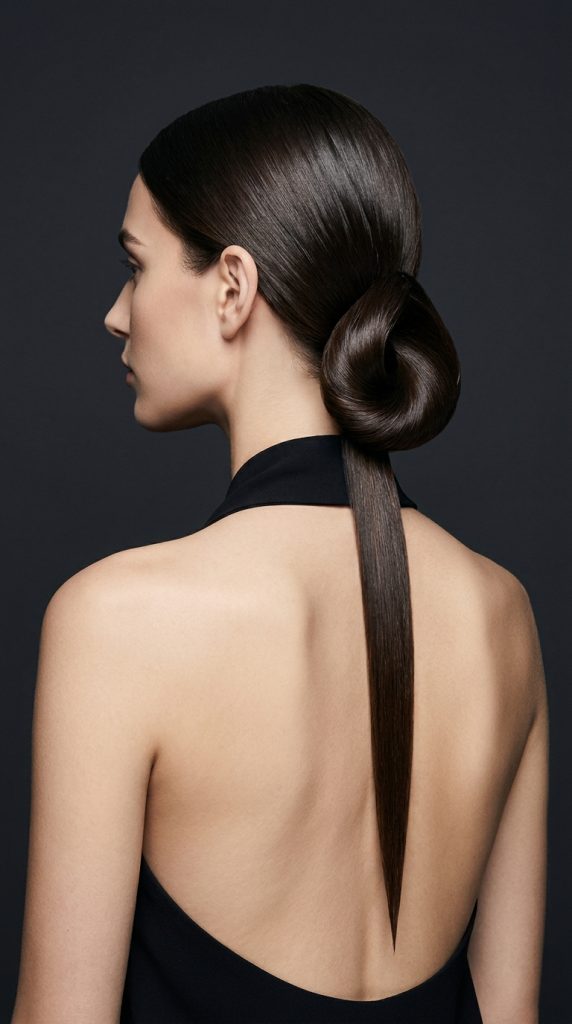
The Beauty of Negative Space Shapes
This concept relies on creating a perfectly smooth, teardrop-shaped loop that holds its hollow form without collapsing inward. Instead of hiding the length of your hair, you celebrate its volume by shaping it into a clean geometric hollow structure. It works exceptionally well on medium-to-thick straight hair types.
Step-by-Step How-to Guide
Slicking to a Low Base
First, apply a medium-hold styling gel from your roots to your ends, brushing the hair back flatly into a low ponytail position.
Forming the Hollow Loop
Next, pass your hair through an elastic band, but stop halfway on the final wrap to create a neat, hollow loop shape.
Directing the Excess Tail
Then, let the remaining loose ends of your hair point directly downward toward the spine, keeping them completely flat and straight.
Wrapping the Elastic Base
After that, take a small section of hair from the tail and wrap it cleanly around the elastic to hide the band.
Straightening the Drop Tail
Finally, use a flat iron on the exposed tail hair to ensure it hangs down perfectly straight, contrasting the curved loop above.
Materials List
- Medium-Hold Styling Gel: Provides the perfect amount of surface control without making the hollow loop structure overly stiff.
- Elastic Bands: Crucial for clamping the hair firmly to establish the exact size of the hollow loop.
- Flat Iron: Used to make the exposed downward tail completely straight, sleek, and free of any waves.
- Bobby Pins: Tucks the tiny wrapping strand away safely underneath the main elastic band connection point.
- Glossing Mist: Sprayed over the entire teardrop structure to enhance light reflection and depth.
Idea 12: The Wrapped Extensions Mega Bun
This high-glamour design utilizes matching synthetic or human hair extensions wrapped around a natural ponytail to create a massive, luxurious bun. It is perfect for individuals with fine or short hair who want to achieve red-carpet volume without waiting years for growth. It looks incredibly rich, dense, and striking.
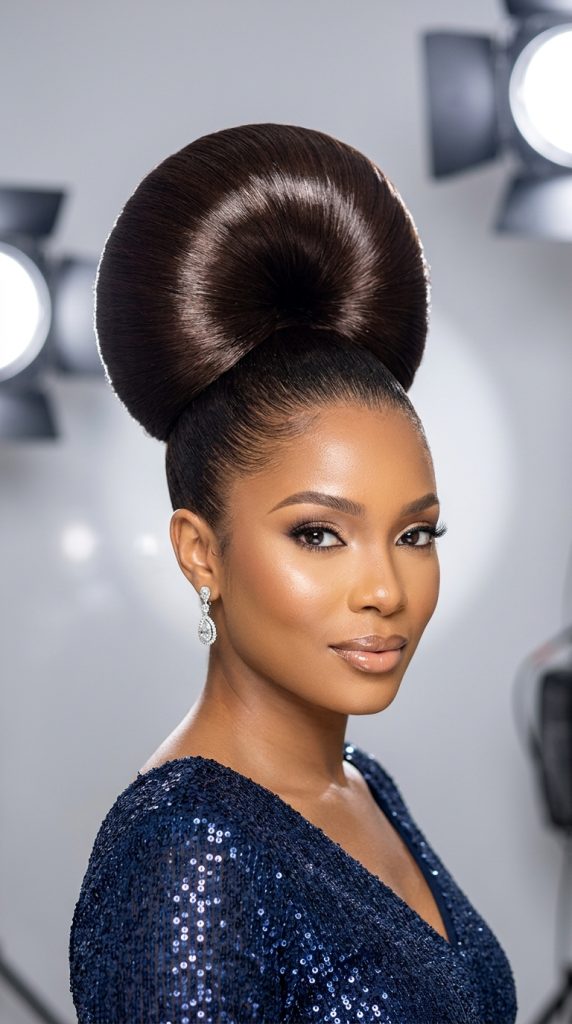
Engineering Maximum Treetop Volume
Achieving a large sleek bun when you have fine hair requires utilizing external hair pieces seamlessly integrated into your natural base. This method allows you to create a secure, lightweight foundation that supports a much larger, more imposing structural knot footprint. It gives the perfect illusion of ultimate thickness.
Step-by-Step How-to Guide
Preparing the Natural Base
First, brush your natural hair back tightly into a secure, small mid-height ponytail using a strong-hold pomade for smoothness.
Attaching the Ponytail Extension
Next, clip or wrap your matching hair extension piece directly onto the base of your natural ponytail, securing the built-in combs.
Blending the Hair Textures
Then, apply a lightweight styling cream across the combined hair lengths, brushing them together thoroughly until they function as one.
Coiling the Massive Ring
After that, wrap the thick, extended hair smoothly around the base, creating a large, uniform, donut-shaped luxury bun structure.
Locking with Long Pins
Finally, push long, heavy-duty bobby pins straight through the extension piece into your natural base hair to lock it firmly.
Materials List
- Ponytail Extension Piece: The essential component used to add massive volume, length, and density to the bun style.
- Strong-Hold Pomade: Keeps your natural hair completely flat, smooth, and securely anchored under the heavy extension piece.
- Long Bobby Pins: Specifically designed to penetrate through thick layers of hair to provide ultimate structural security.
- Styling Cream: Blends the texture of your natural hair seamlessly with the synthetic or human hair piece.
- Boar Bristle Brush: Smooths out the massive combined lengths before the final structural wrapping process begins.
Idea 13: The Criss-Cross Folded Sleek Bun
This intricate design separates the hair into two sections, crossing them over each other diagonally before folding them into a flat low bun. It features a stunning, woven visual effect across the back of the head that looks incredibly intricate and tailored. It is the perfect finishing touch for high-end formal wear.
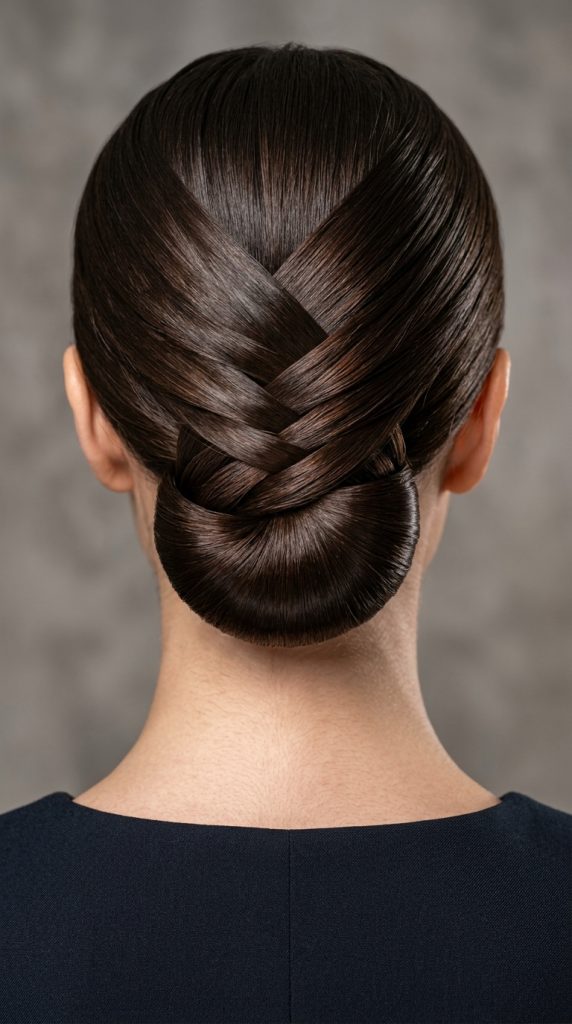
The Mechanics of Woven Sectioning
Splitting the hair allows you to create unique overlapping patterns that add sophisticated detail to the back of your head. By ensuring each section is individually slicked and flattened, the resulting criss-cross pattern looks like a custom piece of tailored fabric. It offers a beautiful, unexpected design twist.
Step-by-Step How-to Guide
Sectioning the Crown Area
First, divide your hair horizontally into a top half and a bottom half using your precise rat tail comb tool.
Securing the Bottom Base
Next, take the bottom half of your hair and tie it into a tight, low ponytail right at the neck nape.
Crossing the Left Strand
Then, take the top left section of hair, smooth it diagonally downward across the back, and wrap it around the low ponytail.
Overlapping the Right Strand
After that, take the top right section, smooth it diagonally downward in the opposite direction, creating a clean X shape.
Folding the Final Knot
Finally, gather all remaining loose hair lengths together and fold them into a neat, flat disk bun, pinning it securely down.
Materials List
- Rat Tail Comb: Used to separate the upper and lower styling sections with clean, straight horizontal lines.
- Smoothing Paste: Provides a high level of grip and shine as you stretch the sections diagonally across the head.
- Elastic Bands: Anchors the low base ponytail which serves as the structural foundation for the crossed strands.
- Bobby Pins: Placed discreetly underneath the X shape to keep the diagonal tension perfectly tight all day long.
- Strong Hairspray: Locks the entire woven geometric layout into place, preventing any loose strands from shifting out.