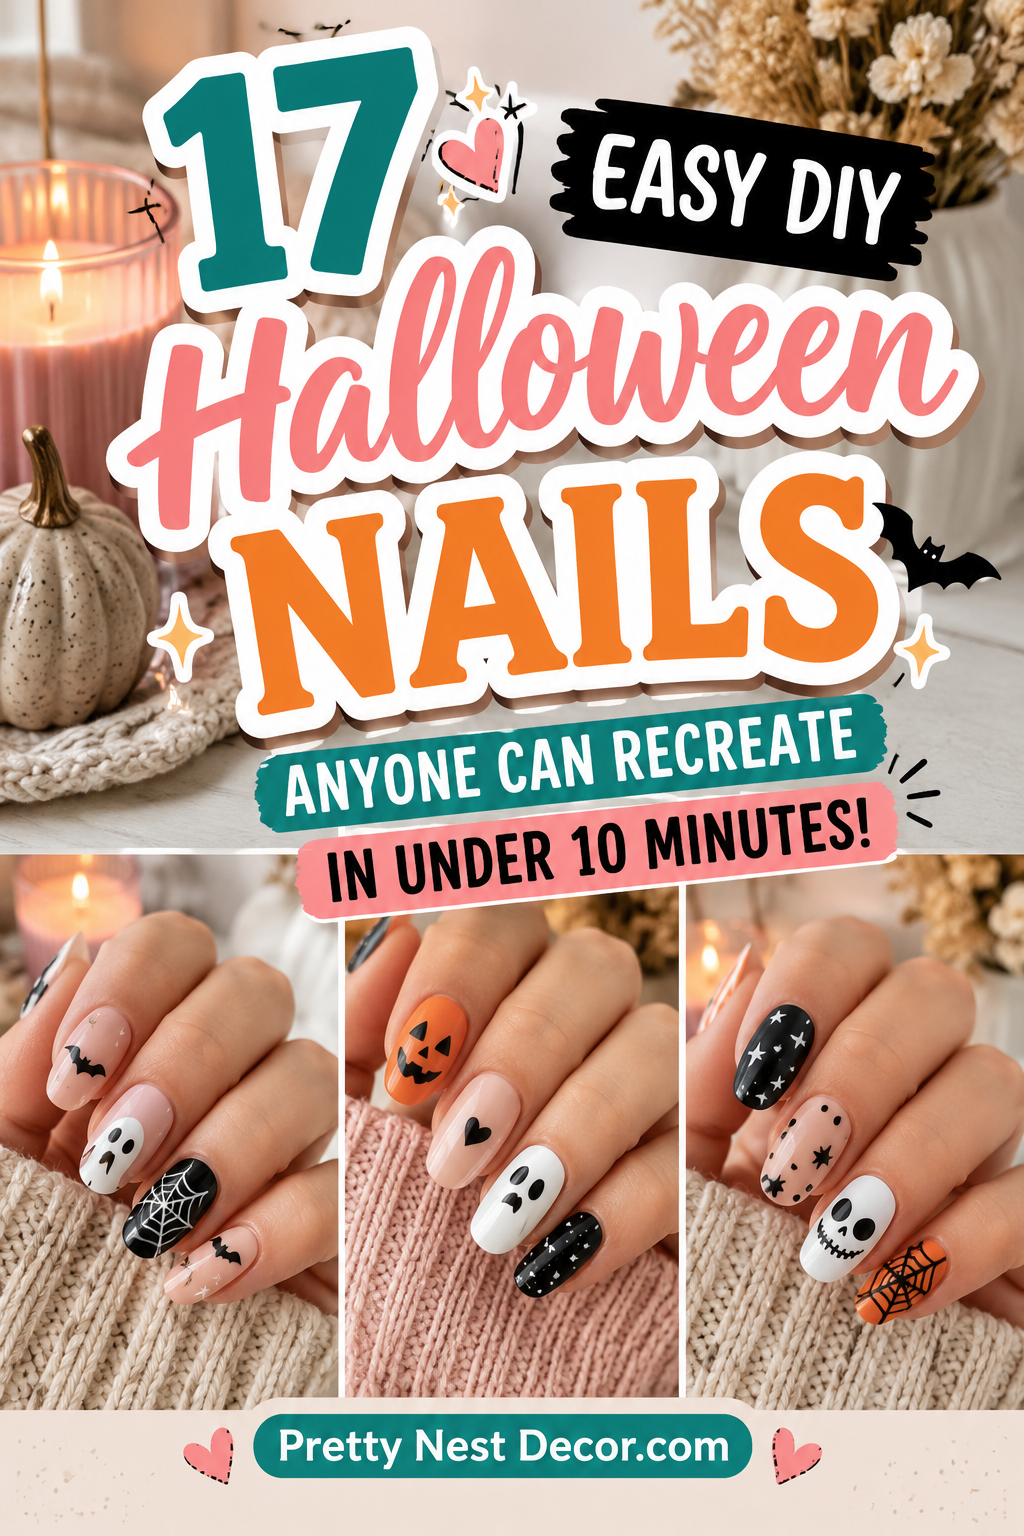
17 Easy DIY Halloween Nails Anyone Can Recreate in Under 10 Minutes
Halloween nail art has undergone a marvelous transformation. Gone are the days when achieving a festive holiday manicure required spending hours at a high-end salon or possessing advanced micro-painting skills. Today, beauty enthusiasts and busy trendsetters alike embrace quick, beginner-friendly techniques that deliver jaw-dropping salon-quality results right at the kitchen table in under ten minutes.

By leveraging smart optical illusions, minimalist negative space, dotting tools, and toothpick precision, you can create sophisticated spooky manicures with zero stress. These seventeen easy DIY Halloween nail ideas are specially designed for rapid execution. They ensure your fingertips look impeccably styled whether you are heading to work, running weekend errands, or dancing at a late-night costume party.
Why Speed and Minimalism Dominate 2026 Nail Trends
Modern lifestyles demand high-impact beauty routines that respect your schedule. Spending an entire afternoon meticulously painting tiny ghosts or multi-colored pumpkins on every single fingernail is rarely practical when October schedules fill up. Consequently, minimalist nail art has emerged as the reigning favorite for trendsetters.
By focusing on accent nails, clean graphic lines, and high-contrast color blocking, you achieve maximum visual impact with minimal brushstrokes. Furthermore, minimalist designs are inherently forgiving; a slightly irregular line or an abstract dot only adds to the handmade, organic charm of your seasonal manicure. You do not need professional certification or expensive equipment to flaunt gorgeous Halloween nails.
Essential Toolkits for Rapid DIY Nail Art
Achieving salon-quality manicures in ten minutes or less requires a well-organized, compact toolkit. Before diving into individual nail designs, gather your core supplies. First, invest in a reliable, quick-drying glossy top coat; this is your secret weapon for smoothing out minor imperfections and locking your art in place instantly.
Also, keep a standard wooden manicure toothpick, a metal dotting tool, a roll of thin striping tape, and a fine-tip cleanup brush dipped in acetone nearby. Having your polishes uncapped and your tools laid out before you start ensures your ten-minute timer stays intact. Let us explore seventeen easy DIY Halloween nail designs you can recreate in minutes.
1. The 5-Second Minimalist Blood-Drip Tips

Elegant French Manicure Subverted with Crimson Edge Drips
The French manicure is a timeless classic, but adding a spooky Halloween twist takes seconds. Instead of a pristine white tip, this design features an abrupt, glossy crimson red drip cascading down from your nail tips. It looks chic, modern, and delightfully eerie without requiring any steady drawing skills.
Additionally, this look pairs effortlessly with everyday professional wardrobes, making it the ultimate subtle holiday manicure for the workplace.
How to Recreate the Blood-Drip Nails in Minutes
First, apply a sheer nude or milky white base coat across all nails and let it dry for two minutes. Next, take a bottle of deep oxblood red nail polish with a thin brush. Paint a horizontal line across your free edge, then use the brush tip to pull three small, rounded downward droplets of varying lengths.
Then, fill in the upper tip solid. Repeat across all fingers, embracing slight irregularities for an organic drip effect. Finally, seal your masterpiece with a high-shine quick-dry top coat.
Required Polishes and Tools
- Sheer milky white or nude base nail polish
- Deep oxblood red or crimson red nail polish
- High-shine quick-dry clear top coat
- Fine detailing brush or polish wand brush
2. The 3-Dot Spooky Ghost Accent Nail
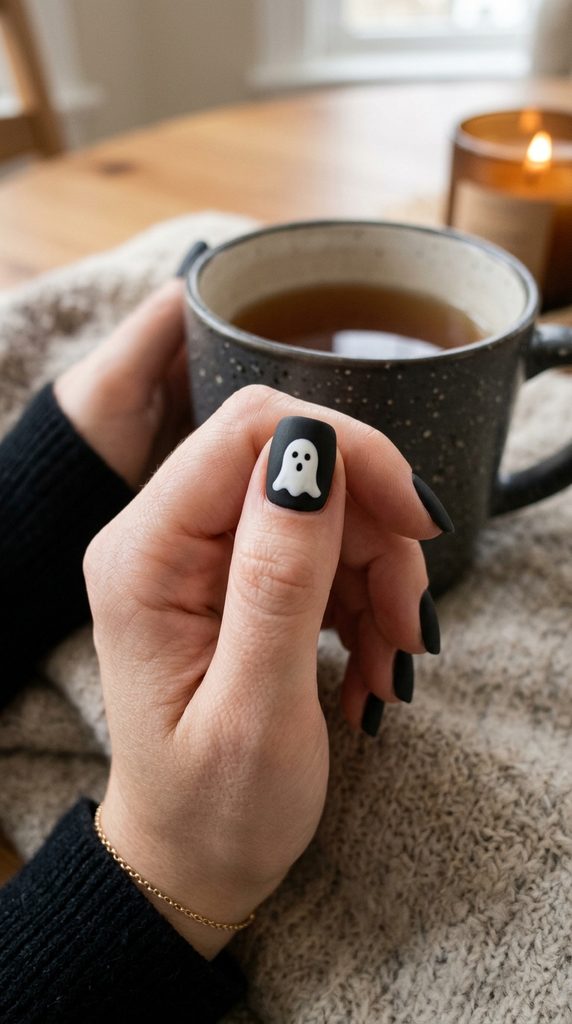
Adorable Minimalist Phantoms Created with Simple Dotting Tools
Intricate ghost nail art often intimidates beginners who worry about drawing facial expressions. However, the 3-Dot Spooky Ghost design bypasses complex drawing entirely. By using a standard metal dotting tool or toothpick dipped in black polish, you create cute, minimalist phantom faces effortlessly.
Moreover, keeping ghosts on a single accent nail per hand keeps the overall manicure looking clean and sophisticated rather than cluttered.
How to Recreate the Spooky Ghost Nails in Minutes
Begin by painting all nails in a chic, opaque matte black or dark grey polish. Let them dry for three minutes. Next, dip the large end of a dotting tool into pure white nail polish and stamp an organic, rounded blob near your cuticle base.
Then, clean the tool and dip the fine tip into black polish. Stamp two tiny dots for eyes and one small oval for a gasping mouth onto the white phantom body. Afterward, add scattered white stars around the ghost. Finally, lock everything down with a glossy top coat.
Required Polishes and Tools
- Opaque matte black or charcoal grey base polish
- Pure white creme nail polish
- Metal nail art dotting tool or wooden toothpick
- Quick-dry glossy clear top coat
3. The Negative Space Midnight Bat Flight
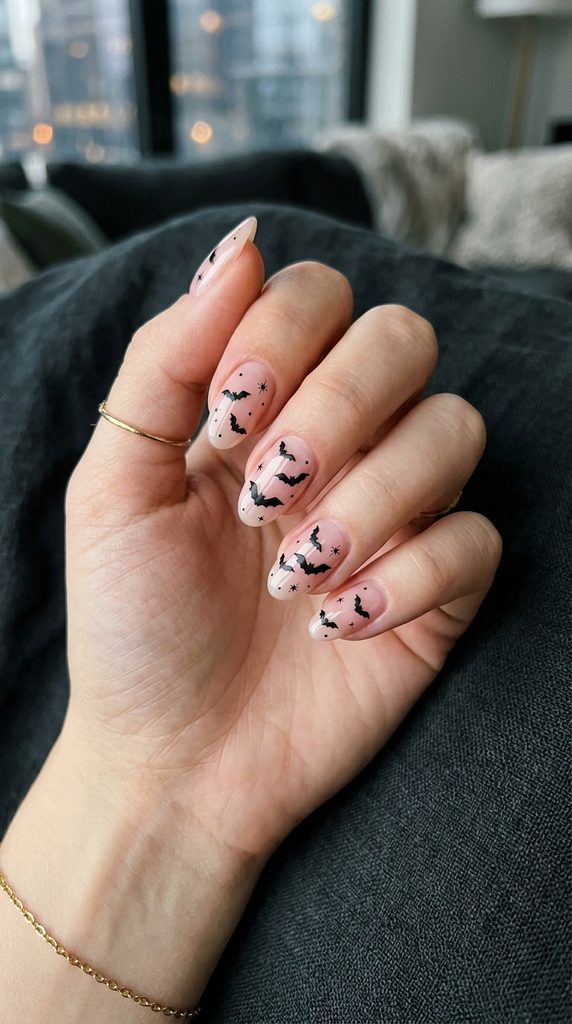
Sleek Silhouette Flocks Soaring Across Bare Nail Beds
Negative space nail art is a massive modern trend that leaves portions of your natural nail exposed for a graphic, airy finish. The Midnight Bat Flight design utilizes tiny black bat stickers or stamped silhouettes placed against a clean, sheer pink base coat.
Furthermore, because the background is entirely nude, nail growth remains invisible for days, extending the lifespan of your manicure.
How to Recreate the Negative Space Bats in Minutes
Start by applying a strengthening clear base coat or sheer pink tint to all nails. Allow it to dry completely. Next, use a pair of tweezers to lift tiny black bat water-slide decals or adhesive nail stickers.
Then, press one bat decal gracefully onto the center or side curve of each nail, smoothing out any air bubbles with your fingertip. Afterward, add tiny black starburst dots around the bats using a toothpick dipped in black lacquer. Finally, seal with two coats of quick-dry top coat.
Required Polishes and Tools
- Sheer pink tint or strengthening clear base coat
- Tiny black bat adhesive nail stickers or water decals
- Precision tweezers for placement
- Quick-dry high-shine clear top coat
4. The 60-Second Vampire Bite Punctures

Two Clean Crimson Dots Simulating Subtle Nocturnal Bites
If you are running severely short on time and need an instant Halloween manicure, the Vampire Bite design takes literally sixty seconds per hand. Two tiny, perfectly circular crimson dots placed near the base of your ring finger mimic a classic nocturnal puncture wound.
Additionally, painted over a nude base, this minimalist design is understated, clever, and conversation-starting.
How to Recreate the Vampire Bite Nails in Minutes
Begin by applying a neutral beige or pale nude polish across all fingernails and let dry for two minutes. Next, pour a small drop of vibrant blood-red polish onto a piece of scrap foil. Dip the rounded tip of a toothpick or small dotting tool into the red polish.
Then, press two clean, closely spaced red dots onto the lower side bed of your left ring fingernail. Repeat on your right hand. Allow the dots to set for one minute. Finally, apply a glossy top coat to seal the puncture marks permanently.
Required Polishes and Tools
- Neutral beige or pale nude base nail polish
- Vibrant blood-red creme nail polish
- Wooden manicure toothpicks or dotting tool
- Scrap piece of aluminum foil for polish mixing
- Glossy quick-dry clear top coat
5. The Easy Toothpick Black Cat Silhouettes
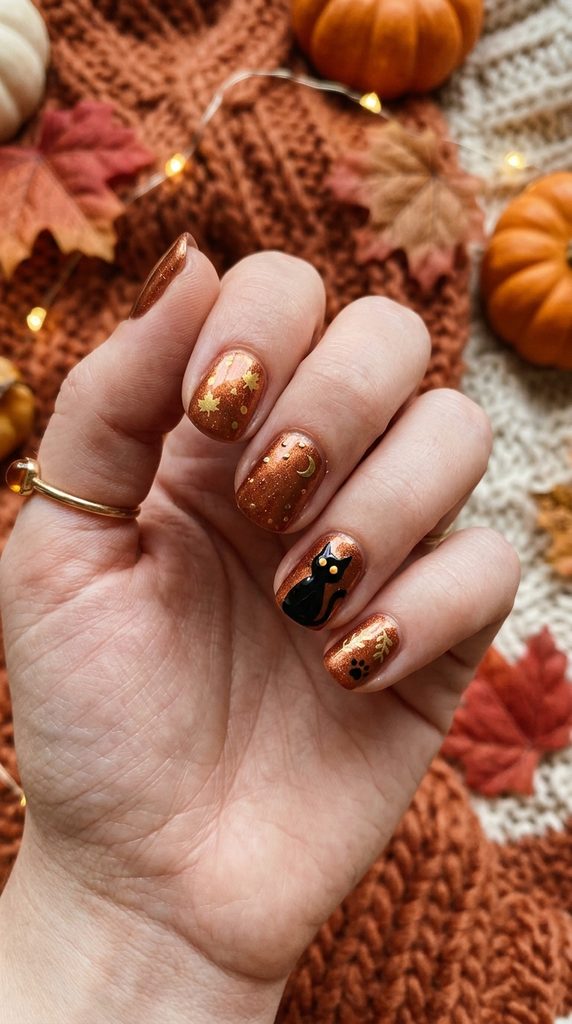
Playful Arched Felines Crafted with a Single Wooden Toothpick
Cat lovers can celebrate Halloween in style with this charmingly simple feline manicure. Using the pointed tip of an ordinary wooden toothpick dipped in black polish, you can shape a cat’s rounded head and pointed triangular ears in seconds.
Moreover, placing a glowing yellow dot for the cat’s eye adds an instant pop of color against the dark silhouette.
How to Recreate the Black Cat Nails in Minutes
Start by painting your nails in a metallic copper or pumpkin orange harvest shade. Let dry for three minutes. Next, dip the tip of a wooden toothpick into black polish and press a small rounded circle near your nail tip for the cat’s body.
Then, draw two tiny triangular ears atop the circle using the toothpick tip. Add a curved tail sweeping up the side of the nail. Afterward, dot a single speck of bright yellow polish for the eye. Finally, finish with a glossy top coat.
Required Polishes and Tools
- Metallic copper or pumpkin orange base polish
- Jet-black creme nail polish
- Bright yellow accent polish
- Wooden toothpicks for precision drawing
- Quick-dry clear top coat
6. The Abstract Metallic Gold Constellation

Celestial Astrology Lines and Starbursts on Obsidian Bases
Celestial astrology aesthetics bring quiet luxury and modern witchcraft to your fingertips. The Abstract Constellation manicure combines a rich obsidian black base with fine metallic gold striping tape and hand-drawn starburst dots. It looks like an expensive boutique manicure yet takes minutes to assemble.
Furthermore, it transitions seamlessly from Halloween celebrations straight into general autumn wear.
How to Recreate the Constellation Nails in Minutes
Begin by applying two coats of deep black polish to all nails and letting them dry completely. Next, cut short segments of thin metallic gold striping tape and press them diagonally across your accent nails to form star-chart lines. Trim excess tape flush with nail edges using clippers.
Then, dip a toothpick into gold metallic polish to stamp bright starburst dots where lines intersect. Finally, seal the entire design with a generous layer of glossy top coat to prevent peeling tape edges.
Required Polishes and Tools
- Deep obsidian black creme nail polish
- Thin metallic gold nail striping tape
- Small nail clipper scissors for trimming tape
- Metallic gold accent polish and wooden toothpicks
- High-shine quick-dry clear top coat
7. The Neon Slime Drip French Tips

Radioactive Green Ooze Cascading Down Dark Accent Bases
Channel radioactive laboratory science experiments with neon green slime tips. This modern twist on the French manicure replaces traditional white edges with glowing lime-green slime drips that ooze down toward your cuticles.
Additionally, contrasting radioactive green against a stark black base creates a high-voltage visual pop that glows intensely under party lighting.
How to Recreate the Slime Drip Nails in Minutes
Start with two coats of jet-black polish on all nails, allowing proper drying time. Next, take a bottle of vibrant neon lime-green polish. Paint a thick green band across your free edge, then use the brush tip to pull randomized, rounded ooze drips down your nail plate.
Then, touch up any wobbly lines with a cleanup brush dipped in acetone. Allow the neon green layer to set for two minutes. Finally, seal with a glossy top coat for wet-look slime realism.
Required Polishes and Tools
- Jet-black creme nail polish
- Vibrant neon lime-green nail polish
- Acetone polish remover and cleanup brush
- High-shine quick-dry clear top coat
8. The 3-Minute Matte Black Spiderwebs

Delicate Geometric Webbing Spun Across Accent Fingernails
Spiderwebs are an essential Halloween staple, but drawing them freehand can feel intimidating. The secret to speed is using a fine striping brush or toothpick to draw three intersecting diagonal lines, then connecting them with gentle sagging smiles.
Moreover, finishing the design with a velvety matte top coat gives the web an authentic, abandoned-attic dust texture.
How to Recreate the Spiderweb Nails in Minutes
Begin by painting your nails in a rich vampy plum or dark charcoal base polish. Let dry for three minutes. Next, dip a fine striping brush or toothpick into white polish. Paint three intersecting lines radiating from one top corner of your accent nail.
Then, connect the radiating lines with three small, inward-curving smile arcs to form the web structure. Add a tiny white spider in the corner. Afterward, apply a matte top coat over the entire nail. Finally, watch the web transform into velvety texture.
Required Polishes and Tools
- Vampy plum or dark charcoal base polish
- Pure white creme nail polish
- Fine nail art striping brush or toothpick
- Velvety matte top coat polish
9. The Quick Ombre Blood-Moon Gradient

Fiery Orange Melting into Deep Crimson Twilight Skies
Capturing a dramatic harvest blood moon on your nails is remarkably easy with the makeup-sponge gradient technique. By dabbing orange and crimson polishes onto a latex sponge and pressing it onto your nails, you achieve a seamless twilight ombre in moments.
Furthermore, adding a tiny black silhouette of a flying witch across the gradient completes the spooky cinematic effect.
How to Recreate the Blood-Moon Ombre in Minutes
Start by painting all nails with a solid white base polish to make gradient colors pop. Let dry. Next, paint horizontal stripes of marigold orange and deep crimson red directly onto a wedge makeup sponge.
Then, dab the sponge repeatedly up and down across your nail bed until colors blend smoothly. Clean excess polish off your skin with acetone. Afterward, use a toothpick to draw a tiny black witch silhouette on your ring finger. Finally, apply a high-shine top coat.
Required Polishes and Tools
- Solid white base polish
- Marigold orange and deep crimson red polishes
- Cosmetic wedge makeup sponges
- Liquid latex cuticle guard (optional for easy cleanup)
- Jet-black polish and wooden toothpicks for silhouettes
- Glossy quick-dry top coat
10. The Minimalist Stitched Frankenstein Stitches
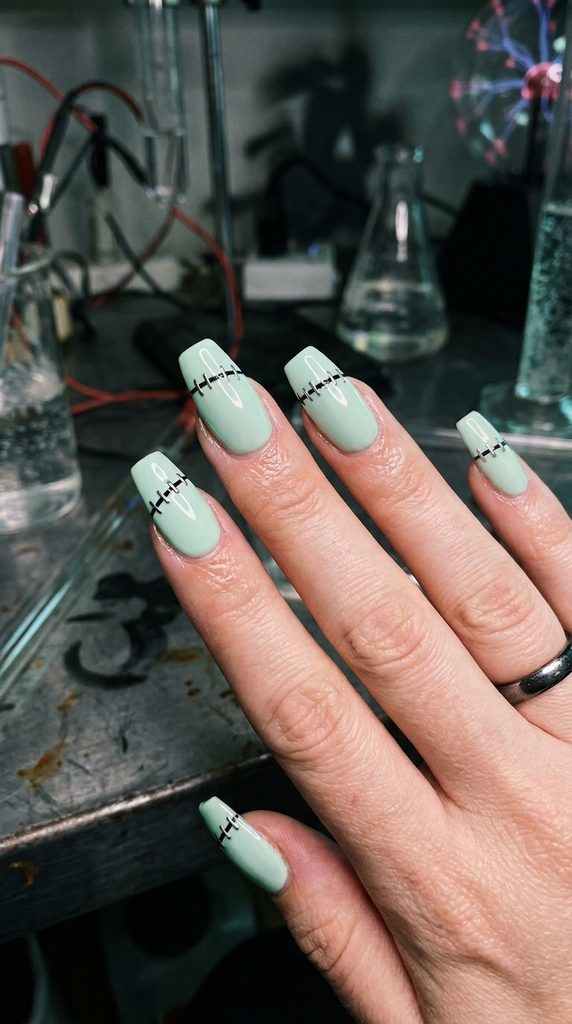
Bold Cross-Hatch Markings Inspired by Classic Monster Sci-Fi
Embrace mad-science monster aesthetics with Frankenstein stitch nails. This minimalist design features a simple horizontal border line across your nail tip intersected by short vertical tick marks, mimicking surgical stitches.
Additionally, painted over a pale mint-green base, it pays instant homage to the iconic cinematic monster without requiring character portrait skills.
How to Recreate the Frankenstein Stitches in Minutes
Begin by applying two coats of pale mint-green polish to all nails and letting them dry. Next, dip a fine striping brush or toothpick into black polish. Paint a straight horizontal line across the upper third or tip of each nail.
Then, intersect the horizontal line with four short vertical tick marks spaced evenly across the width. Afterward, add tiny perpendicular dots at the ends of each tick mark to resemble staple ends. Finally, seal your surgical stitches with a glossy top coat.
Required Polishes and Tools
- Pale mint-green creme base polish
- Jet-black nail polish for stitching lines
- Fine nail art striping brush or toothpick
- Quick-dry high-shine clear top coat
11. The 5-Minute Metallic Copper Foil Shards

Broken Mirror Glass Effect Catching Autumn Candlelight
If you want maximum glamour with minimal physical effort, metallic foil shards are your ultimate solution. Pressing translucent copper and gold transfer foil flakes onto a tacky black polish base creates a shattered mirror illusion that sparkles brilliantly under party lights.
Moreover, because the foil flakes scatter organically, every single nail turns out uniquely gorgeous with zero precision required.
How to Recreate the Foil Shards in Minutes
Start by painting all nails with two coats of jet-black polish and let dry until slightly tacky. Next, cut small jagged triangles out of copper and gold nail transfer foil sheets using scissors.
Then, press the shiny side of the foil flakes firmly onto your tacky black nails using your fingertip or tweezers, lifting away the backing film to leave metallic shards behind. Arrange three to four shards per nail. Finally, seal the fragile foil shards securely under two coats of quick-dry top coat.
Required Polishes and Tools
- Jet-black creme base polish
- Copper and gold nail art transfer foil sheets
- Sharp craft scissors for cutting foil shards
- Precision tweezers
- High-shine quick-dry clear top coat
12. The Polka-Dot Eyeball Cluster Manicure
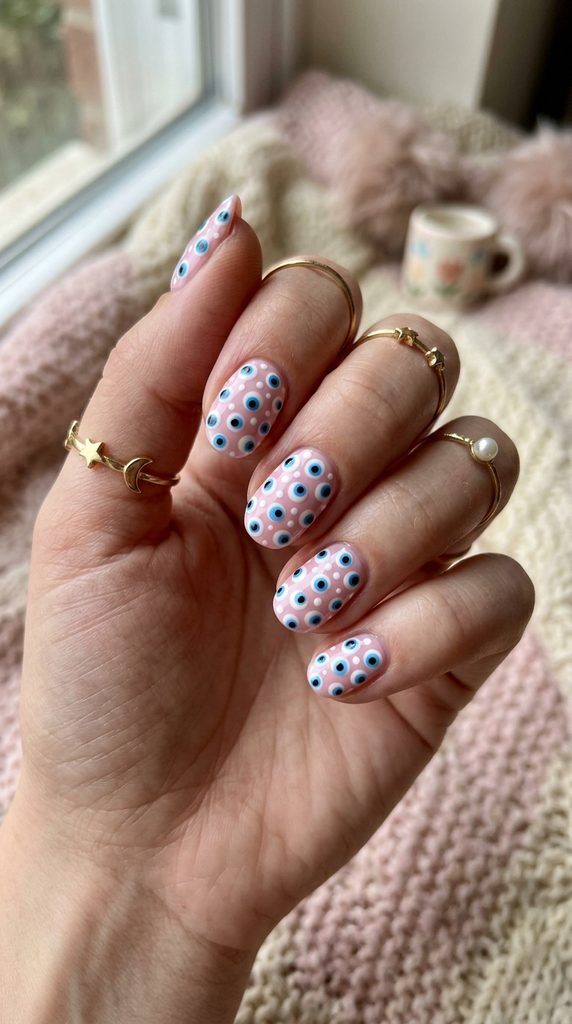
Whimsical Creepy-Cute Orbs Staring Back from Your Fingertips
Creepy-cute aesthetics are a massive Halloween favorite. The Eyeball Cluster manicure features a sea of small white polka dots adorned with tiny blue irises and jet-black pupils staring back at anyone who looks at your hands.
Furthermore, this design is remarkably fast because it relies entirely on varying sizes of dotting tools rather than freehand drawing.
How to Recreate the Eyeball Nails in Minutes
Begin by painting your nails in a soft pastel pink or lilac base color and let dry. Next, dip the large end of a dotting tool into white polish and stamp two to three medium white circles on each nail.
Then, clean the tool and use the medium end dipped in bright blue or green polish to stamp smaller dots inside the white circles for irises. Afterward, use a toothpick dipped in black polish to dot tiny pupils in the center. Finally, lock in your staring eyeballs with a glossy top coat.
Required Polishes and Tools
- Pastel pink or lilac base nail polish
- Pure white creme nail polish
- Bright blue or green accent polish
- Jet-black polish for pupils
- Metal dotting tool set and wooden toothpicks
- Quick-dry glossy clear top coat
13. The Chic Matte Plum and Gold Foil Accents
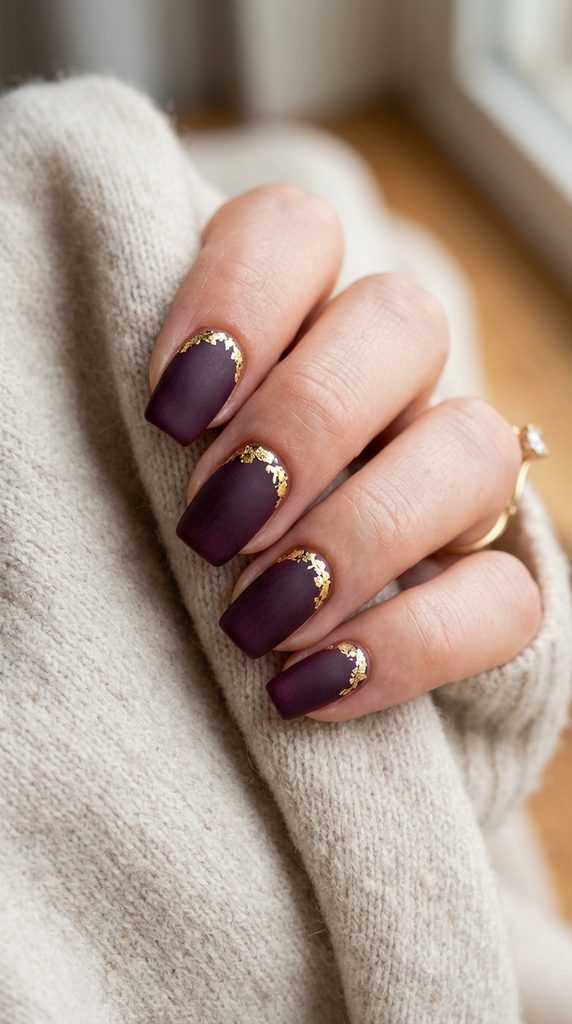
Sophisticated Dark Luxury for Elegant Autumn Evenings
Not every Halloween manicure needs to feature overt monsters or ghosts. The Chic Matte Plum and Gold Foil manicure embraces quiet luxury and moody autumn romance. Rich velvet plum polish contrasted against raw gold foil leaf flakes looks exceptionally expensive.
Additionally, finishing the plum base with a matte top coat while leaving gold shiny creates stunning tactile contrast.
How to Recreate the Plum and Gold Nails in Minutes
Start by applying two coats of rich velvet plum or eggplant polish to all nails and let dry completely. Next, press flecks of gold leaf foil adhesive onto the bottom cuticle curve of your accent nails.
Then, press the gold leaf down gently with a dry makeup sponge so it adheres securely in an organic crescent moon shape. Afterward, apply a velvety matte top coat over the entire plum surface, avoiding the gold foil if possible to keep it metallic. Finally, admire your luxury manicure.
Required Polishes and Tools
- Rich velvet plum or deep eggplant base polish
- Gold leaf foil sheets or loose metallic foil flakes
- Dry cosmetic wedge sponge for pressing foil
- Velvety matte top coat and glossy top coat
14. The Neon Glow-in-the-Dark Constellation Webs

Ultraviolet-Reactive Polish That Illuminates When Lights Dim
Take your Halloween party game to the next level with specialty glow-in-the-dark and UV-reactive nail polishes. Painting simple glowing white starbursts and webs over a black base creates a manicure that looks normal by day and brilliantly radioactive in darkened rooms.
Moreover, modern glow polishes charge rapidly under indoor light bulbs and shine brightly for hours.
How to Recreate the Glow Nails in Minutes
Begin by painting all nails with two coats of jet-black polish and let dry. Next, take a bottle of specialty white glow-in-the-dark nail polish. Dip a toothpick into the glowing formula to dot scattered starbursts and tiny connecting web lines across your nail beds.
Then, let the design air-dry for three minutes. Afterward, charge the polish by holding your hands close to a bright lamp for sixty seconds. Finally, seal with a quick-dry clear top coat. Turn off the lights and watch them glow!
Required Polishes and Tools
- Jet-black creme base nail polish
- Specialty white glow-in-the-dark nail polish
- Wooden toothpicks for precision dotting
- Quick-dry clear top coat polish
- Desk lamp for fast-charging the glow formula
15. The 4-Step Mummy Wrap Accents
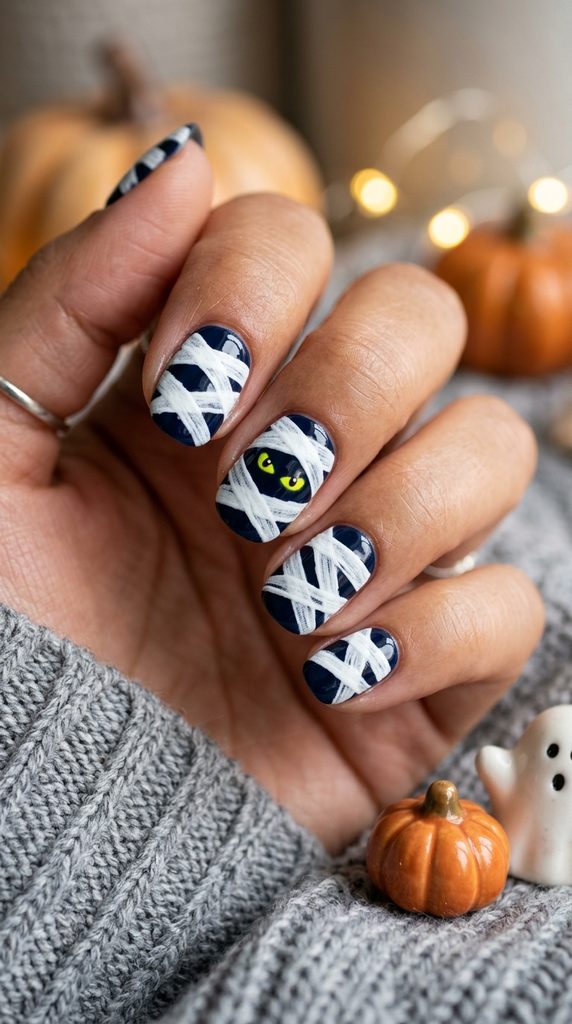
Intersecting White Bandages Framing Peek-A-Boo Eyes
Mummy nails are a playful classic that takes moments to assemble. By painting random diagonal white striping lines across a dark base and inserting two tiny yellow eyes peering through the bandages, your mummy comes instantly to life.
Furthermore, the imperfect, messy nature of bandaging lines makes this design completely foolproof for beginners.
How to Recreate the Mummy Nails in Minutes
Start by painting your nails in a dark charcoal or navy blue base color. Let dry. Next, dip a fine striping brush into white polish and paint two thick, intersecting diagonal white stripes across your accent nail, leaving a small dark diamond gap in the center.
Then, paint a few smaller parallel white stripe lines above and below the gap to simulate wrapped gauze. Afterward, use a toothpick dipped in yellow polish to dot two glowing eyes inside the dark gap. Finally, apply a glossy top coat.
Required Polishes and Tools
- Dark charcoal or navy blue base polish
- Pure white creme nail polish
- Bright yellow accent polish for eyes
- Fine nail art striping brush and wooden toothpicks
- High-shine quick-dry clear top coat
16. The Poison Apple Emerald and Gold Drip

Enchanting Fairy-Tale Magic Inspired by Royal Alchemists
Capture toxic fairy-tale magic with the Poison Apple manicure. Pairing a rich, sparkling emerald green base with metallic gold glitter drips cascading from the cuticles creates an enchanting, mystical potion aesthetic.
Additionally, this rich jewel-toned color combination looks flattering on all skin tones and transitions wonderfully into the winter holiday season.
How to Recreate the Poison Apple Nails in Minutes
Begin by applying two coats of deep sparkling emerald green polish to all nails. Allow them to dry thoroughly. Next, take a bottle of thick metallic gold glitter polish.
Then, dab the glitter brush gently along your cuticle beds, pulling small droplets downward toward the center of your nail plate to mimic dripping liquid gold potion. Afterward, touch up any edges with a clean toothpick. Finally, seal your magical poisoned apple manicure with a thick layer of high-shine top coat.
Required Polishes and Tools
- Deep sparkling emerald green shimmer polish
- Thick metallic gold glitter or liquid foil polish
- Wooden toothpicks for precision drip placement
- Quick-dry high-shine clear top coat
17. The 2-Minute Minimalist Cross Nail Art
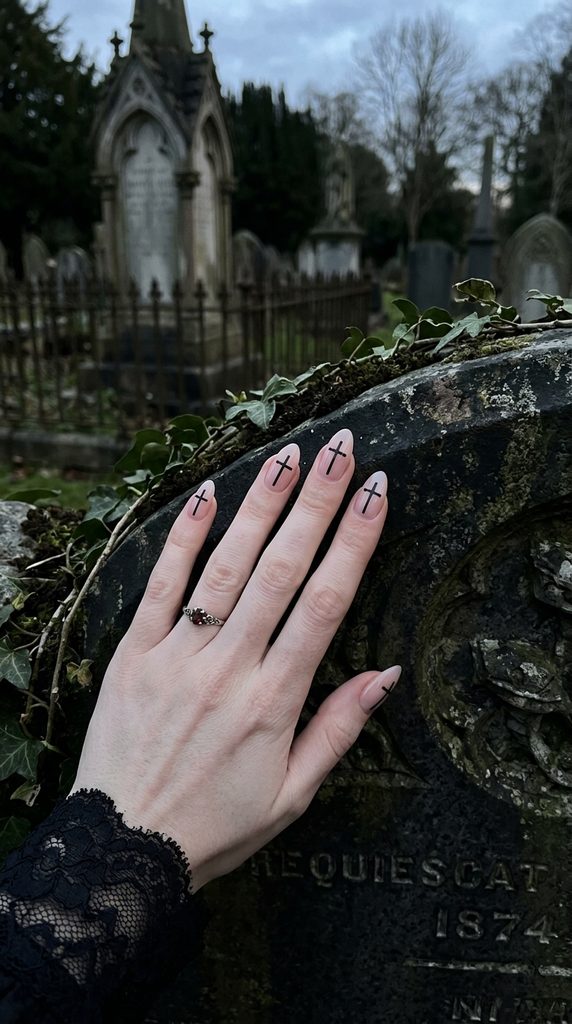
Gothic Christian-Cross and Cemetery Symbols on Nude Beds
For those who adore stark, gothic minimalism, clean black cross symbols painted on neutral nude nails offer quiet sophistication. Using a toothpick to cross two clean lines creates an understated cemetery aesthetic that looks deliberate and editorial.
Moreover, this design pairs gorgeously with dark Victorian rings and lace clothing, completing your gothic look instantly.
How to Recreate the Minimalist Cross Nails in Minutes
Start by painting all nails in a clean, glossy nude or sheer pink base polish. Let dry for two minutes. Next, pour a drop of jet-black polish onto foil. Dip the pointed tip of a wooden toothpick into the black lacquer.
Then, draw a vertical straight line down the center of your ring finger nail bed. Cross it near the top with a shorter horizontal line to form a clean Latin cross. Repeat on your other hand if desired. Finally, lock your minimalist gothic crosses in place with a quick-dry glossy top coat.
Required Polishes and Tools
- Glossy nude or sheer pink base nail polish
- Jet-black creme nail polish for cross symbols
- Wooden manicure toothpicks for precise line work
- Scrap aluminum foil for polish drops
- High-shine quick-dry clear top coat