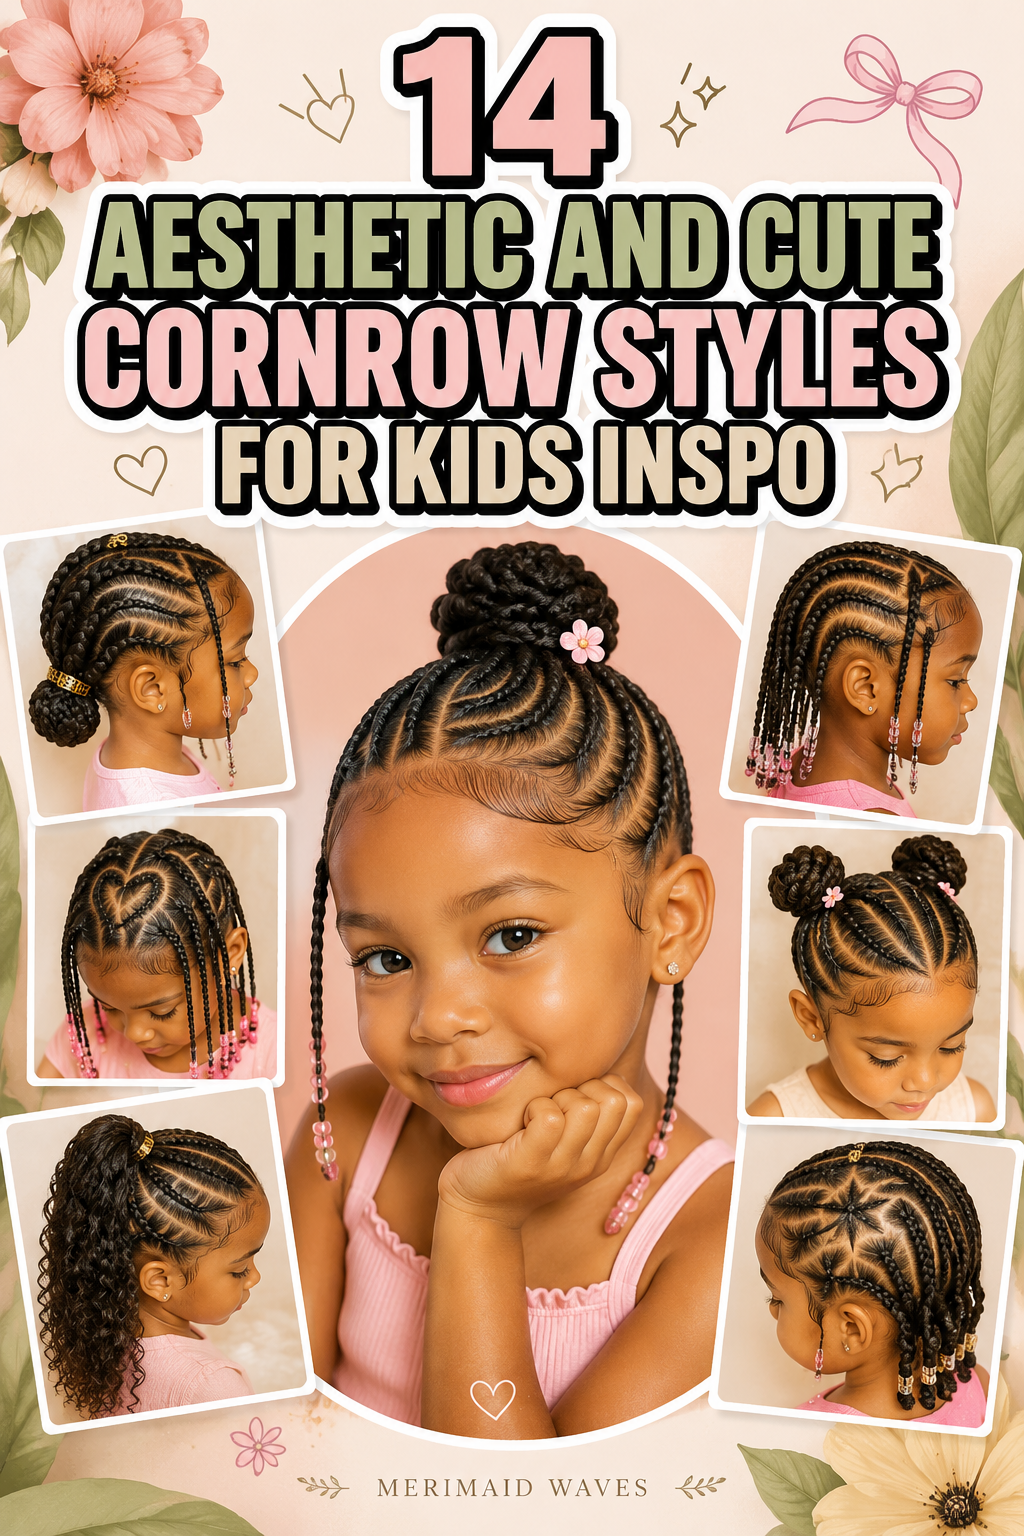
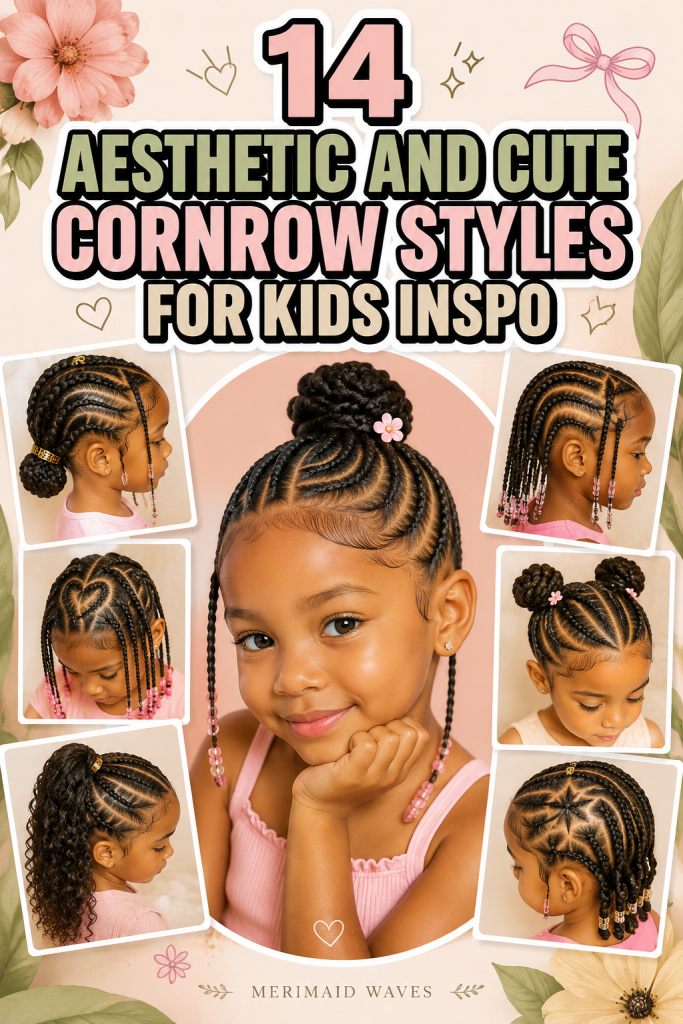
14 Aesthetic And Cute Cornrow Styles for Kids Inspo
Finding hairstyles for kids that strike the perfect balance between adorable aesthetics, creative expression, and scalp safety can be a delicate task Cute Cornrow. As parents, caregivers, and stylists, we want children to feel confident, joyful, and proud of their natural hair texture. At the same time, children’s hairstyles must be practical, durable enough to survive playground activities, and gentle on sensitive, developing hair follicles.
Cornrows have long stood as one of the most celebrated, versatile, and protective styling traditions for children’s hair. By weaving flat, neat underhand braids directly along the scalp, cornrows shield delicate natural ends from daily friction, environmental dryness, and morning detangling stress. Modern kids’ cornrow styling goes far beyond basic straight-back lines, offering a canvas for whimsical heart designs, colorful beads, soft zig-zag parting, and creative hybrid space buns.
This comprehensive guide explores fourteen deeply detailed, practical, and child-approved cornrow hairstyle ideas. Each concept includes essential scalp safety tips, recommended age groups, required supplies, and step-by-step instructions to help you create stunning, painless, and long-lasting cornrow styles for the little ones in your life.
The Essentials of Pain-Free & Gentle Kid Styling
Before diving into specific parting patterns and decorative designs, it is vital to establish a child-first approach to protective styling. Children’s scalps are significantly more sensitive than adult scalps, and their hair follicles are still developing. Excessive tension can cause discomfort, traction alopecia, or a negative association with hair care days.
Golden Rules for Gentle Kids’ Braiding
- The Two-Finger Tension Rule: Never braid tight around the hairline or nape. You should be able to slide two fingers comfortably under the base of any cornrow without pulling the child’s skin.
- Soak-and-Oil Elastics: If using small rubber bands, soak them in natural oil (like jojoba or coconut oil) before applying. This prevents the rubber from snapping or cutting into fragile hair shafts.
- Distraction and Breaks: Keep styling sessions under 90 minutes. Use iPad shows, storybooks, or favorite snacks, and allow five-minute stretch breaks every 30 minutes.
1. The Sweet Heart-Accent Side-Swept Cornrows

Whimsical Facial Framing with Playful Geometric Artistry
The Sweet Heart-Accent Side-Swept Cornrow style is an absolute favorite for young children and pre-teens alike. This concept features a clean, continuous braided heart design positioned over one ear or temple, while the remaining cornrows sweep gracefully across the crown into a low side ponytail or soft afro puff.
This style offers high visual charm without requiring hours in the chair. The focal point is the braided heart, which gives children a fun, magical element to show off to friends at school or weekend birthday parties.
Age Recommendation & Durability
- Ideal Age Group: 4 to 12 years old
- Styling Time: 60 to 75 minutes
- Durability: Lasts 2 to 3 weeks with proper bonnet protection at night
Essential Supplies Checklist
- Nourishing leave-in conditioning cream
- Gentle edge pomade or braid gel (alcohol-free)
- Metal rat-tail parting comb
- Colorful wooden or plastic beads for ponytail ends
- Bead threader tool
Step-by-Step Implementation Guide
- Prep clean, damp hair with a generous application of leave-in conditioner and detangle gently from ends to roots.
- Use a metal rat-tail comb to isolate a 2×2-inch square section directly above the left ear for the heart accent.
- Part the square diagonally into two V-shaped halves to outline the top arches of the heart.
- Braid the top curved arch of the left half forward toward the hairline, then curve the braid smoothly downward to form the left side of the heart point.
- Repeat on the right half, bringing both braid tails together at the bottom point of the heart and securing with a mini elastic.
- Braid the remaining hair across the top and right side of the head in smooth, side-swept diagonal cornrows that feed toward the right ear.
- Gather all remaining cornrow ends and loose hair into a soft side ponytail or puff.
- Thread colorful pastel beads onto the ponytail braid ends using a bead threader.
2. The Classic Straight-Backs with Pastel Bubble Beads

Timeless Simplicity Elevated by Colorful Sound and Movement
Nothing beats the clean, classic beauty of traditional straight-back cornrows, especially when enhanced with vibrant pastel bubble beads along the ends. This style features 6 to 8 medium-sized cornrows running parallel from the front hairline straight to the nape of the neck.
It is one of the most practical and efficient styles for busy school mornings. Adding colorful, click-clacking beads at the ends introduces fun movement, sound, and personality that kids adore.
Age Recommendation & Durability
- Ideal Age Group: 2 to 10 years old
- Styling Time: 45 to 60 minutes
- Durability: Lasts 2 to 4 weeks
Essential Supplies Checklist
- Lightweight natural hair oil (jojoba or sweet almond oil)
- Rat-tail comb for straight parting lines
- Soft-bristle brush
- Assorted pastel bubble beads and pony beads
- Small rubber bands soaked in oil
Step-by-Step Implementation Guide
- Section hair into 6 to 8 equal vertical lanes running from front to back.
- Apply a small amount of braid gel or natural oil along each part line to keep sections clean and defined.
- Begin braiding the first middle lane at the front hairline, keeping light, even tension as you move backward.
- Continue braiding down to the ends of the hair, leaving 2 to 3 inches of unbraided tail for beading.
- Repeat for all remaining vertical lanes across the head.
- Load 3 to 5 pastel bubble beads onto a bead threader tool.
- Pass the tail of a cornrow through the threader loop, slide the beads up the braid, fold the hair end over the bottom bead, and secure with an oil-soaked elastic.
- Repeat beading across all braid ends for a uniform, clacking finish.
3. The Whimsical Zig-Zag Parted Cornrow Space Buns
Bouncy Double Buns Paired with Dynamic Geometric Lines
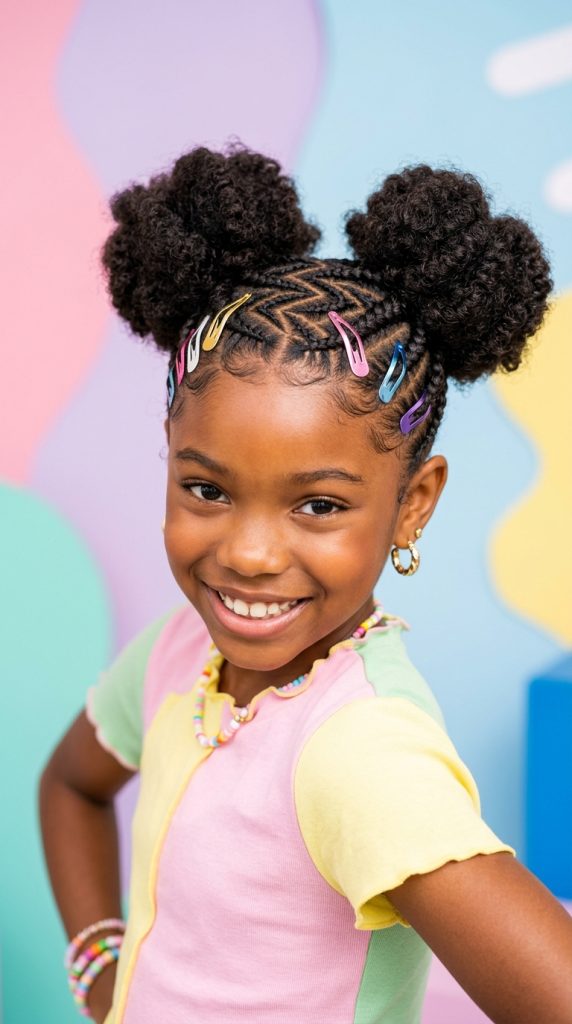
Combining dynamic geometric parting with a playful silhouette, the Whimsical Zig-Zag Space Bun style is energetic, modern, and cute. Instead of standard straight part lines, this style utilizes a sharp zig-zag center part that splits the head into two equal halves.
Cornrows curve upward on each side, feeding cleanly into two high, fluffy space buns resting atop the crown. This look keeps hair completely off the neck, making it ideal for summer weather and active sports.
Age Recommendation & Durability
- Ideal Age Group: 5 to 13 years old
- Styling Time: 75 to 90 minutes
- Durability: Lasts 2 weeks
Essential Supplies Checklist
- Rat-tail comb for crisp zig-zag parting
- Moisturizing hair butter or mango butter
- Satin scrunchies or soft hair ties
- Colorful hair cuffs or metallic clips
- Edge control brush
Step-by-Step Implementation Guide
- Create a clean, sharp zig-zag part down the exact center of the head from forehead to nape, dividing hair into left and right halves.
- Clip the right side out of the way.
- On the left side, section 3 to 4 curved diagonal cornrows that start at the hairline and curve upward toward the top crown.
- Braid each section upward, gathering all ends into a high ponytail base at the crown.
- Repeat the upward curved cornrows on the right side, securing into a second high ponytail base.
- Twist or fluff the loose hair in each ponytail into a soft, round space bun, securing with a gentle satin scrunchie.
- Smooth baby hairs along the hairline using an alcohol-free edge pomade and a soft-bristle brush.
- Attach gold or silver metallic clips along the zig-zag part lines for an extra festive touch.
4. The Half-Up Cornrow Top-Knot with Loose Afro Curls
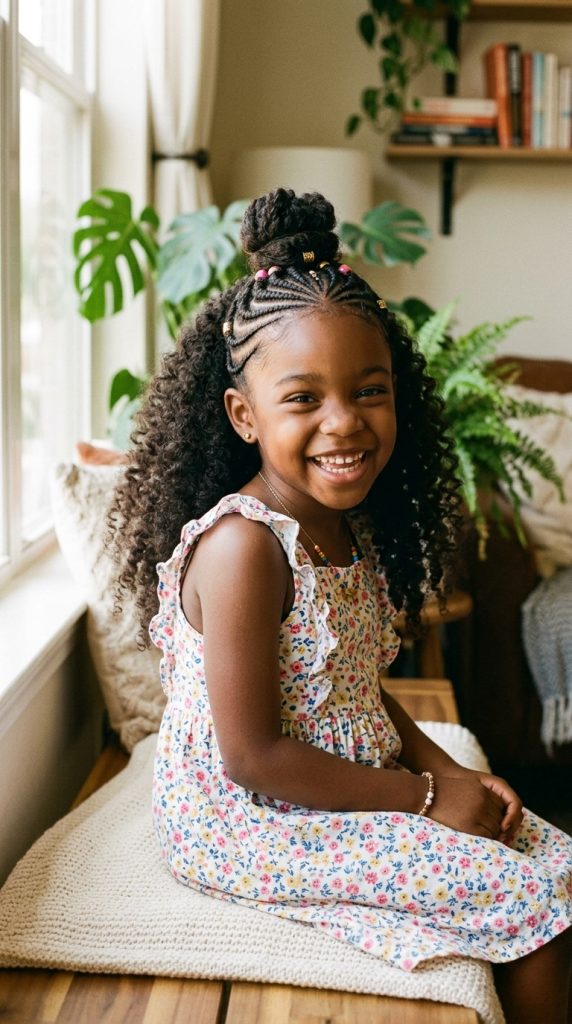
Showcasing Natural Texture While Securing the Crown
For parents who want to keep the front of their child’s hair neat and tangle-free while still showcasing their lush natural curl pattern in the back, the Half-Up Cornrow Top-Knot is the perfect compromise. The front half of the scalp is styled into neat, straight-back or diagonal cornrows that gather into a high top-knot bun.
The back half of the hair is left loose, allowing natural coils, curls, or waves to bounce freely. This style offers excellent facial framing while letting kids rock their texture.
Age Recommendation & Durability
- Ideal Age Group: 3 to 12 years old
- Styling Time: 45 to 60 minutes
- Durability: Cornrows last 2 to 3 weeks; back curls require daily hydration misting
Essential Supplies Checklist
- Curl-defining cream or leave-in conditioner mist
- Rat-tail comb for ear-to-ear sectioning
- Soft hair elastic for top-knot
- Lightweight sheen spray
- Wide-tooth comb for back detangling
Step-by-Step Implementation Guide
- Create a horizontal ear-to-ear part across the crown, separating the hair into a front section and a back section.
- Twist and clip the back section out of the way.
- Apply a hydrating cream to the front section and divide into 5 to 7 vertical cornrow lanes.
- Braid each lane from the hairline backward toward the center crown, gathering all braid ends together.
- Secure the gathered braid ends into a high ponytail and wrap into a neat, compact top-knot bun.
- Unclip the loose back section, spritz generously with a leave-in conditioner mist, and apply curl cream.
- Finger-coil or gently rake through the back curls to define natural ringlets.
- Finish with a light mist of sheen spray across the top-knot and back curls.
5. The Criss-Cross Butterfly Accent Cornrows

Intricate Woven Ribbons Paired with Vibrant Butterfly Hardware
Inspired by whimsical fairytale aesthetics, the Criss-Cross Butterfly Accent style incorporates overlapping cornrow lines that cross over one another like delicate woven ribbons. The points where the braids intersect are decorated with vibrant, spring-loaded butterfly clips or colorful barrettes.
This creative style turns a standard braiding session into an artistic masterpiece. Kids love choosing their favorite butterfly colors to customize their look.
Age Recommendation & Durability
- Ideal Age Group: 4 to 11 years old
- Styling Time: 75 to 90 minutes
- Durability: Lasts 2 weeks
Essential Supplies Checklist
- Alcohol-free braid gel
- Precision parting comb
- Spring-loaded plastic butterfly clips (assorted colors)
- Mini silicone elastics
- Moisturizing scalp spray
Step-by-Step Implementation Guide
- Section off a 3-inch panel across the front hairline from temple to temple.
- Divide this front panel into 4 diagonal lanes that cross over one another in an “X” or diamond geometry.
- Braid the first diagonal strand halfway, then cross it over the adjacent section, incorporating it into the next cornrow pass.
- Continue this criss-cross pattern across the front panel until all front strands feed into main straight-back cornrows.
- Braid the remaining back sections down to the nape in smooth, neat lines.
- Attach colorful butterfly clips directly over the intersection points of the criss-cross braids.
- Add matching barrettes or beads to the ends of the braids.
- Spritz the scalp with an aloe vera-based moisturizing spray to keep parts hydrated.
6. The Crown Halo Braids with Hanging Front Beads
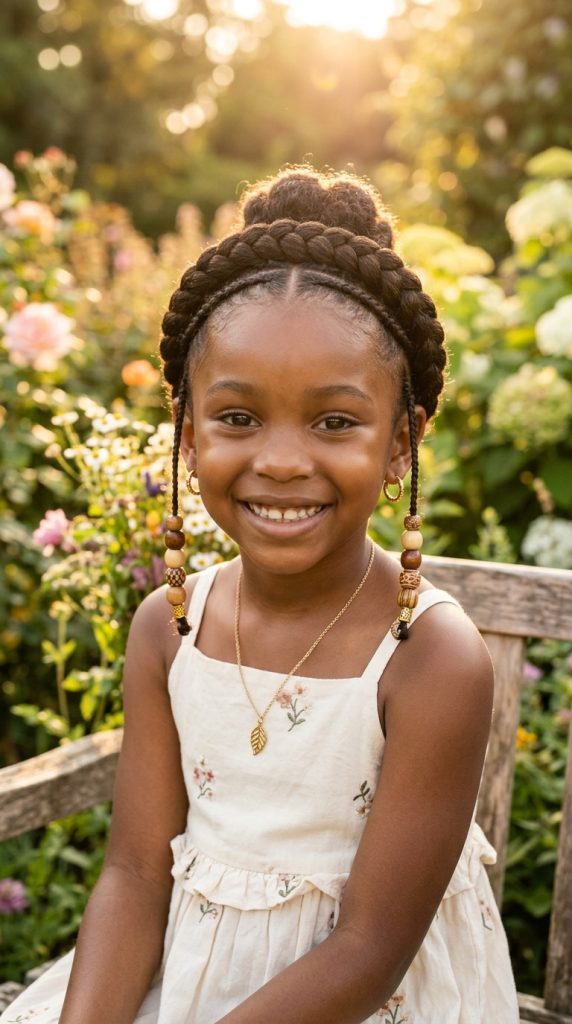
Regal Elegance and Protective Full-Scalp Enclosure
The Crown Halo Braid is a timeless, protective style that wraps two thick cornrows around the perimeter of the head, creating a regal, crown-like halo effect. To give it a cute, kid-friendly twist, two small accent cornrows are braided forward in front of the ears, adorned with hanging wooden or pastel beads that swing beside the cheeks.
This style fully encloses natural ends inside the halo braid, offering maximum protection against winter frost or summer heat.
Age Recommendation & Durability
- Ideal Age Group: 3 to 12 years old
- Styling Time: 40 to 50 minutes
- Durability: Lasts 2 to 3 weeks
Essential Supplies Checklist
- Nourishing edge pomade
- Bobby pins or hair pins matching hair color
- Pony beads or wooden beads
- Bead threader
- Satin sleep bonnet
Step-by-Step Implementation Guide
- Section out two thin, 1/2-inch vertical strands directly in front of each ear for the hanging accent braids.
- Create a clean center part running from the forehead down to the nape of the neck.
- Beginning at the nape on the left side, cornrow upward and around the left perimeter, following the ear line up toward the forehead.
- Continue the braid across the front hairline and down the right side, wrapping around to the nape to complete a full circular halo.
- Tuck the remaining braid tail invisibly underneath the starting halo loop and pin securely with bobby pins.
- Braid the two small front accent strands forward and thread 3 to 4 colorful beads onto each end.
- Smooth baby hairs along the forehead using a soft toothbrush and edge pomade.
- Secure with a satin bonnet at bedtime to keep the halo smooth and frizz-free.
7. The Diagonal Fulani-Inspired Kids’ Cornrows

Historic West African Symmetry Adapted for Young Royalty
Inspired by traditional Fulani braiding heritage, this style features a central cornrow braided straight down the middle of the scalp, flanked by diagonal cornrows that slope gracefully toward the ears. Two side braids hang forward over the shoulders, adorned with traditional wooden beads and cowrie shell accents.
This style connects young children to rich cultural heritage while delivering a polished, symmetrical look suitable for family gatherings, holidays, and school picture days.
Age Recommendation & Durability
- Ideal Age Group: 6 to 14 years old
- Styling Time: 80 to 100 minutes
- Durability: Lasts 3 weeks
Essential Supplies Checklist
- Natural wooden beads and mini cowrie shells
- Bead threader
- Rat-tail comb for clean diagonal geometry
- Organic coconut or jojoba oil
- Braid sheen spray
Step-by-Step Implementation Guide
- Part a clean central lane straight down the middle of the scalp from forehead to crown.
- Braid this central lane straight back to the crown.
- On both sides of the central lane, create 3 to 4 symmetrical diagonal lanes that angle downward toward the temples and ears.
- Braid these diagonal lanes down, directing the braid ends toward the back of the neck.
- Section one small braid on each side near the temples to braid forward over the shoulders.
- Thread natural wooden beads and slide a mini cowrie shell onto the ends of the forward-facing side braids.
- Add matching wooden beads to all remaining braid ends at the back.
- Oil exposed scalp parts gently with coconut oil and finish with a spritz of braid sheen.
8. The Curved Banana-Cornrows with Fluffy Side Puff
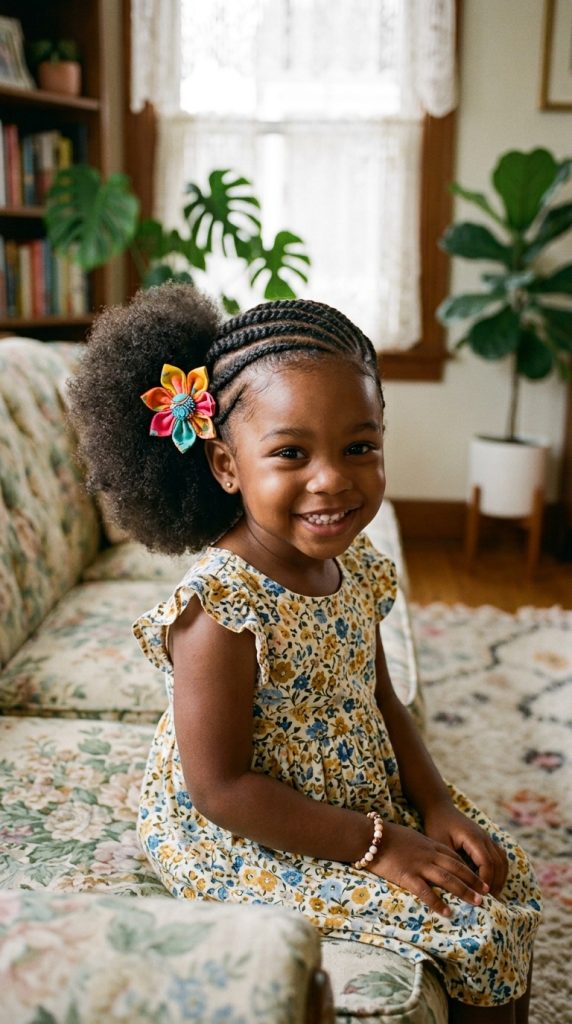
Retro 80s Charm with Asymmetrical Modern Flair
Banana cornrows (also known as curved or S-shaped cornrows) feature graceful, sweeping curves that glide across the scalp horizontally or diagonally. In this cute kid variation, all curved cornrows sweep from the right temple around to the left ear, gathering into a single, oversized, fluffy side afro puff.
The contrast between sleek, curved scalp lines and a voluminous, bouncy side puff creates a fun, retro aesthetic that looks adorable on toddlers and younger kids.
Age Recommendation & Durability
- Ideal Age Group: 2 to 8 years old
- Styling Time: 50 to 65 minutes
- Durability: Cornrows last 2 weeks; side puff requires re-fluffing every few days
Essential Supplies Checklist
- Mango butter or shea butter cream
- Soft scrunchie or pain-free hair tie
- Afro pick comb
- Cute fabric bow or flower hair clip
- Rat-tail comb for curved parting
Step-by-Step Implementation Guide
- Apply moisturizing mango butter throughout clean, detangled hair.
- Establish a focal point behind the left ear where the side puff will sit.
- Starting at the right side of the head, part 5 to 7 curved, sweeping horizontal lanes that arch across the crown toward the left ear.
- Cornrow each curved lane smoothly, feeding all braid ends toward the left ear focal point.
- Gather all braid ends into a secure ponytail base behind the left ear using a soft scrunchie.
- Use an afro pick comb to fluff out the loose hair in the ponytail, creating a round, bouncy side puff.
- Attach a cute fabric bow or flower clip directly over the scrunchie base.
- Ensure edge lines around the right ear and nape are soft and tension-free.
9. The Star-Burst Pattern Top-Knot with Hanging Back Braids

Dynamic Geometric Crown Detailing for Active Kids
The Star-Burst pattern is a high-impact, geometric cornrow style where all braids radiate outward from a central point on the crown like rays of sunlight. The top braids gather into a high top-knot or bun, while the back cornrows hang down neatly past the shoulders.
This dynamic pattern keeps hair firmly contained at the crown, preventing sweat buildup during active play and outdoor activities.
Age Recommendation & Durability
- Ideal Age Group: 6 to 13 years old
- Styling Time: 90 to 110 minutes
- Durability: Lasts 3 weeks
Essential Supplies Checklist
- Precision parting comb
- Alcohol-free braiding gel
- Colorful pony beads
- Bead threader
- Hair elastic and bobby pins
Step-by-Step Implementation Guide
- Mark a small 1-inch circle in the exact center of the crown to serve as the starburst center.
- Part triangular, wedge-shaped lanes radiating outward from the central circle toward the front hairline and sides.
- Braid each top wedge lane starting from the outer hairline moving inward toward the central circle.
- Gather all top braid ends at the central circle and bind with a hair elastic, wrapping into a tight top-knot bun.
- Part the back half of the head into straight vertical lanes running from the crown down to the nape.
- Braid the back lanes straight down and thread colorful pony beads onto the ends.
- Apply braid gel along all starburst part lines to maintain sharp geometric definition.
10. The Cornrowed Mohawk (Frohawk) with Colorful Cuffs
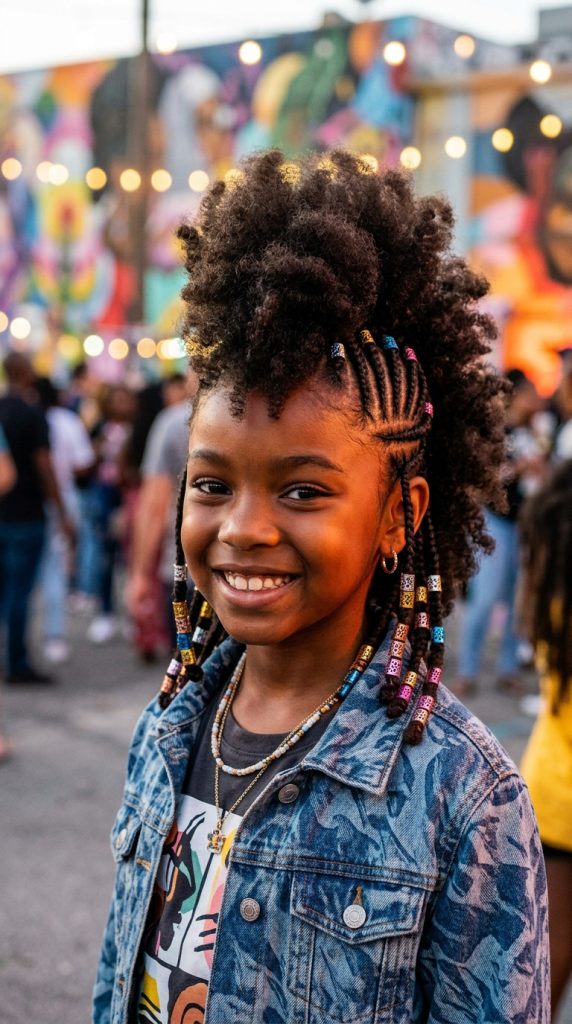
Bold Edge and Protective Convenience for Confident Kids
For kids who love bold, expressive styles, the Cornrowed Frohawk (or Mohawk) delivers instant attitude. The sides of the head are cornrowed tightly upward toward the center strip of the head. The central strip is left unbraided or styled into fluffy, voluminous afro curls that run from the forehead down to the nape.
Adding colorful metallic hair cuffs along the side cornrows emphasizes the vertical lines of the frohawk while providing a cool, rockstar aesthetic.
Age Recommendation & Durability
- Ideal Age Group: 4 to 13 years old
- Styling Time: 50 to 65 minutes
- Durability: Lasts 2 weeks
Essential Supplies Checklist
- Metallic hair cuffs (gold, silver, pink, or blue)
- Curl-defining gel or mousse
- Afro pick comb
- Rat-tail comb for vertical side parting
- Lightweight hair oil
Step-by-Step Implementation Guide
- Section off a 3-inch-wide central strip running from the front hairline down to the nape of the neck; clip this strip away.
- On the left side of the head, create 4 to 5 vertical or slightly angled cornrow lanes that braid upward toward the center strip.
- Braid each left lane tightly up to the edge of the center strip and secure with mini elastics.
- Repeat the upward cornrows on the right side of the head.
- Unclip the central strip, apply curl-defining mousse, and finger-coil or pick out the natural curls to create a tall, voluminous central crest.
- Snap colorful metallic hair cuffs onto the side cornrows at even intervals.
- Mist the central frohawk crest with lightweight hair oil for shine and softness.
11. The Double Stitch-Braid Pigtails with Heart Extensions

Sleek Precision Lines and Trendsetting Silhouette
Stitch braiding is a popular variation of cornrowing that uses a finger or comb technique to create sharp, horizontal line steps along the sides of each braid. This style features two thick, sleek stitch-braided pigtails running from front to back, with a delicate braided heart accent added beside one pigtail.
This look offers a clean, sophisticated, and trendsetting finish that older kids and pre-teens adore for school, dance recitals, and special events.
Age Recommendation & Durability
- Ideal Age Group: 7 to 14 years old
- Styling Time: 75 to 90 minutes
- Durability: Lasts 2 to 3 weeks
Essential Supplies Checklist
- Firm-hold braiding gel (non-flaking)
- Precision metal tail comb for stitch lines
- Soft satin hair ties
- Decorative thread or string wrap (optional)
- Edge control brush
Step-by-Step Implementation Guide
- Part hair down the exact center from forehead to nape, dividing into two equal halves.
- On the left side, carve a small heart outline near the temple and braid it into a flat heart accent.
- Apply a generous layer of firm-hold braid gel along the left main section.
- Using the metal tail comb, create horizontal “stitch” lines every 1/2 inch as you feed hair into a thick cornrow moving backward.
- Continue stitch-braiding down to the nape, securing the pigtail tail with a soft hair tie.
- Repeat the stitch-braiding process on the right half of the head.
- Wrap decorative colored thread around the base of the pigtails for a subtle pop of color.
- Slick down hairline edges smoothly using an edge brush.
12. The Diagonal Feed-In Cornrows into Low Double Buns
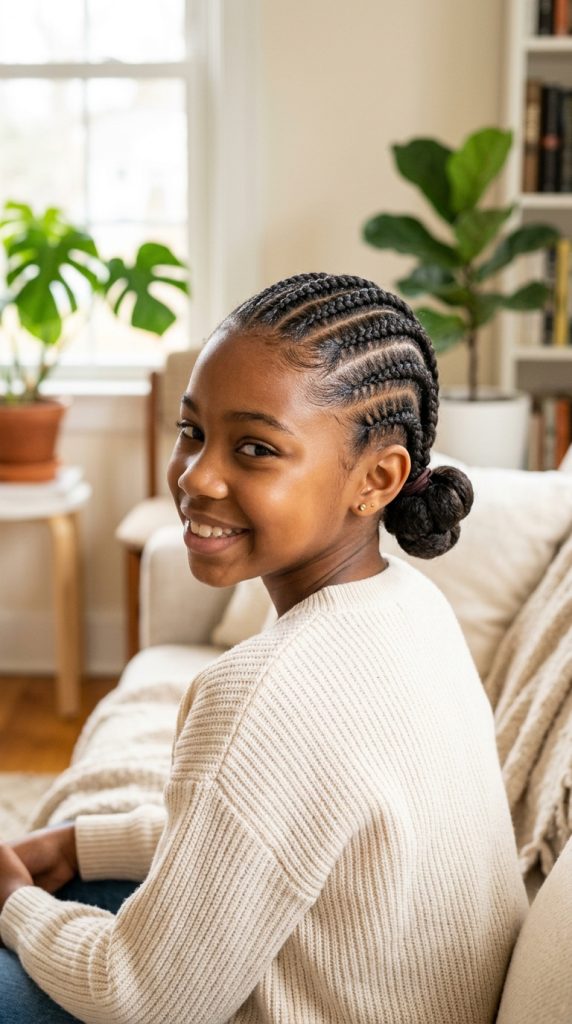
Smooth Extensions and Gentle Weight Distribution
For children with fine or shorter natural hair who desire longer, fuller braids, the Feed-In technique adds small, gradual synthetic or human hair extensions into the cornrows without placing heavy knots on the scalp. This style feeds diagonal cornrows into two low, cozy double buns at the nape of the neck.
Because extension hair is added gradually strand-by-strand, tension is distributed evenly across the scalp, making it comfortable and lightweight for young wearers.
Age Recommendation & Durability
- Ideal Age Group: 6 to 14 years old
- Styling Time: 90 to 120 minutes
- Durability: Lasts 3 to 4 weeks
Essential Supplies Checklist
- Pre-stretched lightweight braiding hair (matching natural color)
- Braid pomade
- Bobby pins for securing low buns
- Scalp soothing peppermint oil
- Satin bonnet
Step-by-Step Implementation Guide
- Prep natural hair with a thorough detangling and moisturizing cream session.
- Part hair down the center from forehead to nape.
- Create 3 to 4 diagonal lanes on the left side sloping toward the left nape corner.
- Begin braiding the natural hair first for 2 passes, then gradually feed in tiny wisps of pre-stretched braiding hair to build thickness smoothly.
- Braid down to the nape and gather all left strands into a low ponytail.
- Repeat the feed-in diagonal cornrows on the right side, gathering into a right low ponytail.
- Wrap each ponytail tail into a smooth, low donut bun at the nape and pin with bobby pins.
- Apply a drop of peppermint oil along part lines to keep the scalp cool and comfortable.
13. The Two-Layer Fulani-Style Cornrows with Box Braids

Dynamic Movement Meets Structured Scalp Artistry
Combining the structured elegance of top cornrows with the free-flowing movement of lower box braids, the Two-Layer style is a showstopper. The top half of the scalp is cornrowed in forward- or backward-facing geometric lines, while the lower nape section is parted into individual box braids.
This two-layer design allows the lower individual braids to swing freely, creating a beautiful silhouette that looks gorgeous when decorated with colorful beads.
Age Recommendation & Durability
- Ideal Age Group: 7 to 14 years old
- Styling Time: 100 to 130 minutes
- Durability: Lasts 3 to 4 weeks
Essential Supplies Checklist
- Assorted pony beads and wooden beads
- Bead threader
- Rat-tail comb for clean square parts
- Moisturizing braid spray
- Satin hair scarf for night wrapping
Step-by-Step Implementation Guide
- Create a horizontal part across the back of the head from ear to ear, separating top and bottom layers.
- Part the lower nape layer into a grid of clean individual box braid squares.
- Braid each lower square into an individual three-strand braid down to the ends.
- Unclip the top layer and part into 6 to 8 geometric cornrow lanes radiating from the crown or forehead.
- Cornrow the top lanes neatly, bringing all braid ends down to join the lower box braids.
- Thread colorful pony beads onto all braid ends using a bead threader.
- Spritz the entire head with moisturizing braid spray.
- Tie a satin scarf around the top cornrows at night to maintain crisp part lines.
14. The Cute Bow-Accented Cornrow Ponytail

Practical Playground Protection with Adorable Fabric Hardware
Rounding out our guide is a classic daily driver style: the Cornrow Ponytail accented with a large, cute fabric bow. All cornrows are braided from the outer hairline inward toward the high crown, gathering every strand into a single, secure, high ponytail.
A large, colorful fabric bow or ribbon clip is placed at the ponytail base, providing a cute, polished finish that holds up against rough playground games, physical education classes, and naptime.
Age Recommendation & Durability
- Ideal Age Group: 3 to 10 years old
- Styling Time: 50 to 65 minutes
- Durability: Lasts 2 to 3 weeks
Essential Supplies Checklist
- Large fabric bow hair clip or ribbon tie
- Soft scrunchie
- Alcohol-free edge pomade
- Beads or barrettes for ponytail braid ends
- Braid sheen mist
Step-by-Step Implementation Guide
- Apply a moisturizing leave-in cream throughout clean hair.
- Establish a central ponytail anchor point at the top crown.
- Part 8 to 10 straight or slightly curved lanes radiating from the hairline inward toward the central anchor point.
- Braid each lane toward the crown, holding all braid ends together in one hand.
- Bind all gathered braid ends securely into a high ponytail using a soft, pain-free scrunchie.
- Braid the loose hair in the ponytail into 3 to 4 thick braids, or leave as a fluffy puff.
- Attach a large, colorful fabric bow clip directly over the scrunchie base.
- Add colorful barrettes or beads to the ends of the ponytail braids.
- Finish with a quick mist of braid sheen for a radiant, healthy shine.
Nighttime Maintenance & Scalp Care for Kids
To ensure these cute cornrow styles stay fresh, neat, and comfortable for weeks without causing scalp irritation, follow this simple nighttime care routine:
+-------------------------------------------------------+
|             Kid's Nighttime Care Routine              |
+--------------------------+----------------------------+
| Daily Hydration          | Water & Aloe Vera Mist     |
| Scalp Nourishment        | Jojoba Oil along Parts     |
| Friction Protection      | Satin Bonnet or Pillowcase |
| Edge Care                | Loose Satin Headband       |
+--------------------------+----------------------------+
- Hydrate Daily: Spritz the child’s scalp every 2 to 3 days with a light mixture of water, aloe vera juice, and a drop of jojoba oil.
- Protect at Night: Always have the child sleep in a satin bonnet or on a smooth satin pillowcase to prevent cotton sheets from drying out hair moisture and causing frizz.
- Listen to Your Child: If a child complains of itching or tenderness, apply a soothing tea tree or peppermint oil blend along the parts. If a braid is causing persistent pain or bumps along the hairline, remove that specific braid immediately.