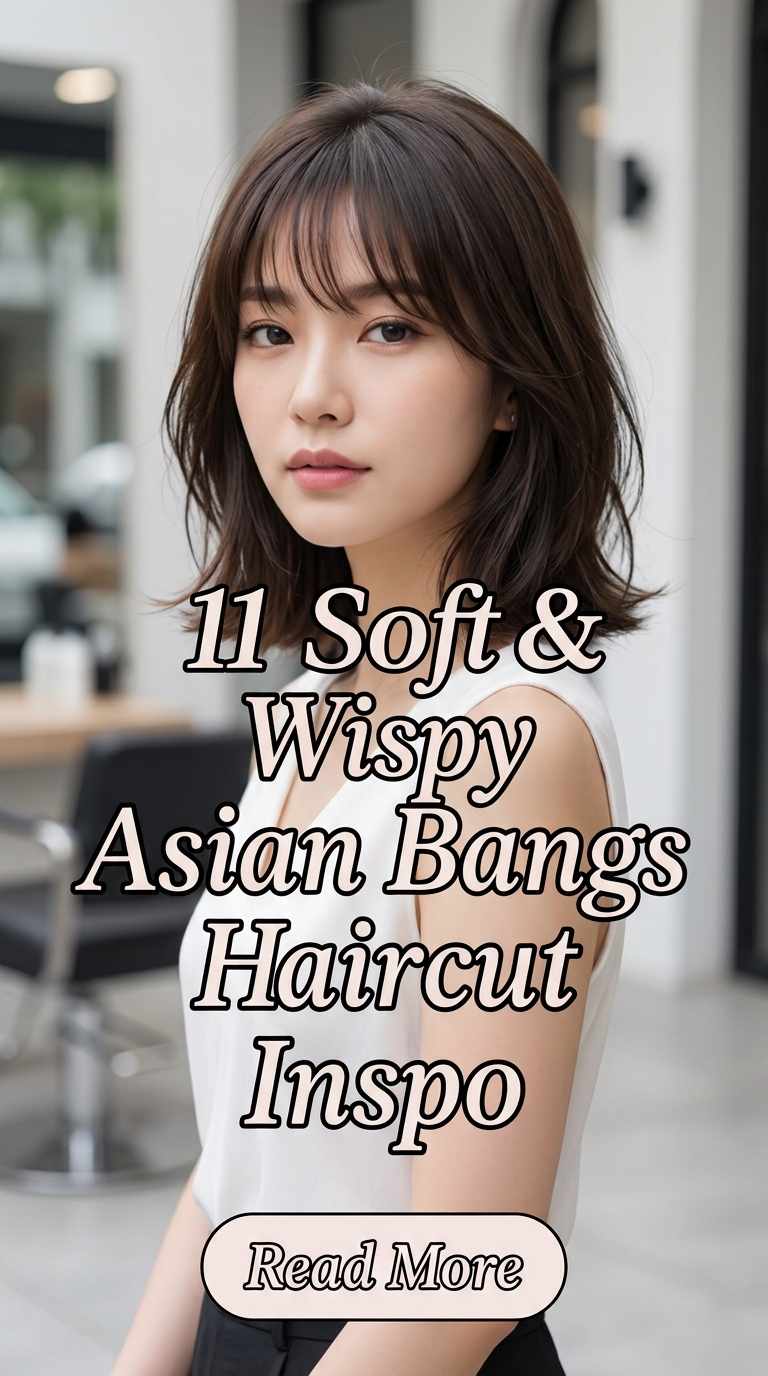
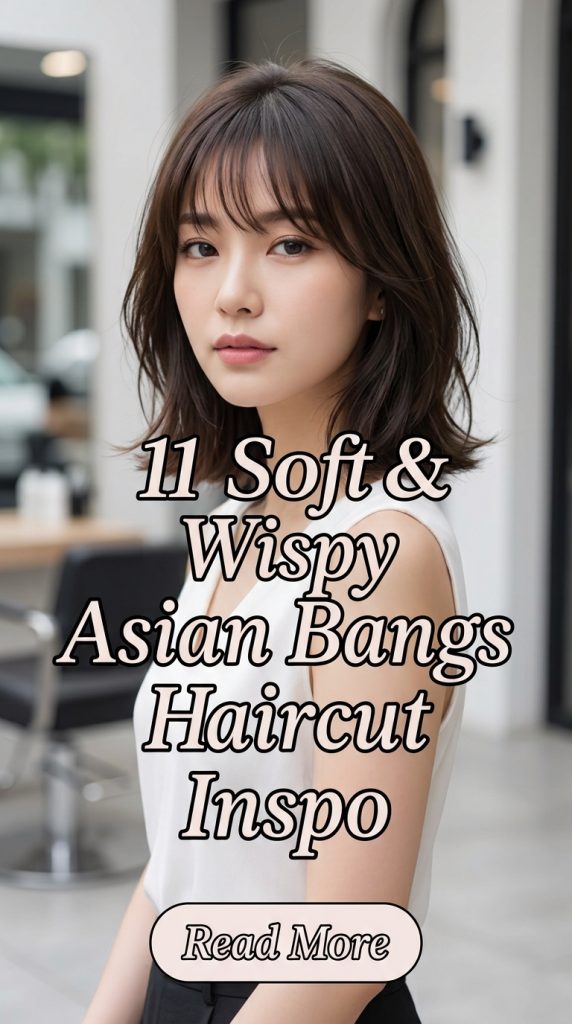
11 Soft & Wispy Asian Bangs Haircut Inspo
Fringe haircuts have always held a special place in the world of global fashion, personal expression, and beauty transformations. Among all modern styling trends, soft and wispy Asian bangs stand out as an absolute symbol of effortless grace, youthful charm, and delicate facial framing. However, many people mistakenly believe that pulling off delicate fringe is extremely difficult, requires thick hair, or demands high-maintenance salon visits every single week.
Modern Asian haircutting techniques have completely revolutionized these traditional styling methods into versatile, low-maintenance, and beginner-friendly everyday options. Today, you can wear beautifully tailored wispy fringe to the office, the gym, a casual coffee date, or a high-end evening gala with total confidence. This comprehensive guide will explore eleven fresh, stunning, and detailed Asian bangs concepts to inspire your next haircut transformation.
The Basics of Modern Wispy Fringe Sculpting
Achieving the perfect wispy Asian fringe requires a fundamental understanding of face shapes, natural cowlicks, hair density, and mechanical styling tools. Before you pick up hair shears or commit to a dramatic salon haircut, you must prepare your hair strands correctly. Clean hair can often be too slippery or separate down the middle awkwardly, causing your bangs to fall flat across your forehead.
1. The Korean See-Through Air Fringe (Sithuru Bangs)
Embracing Minimalist Feather-Light Softness for Daily Wear
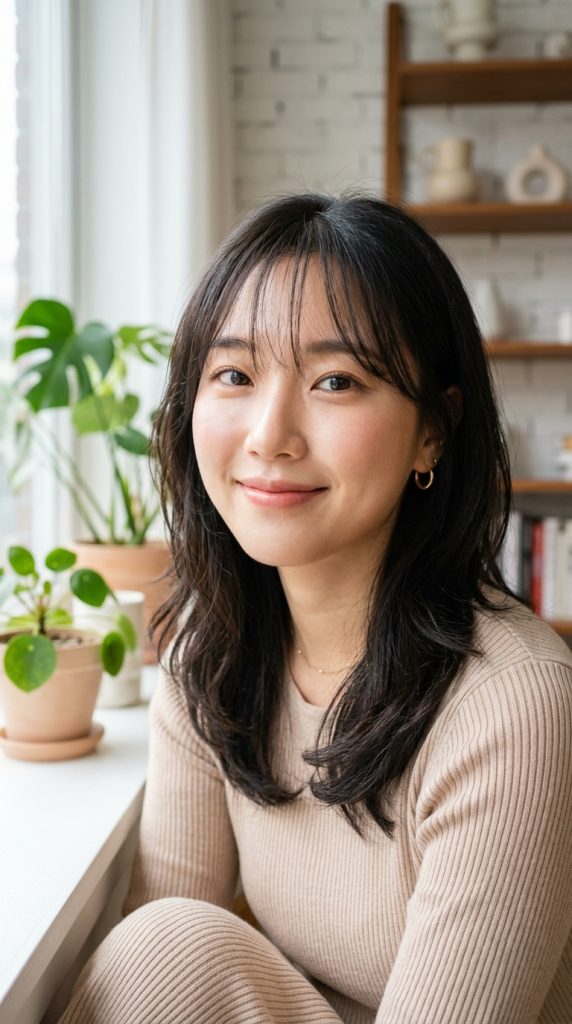
The iconic Korean see-through air fringe—often referred to as “Sithuru” bangs—breathes fresh life into traditional, heavy fringe styles. This haircut relies on taking a tiny, triangular section of hair from the very front of the hairline. It celebrates delicate gaps, lash-grazing lengths, and an airy silhouette that allows your skin to peek through naturally.
When you remove the weight of heavy horizontal cutting lines, wearing bangs becomes exceptionally comfortable and versatile. This soft version focuses on lightness and mobility, making it ideal for individuals with fine to medium hair textures. It pairs beautifully with natural, glowy makeup looks and subtle, face-framing layers.
Selecting the Right Everyday Texturizers
The secret to keeping see-through bangs fresh all day is preventing natural forehead oils from clumping your strands together. Without proper oil control, your airy fringe will flatten out and separate into greasy pieces within a few hours. Therefore, avoid applying heavy facial creams or facial oils directly onto your upper forehead.
Instead, utilize translucent dry shampoos, silica powders, or matte texturizing mists right at the roots. These products absorb excess sebum continuously, keeping your fringe lightweight, bouncy, and easy to adjust with your fingers. They give your hair a clean, soft finish that holds up throughout busy working days.
Essential Supplies for Air Fringe Styling
- Translucent oil-absorbing dry shampoo powder
- Mini ceramic tourmaline flat iron
- Boar bristle small round brush
- Mini Velcro hair roller accessory
- Fine-tooth carbon tail comb
Step-by-Step Implementation Guide
- Lightly mist your front hairline with dry shampoo to absorb natural skin oils.
- Comb a small triangular section of hair forward using your fine-tooth tail comb.
- Blow dry the hair downward using a small boar bristle round brush on medium heat.
- Direct the airflow from above to flatten any stubborn cowlicks right at the root.
- Wrap the middle strands around a mini Velcro roller and let it set for five minutes.
- Unroll the roller gently and separate the strands evenly across your forehead.
- Run a mini flat iron through the ends, curving the tips inward very slightly.
- Mist a light, flexible working hairspray onto your fingers and pinch the tips.
2. The Japanese Kawaii Wispy Curtain Blend
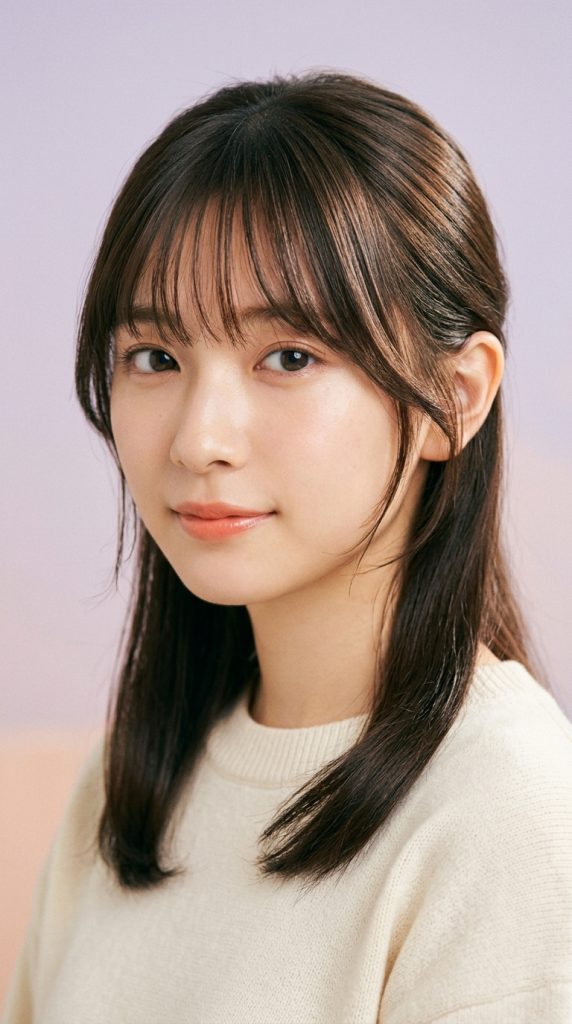
Blending Soft Center Strands with Cheekbone-Skimming Wings
Combining delicate center fringe with soft, cheekbone-skimming curtain wings creates a classic Japanese-inspired silhouette that flatters almost every face shape. This haircut features shorter, feathered pieces over the brows that gradually lengthen into soft side layers. It narrows rounder cheeks while softening angular jawlines effortlessly.
The philosophy behind this design is continuous movement and seamless integration into the rest of your haircut. Rather than creating a stark contrast between your fringe and your length, the side wings curve outward gracefully. This allows you to tuck your hair behind your ears while keeping soft, flattering tendrils out.
Mastering the Dual-Direction Blowout Technique
Achieving proper flow with this haircut requires a two-step styling process. You must style the central wispy section straight forward, while sweeping the longer side wings backward away from your eyes. This creates a open, eye-catching frame that highlights your cheekbones.
Apply a small amount of lightweight styling mousse to damp roots before applying heat. Using a round brush, lift the central bangs forward and up for volume, then roll the side pieces back toward your temples. This sets a soft, wave-like memory into the hair that lasts all day.
Materials Required for Japanese Curtain Blends
- Volumizing root-lifting hair mousse
- Medium-sized ionic ceramic round brush
- Professional hair dryer with a narrow concentrator nozzle
- Sectioning alligator clips
- Lightweight glossing finishing mist
Step-by-Step Implementation Guide
- Apply a small dollop of volumizing mousse to your damp fringe roots.
- Separate the center wispy bangs from the longer side curtain wings using clips.
- Place your round brush under the center section and blow dry forward for volume.
- Switch to the right side wing, wrapping the hair around the brush away from your face.
- Blow dry the right wing backward toward your temple to create a soft curve.
- Repeat the backward blow-drying technique on the left side wing section.
- Comb all sections together gently using a wide-tooth comb to blend the edges.
- Apply a light mist of glossing spray across the ends for a healthy, shiny finish.
3. The Feathered Asian Micro-Wispy Fringe
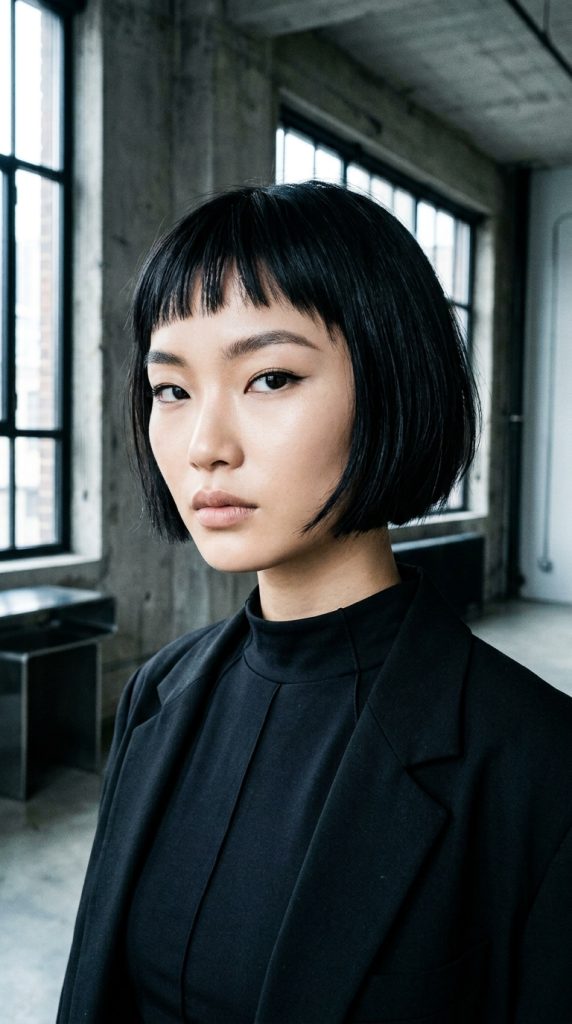
Embracing Bold Architectural Lines with Ultra-Light Texture
For individuals seeking an artistic, high-fashion statement, the feathered micro-wispy fringe is an exceptional choice. This haircut sits approximately an inch above the eyebrows, offering a short, choppy length that opens up the face. However, unlike heavy blunt micro bangs, this Asian variation is cut with soft, feathered ends.
This style provides a cool, editorial edge while remaining soft and approachable. It highlights your eyes, brows, and facial structure with striking clarity. It is a brilliant option for fine hair types, creative professionals, and those who love wearing statement glasses.
Controlling Short Layers with Lightweight Pastes
Shorter hair pieces tend to stick straight out or bend into unwanted directions overnight. To keep your micro fringe lying flat and piecey, you need a styling product that provides light hold without adding heavy grease. A matte texturizing paste or styling wax is ideal for this task.
Warm a tiny, pea-sized amount of paste between your fingertips until it turns completely clear. Gently pinch the tips of your micro-bangs to create defined, feathered texture. This prevents the short cut from looking like a solid, blunt block across your upper forehead.
Tools for the Feathered Micro-Fringe
- Matte finish texturizing styling paste
- Miniature ceramic flat iron
- Fine-tooth rat tail comb
- Boar bristle edge-smoothing brush
- Anti-humidity flexible shield spray
Step-by-Step Implementation Guide
- Dampen your micro-bangs completely to reset the root direction before styling.
- Apply a tiny drop of texturizing paste through the damp hair strands.
- Blow dry the short bangs flat against your forehead using downward brush strokes.
- Press the concentrator nozzle of your dryer close to the hair to set the direction.
- Use a mini flat iron to smooth out any stubborn kinks near the roots.
- Pinch individual hair ends together using your fingertips and a touch of paste.
- Mist the entire fringe with an anti-humidity spray to shield against moisture.
- Gently run a rat tail comb through the tips to ensure soft, feathered separation.
4. The Soft Bottleneck Fringe with Tapered Layers

Blending Narrow Roots with Flared Cheekbone Contours
Bottleneck bangs are a modern, trending variation of traditional curtain fringe that mimics the shape of a classic glass bottle. The haircut starts narrow at the center of the forehead, then curves outward dynamically into longer side layers. This Asian adaptation keeps the center section soft and wispy rather than thick and heavy.
This silhouette offers maximum versatility for individuals who want the option to hide or show their forehead. The narrow middle section provides soft coverage, while the flared sides frame the cheekbones. It blends effortlessly into long layers, shags, or classic shoulder-length bobs.
Sculpting the Bottleneck Curve with Heat Tools
Achieving the signature bottleneck shape requires strategic directional heat styling. You want the center section to fall straight down smoothly, while the outer wings flare away from your eyes. Using a flat iron with curved edges allows you to shape both sections quickly.
Take the narrow center section and glide your flat iron straight down, turning the wrist slightly inward at the very ends. Next, take the side wings, clamp the iron near the roots, and glide outward toward your hairline in a soft “C” shape. This creates a smooth, flowing bottleneck outline.
Bottleneck Styling Tools Checklist
- One-inch ceramic flat iron with rounded plate edges
- Heat protectant styling spray
- Large Velcro hair rollers
- Flexible working hairspray
- Teasing comb for subtle root support
Step-by-Step Implementation Guide
- Spritz your damp bangs with a heat protectant spray from roots to tips.
- Blow dry the central narrow section straight down using a flat brush.
- Glide your flat iron through the center section, turning slightly inward at the tips.
- Clamp the right side wing with your flat iron and sweep it outward in a soft “C” motion.
- Repeat the outward “C” motion on the left side wing to match the symmetry.
- Roll the entire fringe loosely onto a large Velcro roller while the hair is still warm.
- Allow the hair to cool on the roller for three minutes to lock in the memory.
- Remove the roller and comb the fringe into place, setting it with a light hairspray.
5. The Wispy French-Asian Hybrid Bangs
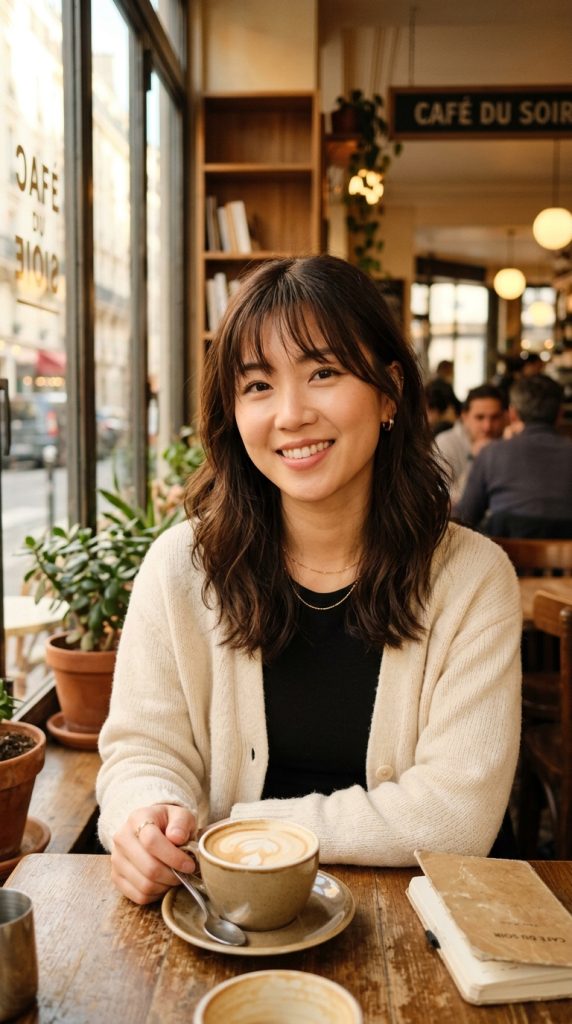
Combining Parisian Effortlessness with Eastern Precision
The French-Asian hybrid fringe bridges the gap between chic Parisian bedhead texture and precise Asian hair sculpting. This haircut is slightly fuller than a traditional see-through air fringe, yet far lighter than a solid French fringe. It features soft, piecey center strands that graze the eyelashes with slightly longer temple pieces.
This style exudes an effortless, “lived-in” aesthetic that looks stylish without appearing over-processed. It works exceptionally well for individuals with medium to thick hair density who want a lighter front section without losing their hair’s natural body.
Creating Lived-In Texture without Heavy Products
The charm of the French-Asian hybrid fringe lies in its natural, touchable movement. You want to avoid stiff hairsprays or heavy gels that make the hair look rigid. Instead, use dry texturizing sprays or sea salt mists to build soft, touchable volume.
Spray a light mist of dry texturizer onto dry bangs, then shake the hair out using your fingers. This breaks up uniform lines, giving the fringe a soft, piecey look. It allows the bangs to move naturally with the wind while returning to their shape easily.
Supplies for the French-Asian Hybrid Look
- Dry texturizing spray
- Medium boar bristle round brush
- Professional ionic hair dryer
- Flat metal no-crease hair clips
- Matte finish texturizing powder
Step-by-Step Implementation Guide
- Wash and towel dry your hair, leaving the fringe section slightly damp.
- Blow dry the bangs using a medium boar bristle brush, sweeping side-to-side.
- Sweep the brush continuously left and right to eliminate any center parts.
- Finish blow drying with the brush underneath, curling the tips inward gently.
- Lightly dust a tiny amount of texturizing powder right at the roots.
- Massage the powder in with your fingertips to create airy elevation.
- Spritz dry texturizing spray through the mid-lengths to create piecey gaps.
- Use no-crease clips on the side pieces for two minutes to set a soft frame.
6. The Textured Shag Wispy Fringe
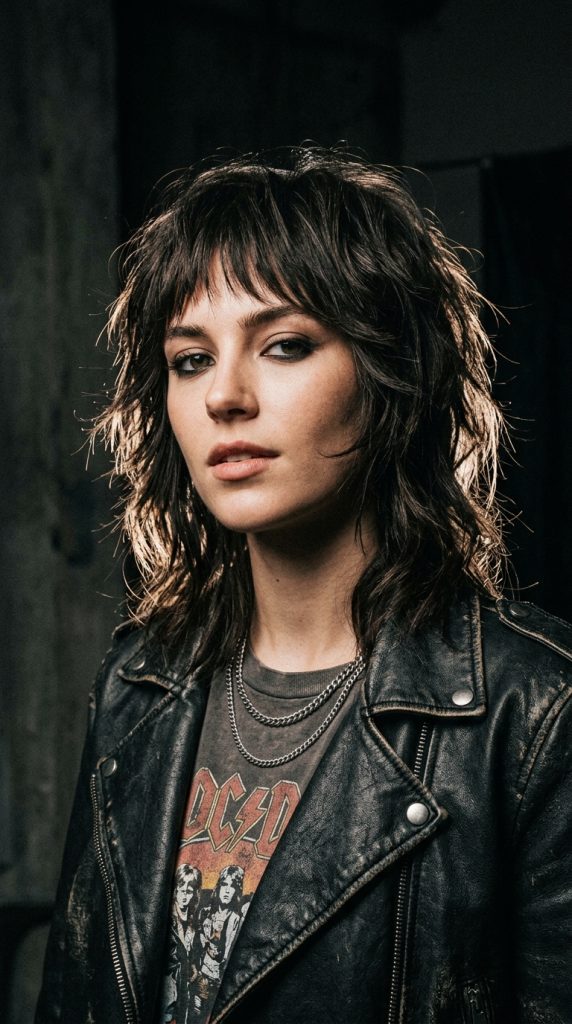
Injecting Rock-and-Roll Energy into Soft Asian Cuts
Combining a wispy fringe with a heavily layered shag or wolf cut creates a dynamic, rock-and-roll silhouette. This haircut features razored, textured bangs that blend into choppy side layers and face-framing steps. It adds immediate movement, volume, and personality to straight or slightly wavy hair.
The wispy shag fringe is perfect for those who love low-maintenance, bedhead aesthetics. The razored ends prevent the hair from looking heavy, allowing your natural texture to bounce freely. It pairs exceptionally well with casual outfits, graphic tees, and bold eye makeup.
Enhancing Layered Separation with Sea Salt Mists
To highlight the choppy, razored layers of a shaggy wispy fringe, you need a product that adds grip and separation. Sea salt mists or texturizing salt sprays are ideal for creating that beachy, effortless separation.
Spritz a texturizing sea salt mist onto damp bangs, then scrunch the hair gently with your fingers as you blow dry with a diffuser attachment. This brings out natural bends and waves, creating a textured, piecey finish that looks cool and energetic.
Shag Fringe Supplies List
- Texturizing sea salt mist spray
- Professional hair dryer with diffuser attachment
- Flexible styling paste or clay
- Wide-tooth styling comb
- Sectioning clips
Step-by-Step Implementation Guide
- Spritz damp bangs generously with a texturizing sea salt mist.
- Scrunch the fringe section gently using your fingers to encourage natural wave.
- Attach a diffuser to your hair dryer and dry the bangs on low airflow.
- Cup the hair in the diffuser bowl to build natural texture without frizz.
- Warm a tiny pinch of styling clay between your fingertips once dry.
- Pinch individual razored ends to create defined, piecey separation.
- Use a wide-tooth comb to gently break up any overly stiff sections.
- Shake your head out lightly to let the shaggy fringe settle naturally.
7. The Soft Wispy Side-Swept Asian Bangs

Creating Gentle Diagonal Lines for Round Face Shapes
For individuals with rounder face shapes or shorter foreheads, a soft wispy side-swept fringe is an exceptional styling option. This haircut sweeps diagonally across the forehead, creating an asymmetrical line that visually elongates the face. The thin, feathered texture keeps the look light and modern rather than heavy or dated.
Side-swept wispy bangs offer an elegant, sophisticated appearance that seamlessly blends into long layers or a classic bob. They are easy to pin back or tuck away when you want a bare-faced look, making them a low-commitment choice.
Training the Roots for a Smooth Diagonal Sweep
The key to a long-lasting side-swept fringe is training the roots to lay in a continuous diagonal direction. If your roots naturally grow forward or split down the middle, you must use heat and directional brushing to redirect them.
While blow drying, use a fine-tooth comb to pull the fringe tautly in the opposite direction of where you want it to lay. Once dry, sweep the hair back to its intended side. This creates a soft, natural arch that holds its diagonal line throughout the day.
Side-Swept Accessories Checklist
- Fine-tooth carbon tail comb
- Directional blow drying concentrator nozzle
- Lightweight flexible hold hairspray
- Decorative metal barrette or bobby pin
- Smoothing boar bristle brush
Step-by-Step Implementation Guide
- Comb your damp fringe forward using a fine-tooth tail comb.
- Determine your side part line above the highest point of your eyebrow arch.
- Pull the fringe section diagonally in the opposite direction of your part.
- Blow dry the taut hair in this opposite direction using high heat.
- Once 90% dry, sweep the fringe back across your forehead to its natural side.
- Use a flat iron to gently curve the ends away from your eyes.
- Mist a light, flexible hold hairspray across the diagonal surface.
- Optionally, secure the longer side ends behind your ear with a sleek barrette.
8. The Romantic Curly-Wispy Asian Fringe
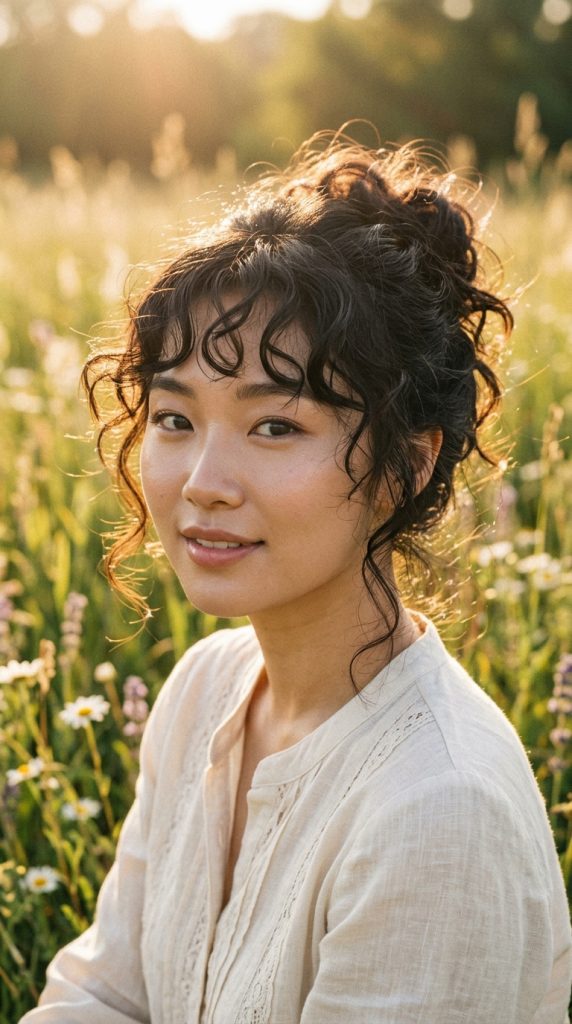
Honoring Natural Waves with Delicate Face-Framing Rings
Natural waves and soft curl patterns look breathtaking when paired with a light, wispy fringe. The romantic curly-wispy Asian bangs style embraces natural texture, creating soft, bouncy ringlets that fall delicately across the brow line. This haircut adds a playful, fairytale charm to any updo or loose hairstyle.
Unlike straight wispy bangs that require daily heat styling, curly wispy fringe relies on proper hydration and gentle drying techniques. The natural bends create built-in volume and separation that stays bouncy all day.
Hydrating Curls for Frizz-Free Definition
Curly and wavy hair textures are naturally prone to dryness and frizz, making moisture an essential part of styling. Before styling your wispy curly fringe, apply a hydrating leave-in conditioner or curl-defining cream to damp strands.
Avoid using fine-tooth combs on dry curls, as this breaks up the natural curl pattern and creates a frizzy halo. Instead, use your fingers to coil individual wispy pieces into shape while wet, allowing them to dry undisturbed.
Curly Fringe Essential Products
- Hydrating leave-in conditioner cream
- Alcohol-free curl-defining gel mist
- Professional hair dryer with diffuser attachment
- Microfiber hair towel
- Lightweight hair oil for scrunching out the crunch
Step-by-Step Implementation Guide
- Apply a small drop of leave-in conditioner to soaking-wet fringe strands.
- Spritz the bangs with an alcohol-free curl-defining gel mist.
- Gently scrunch the fringe upward toward your hairline using a microfiber towel.
- Finger-coil individual wispy sections to define small, delicate curl loops.
- Attach a diffuser to your dryer and dry the fringe on low heat and low speed.
- Hold the diffuser under the curls without moving it around frantically.
- Once 100% dry, apply a drop of hair oil to your hands and scrunch out any stiffness.
- Fluff the roots gently with your fingertips for natural volume and bounce.
9. The Minimalist Long Wispy Curtain Bangs
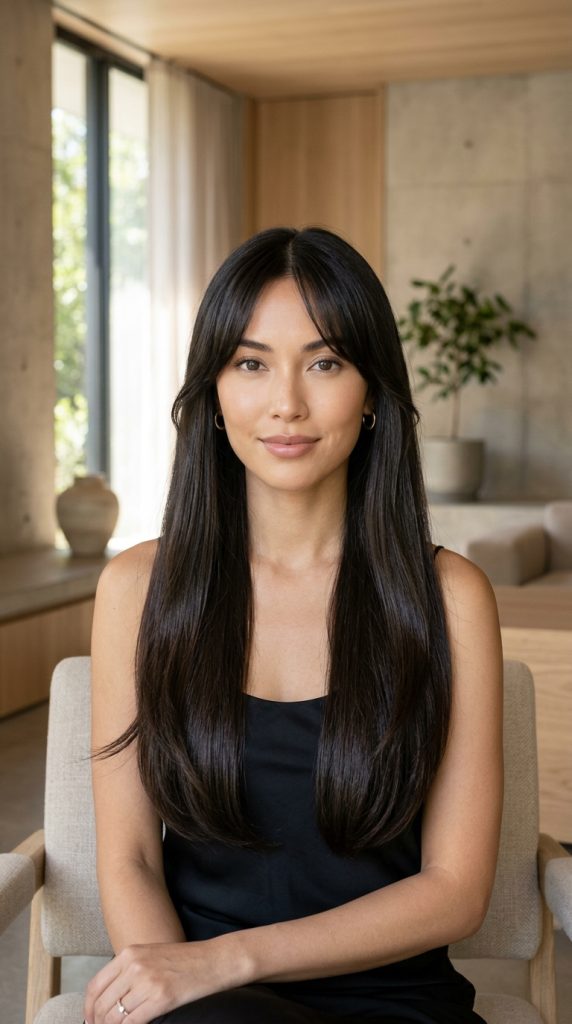
Elegant Cheekbone Framing for Low-Maintenance Styles
If you love the look of bangs but do not want hair sitting directly over your eyes, long wispy curtain bangs are the ultimate solution. This haircut features long, delicate strands that start around the bridge of the nose and sweep down past the cheekbones. It offers graceful facial framing that can be pulled back easily into a ponytail.
Long wispy curtain bangs add immediate sophistication to long straight hair, subtle waves, or sleek updos. They provide a soft visual transition between your face and your length, making your hairstyles look intentional and polished.
Creating Soft “S” Waves with a Flat Iron
To give long curtain bangs a graceful, floating curve, shape them into soft “S” waves. This outward sweep highlights your cheekbones and opens up your face beautifully. A flat iron with rounded edges is the easiest tool for creating this effect.
Clamp your flat iron at the roots of your long curtain section. Glide the iron down an inch, then turn it 180 degrees away from your face as you pull through to the ends. This creates a soft, natural flare that sits perfectly along your facial contours.
Long Curtain Supplies Checklist
- One-inch ceramic flat iron with rounded plates
- Heat protectant spray
- Large Velcro rollers
- Lightweight hair oil
- Fine-tooth parting comb
Step-by-Step Implementation Guide
- Part your hair down the center using a fine-tooth parting comb.
- Spritz heat protectant spray through the long curtain sections on both sides.
- Clamp the left curtain section with your flat iron near the eye level.
- Rotate the iron away from your face and glide through to the ends.
- Repeat the outward iron rotation on the right curtain section.
- Wrap each side section loosely onto a large Velcro roller while warm.
- Leave the rollers in for five minutes while applying your makeup or finishing your routine.
- Remove the rollers, run a drop of hair oil through the ends, and let them sweep back naturally.
10. The Wispy Two-Tone Accent Fringe
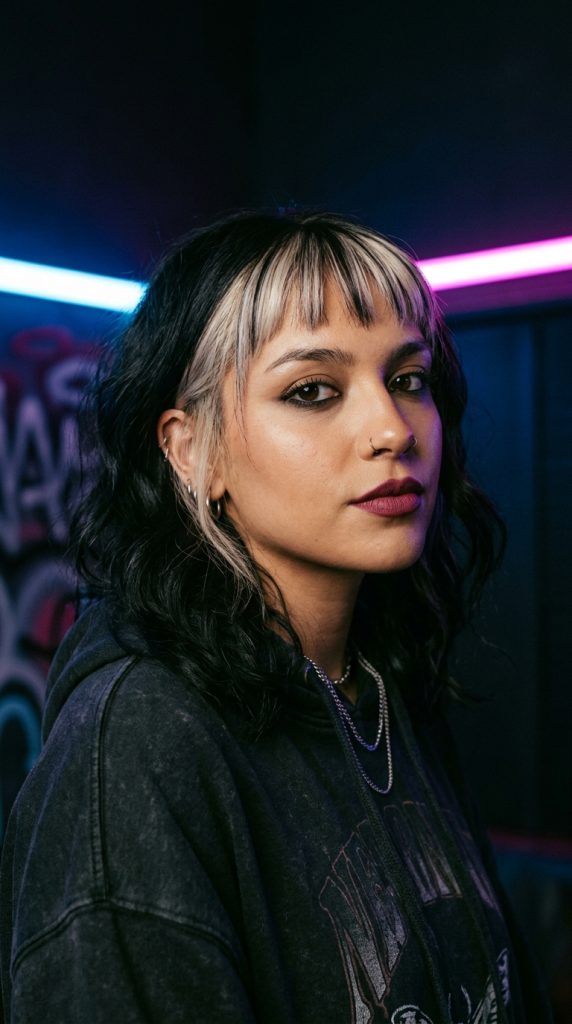
Injecting Creative Color and Dimension into Modern Cut
For individuals who love alternative fashion, creative self-expression, or modern streetwear, the wispy two-tone accent fringe offers a bold statement. This style involves coloring the thin wispy front fringe a contrasting shade from the rest of your hair—such as platinum blonde, pastel pink, or warm copper against dark hair.
Because wispy bangs use a minimal amount of hair, coloring this section causes far less damage than dyeing an entire head of hair. It creates an eye-catching visual frame that accentuates your eyes and brightens your complexion instantly.
Maintaining Bleached Wispy Strands Safely
Bleaching even thin sections of hair can leave strands delicate and prone to breakage if not cared for properly. To keep your two-tone wispy fringe soft, healthy, and vibrant, you must incorporate bond-building treatments and thermal protection into your routine.
Always use a low temperature setting when using flat irons or curling irons on lightened hair. Apply a bond-repairing hair oil to damp fringe before blow drying to protect the structural integrity of the hair fibers.
Two-Tone Accent Supplies List
- Bond-building repair hair oil
- Color-safe moisturizing shampoo and conditioner
- Low-heat ceramic mini flat iron
- UV-protectant shine spray
- Mini fine-tooth comb
Step-by-Step Implementation Guide
- Wash your colored fringe with a color-safe moisturizing shampoo.
- Apply two drops of bond-building repair oil to damp lightened strands.
- Blow dry the wispy fringe on a cool or low-heat setting using a round brush.
- Keep the blow dryer nozzle moving constantly to avoid localized heat damage.
- Use a low-heat mini flat iron to smooth the fringe if necessary.
- Piece out the colored tips using a touch of hair oil on your fingertips.
- Mist with a UV-protectant shine spray to prevent the custom color from fading.
- Gently comb the strands across your forehead to showcase the vibrant color contrast.
11. The Wispy Half-Up Updo Framing Fringe
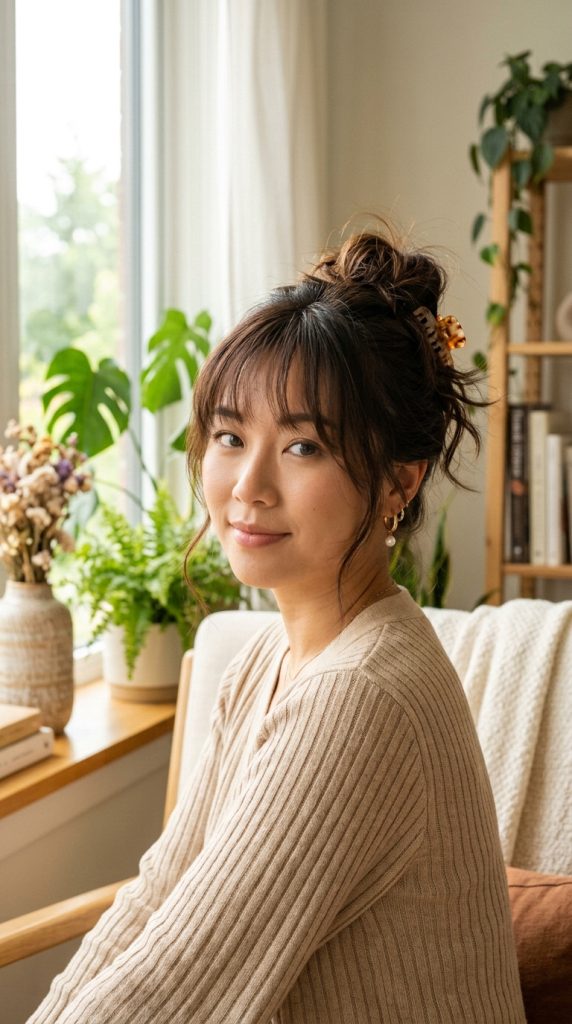
Elevating Everyday Buns and Ponytails with Face-Framing Tendrils
One of the greatest benefits of having a wispy Asian fringe is how incredible it looks when the rest of your hair is pulled up. Whether you are wearing a messy high bun, a sleek ponytail, or a half-up clip style, a soft wispy fringe prevents the updo from looking harsh or slicked-back.
This styling concept focuses on pairing delicate center bangs with slightly longer side tendrils that drape around the temples and jawline. It creates a soft, romantic look that elevates simple, casual updos into chic, effortless styles instantly.
Perfecting the Balance Between Updo and Fringe
The key to a gorgeous framing updo is ensuring a clean separation between the hair pulled back and the face-framing pieces left out. You want the updo itself to sit securely, while the fringe and side tendrils float softly around your face.
Use a rat-tail comb to section off your wispy bangs and side tendrils before pulling the rest of your hair back into a bun or ponytail. Secure your updo first, then go back and style the loose framing pieces using a mini flat iron or round brush.
Updo Framing Supplies Checklist
- Rat-tail metal parting comb
- Heavy-duty hair elastics or claw clips
- Mini flat iron or curling wand
- Flexible hold hairspray
- Smoothing edge brush
Step-by-Step Implementation Guide
- Separate your wispy bangs and temple tendrils forward using a rat-tail comb.
- Secure the rest of your hair into a high bun, ponytail, or half-up claw clip style.
- Smooth any flyaways along your scalp using a smoothing edge brush and light hairspray.
- Focus on the loose wispy front bangs, blow drying or flat ironing them smooth.
- Take the longer temple tendrils and curve them gently inward toward your jawline using a flat iron.
- Lightly mist your fingers with flexible hairspray and touch up the tips of your bangs.
- Gently tug on a few small strands near your ears to soften the overall updo silhouette.
- Step back and check your profile view, ensuring the framing tendrils balance the updo height.