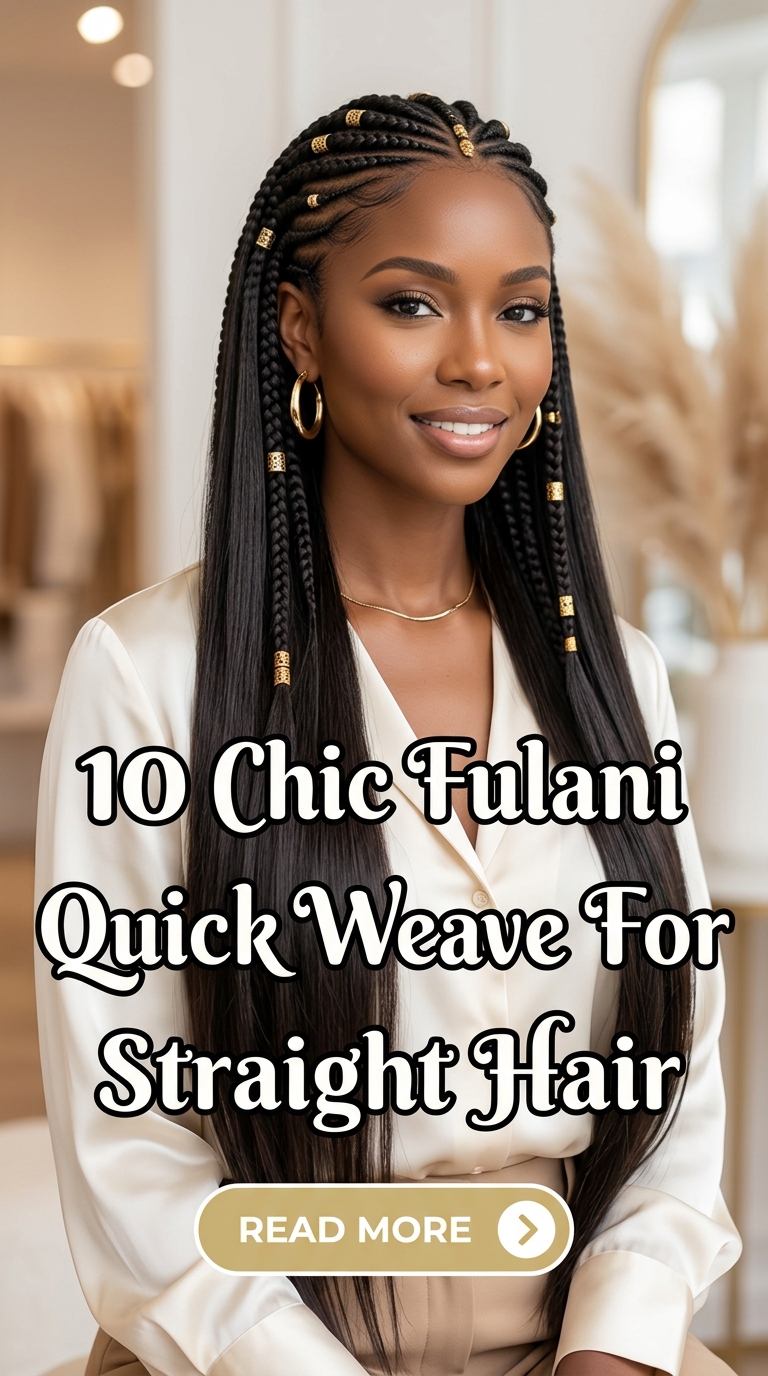
10 Chic Fulani Quick Weave For Straight Hair
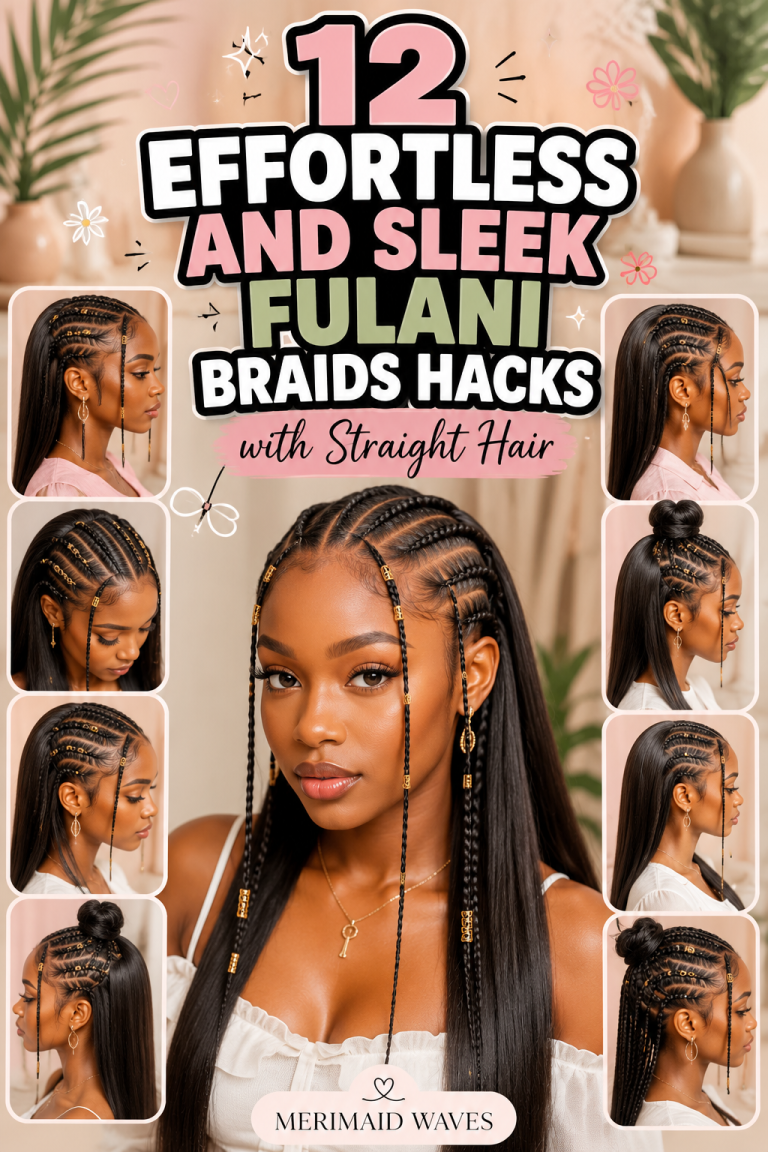
The Fulani quick weave represents a stunning fusion of traditional African look and modern sleek styles. Consequently, it creates a high-contrast style. This silhouette perfectly balances structured protective braids with bone-straight lengths. Many women assume that blending texturized scalp cornrows with straight hair takes all day. However, using a protective cap method, you can easily create this style at home. It provides a secure, lightweight canvas. Thus, your natural hair stays fully protected.

Why Choose a Fulani Quick Weave?
Opting for a quick weave over a traditional sew-in offers immense styling speed. Furthermore, it saves hours of sitting in a salon chair. This makes it an incredibly practical choice for busy modern women. Second, the front section beautifully frames your face with clean geometric lines. Therefore, it accentuates your jawline and cheekbones perfectly. Lastly, leaving the back free and straight provides a stunning fluid length. Thus, the hair sways elegantly with your every step.
Finding Your True Texture and Palette Balance
The secret to a natural look lies in matching your premium extensions perfectly. To achieve a seamless transition, use high-quality human hair bundles. Bone-straight extensions featuring a high-gloss finish provide the ultimate clean contrast. If you want extra depth, experimenting with subtle ombre color variations works beautifully. For example, rich chocolate brown or honey-blonde tips look amazing. Always prioritize tangle-free extensions to ensure the long back lengths maintain movement.
Designing Your Protective Base Architecture
Before applying any bonding glue, you must carefully engineer your hair layout. The front half of your scalp is dedicated to the cornrow patterns. Meanwhile, the back half is flattened to support the tracks. Apply a generous layer of liquid hair shield over the rear hair. This step forms a complete barrier against the hair glue. Thus, it protects your natural strands from breakage during removal later. Once the shield dries completely, stretch the black cap tightly over the area.
Gathering Your Professional Styling Toolkit
You will need a specific set of tools to ensure a smooth installation. First, invest in a fine-tooth metal rat tail comb for precise parting. You will also need a black weaving cap and premium hair bonding glue. Keep a pair of sharp styling shears handy to cut extension tracks cleanly. Finally, collect an assortment of decorative accessories like beads, cuffs, and cowrie shells. These items adorn the front braids beautifully.
Idea 1: The High-Gloss Center-Parted Classic Duo
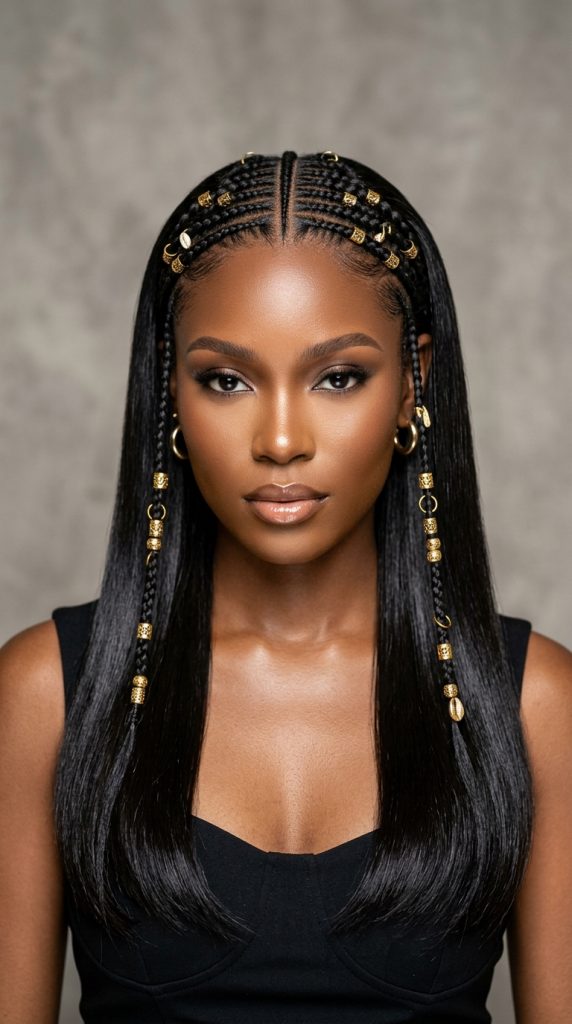
This iconic look features a razor-sharp center part with symmetrical front cornrows. The back transitions into a bone-straight quick weave falling past the shoulders. It utilizes a firm-hold styling jam to achieve a sleek surface sheen. This setup protects your natural edges completely while exuding modern geometric luxury.
Understanding the Classic Duo Concept
The Center-Parted Classic Duo focuses on achieving absolute facial symmetry. Instead of complex designs, you utilize clean lines that direct focus toward your eyes. The contrast between rigid front braids and liquid-smooth extensions creates a powerful dynamic. It uses minimal decoration, relying on a few polished gold cuffs.
Step-by-Step How-to Guide
Mapping the Symmetrical Center Part
First, use a rat tail comb to draw a straight middle line backward.
Braiding the Symmetrical Fulani Accents
Next, braid three tight cornrows downward on each side of the part.
Preparing the Protective Back Shield
Then, mold the back hair flatly against your scalp using gel.
Gluing the Bone Straight Tracks
After that, stretch a cap over the dried shield to glue tracks.
Adorning with Polished Gold Cuffs
Finally, slide gold metallic cuffs onto the front braid loops smoothly.
Materials List
- Premium Straight Extension Bundles: Provides the crucial bone-straight length.
- Liquid Hair Shield: Creates an absolute protective barrier.
- Rat Tail Comb: Essential for carving out laser-precise parting lines.
- Polished Gold Cuffs: Adds a beautiful traditional metallic shine.
- Firm-Hold Braiding Jam: Used to ensure the cornrows look neat.
Idea 2: The Deep Side-Swept Asymmetric Cascade
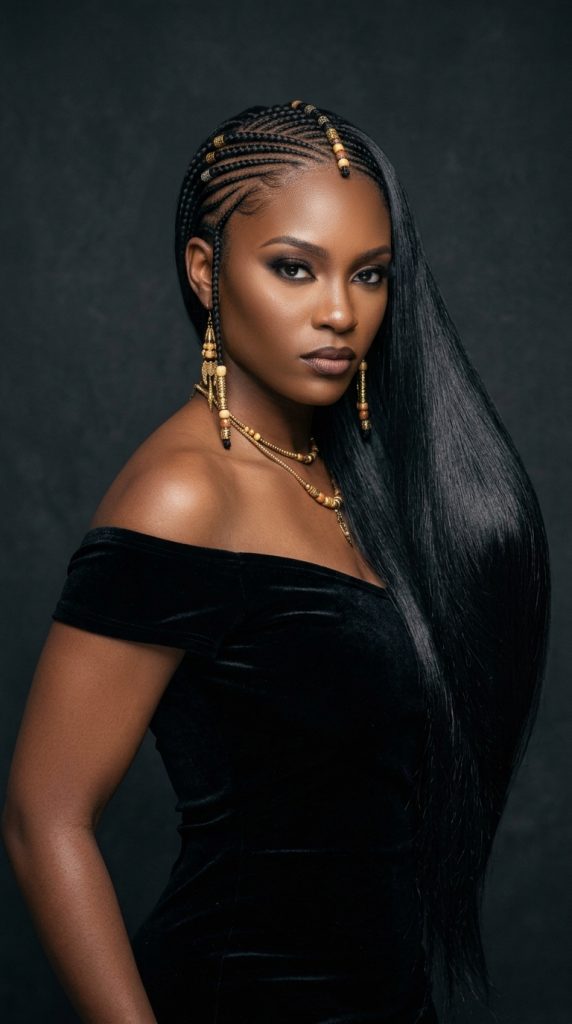
This sophisticated design replaces the traditional middle part with a dramatic side part. It pairs this striking asymmetrical front layout with a waist-length straight weave. It looks incredibly polished, modern, and fiercely confident. Therefore, it is the ultimate selection for contemporary red-carpet events.
The Impact of Asymmetric Framing
The Deep Side-Swept Cascade alters the dynamics by injecting sharp visual movement. This design features precise diagonal cornrows running across the top of your head. Consequently, it beautifully softens a square or angular jawline silhouette. It requires careful planning to ensure the braids transition smoothly into the straight extensions.
Step-by-Step How-to Guide
Sectioning the Deep Side Part
First, align your comb tip with the outer left eyebrow arch.
Braiding the Slanting Front Grid
Next, weave four dense cornrows diagonally across your forehead cleanly.
Securing the Flattened Nape Base
Then, braid the remaining rear hair into low flat circles tightly.
Layering the Waist Length Tracks
After that, secure your black cap down to glue the tracks.
Setting the Sleek Side Flow
Finally, sweep the straight weave section over your right shoulder.
Materials List
- Waist-Length Straight Extensions: Offers a dramatic, fluid length.
- Protective Liquid Barrier: Seals your natural hair cuticles safely.
- Flat Iron: Crucial for making the extensions perfectly straight.
- Sectioning Clips: Holds separate styling zones away cleanly.
- Glossing Serum: Adds a brilliant, healthy reflective sheen.
Idea 3: The Geometric Zig-Zag Halo Fusion
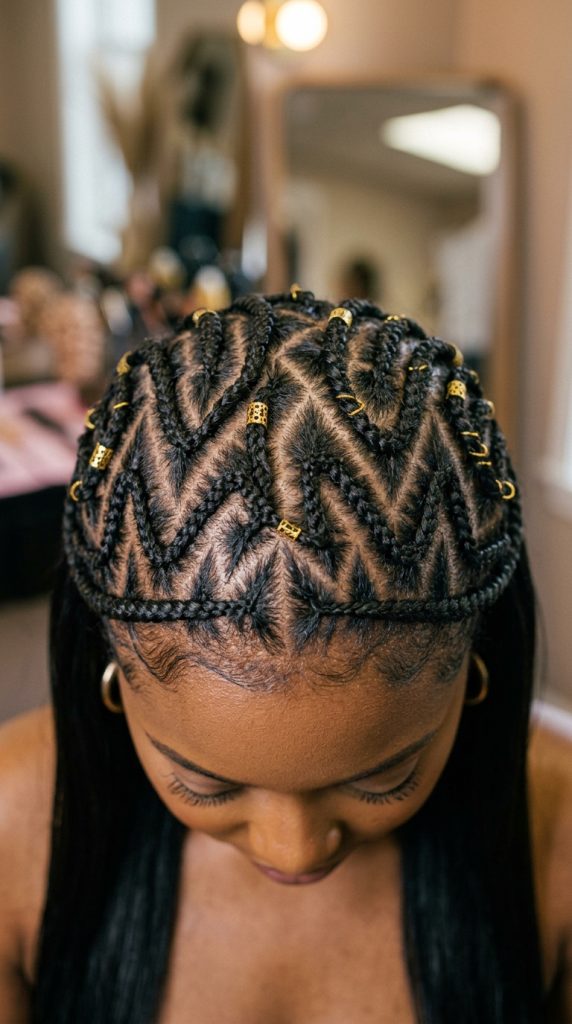
This bold design replaces traditional straight partings with a sharp zig-zag configuration. It wraps a thin halo braid continuously around the perimeter of the forehead. Then, it drops into a bone-straight, jet-black quick weave at the back. It looks incredibly artistic, edgy, and modern.
The Depth of Jagged Scalp Lines
The zig-zag parting pattern transforms the look by introducing graphic modern geometry. This design features precise, alternating diagonal lines that catch the light beautifully. Thus, it draws immediate attention to your technical hair craftsmanship. It utilizes strong styling gels to keep the scalp boundaries looking completely pristine.
Step-by-Step How-to Guide
Carving the Sharp Zig Zag
First, place the comb at the hairline to draw zig-zags.
Weaving the Perimeter Halo Braid
Next, begin a thin French cornrow along the hairline border.
Hardening the Protective Rear Cap
Then, gather the back hair tightly under a liquid shield.
Mounting the Jet Black Wefts
After that, glue your straight wefts in close, dense rows.
Polishing the Graphic Scalp Paths
Finally, apply a strong freeze gel along the jagged edges.
Materials List
- Jet-Black Straight Hair Wefts: Provides an intensely dark, uniform texture.
- Spandex Weaving Cap: Offers a stable surface for track bonding glue.
- Edge Brush: Used to flatten down stubborn baby hairs neatly.
- Freeze Gel: Instantly hardens the clean scalp lines into place.
- Hair Scissors: Crucial for trimming the cap borders cleanly.
Idea 4: The Minimalist Horizontal Chevron Ladder
This contemporary concept maps out a series of neat, horizontal chevron-shaped cornrows. It balances this intricate geometric scalp work with a bone-straight quick weave. The extensions fall in a clean, blunt-cut perimeter at the middle of your back. It is perfect for individuals who appreciate architectural clean lines.
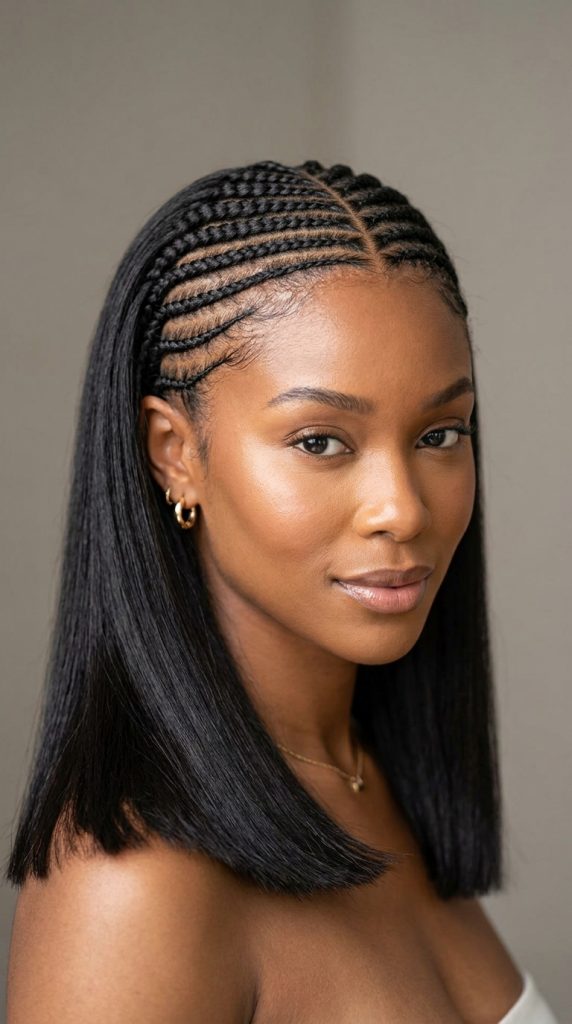
The Symmetry of Structured Ladders
The Chevron Ladder layout relies on absolute precision to create uniform, V-shaped rows. This design eliminates visual chaos by channeling all braid paths backward seamlessly. Consequently, they meet at a central anchor point where the weave begins. It utilizes thin, lightweight wefts to ensure the transition zone looks completely flat.
Step-by-Step How-to Guide
Laying out the Chevron Grid
First, part your front hair into four matching horizontal strips.
Braiding the V Shaped Steps
Next, cornrow each strip inward to form a chevron step.
Molding the Sleek Back Surface
Then, brush your back hair flatly using a firm pomade.
Bonding the Blunt Cut Wefts
After that, secure your cap and glue the extensions tightly.
Executing the Sharp Perimeter Cut
Finally, use your shears to cut a sharp horizontal edge.
Materials List
- Blunt-Cut Straight Bundles: Provides a heavy, dense volume profile.
- Firm Styling Pomade: Offers excellent structural control for molding hair.
- Weaving Bonding Glue: Locks track wefts securely onto the cap.
- Tail Comb: Crucial for measuring and executing the chevron steps.
- Shears: Used to sculpt the clean horizontal blunt edge line.
Idea 5: The Ombre Honey-Blond High-Contrast Sleek
This vibrant, high-fashion look incorporates a stunning honey-blonde color transformation. It features deep, dark natural roots along the front Fulani cornrows. Then, it transitions into bright, golden-blonde lengths cascading down the back. It is perfect for bold trendsetters who want to add visual depth.
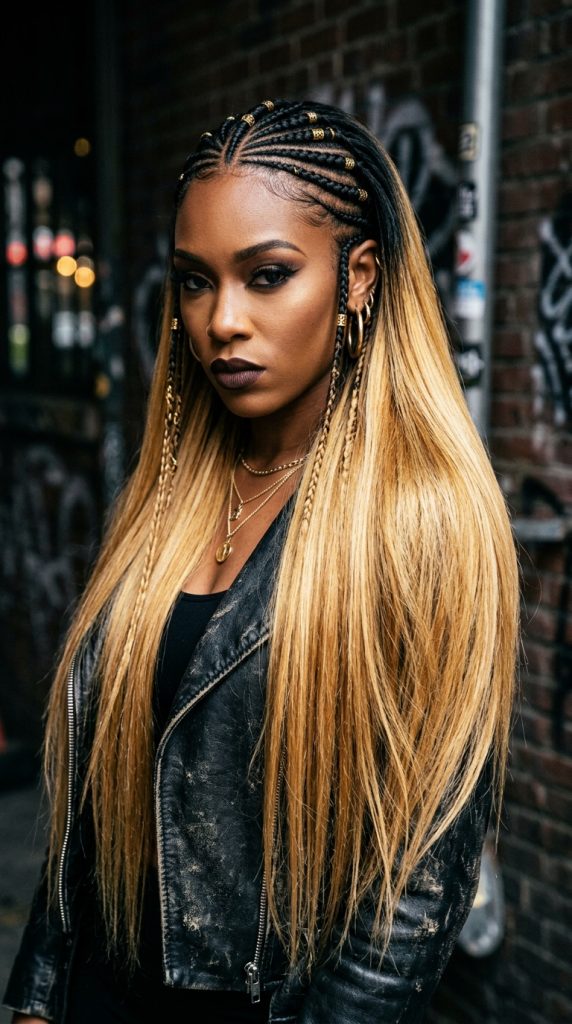
Enhancing Length Through Color Gradients
Coloring your quick weave extensions with warm honey-blonde tones changes light interaction. This design combines the rich texture of dark braids with bright straight tresses. Consequently, it creates an intensely multi-dimensional style. It utilizes advanced leave-in serums to keep the blonde fiber looking silky and fluid.
Step-by-Step How-to Guide
Parting for Dark Braid Roots
First, weave your front Fulani cornrows using natural uncolored hair.
Securing the Protective Shield Layer
Next, smooth your back hair flatly under a liquid shield.
Gluing the Honey Blond Tracks
Then, apply bonding glue to your honey-blonde straight tracks.
Blending the Color Transition Zone
After that, ensure the top track sits flush behind braids.
Applying the Silicone Gloss Serum
Finally, work a drop of serum through the blonde lengths.
Materials List
- Honey-Blonde Straight Extensions: Introduces bright golden tones instantly.
- Dark Hair Bonding Glue: Blends invisibly with the black weaving cap.
- Silicone Gloss Serum: Coats the extension fibers to eliminate frizz.
- Flat Iron: Used to press the hair into a bone-straight configuration.
- Satin Wrap Scarf: Ties down the top transition zone overnight.
Idea 6: The Wet-Look Liquid Straight Bob
This high-shine design pairs a classic, sharp asymmetrical bob with a glossy finish. It utilizes an abundance of glossing sprays to achieve a drenching appearance. This look makes the hair appear freshly stepped out of water. Therefore, it is ideal for contemporary fashion enthusiasts who want zero dry frizz.
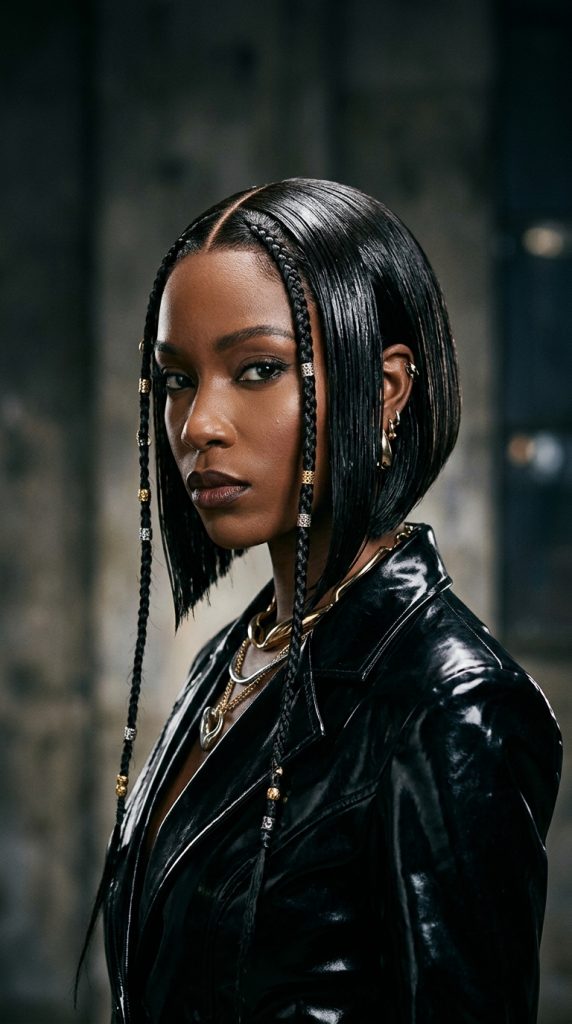
The Aesthetic of Liquid Sheen
The wet-look straight style relies heavily on using non-drying glosses and lightweight serums. This build capitalizes on that highly reflective finish to create a flat bob. Consequently, it frames your jawline cleanly. It keeps your quick weave looking intensely hydrated and sharp from front to back.
Step-by-Step How-to Guide
Braiding the Low Profile Front
First, weave two thin cornrows down the center part line.
Protecting the Tapered Nape Base
Next, mold your back hair into a flat low bun.
Installing the Short Bob Tracks
Then, stretch on your cap and glue short tracks tightly.
Cutting the Slanting Asymmetric Line
After that, use shears to cut a sharp asymmetrical bob.
Saturating with Liquid Gloss Spray
Finally, drench the surface of the bob with gloss spray.
Materials List
- Short Straight Extension Bundles: Provides the clean straight texture.
- Liquid Gloss Spray: Locks in the wet-look editorial aesthetic permanently.
- Matte Hair Shears: Used to execute the precise, slanting cuts.
- Liquid Hair Shield: Forms an absolute protective film over hair.
- Fine-Tooth Comb: Used to distribute the liquid gloss evenly.
Idea 7: The Intricate Criss-Cross Diamond Lattice
This majestic design separates the front hairline into a complex, interlocking diamond grid. It balances this highly detailed, woven scalp art with a bone-straight quick weave. The extensions extend long past your waist. Thus, it looks incredibly intricate, luxurious, and regal for formal gala events.
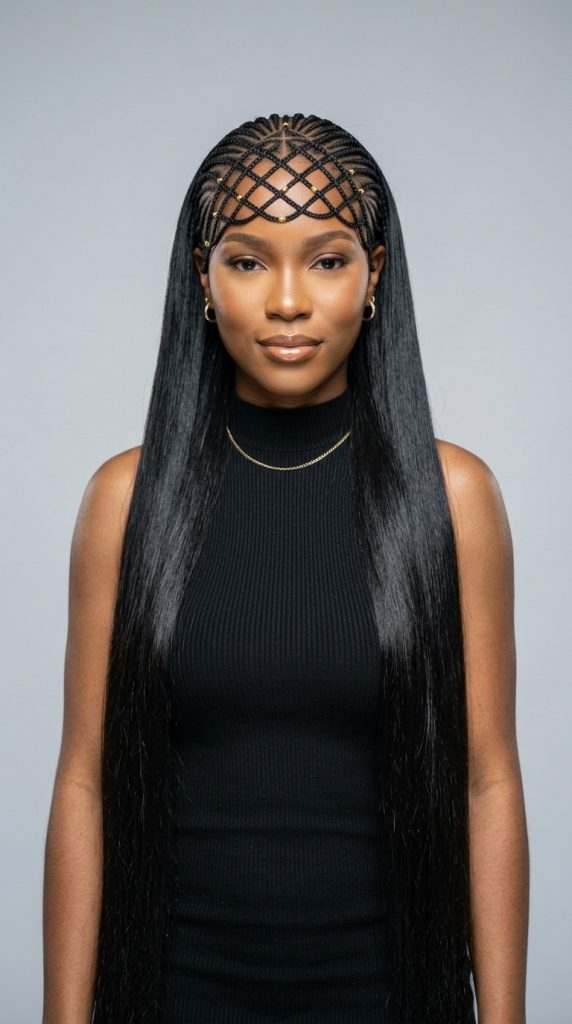
The Mastery of Woven Scalp Art
Creating a criss-cross diamond lattice requires elite-level spatial planning for perfect angles. This design features geometric diamond exposures on the scalp that catch light beautifully. Furthermore, it frames your face like a custom crown piece. It utilizes clear mini elastics to lock crossing points down smoothly.
Step-by-Step How-to Guide
Parting the Front Diamond Grid
First, carve your front hairline into small, uniform square boxes.
Weaving the Interlocking Crosses
Next, cornrow the hair from opposite corners of the boxes.
Hardening the Back Cap Foundation
Then, secure your remaining rear hair flatly under a shield.
Bonding the Waist Length Wefts
After that, glue your ultra-long straight extensions onto the cap.
Concealing the Final Intersection
Finally, place the top track row flush against the grid.
Materials List
- Waist-Length Straight Extensions: Delivers a dramatic, statuesque length element.
- Clear Mini Elastics: Used to tie off crossing intersection points safely.
- Weaving Bonding Glue: Secures the long track wefts firmly.
- Metal Rat Tail Comb: Crucial for drawing the uniform square boxes.
- Shine Spray: Adds a radiant coating that highlights the lines.
Idea 8: The Embellished Pearl-Ring Red Carpet Regal
This high-fashion project incorporates delicate, glossy pearl rings and metallic silver cuffs. These accessories are inserted directly into the front Fulani cornrow loops. It features a stunning contrast between natural dark braids, white pearl accents, and straight hair. Therefore, it is the ultimate styling project for bridal celebrations.
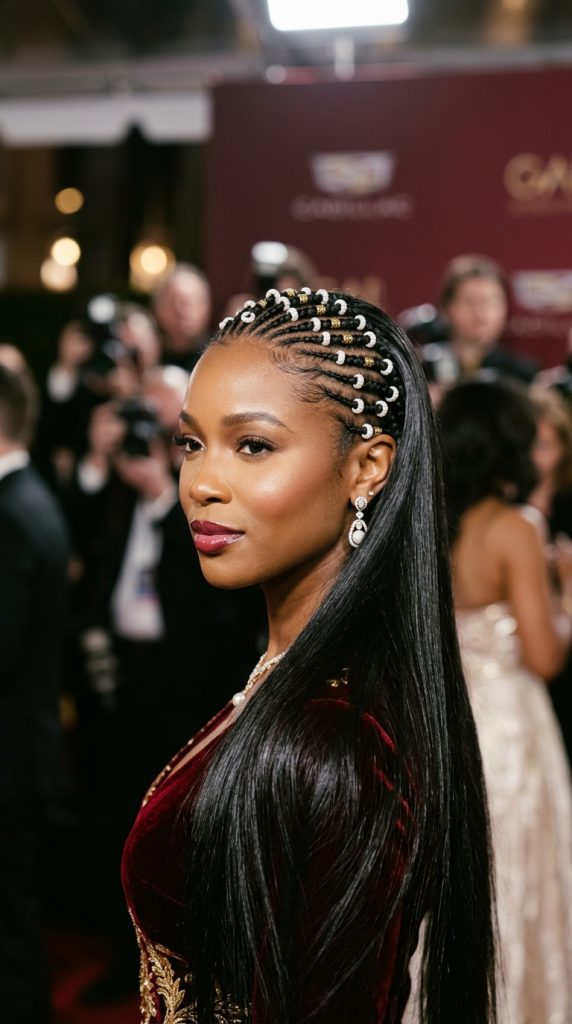
Infusing High-End Jewelry Details
Integrating jewelry pieces directly into your protective loops expands styling into luxury territory. By choosing varying scales of pearl accessories, you create an expensive-looking aesthetic. Consequently, it transforms a traditional structure into pure contemporary elegance instantly. It utilizes a flat iron to maximize the back sheen.
Step-by-Step How-to Guide
Slicking a Flawless Part Grid
First, apply a firm-hold braiding jam along front hair sections.
Braiding with Firm Hand Tension
Next, cornrow both sides tightly down the scalp surface uniformly.
Layering the Flat Quick Weave
Then, secure your back hair under a cap to glue tracks.
Inserting the Pearl Rings
After that, clip glossy pearl hair rings into the loops.
Setting the Straight Gloss Sheen
Finally, use a flat iron on the long back extensions.
Materials List
- Glossy Pearl Hair Rings: The key decorative jewelry accents used.
- Premium Straight Hair Wefts: Provides a clean, sleek backing texture.
- Firm-Hold Braiding Jam: Creates the smooth, bump-free braid canvas.
- Flat Iron: Used to press extensions into a bone-straight configuration.
- Premium Shine Spray: Adds a gorgeous gloss that matches pearls.
Idea 9: The Futuristic Cyber-Side Tapered Line
This edgy design leaves the side temples closely faded or slicked flat. It routes all front cornrows into a tight vertical column on one side. It pairs this rebellious scalp styling with a straight quick weave cut into sharp angles. Therefore, it injects a bold, retro-futuristic energy into your look.

Merging Polish with Rebel Energy
The Cyber-Side Tapered Line celebrates raw, sharp geometric lines at the finish. This design makes it look like you stepped out of a futuristic studio. Consequently, it creates a very striking asymmetrical silhouette. It utilizes ultra-strong freeze gels and flat irons to make the hair ends look stiff.
Step-by-Step How-to Guide
Slicking the Side Temple Flat
First, apply styling gel to your left temple area flatly.
Braiding the Vertical Column Rows
Next, weave three tight cornrows vertically down the right side.
Hardening the Protective Rear Base
Then, mold your remaining hair into a flat rear base.
Bonding the Angular Straight Wefts
After that, glue your straight extensions onto the black cap.
Sculpting the Sharp Angled Ends
Finally, use shears to cut the ends into a diagonal.
Materials List
- Maximum-Hold Styling Gel: Provides heavy control to freeze the temple.
- Geometric Styling Shears: Crucial for cutting hair into sharp lines.
- Black Spandex Cap: Offers a stable surface for track bonding glue.
- Liquid Hair Shield: Forms an absolute protective film over hair.
- Flat Iron: Used to press extensions into a bone-straight configuration.
Idea 10: The Modern Half-Up Topknot Ribbon Hybrid
This chic concept installs a full head of bone-straight quick weave extensions. Then, it gathers the top braided crown section into a tightly wrapped topknot bun. It features a long black leather ribbon interwoven directly into the bun loops. Thus, it lets the remaining straight lengths cascade freely down your back.
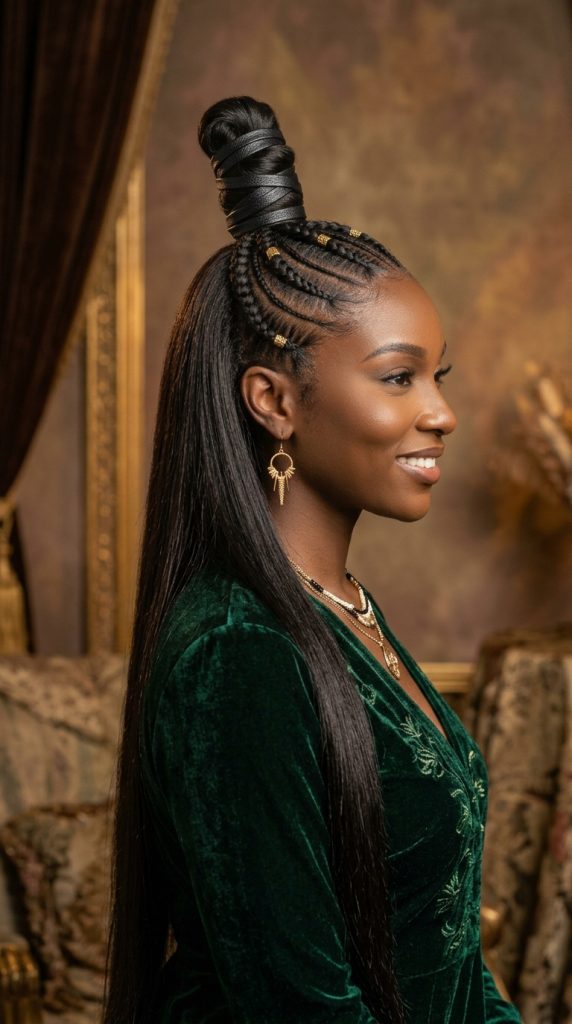
Balancing Structure with Fluid Length
Half-up styling keeps the hair pulled flatly away from your face beautifully. Meanwhile, it celebrates massive length at the back for excellent depth. By ensuring the upper topknot is tightly coiled with a ribbon, you gain contrast. Consequently, it looks highly fashionable, youthful, and fresh for the weekend.
Step-by-Step How-to Guide
Braiding the Crown Topknot Base
First, weave four clean Fulani cornrows straight back to crown.
Securing the Protective Quick Weave
Next, mold the lower half of your hair flatly down.
Gluing the Straight Extension Tracks
Then, apply bonding glue to your straight tracks across cap.
Intertwining the Leather Ribbon
After that, gather the braid tails to wrap a ribbon.
Pinning the Structural Ribbon Bun
Finally, secure the wrapped topknot loop firmly with bobby pins.
Materials List
- Bone-Straight Extension Tracks: Delivers a clean, uniform, and fluid texture.
- Thin Black Leather Ribbon: The key accessory used to weave texture.
- Liquid Hair Shield: Forms an absolute protective film over hair.
- Heavy-Duty Bobby Pins: Specifically designed to penetrate through layers.
- Satin Wrap Scarf: Ties down the front sections flatly overnight.