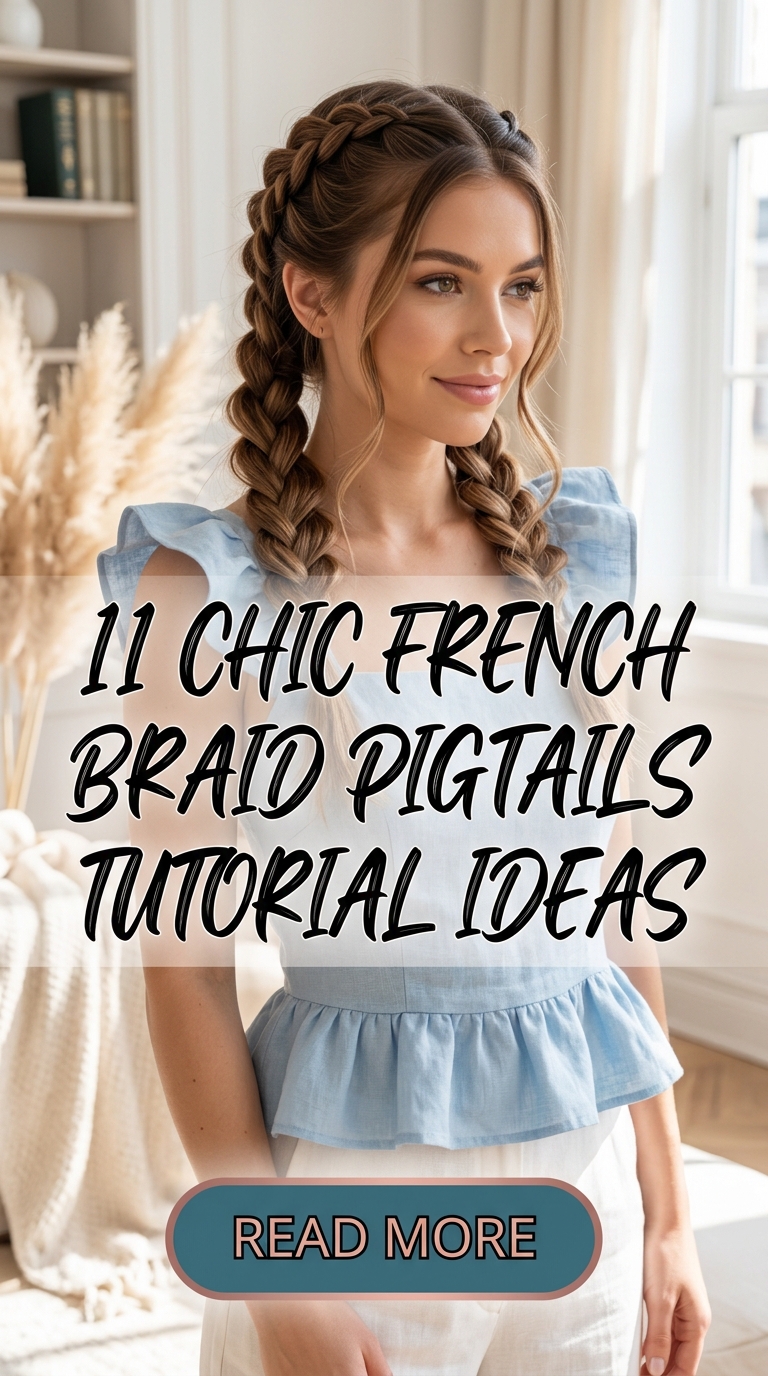
11 Chic French Braid Pigtails Tutorial Ideas
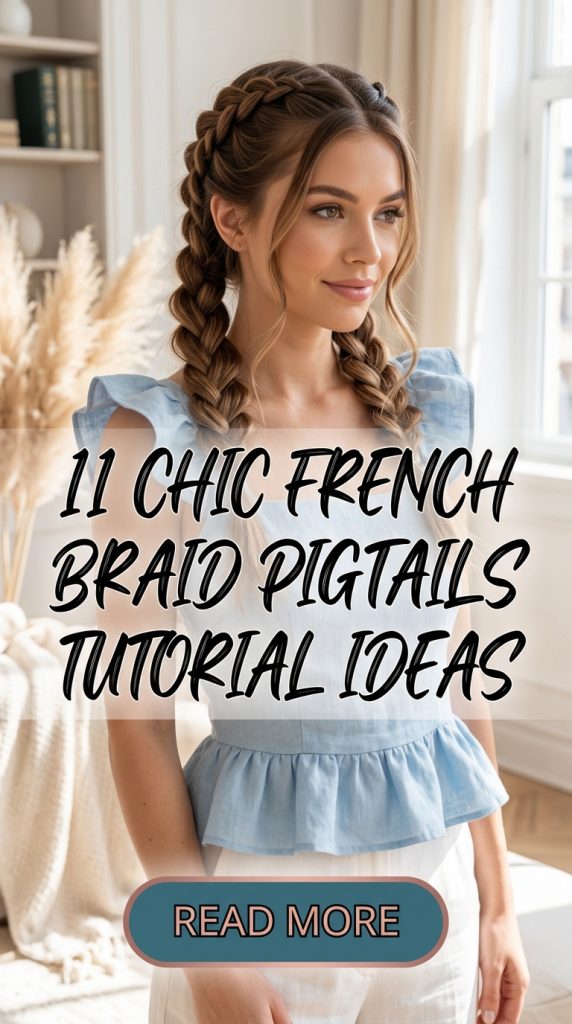
French braid pigtails have evolved from a simple childhood staple into one of the most sophisticated, high-fashion hairstyles embraced by style icons globally. Celebrating the beautiful intersection of athletic utility and feminine charm, this timeless look offers a polished finish that complements any outfit. Many people assume that creating perfectly symmetrical, sleek pigtails requires professional salon execution. However, with the right parting preparation, hand placements, and texturizing products, you can easily master this iconic look right at home. It provides a clean, secure silhouette that accentuates your jawline and beautifully frames your facial features.
Why Choose French Braid Pigtails?
Opting for French braid pigtails over a standard three-strand plait or messy topknot offers immense styling versatility and protective advantages. First, the continuous weaving technique keeps your hair completely secure and flat against your scalp, eliminating the annoyance of stray windblown hairs. Second, it is a fantastic style choice for second- or third-day hair, managing your natural essential oils to create a sleek sheen. Lastly, it protects your fragile mid-lengths and ends from friction breakage while keeping your neck completely cool. It allows you to confidently transition from a high-intensity morning gym workout to a chic, formal evening event.
Finding Your True Styling Product Balance
The secret to executing a flawless, runway-ready set of pigtails lies in tailoring your product combination to your hair texture. Heavy pomades and high-hold gels provide excellent grip for thick or coily patterns, ensuring that the parting lines remain pristine. Lightweight texturizing mists and styling creams work beautifully for fine or medium hair, providing necessary traction without flattening volume. If you want to achieve a healthy, highly reflective surface finish, incorporating a drop of argan hair oil is essential. Always look for alcohol-free formulas to prevent your scalp from flaking or drying out throughout the day.
Planning Your Parting and Symmetrical Balance
Before crossing any sections of hair, you must establish an absolute laser-precise parting line down the center of your scalp. Will your pigtails feature a classic, razor-sharp straight line that extends uniformly from your forehead to the nape? Or do you prefer a modern, dynamic zig-zag pattern for an edgy, high-design visual statement? The tension you apply while braiding also completely alters the finished vibe of the hairstyle. Taut, high-tension braids deliver a bold athletic aesthetic, while pancaked, loosened loops offer a soft, romantic boho allure.
Gathering the Essential Braiding Toolkit
You will need a specific set of tools to ensure a smooth, bump-free finish before beginning your double-braid journey. It is highly recommended to invest in a fine-tooth rat tail comb, which is crucial for creating straight lines across your scalp. You will also need snag-free mini elastic bands that blend invisibly with your hair color, along with durable sectioning clips. Keep a boar bristle smoothing brush handy to flatten down stubborn baby hairs along your hairline before weaving. Collect a few bobby pins to secure short interior layers that might try to pop out.
Mastering the Dynamic Underhand Weaving Technique
Many beginners struggle with French braiding because they lose control of the three strands, resulting in loose, saggy roots. In these cases, you will find that bumps form along the center part line, ruining the sleek effect. Start by separating a clean two-inch triangular section at your front hairline, dividing it into three equal pieces. Cross the right strand over the middle, then cross the left strand over the new center piece smoothly. As you repeat this pattern, use your pinky finger to scoop up a small, thin section of loose hair. Add it into the side strand before crossing it over, maintaining firm, consistent tension close to the scalp.
Idea 1: The High-Gloss Classic Sleek Pigtail Duo
This iconic runway-inspired look features a razor-sharp middle part that frames the face symmetrically before gathering into tight, high-shine plaits. It utilizes firm-hold pomades to achieve a wet-look finish that reflects studio light beautifully from every single angle. This setup protects your hair completely while exuding an air of effortless, high-fashion authority. It serves as the perfect styling choice for upscale evening events or professional editorial photography.

Understanding the Classic Sleek Concept
The High-Gloss Classic Duo focuses on achieving maximum smoothness and absolute symmetry without adding unnecessary texture to the roots. Instead of weaving loosely, you pull each section firmly against the contours of your head shape. This gives you a striking, polished profile while ensuring that short baby hairs are pinned down securely. It uses strong products that keep your hair completely locked in place from morning until night.
Step-by-Step How-to Guide
Drawing the Symmetrical Part Line
First, use the sharp metal tip of a rat tail comb to draw a perfectly straight line down your scalp center. Secure the right side of your hair away with a clip.
Applying the High Shine Pomade
Next, distribute a generous amount of high-shine pomade from your front hairline to the mid-lengths of the left section. Brush it smooth with your boar brush.
Beginning the Tight Weave
Then, separate a small triangular piece at the forehead and begin crossing strands over the center tightly, keeping your hands flush against the scalp.
Incorporating the Side Strands
After that, scoop thin, even horizontal sections of hair into the braid as you progress downward toward the absolute nape of your neck.
Securing the Glossy Tail
Finally, continue braiding the length down to the very ends, securing it with a clear elastic band. Repeat the process on the right side.
Materials List
- High-Shine Pomade: Used to create the mirror-like, glossy finish and flatten down stubborn baby hairs along the part.
- Rat Tail Comb: Essential for drawing a laser-precise, perfectly symmetrical front-to-back middle parting line.
- Boar Bristle Brush: Smooths out surface bumps and distributes styling product evenly across the scalp.
- Clear Mini Elastics: Holds the ends of the braids securely without adding bulky visual weight.
- Sectioning Clips: Keeps the opposite side of hair cleanly out of the way during active braiding.
Idea 2: The Soft Pancaked Boho Shag Variation
This dreamy, romantic design takes a standard French braid base and loosens the loops dramatically to build effortless, texturized volume. It incorporates lightweight texturizing sea salt mists to create a soft, touchable matte finish that looks beautifully lived-in. It looks incredibly chic, whimsical, and relaxed, making it an excellent choice for outdoor summer music festivals.

The Art of Pancaking Braids
This concept relies on creating a wide, visually thick braid structure by pulling gently at the outer edges of the woven loops. By expanding the width of the pigtails, you create a soft, voluminous silhouette that flatters heart-shaped faces beautifully. The challenge lies in loosening the hair without pulling the entire braid apart completely.
Step-by-Step How-to Guide
Prepping for Ultimate Texture
First, mist your dry hair thoroughly with a texturizing sea salt spray, scrunching the lengths with your fingers to build grip.
Creating a Casual Parting
Next, use your fingers instead of a comb to separate your hair down the center for a softer, less rigid parting line.
Weaving with Loose Tension
Then, begin French braiding the left side using relaxed hand tension, allowing the loops to sit softly on the scalp surface.
Pulling the Loop Edges
After that, secure the end with a band, then start from the bottom and gently tug the outer edges of each loop outward.
Framing with Soft Tendrils
Finally, pull a few delicate pieces of hair free around your temples and ears, using a curling iron to add waves.
Materials List
- Texturizing Sea Salt Spray: Adds the essential grit and matte texture needed to keep loose braids from slipping apart.
- Clear Mini Elastics: Anchors the ends of the voluminous, pancaked pigtail sections safely.
- Curling Iron: Used to add soft, romantic waves to the loose face-framing tendrils around the ears.
- Boar Brush: Gently smooths the hair lengths before braiding without stripping away the natural texture.
- Flexible Hold Hairspray: Seals the soft, expanded shape into place without making the loops look stiff.
Idea 3: The Edgy Zig-Zag Geometric Statement
This bold design replaces the traditional middle part line with a sharp, geometric zig-zag configuration across the top of the head. It utilizes maximum-hold styling gels to create a clean contrast between the graphic scalp lines and the braided pigtails. It looks modern, artistic, and fiercely confident, making it the ultimate selection for trendsetters who love high-design beauty.
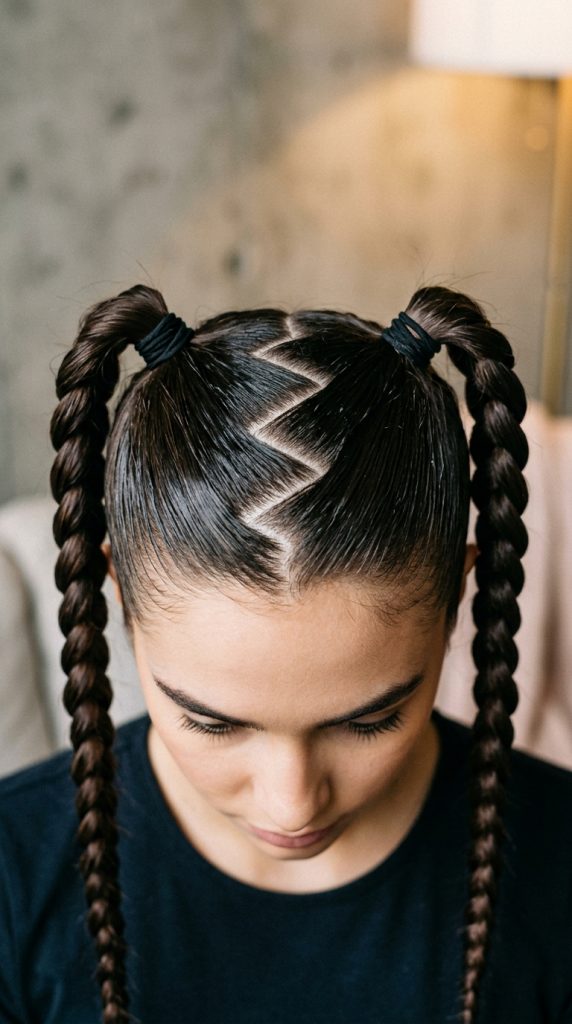
The Impact of Graphic Scalp Lines
The zig-zag parting pattern completely transforms the dynamics of pigtails by injecting an unexpected element of sharp modern geometry. This design features precise, alternating diagonal lines that catch the light beautifully, drawing attention immediately to your hair craftsmanship. It requires patience and a steady hand to map out the clean angles perfectly.
Step-by-Step How-to Guide
Mapping the First Angle
First, place the tip of your rat tail comb at your front hairline, drawing a diagonal line two inches to the left.
Continuing the Zig Zag
Next, pivot the comb tip sharply and draw a diagonal line back toward the right side, creating a clean point angle.
Completing the Scalp Grid
Then, repeat this alternating diagonal pattern all the way down to the nape, separating the hair into two jagged halves cleanly.
Slicking the Jagged Sections
After that, apply a strong freeze gel along the edges of the zig-zag part line, smoothing the hair down flatly.
Braiding the Geometric Path
Finally, French braid each side tightly, following the unique horizontal boundaries established by the graphic geometric parting line.
Materials List
- Maximum-Hold Styling Gel: Keeps the sharp points of the zig-zag parting line perfectly flat, clean, and defined.
- Rat Tail Comb: Crucial for measuring and executing the sharp, alternating diagonal parting lines smoothly.
- Clear Mini Elastics: Used to tie off the bottom of the tight, geometric pigtail columns.
- Boar Bristle Brush: Smooths the hair sections down flatly to emphasize the graphic scalp lines.
- Freeze Hairspray: Instantly locks the completed geometric layout into place so it won’t shift.
Idea 4: The Ribbon-Interwoven Luxury Pigtails
This chic concept incorporates a minimalist satin or leather ribbon woven directly into the French braid loops for a high-end designer finish. It features a beautiful contrast between natural glossy hair strands and luxurious fabric textures running down the head. It is the definitive ultimate fashion project for coordinating your hairstyle with your outfit.

Enhancing Hair with Minimalist Fabrics
Weaving a sleek ribbon directly into your pigtail loops expands the hairstyle into the realm of custom high-fashion accessory coordination. By choosing a ribbon color that matches your wardrobe palette, you create an incredibly cohesive, curated style aesthetic. It adds a sophisticated, multi-dimensional element that catches the eye immediately from every angle.
Step-by-Step How-to Guide
Knotting the Ribbon Anchor
First, separate your front hairline section and tie a long, thin satin ribbon directly around the base of the middle strand.
Dividing the Fabric Tails
Next, blend the two remaining tails of the fabric ribbon into the left and right strands of your braiding section cleanly.
Commencing the Fabric Weave
Then, proceed with your standard French braid pattern, crossing the ribbon-infused hair strands over each other smoothly.
Keeping the Ribbon Visible
After that, ensure the fabric faces upward flatly as you weave, letting the color peek out between the hair layers beautifully.
Tying a Minimalist Bow
Finally, wrap the remaining ribbon ends around the bottom elastic band, tying a neat, tiny bow to finish the look.
Materials List
- Thin Satin Ribbon: The key fashion accessory used to weave luxury color and texture directly into the braids.
- Rat Tail Comb: Used to separate the initial braiding sections with clean, straight horizontal boundary lines.
- Clear Mini Elastics: Secures the bottom of the pigtails firmly before the final ribbon bow is tied.
- Smoothing Cream: Eliminates surface frizz to ensure the hair looks as polished as the premium fabric.
- Bobby Pins: Placed secretly to tuck away any loose ribbon ends neatly underneath the braid base.
Idea 5: The Futuristic Spiky-End Pigtail Combo
This edgy, Y2K-inspired design leaves the sharp ends of your hair deliberately sticking out at the bottom to create needle-sharp fan spikes. It features high contrast between the beautifully polished French braid roots on the scalp and the crisp, texturized tail pieces. It is perfect for injecting a rebellious, retro-futuristic energy into your look.
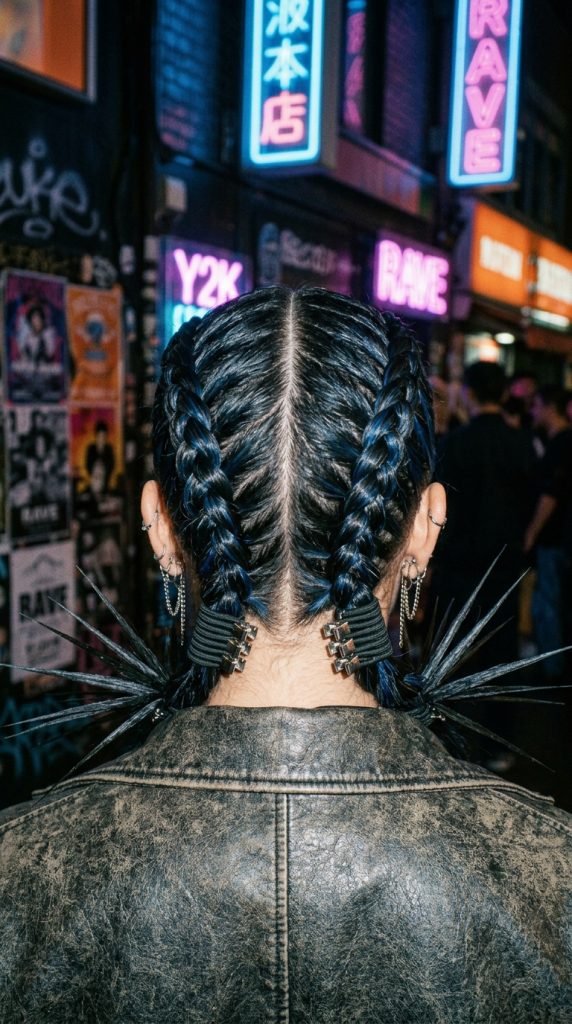
Merging Polish with Rebel Energy
The spiky-end pigtail combo looks incredible because it defies traditional hair expectations by celebrating raw, sharp geometric lines at the finish. This design makes it look like you have stepped right out of a futuristic styling studio. It utilizes ultra-strong freeze gels and flat irons to make the hair ends stiff.
Step-by-Step How-to Guide
Slicking the Scalp Base
First, apply a maximum-hold styling gel to your roots, brushing the hair back smoothly into a classic center part layout.
Braiding to the Nape
Next, French braid each side tightly down the scalp, stopping abruptly right when you reach the lowest neck hairline point.
Securing the Nape Base
Then, clamp the braid firmly at the nape using a strong elastic band, leaving the remaining tail hair fully loose.
Flat Ironing the Tails
After that, use a mini flat iron on the exposed tail hair to make it completely straight, crisp, and needle-sharp.
Freezing the Sharp Spikes
Finally, coat the straight tails with an extra-strength freeze gel, using a comb to fan the sharp ends out dramatically.
Materials List
- Maximum-Hold Styling Gel: Provides the heavy control necessary to freeze the spiky tail ends into a rigid configuration.
- Mini Flat Iron: Crucial for making the exposed tail hair perfectly straight, crisp, and free of any waves.
- Strong Elastic Bands: Anchors the French braid sections firmly at the nape before the spiky transitions.
- Rat Tail Comb: Used to spread the texturized ends evenly into an aesthetic, sharp fan profile.
- Shine Spray: Adds a gorgeous gloss that matches the sleek texture of the braided roots beautifully.
Idea 6: The Extended Mega-Length Wrap Pigtails
This high-glamour design utilizes matching synthetic or human hair extensions woven directly into your natural strands to create massive, luxurious pigtails. It is perfect for individuals with fine or short hair who want to achieve red-carpet length without waiting years for growth. It looks incredibly rich, dense, and striking.
Engineering Maximum Treetop Length
Achieving a dramatic length contrast when you have short layers requires utilizing external hair pieces seamlessly integrated into your natural braid. This method allows you to create a secure, lightweight foundation that supports a much longer, more imposing structural footprint. It gives the perfect illusion of ultimate thickness.
Step-by-Step How-to Guide
Prepping the Natural Roots
First, brush your natural hair back tightly into a secure center part, using a styling cream for smoothness.
Looping the Extension Strand
Next, take a long feed-in hair extension track and loop it around the middle strand of your initial hairline section.
Blending the Hair Textures
Then, apply a lightweight styling cream across the combined hair lengths, brushing them together thoroughly until they function as one.
Braiding the Extended Column
After that, French braid downward continuously, adding more feed-in hair extensions gradually to maintain a uniform, thick volume profile.
Tucking the Final Tips
Finally, tie off the bottom of the long extended pigtail with an elastic band, misting with shine spray for radiance.
Materials List
- Feed-In Hair Extensions: The essential component used to add massive length, density, and thickness to the braids.
- Styling Cream: Blends the texture of your natural hair seamlessly with the synthetic or human hair piece.
- Clear Mini Elastics: Used to secure the bottom of the long extended pigtail columns discretely.
- Boar Bristle Brush: Smooths out the combined lengths before the active weaving process begins.
- Shine Spray: Adds a lightweight, reflective coating over the long braided texture details.
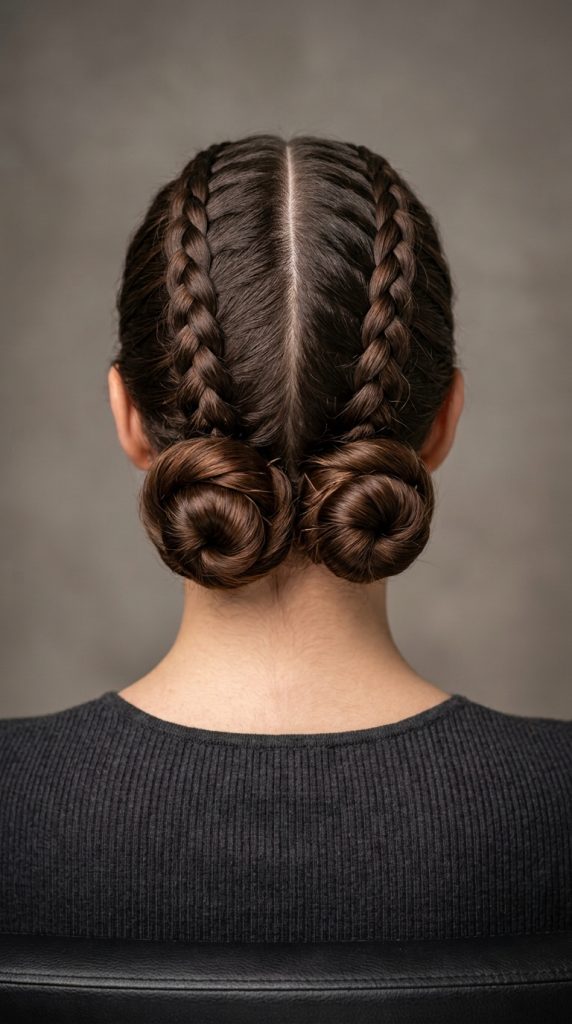
Idea 7: The Double-Knot Low Bun Transition
This sophisticated design weaves your hair down the scalp before gathering the remaining lengths into two neat, polished low cinnamon buns. It offers a beautiful balance of clean braided structure and tailored, architectural updos nestled elegantly at the nape of the neck. It is the perfect choice for corporate environments or formal dining.

The Elegance of Wrapped Nape Buns
This concept transforms a casual set of pigtails into a high-end updo by altering how you finish the hair lengths at the neck line. One section houses your detailed French weave, which drops seamlessly into a compact, perfectly smooth coiled bun structure. It keeps your hair completely contained while looking highly professional.
Step-by-Step How-to Guide
Executing the Clean Weave
First, French braid both sides of your head cleanly down to the absolute lowest point of your neck hairline surface.
Tying the Low Pigtails
Next, secure both sides tightly at the nape using strong elastics that match your natural hair color tone perfectly.
Twisting the Sleek Cord
Then, twist the remaining length of the left ponytail tightly until it naturally begins to coil around the elastic base.
Pinning the Cinnamon Bun
After that, wrap the twisted cord smoothly to create a compact bun, securing the edges firmly with U-shaped bobby pins.
Repeating and Setting Uniform
Finally, repeat the tight coiling process on the right side, checking in a mirror to ensure both low buns balance.
Materials List
- U-Shaped Bobby Pins: Specifically designed to lock the coiled bun structures firmly against the head without slipping out.
- Strong Elastic Bands: Holds the heavy ponytail bases securely at the nape before the coiling process begins.
- Rat Tail Comb: Essential for maintaining the clean center part line all the way down between the buns.
- Smoothing Cream: Eliminates all surface frizz to ensure the coiled low buns look perfectly tailored.
- Strong Hairspray: Seals the completed double-knot updo layout into place for long-lasting durability.
Idea 8: The Embellished Pearl-Pin Red Carpet Look
This high-fashion project incorporates delicate, glossy pearl pins inserted directly into the center intersections of your French braid loops. It features a stunning contrast between natural dark glossy hair tones and luminous white pearl accents for a glamorous finish. It is the definitive ultimate bridal or gala event styling project.
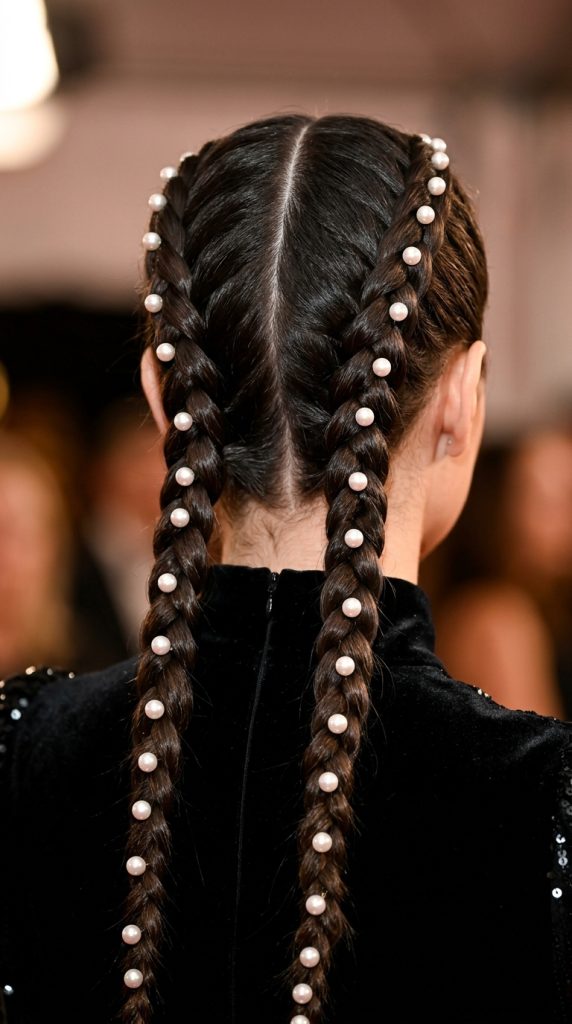
Infusing High-End Jewelry Details
Integrating jewelry pieces directly into your pigtail loops expands the hairstyle into the realm of custom red-carpet luxury styling. By choosing varying scales of high-end pearl pins, you create an incredibly expensive-looking, curated style aesthetic across your scalp. It transforms a sporty structure into pure elegance instantly.
Step-by-Step How-to Guide
Slicking a Flawless Base
First, pull your hair back smoothly into a precise center part, using a firm-hold pomade to ensure zero bumps exist.
Braiding with Firm Tension
Next, French braid both sides down the scalp using tight, uniform hand tension to create a solid woven foundation grid.
Securing the Braid Ends
Then, tie off the bottom of both pigtails cleanly with clear elastics, letting the remaining tails hang down smoothly.
Inserting the Pearl Pins
After that, slide glossy pearl hair pins straight down into the center crossroads of each individual braid loop section.
Checking the Balanced Radiance
Finally, check your profile in a mirror to ensure the pearls are spaced evenly down the back of your head.
Materials List
- Glossy Pearl Hair Pins: The key decorative jewelry accents used to add high-end luxury to the braid intersections.
- Firm-Hold Pomade: Provides the clean, smooth canvas necessary to showcase reflective pearl accessories beautifully.
- Clear Mini Elastics: Holds the bottom of the pigtail columns securely without breaking the clean visual lines.
- Mirror Setup: Crucial for checking the back of your head to ensure the pearl placement is perfectly balanced.
- Shine Spray: Adds a gorgeous gloss that matches the reflective quality of the pearls flawlessly.
Idea 9: The Half-Up Cascading Wave Hybrid
This romantic concept weaves only the top crown section of your hair into French pigtails, leaving the bottom half fully loose and flowing. It features a beautiful harmony between clean, structured scalp braids and rich, voluminous cascading waves draping over your shoulders. It feels highly sophisticated, youthful, and fresh.
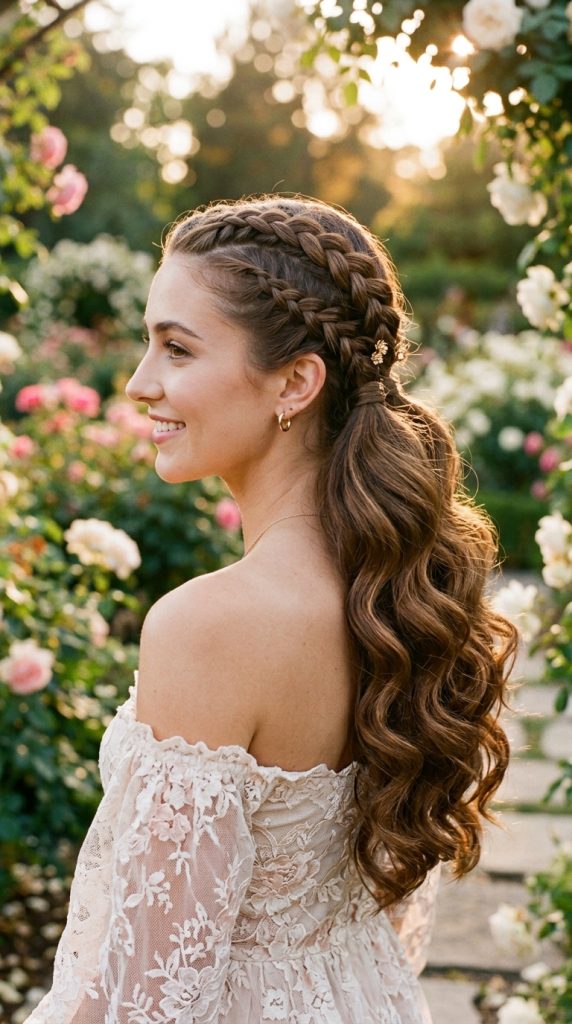
The Dynamics of Hybrid Textures
Half-up styling creates a gorgeous dynamic by keeping the hair pulled flatly away from your face while celebrating long length at the back. By ensuring the upper braids are tightly defined and the lower hair is curled into big waves, you gain immense depth. It looks gorgeous from every camera angle profile.
Step-by-Step How-to Guide
Horizontal Sectioning Split
First, divide your hair horizontally into a top half and a bottom half using your precise rat tail comb tool.
Clipping the Lower Lengths
Next, wrap the bottom half of your hair securely in a large clip to keep it separated from the braiding zone.
Braiding the Crown Pigtails
Then, draw a center part on the top half, French braiding each side tightly from the forehead down to the crown.
Tying the Crown Connections
After that, secure both braids at the back of your crown using clear elastics, letting the remaining tails drop loose.
Curving the Cascading Waves
Finally, unclip the bottom hair and use a wide-barrel curling iron to create large, bouncy waves across all loose lengths.
Materials List
- Wide-Barrel Curling Iron: Used to add massive, bouncy voluminous waves to the loose half-down section of hair.
- Rat Tail Comb: Essential for separating the upper and lower styling zones with a clean horizontal split line.
- Clear Mini Elastics: Anchors the crown pigtails firmly at the back of the head before the wave styling.
- Volumizing Mousse: Provides excellent body and flexible hold for the cascading loose wave sections.
- Sectioning Clips: Holds the lower hair lengths away cleanly while you work on the upper braid architecture.
Idea 10: The Wet-Look Liquid Double Loop
This minimalist, editorial-style hairstyle relies on an abundance of hair oil to create a drenching, liquid-like appearance that looks freshly stepped out of water. It features a low-profile double loop at the neck nape that looks incredibly modern, clean, and sleek. It offers an unparalleled aesthetic with zero dry frizz texture.
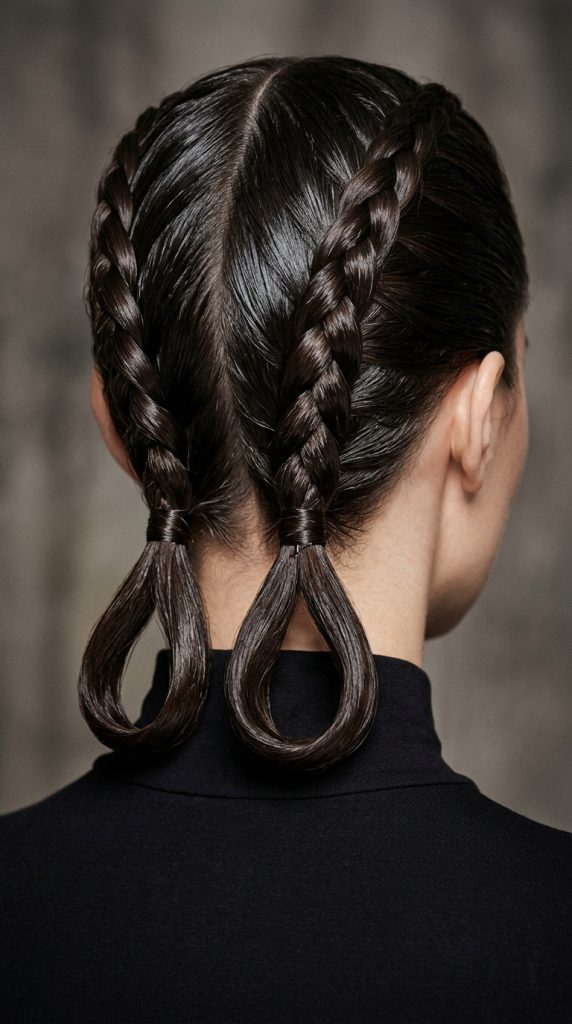
The Aesthetic of Liquid Definition
The wet-look style relies heavily on using non-drying oils and glosses that simulate moisture without leaving your hair cold. This build capitalizes on that glossy finish to create a highly reflective, flat silhouette that hugs the contours of your scalp. It keeps your pigtail layout completely clumped, heavy, and brilliant.
Step-by-Step How-to Guide
Saturating with Liquid Oil
First, apply a generous mix of leave-in conditioner and high-grade hair oil from your roots entirely to your tips until saturated.
Weaving the Liquid Braids
Next, draw a flat center part, French braiding both sides down the scalp smoothly without adding any root volume.
Forming the Low Nape Loops
Then, pass the braid tails through an elastic at the nape, stopping halfway on the final pass to create a neat loop.
Wrapping the Tail Ends
After that, take the remaining loose hair ends and wrap them smoothly around the elastics to hide the bands completely.
Sealing the Wet Shine
Finally, coat the entire surface of the style with a generous layer of high-shine liquid gloss spray for lasting moisture illusion.
Materials List
- Hair Oil & Leave-in Conditioner: Blended together to saturate the strands and create a lasting wet-look sheen finish.
- Liquid Gloss Spray: Provides the final, highly reflective coating that locks in the liquid moisture editorial aesthetic.
- Elastic Bands: Anchors the low loops safely at the lowest point of the neck nape structure.
- Rat Tail Comb: Used to layout the flat, precise parting line before the liquid braiding process begins.
- Bobby Pins: Tucks away any remaining loose ends smoothly under the base of the double loop setup.
Idea 11: The Crown-Wrapped Halo Pigtail Updo
This advanced, regal variation weaves your pigtails long before wrapping them upward and pinning them flat across the top of your head like a crown. It features an incredibly detailed, woven halo effect circling your scalp that looks deeply intricate, historic, and tailored. It is the definitive ultimate comfortable hairstyle for formal events.

The Structure of Woven Halos
Wrapping your long pigtails around your head transforms the style into a classic, timeless crown updo that completely clears your neck line. By ensuring each loop is pinned flatly and securely, the resulting halo pattern looks like a custom piece of architectural hair art. It offers a beautiful, unexpected design twist.
Step-by-Step How-to Guide
Braiding the Full Lengths
First, French braid both sides of your head cleanly from the front hairline all the way down to the very tips of your strands.
Pancaking the Braid Columns
Next, pull gently at the outer edges of both long braid tails to expand their width and volume before wrapping them upward.
Crossing the Left Tail Up
Then, take the left braid tail, sweep it vertically upward over the top of your head, and pin it flat across the crown.
Overlapping the Right Tail
After that, take the right braid tail, sweep it upward in the opposite direction, overlapping the first braid to complete the circle.
Hiding the Tail Tips
Finally, tuck the very ends of both braids underneath the opposite woven layers, locking the entire halo down with bobby pins.
Materials List
- Bobby Pins: Placed strategically every two inches along the halo path to lock the braids flat against the crown.
- Rat Tail Comb: Used to maintain clean symmetry along the initial front hairline sections before weaving.
- Clear Mini Elastics: Ties off the tips of the long braid tails cleanly before the upward wrapping process.
- Smoothing Paste: Provides a high level of grip and shine as you stretch the braids over the top of your head.
- Strong Hairspray: Seals the completed crown updo layout into place, preventing any loose layers from shifting out.