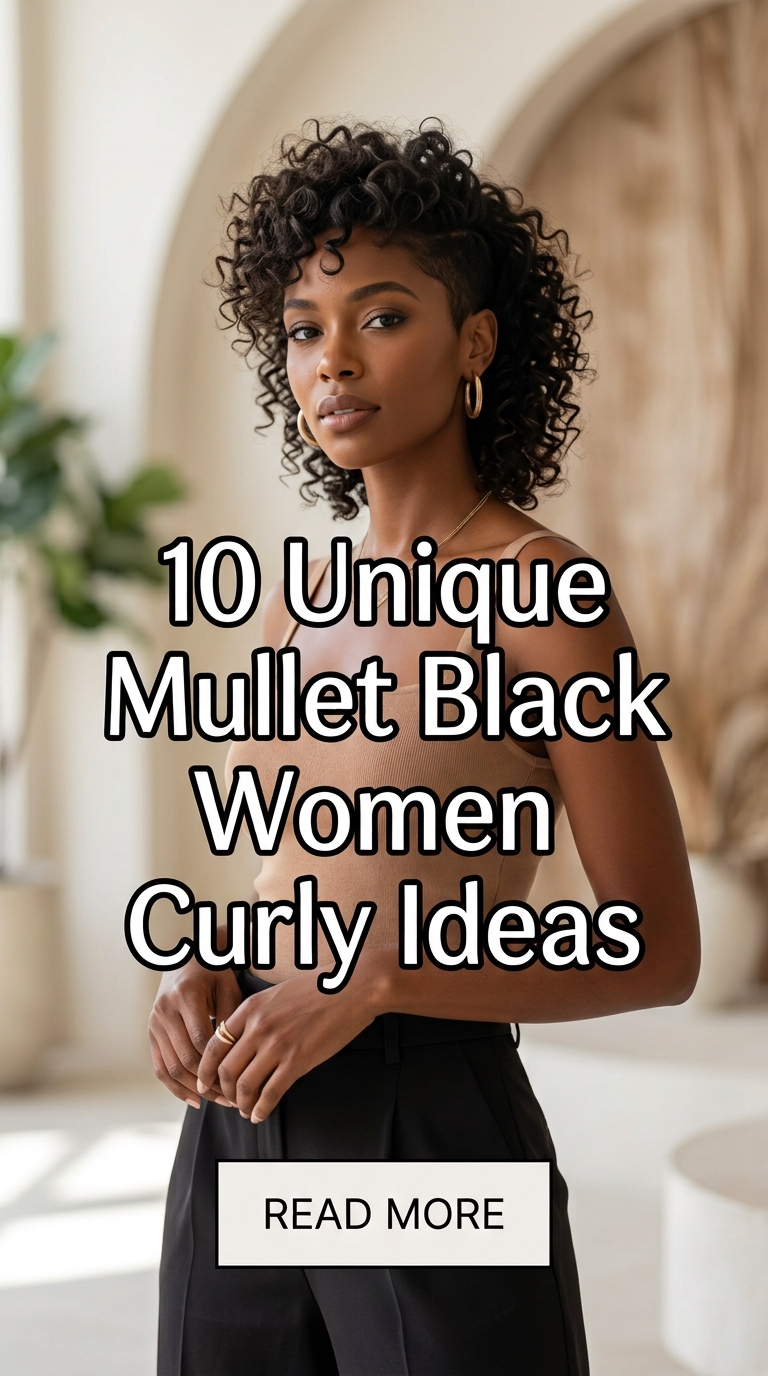
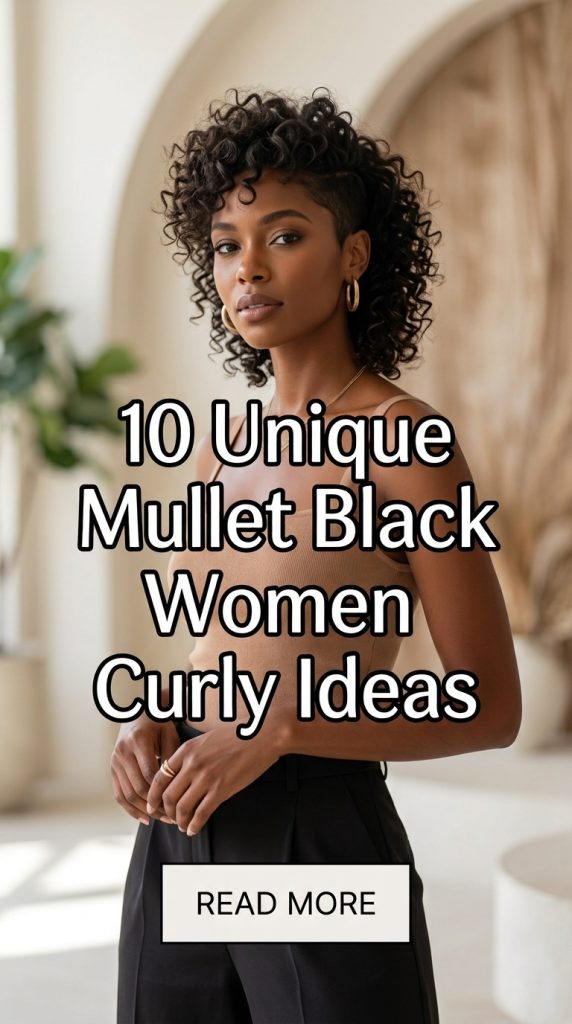
10 Unique Mullet Black Women Curly Ideas
The curly mullet has transitioned from a daring retro relic into one of the most powerful, trendsetting hairstyles for Black women embracing their natural texture. Celebrating the gorgeous bounce of type 3 and type 4 curls, this silhouette perfectly balances edgy attitude with soft femininity. Many individuals worry that a mullet might look dated or overly harsh against their delicate features. However, modern cutting techniques tailor the length layers specifically to framing your face while showcasing maximum texture volume. It provides a stunning, high-contrast shape that highlights your jawline and cheekbones while letting your natural curls thrive beautifully.
The Power of Texturized Mullets
Choosing a curly mullet over a standard uniform afro or custom tapered cut offers incredible styling versatility and dimension. First, the shorter crown layers instantly inject a massive amount of volume right at the top of your head. This prevents the heavy, weighed-down appearance that long, dense curls can sometimes create over time. Second, the longer tail sections framing your neck add a gorgeous length element that sways elegantly with movement. Lastly, it frames your forehead with soft, organic curly bangs, minimizing styling time while keeping your look intentionally chic.
Finding Your True Curl Pattern Harmony
The true secret to a jaw-dropping curly mullet lies in customizing the layers to your specific coil definition and density. Fine type 3 curls look incredible with shorter, texturized crown pieces that build up maximum height effortlessly without flattening. Coarser, high-density type 4 coils thrive when shaped using specialized curl-by-curl cutting techniques to prevent a blocky look. Incorporating deep leave-in conditioners and curl-defining custards ensures each layer maintains its distinct shape without turning into frizz. Always prioritize moisture-rich products to keep your textured mullet looking healthy, springy, and full of natural life.
Planning Your Length Dynamics
Before picking up the shears, you must determine the exact length contrast you want for your personalized look. Will you opt for a dramatic, high-contrast look featuring skin-faded sides paired with an ultra-long cascading back? Or do you prefer a soft, modern shag variation with subtle layers that blend seamlessly into each other? The length of your front bangs also heavily influences the final vibe of the texturized style. Short micro-bangs deliver a bold punk-rock aesthetic, while longer eye-grazing curls offer a romantic, mysterious allure.
Gathering the Essential Maintenance Tools
You will need a specific set of tools to maintain the gorgeous structure and definition of your curls daily. It is highly recommended to invest in a high-quality diffuser attachment for your blow dryer to dry layers evenly. You will also need a wide-tooth comb and a specialized curl-defining brush to detangle sections gently without causing breakage. Keep a lightweight satin bonnet or silk pillowcase handy to protect the long back layers while you sleep. Collect premium moisturizing oils, like jojoba or argan oil, to lock in moisture and add a brilliant shine.
Mastering the Dynamic Curl Definition Technique
Many beginners struggle with styling a mullet because they treat the different lengths exactly the same during wash days. In these cases, you might find the crown layers frizz up while the long back sections lose definition. Start by applying product to soaking wet hair, sectioning the crown away from the longer back perimeter pieces. Work a defining gel through the top layers using your fingers to encourage tight, vertical bounce and height. For the back, smooth the product downward using a raking motion to preserve length and prevent shrinkage.
Idea 1: The High-Volume Afro-Textured Crown Mullet
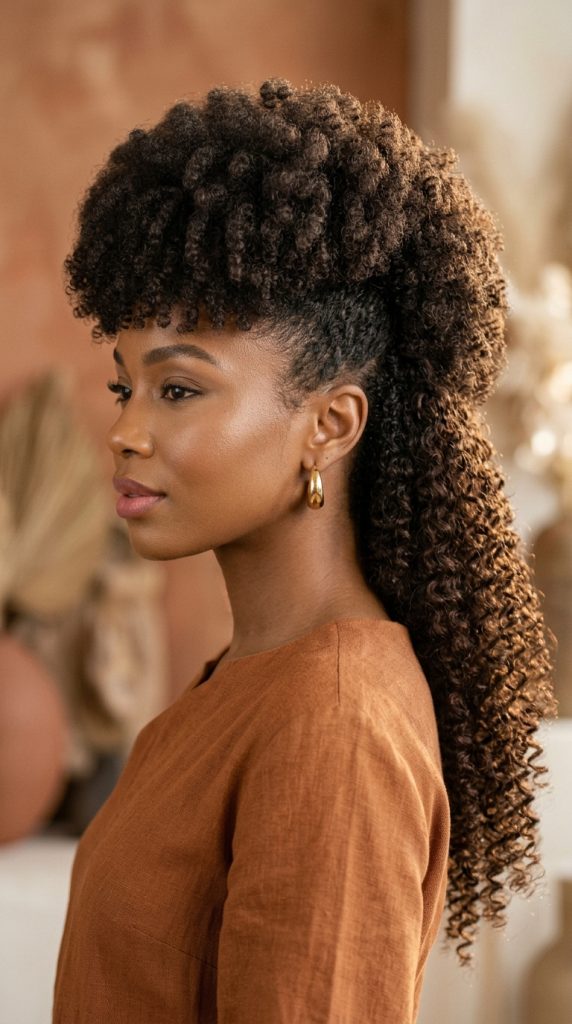
This bold design maximizes the natural volume of tight type 4 coils by creating a massive, pillowy crown layer. It tapers dramatically down the sides before dropping into a long, beautifully defined curly tail section at the neck. This setup protects your delicate edges while establishing an imposing, high-fashion silhouette that turns heads immediately everywhere. It serves as an empowering statement for anyone wanting to celebrate maximum shrinkage contrast and volume.
Understanding the Afro Crown Concept
The Afro-Textured Crown Mullet focuses on building extreme height at the top of the scalp using tight coils. Instead of smoothing the hair down, you encourage the curls to expand upward and outward to create volume. This gives you a striking profile view that beautifully elongates your neck while keeping the sides clean. It uses rich leave-in creams that lock in moisture to keep the voluminous crown perfectly defined.
Step-by-Step How-to Guide
Prepping the Coil Base
First, wash your hair with a hydrating shampoo and apply a rich leave-in conditioner to damp strands. Ensure your coils are completely detangled from roots to tips before starting the styling process.
Shaping the Voluminous Crown
Next, use a pick comb to gently lift the hair at the top of your head upward. Create a rounded, full shape that establishes the signature height of the modern mullet.
Defining the Side Blends
Then, apply a firm-hold curling gel to the sides of your head, smoothing them slightly downward. This creates a clean transition without removing too much length from the section.
Raking the Back Tail
After that, rake a generous amount of curl-defining custard through the long back sections of your hair. Let the coils drop naturally toward your shoulders to maximize the visible length.
Diffusing for Lasting Height
Finally, use a blow dryer with a diffuser attachment on low heat to dry your roots. Tilt your head forward while diffusing to lock in maximum volume at the crown.
Materials List
- Hydrating Leave-In Conditioner: Provides the essential moisture base needed to keep tight type 4 coils soft.
- Hair Pick Comb: Crucial for lifting the crown layers to achieve maximum height and volume.
- Curl-Defining Custard: Enhances the natural pattern of the longer back layers while preventing frizz.
- Firm-Hold Curling Gel: Used to control the sides and create a clean, intentional transition.
- Diffuser Attachment: Dries the hair safely while preserving the structural bounce of the curls.
Idea 2: The Tapered Fade Romantic Curly Mullet
This sophisticated variation blends a clean, precision-cut tapered fade on the sides with ultra-soft, romantic ringlets down the back. It offers a beautiful balance of sharp barbershop lines and lush, flowing texture that flatters oval faces perfectly. It looks incredibly polished, making it an excellent choice for corporate environments and high-profile social gatherings.

The Dynamics of Tapered Borders
This concept relies on creating a stark visual contrast between bare skin and dense, luxurious curl definition. By dropping the side layers into a crisp fade, you instantly highlight your bone structure and ears. The challenge lies in ensuring the transition from the faded sides to the long back layers looks smooth.
Step-by-Step How-to Guide
Executing the Precision Taper
First, use professional clippers to create a clean fade around your ears and temples, keeping borders sharp. Let the fade blend gradually into the longer hair texturing the upper crown area.
Sectioning the Romantic Ringlets
Next, separate the top and back curly sections into small, manageable squares using clips for control. Apply a lightweight curl cream through each individual section for uniform moisture.
Defining with Finger Coiling
Then, take small strands from the crown and back sections and twist them tightly around your finger. This finger-coiling method creates perfectly uniform, smooth ringlets throughout the cut.
Setting the Crisp Edges
After that, use a small detail trimmer to line up your forehead and sideburn areas cleanly. This adds a sharp, masculine-inspired structure that balances the soft ringlets beautifully.
Sealing with Lightweight Mist
Finally, allow your ringlets to air dry completely before misting the style with shine spray. Avoid touching the curls while drying to prevent disrupting the uniform definition.
Materials List
- Professional Hair Clippers: Essential for cutting the clean, precise tapered fade along the side sections.
- Lightweight Curl Cream: Defines ringlets without weighing down the bounce of fine curl patterns.
- Detail Trimmer: Used to create sharp, crisp lines along the perimeter of the face.
- Shine Spray: Adds a brilliant, healthy gloss over the finished finger-coiled ringlets.
- Sectioning Clips: Holds hair away cleanly while you work on individual styling zones.
Idea 3: The DevaCut Layered Shoulder-Length Mullet
This custom-tailored style utilizes the famous DevaCut method to shape curly layers perfectly while the hair is completely dry. It features a cascade of medium-length curls that frame the face softly before extending down to shoulder length. It is perfect for individuals who want a natural, organic shape that honors their unique curl flow.

The Dry-Cutting Layered Approach
This build transforms a traditional mullet into a modern, seamless shag by cutting curls in their natural state. By analyzing how each ringlet falls when dry, you eliminate unexpected shrinkage surprises after washing your hair. It provides a highly personalized layout that moves naturally and gracefully with your every step.
Step-by-Step How-to Guide
Dry Shaving the Frame
First, ensure your hair is washed, dried, and styled loosely without any heavy hold products present. Carefully snip individual curls around your face to create soft, texturized front bangs.
Layering the Crown Transition
Next, lift the top layers upward and cut them at an angle to create volume. Ensure these pieces blend smoothly into the side lengths without looking disconnected.
Preserving the Back Length
Then, leave the lower perimeter sections long, cutting only the split ends to maintain shoulder length. Shape the back into a soft V-shape for a flattering finish.
Hydrating the Fresh Cut
After that, wash your hair completely to remove loose clips, applying a deeply hydrating hair mask. Squish the product into the curls to encourage ultimate pattern bounce.
Styling with Wet Gel
Finally, apply a generous amount of strong-hold wet gel using the praying hands method across sections. Shake your head vigorously to let the fresh layers separate naturally.
Materials List
- Professional Shears: Designed to snip individual dry curls cleanly without causing split ends.
- Hydrating Hair Mask: Restores moisture balance and enhances pattern bounce after the dry cut.
- Strong-Hold Wet Gel: Seals the fresh layer configuration into place with long-lasting definition.
- Microfiber Towel: Used to blot away excess water gently without creating surface frizz.
- Wide-Tooth Comb: Helps distribute the hydrating mask evenly through sections during the wash.
Idea 4: The Micro-Bangs Edgy Pixie Mullet
This daring punk-rock design combines the ultra-short crop of a pixie cut with the long tail of a classic mullet. It features super-short, texturized curly micro-bangs that sit high on the forehead, creating a bold aesthetic. It looks incredibly striking, modern, and artsy when paired with statement vintage eyewear or bold makeup.
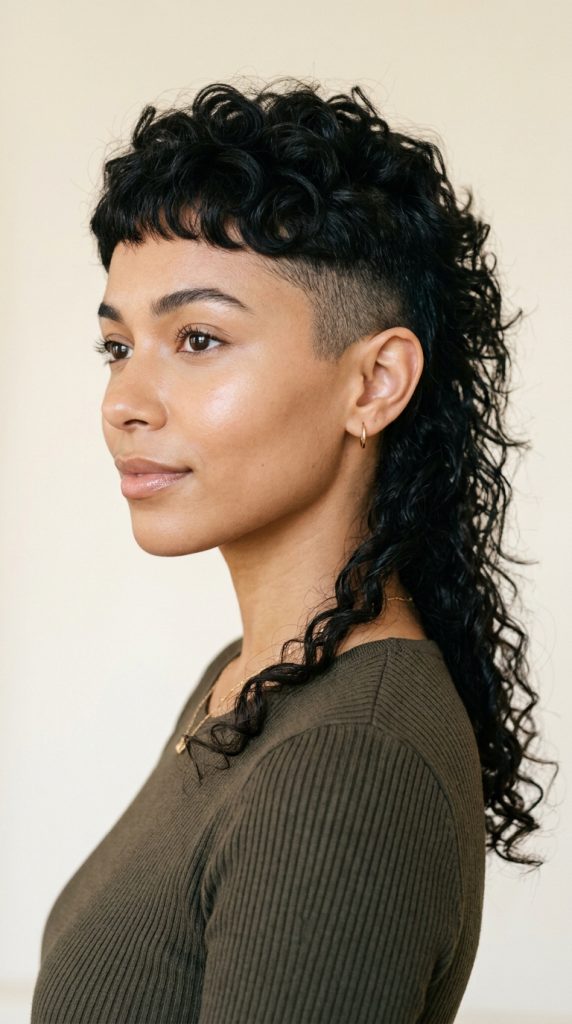
The Edge of Cropped Perimeters
Micro-bangs completely transform the dynamics of a curly mullet by exposing your eyebrows and forehead completely to the light. This design creates an intentional, rebellious look that showcases your eyes while maintaining length at the back neck. It requires regular trimming to keep the short front pieces looking sharp and clean.
Step-by-Step How-to Guide
Cropping the Front Bangs
First, separate a small triangular section at the front hairline to create your bold micro-bangs base. Snip the curls dry so they sit two inches above your eyebrows.
Buzzing the Close Sides
Next, use clippers with a short guard to buzz the sides of your head closely. Leave only a thin layer of hair near the temples for texture.
Texturizing the Pixie Crown
Then, cut the upper crown layers short, blending them seamlessly into the buzzed side sections for height. Use your fingers to piece out individual curl clumps.
Extending the Long Tail
After that, leave the very back section long, letting it contrast sharply with the cropped pixie top. Apply a defining pomade through the back tail pieces.
Freezing the Pixie Texture
Finally, use a firm styling paste to pinch the ends of your micro-bangs and crown curls. This creates a piecey, texturized finish that stays put.
Materials List
- Hair Clippers with Guards: Used to buzz the side sections closely to achieve the pixie effect.
- Defining Pomade: Adds weight and separation to the long back tail strands for depth.
- Firm Styling Paste: Perfect for pinching and defining the short curly micro-bangs texturized ends.
- Styling Scissors: Crucial for executing the short, precise dry snips on the front hairline.
- Water Spray Bottle: Used to refresh the short crown pieces quickly during morning styling.
Idea 5: The Bleached Honey-Blond Textured Mullet
This vibrant, high-contrast look incorporates a stunning honey-blond color transformation over a beautifully layered curly mullet shape. It is perfect for trendsetters who want to add an extra layer of visual depth and dimension to their curls. It features bright highlights that make individual coil patterns pop beautifully.
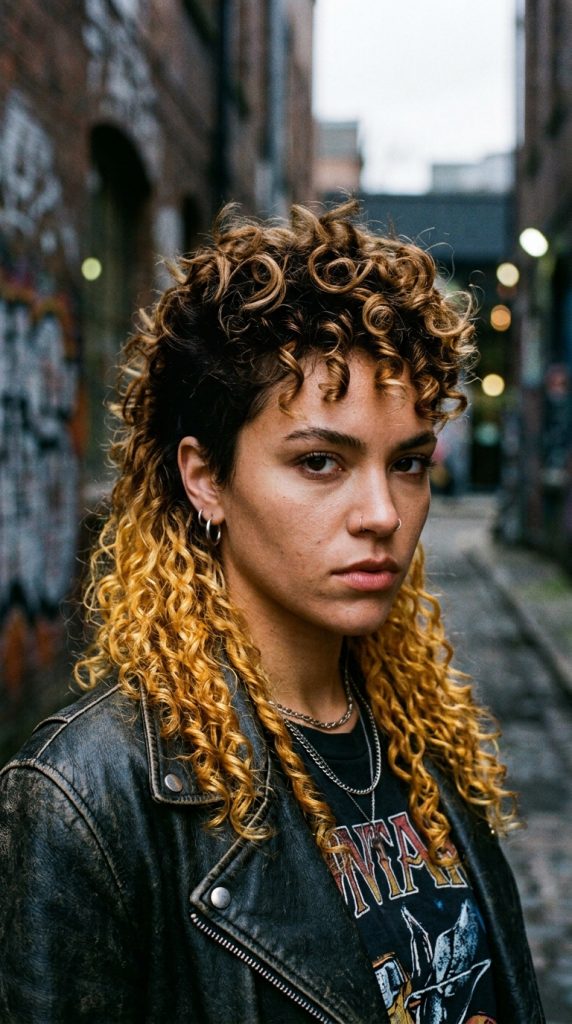
Enhancing Texture Through Color Contrast
Coloring your hair blond changes how light interacts with your curls, making individual layers look much more distinct. This design combines warm honey tones with dark roots to create a natural, sun-kissed look with plenty of edge. It utilizes intensive bond-repair treatments to keep bleached curls strong and bouncy.
Step-by-Step How-to Guide
Sectioning for Color Placement
First, map out your mullet layers, separating the crown from the long back perimeter sections using plastic clips. Apply a protective barrier cream along your hairline.
Applying the Honey Lightener
Next, paint the honey-blond lightener onto your curls, focusing heavily on the crown tips and back lengths. Leave the roots dark for a seamless blend.
Rinsing and Deep Conditioning
Then, rinse the color thoroughly after processing, immediately applying a premium bond-repair treatment. Let it sit for fifteen minutes to restore optimal coil elasticity.
Cutting the Mullet Shape
After that, use your shears to layer the bright crown curls short, building a full, bouncy top shape. Keep the blond back pieces long and flowing.
Definding with Leave-In Oil
Finally, apply a mix of leave-in cream and argan oil to the fresh blond layers to lock in moisture. The oil adds a gorgeous sheen that reflects light.
Materials List
- Honey-Blond Hair Lightener: The key component used to transform the color and add extreme depth.
- Bond-Repair Treatment: Restores structural integrity to bleached curls, preventing dryness and breakage.
- Argan Oil: Adds a brilliant, reflective gloss over the warm blond curls for radiance.
- Plastic Clips: Used to partition sections safely during the chemical coloring process.
- Sulfate-Free Shampoo: Cleanses the fresh color gently without stripping away natural essential oils.
Idea 6: The Wet-Look Glossy Jelly Mullet
This high-shine, editorial-style mullet relies on an abundance of styling gel to create a glossy, soaking-wet appearance that lasts all day long. It is ideal for contemporary fashion enthusiasts who want a sleek look with zero dry frizz texture. It offers unparalleled definition and sharp contrast.

The Aesthetic of Liquid Definition
The wet-look curly style relies heavily on using heavy-duty styling gels that lock moisture into your hair strands permanently. This build capitalizes on that glossy finish to create a highly defined, low-frizz silhouette from top to bottom. It keeps your curls completely clumped, heavy, and brilliantly shiny.
Step-by-Step How-to Guide
Saturating the Curls Fully
First, wash your hair and apply a generous amount of leave-in conditioner while standing directly under the shower stream.
Applying the Defining Gel
Next, rake an exceptionally large amount of strong-hold styling gel through your soaking wet hair from roots to ends.
Shaping the Mullet Silhouette
Then, use your hands to press the side sections flat against your head, keeping them close to your ears. Push the crown curls upward for height.
Arranging the Face Framing Bangs
After that, arrange individual wet curl clumps across your forehead to form perfect, glossy, piecey front bangs.
Letting the Style Air Dry
Finally, allow the gel to air dry completely without touching it or using a blow dryer. This creates a hard, shiny glaze that locks in the wet look.
Materials List
- Strong-Hold Styling Gel: Creates the signature hard glaze that maintains the wet look illusion all day.
- Leave-In Conditioner: Sits underneath the gel layer to ensure the hair strands remain hydrated.
- Shower Stream Access: Crucial for ensuring the product application happens on completely soaking wet hair.
- Wide-Tooth Comb: Used to distribute the heavy gel evenly through dense curl clumps.
- Silk Bonnet: Protects the shiny gel cast overnight if you style your hair before bed.
Idea 7: The Asymmetrical Side-Swept Curly Mullet
This romantic yet modern concept sweeps the voluminous crown curls to one side, creating a beautiful asymmetrical focal point over one eye. It is tailored for individuals who love soft, dynamic lines that complement tilted necklines and modern fashion aesthetics. It feels highly sophisticated, unique, and fresh.
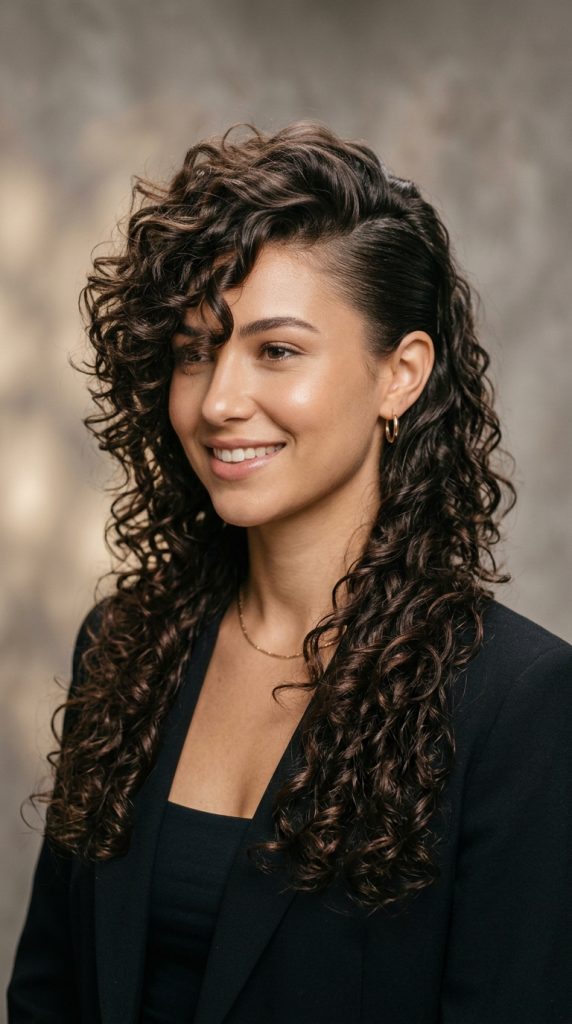
Embracing Asymmetrical Curly Lines
Side-swept styling creates a gorgeous dynamic by leaving one temple area clean while adding a detailed, voluminous curl cluster to the other. By ensuring the back layers remain long and balanced, you maintain a high-fashion, intentional mullet silhouette. It looks gorgeous from every camera profile.
Step-by-Step How-to Guide
Directing the Top Curls
First, apply a lightweight styling mousse throughout your damp crown layers, brushing all strands diagonally toward your left or right eye side.
Securing the Clean Side
Next, use a firm-hold gel to smooth the opposite side section flatly behind your ear, pinning it securely if necessary.
Defining the Drooping Bangs
Then, use your fingers to coil the side-swept front curls so they hang beautifully just above your eyelash line.
Balancing the Back Length
After that, rake your defining cream through the back tail layers, ensuring they hang evenly across your shoulders.
Diffusing for Asymmetric Hold
Finally, diffuse your hair on a medium heat setting, holding the side-swept crown upward to lock in the volume.
Materials List
- Lightweight Styling Mousse: Provides excellent volume and flexible hold for the side-swept crown pieces.
- Firm-Hold Gel: Used to slick the opposite side section flatly behind the ear for contrast.
- Defining Cream: Keeps the long back tail layers hydrated, uniform, and completely frizz-free.
- Diffuser Attachment: Locks the asymmetric direction into place while drying the roots safely.
- Bobby Pins: Placed secretly to hold the slicked side flat against the scalp if needed.
Idea 8: The Two-Tone Split-Dyed Punk Mullet
This edgy design splits your curly mullet directly down the center, coloring one half deep black and the other half a vibrant fashion tone. It brings an incredible punk-rock energy to natural texturing, making your style look intensely artistic and graphic. It is perfect for making an unforgettable statement.
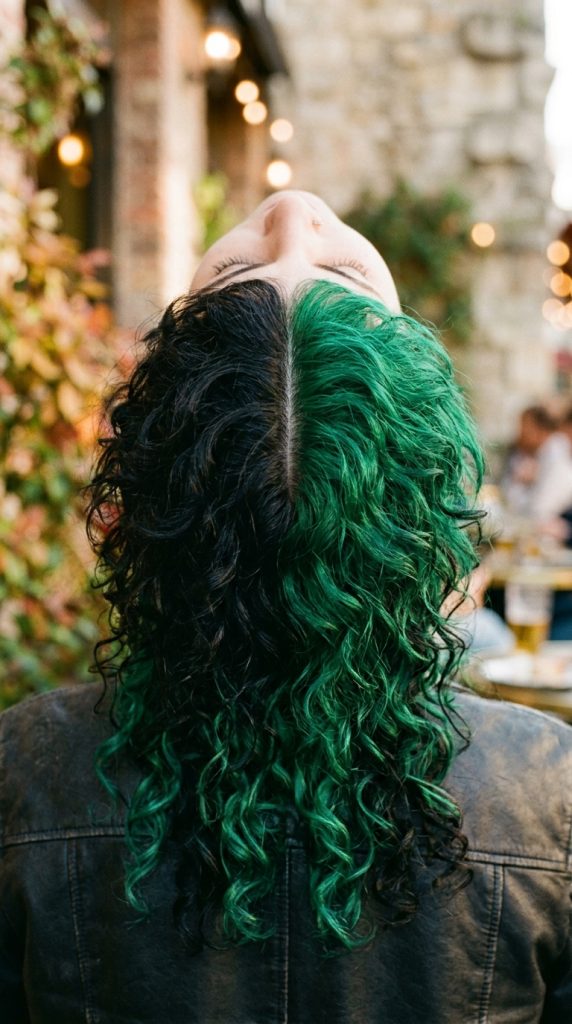
The Impact of Graphic Split Coloring
Split-dyed styling creates a mesmerizing optical illusion by dividing your hair symmetry completely in half with contrasting colors. This design features flawless color separation lines that emphasize the unique layers of your crown bangs and long back tail. It keeps your look bold while highlighting curl movement.
Step-by-Step How-to Guide
Parting the Center Line
First, use a sharp rat tail comb to draw a perfect parting line from your front hairline straight down to the back neck.
Isolating the Natural Side
Next, wrap the right side of your hair securely in plastic wrap to protect it from any overlapping hair dye color.
Applying the Fashion Tone
Then, apply your chosen vibrant fashion dye, like emerald green or hot pink, completely through the left side curls.
Processing and Washing Safely
After that, let the color process fully before rinsing it out carefully with cold water, keeping the sides separated.
Styling the Layered Cut
Finally, apply your favorite defining gel across both halves, letting the contrasting curly layers mingle beautifully at the center interface.
Materials List
- Vibrant Fashion Hair Dye: The key coloring agent used to create the high-contrast split-dyed effect.
- Rat Tail Comb: Essential for drawing the laser-precise center parting line down the scalp.
- Plastic Wrap: Used to isolate sections cleanly to prevent color bleeding during application.
- Cold Water Access: Crucial for rinsing the vibrant dye safely without staining the dark side.
- Defining Gel: Enhances the curl definition across both contrasting color halves smoothly.
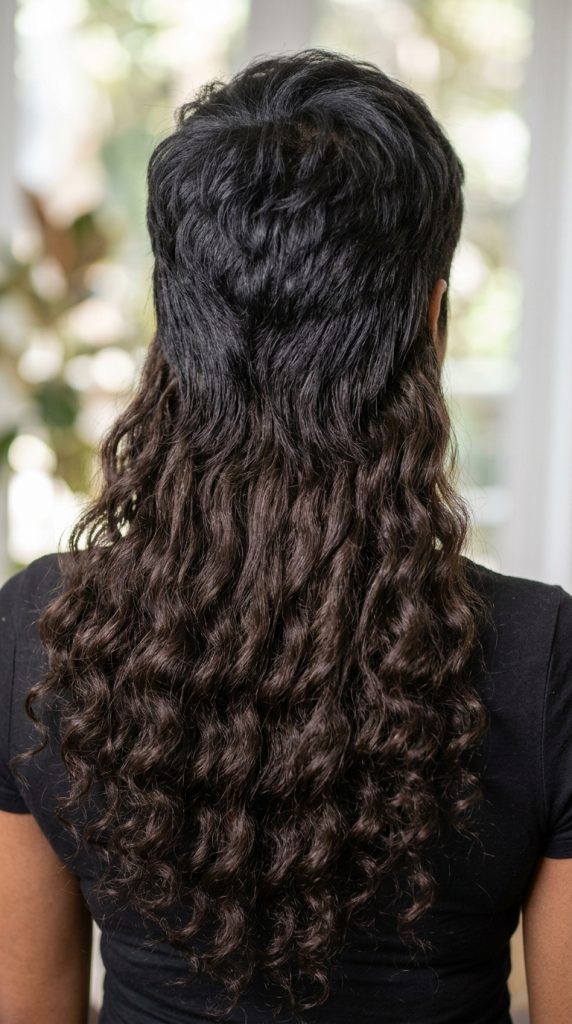
Idea 9: The Ultra-Long Extensions Dream Mullet
This high-glamour design utilizes matching curly clip-in extensions attached to the back neck to create an incredibly long, dramatic tail section. It is perfect for individuals with short hair who want to achieve red-carpet length without waiting years for growth. It looks incredibly rich, dense, and striking.
Engineering High Contrast Length
Achieving a dramatic length contrast when you have a short curly crop requires utilizing external hair pieces seamlessly integrated into your back perimeter. This method allows you to create a secure, lightweight foundation that supports a much longer, more imposing structural tail footprint. It gives the perfect illusion of natural length.
Step-by-Step How-to Guide
Shaping the Short Crown
First, cut your natural top layers into a textured pixie shape, creating short, bouncy curls that frame your face beautifully.
Braiding the Back Anchor
Next, create two small, flat cornrow braids horizontally at the absolute nape of your neck to serve as anchors.
Clipping the Curly Extensions
Then, snap the clips of your long curly extension tracks directly onto the flat cornrow braids, checking for security.
Blending the Hair Pieces
After that, apply a moisturizing leave-in cream across your natural top curls and the extension lengths, finger-twining them together.
Setting the Seamless Illusion
Finally, check your profile in a mirror to ensure the top layers drop naturally over the extension tracks, hiding them completely.
Materials List
- Curly Extension Tracks: The essential component used to add massive, dramatic length to the back tail section.
- Moisturizing Leave-In Cream: Blends the texture of your natural curls seamlessly with the extension hair piece.
- Hair Scissors: Used to trim the top layers short to create the initial pixie framework.
- Comb: Helps create clean horizontal lines for the flat anchor cornrow braids at the neck.
- Mirror Setup: Crucial for checking the back of your head to ensure the tracks are hidden.
Idea 10: The Modern Shag-Infused Soft Mullet
This chic project incorporates soft, blended layers throughout the entire head to create a highly commercial, wearable variation of the classic mullet. It features a beautiful harmony between retro shag elements and modern texturing techniques. It is the definitive ultimate everyday survival style project.

Softening the Classic Mullet Lines
Integrating shag elements into your mullet expands the haircut into the realm of effortless, low-maintenance everyday beauty. By choosing softer transitions between the crown and the back, you create an incredibly cohesive, organic style aesthetic. It elevates your natural curls instantly.
Step-by-Step How-to Guide
Cutting the Soft Bangs
First, snip your front curls at an angle so they drape softly across your forehead, mimicking a classic shag fringe look.
Layering the Side Perimeters
Next, create gentle slide-cuts down the sides of your head, avoiding harsh steps to keep the transition smooth.
Blending into the Tail
Then, blend the crown layers gradually into the back lengths, ensuring the hair maintains a soft, uniform thickness throughout.
Applying Styling Mousse
After that, work a generous palmful of volumizing mousse through your damp curls, scrunching upward to encourage pattern formation.
Air Drying for Softness
Finally, allow your hair to air dry naturally, shaking out the roots gently with your fingers once fully dry for maximum fluff.
Materials List
- Volumizing Styling Mousse: Provides a soft, touchable hold that maximizes natural curl fluff and bounce.
- Texturizing Shears: Used to soften the layer edges to ensure a seamless transition between lengths.
- Moisturizing Conditioner: Keeps the entire shag structure soft, hydrated, and completely tangle-free.
- Finger Tips: The best tool used to shake out the dry roots to create effortless volume.
- Water Spray: Used to refresh the soft shape easily on non-wash days.
An editorial beauty shot focusing on the high-volume afro-textured crown mullet hairstyle, showcasing a rounded pillowy top layer of tight coils tapering down the sides into a long defined curly tail section, highlighted by warm morning light, high-fashion studio style.
A dramatic studio portrait of the tapered fade romantic curly mullet, featuring a sharp precision-cut fade on the sides transitioning into ultra-soft uniform ringlets cascading down the back, showing a crisp clean front lineup against a minimalist solid dark background.
A high-end fashion photograph of the modern shag-infused soft mullet, showcasing blended layer transitions throughout the entire head, soft draping fringe bangs, and fluffy natural curls full of volume and effortless everyday beauty.