12 Jaw-Dropping Optical Illusion & 3D Halloween Makeup Tutorials Going Viral
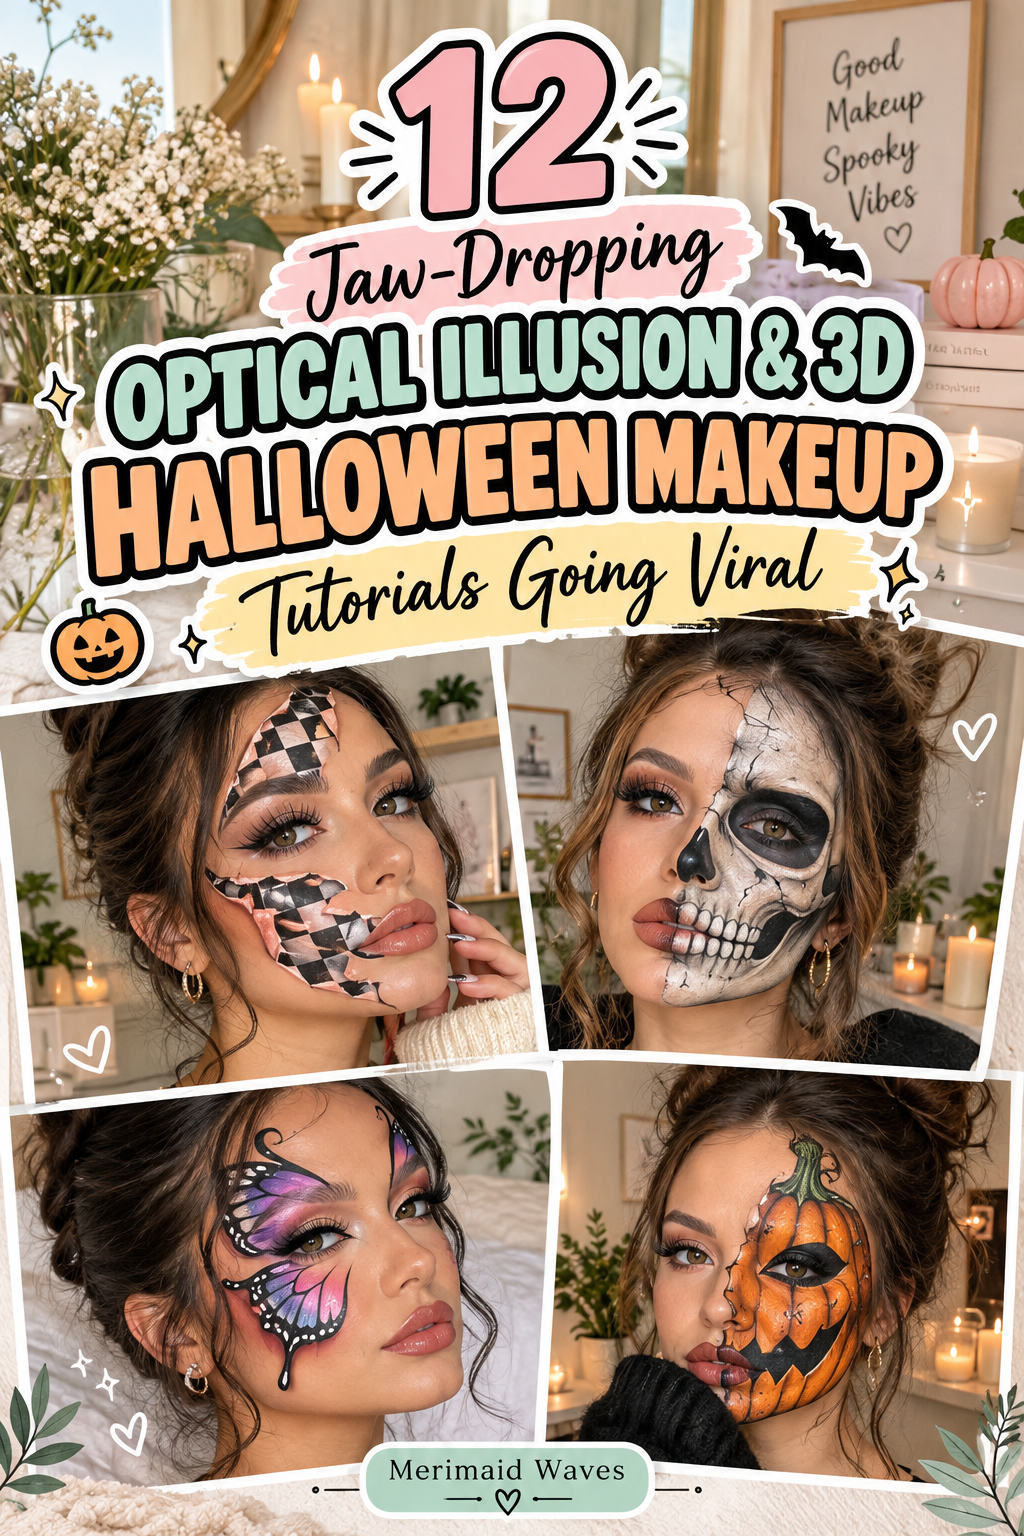
Optical illusion and three-dimensional Halloween makeup have completely overtaken social feeds. Enthusiasts and casual partygoers have abandoned flat, predictable face paint in favor of mind-bending surrealism. Today’s most celebrated looks manipulate lighting, anatomy, and perspective to distort human reality.
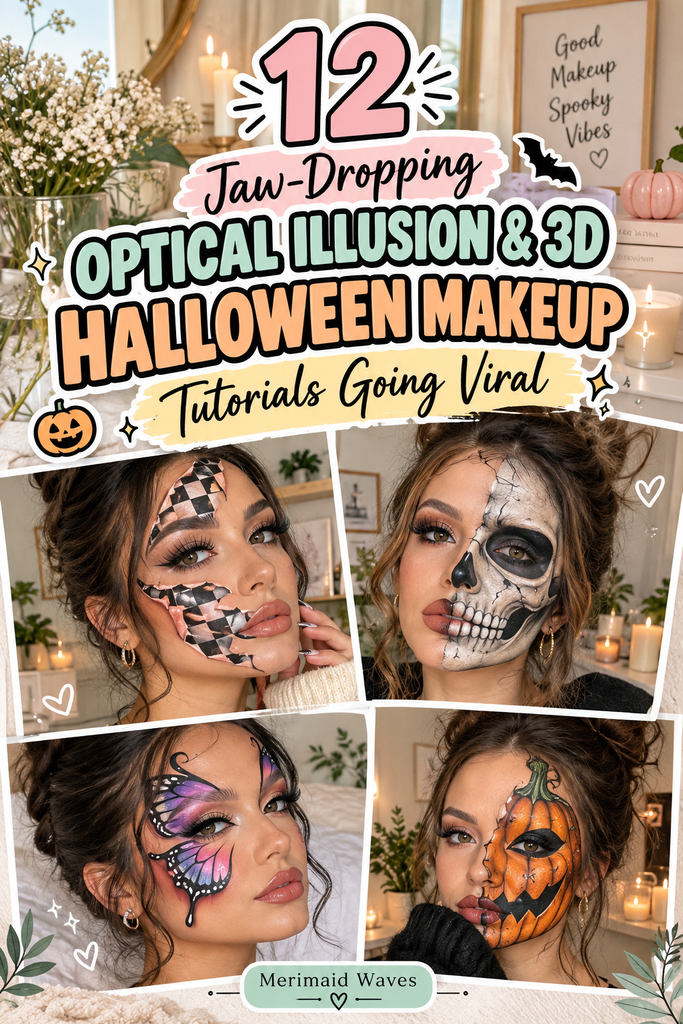
These hyper-realistic makeup effects trick digital cameras and in-person viewers effortlessly. You do not need expensive silicone prosthetics or high-tech film lab gear. Armed with matte face paints, shading brushes, and proper highlight control, anyone can master these illusions.
Deconstructing the Optical Illusion Mechanics
Every successful optical illusion relies directly on understanding how light and shadow define real-world depth. The human eye interprets darker values as receding deep into space and brighter highlights as protruding outward. By placing pitch-black pigments beside stark white reflections, flat skin gains immediate three-dimensional volume.
Precision blending creates soft, deceptive drop shadows that simulate floating objects and deep facial cuts. A single misplaced specular highlight instantly breaks the illusion and reveals flat skin. Mastering subtle value gradations ensures your facial features appear warped, severed, or entirely duplicated.
Selecting Matte Cosmetic Mediums
Shiny, reflective cream formulas destroy optical illusions under direct party lights or phone flashes. Glare bounces off the skin, alerting the human brain that the painted depth is artificial. Professional illusionists rely exclusively on ultra-matte water-activated cakes, setting powders, and cream-to-powder paints.
Water-activated split cakes offer unmatched linework opacity, drying down completely flat without tackiness. Setting dark charcoal shadows with ultra-matte eyeshadows prevents midday creasing and oil breakthrough. A shine-free canvas guarantees that camera lenses capture pure, uninterrupted visual trickery from every angle.
Mapping Perspective and Angles
Visual illusions operate along strict angles of perspective to deliver their most shocking visual payoffs. When painting an illusion on yourself, looking straight into a centered vanity mirror is critical. Angling your head slightly upward or downward during application skews the finished camera perspective.
Position your primary smartphone camera at direct eye level using a steady ring light stand. Take test photos at each stage to ensure your drop shadows match the intended viewing plane. This deliberate alignment guarantees your finished video captures viral attention across Pinterest and TikTok feeds.
The Power of Blackout Backgrounds
High-contrast illusions frequently require turning parts of the face, neck, or hairline completely invisible. High-opacity black face paint absorbs ambient light, erasing bodily boundaries against dark rooms. Blending the edges of your painted cuts into dark clothing heightens the floating illusion dramatically.
Pairing your makeup with a solid black velvet backdrop creates clean, surreal editorial visuals. The boundary between your jawline and the background vanishes, making floating pieces feel completely detached. It provides a salon-quality cinematic finish that stops viewers mid-scroll.
Preventing Smudges and Setting Longevity
Intricate illusion makeup requires hours of concentrated detail, making long-lasting durability an absolute necessity. Sweat, natural sebum, and accidental finger brushes can smear precise drop shadows within seconds. Prepping clean skin with an oil-control barrier primer locks down pigments for hours.
Mist finished designs heavily with an alcohol-based, transfer-proof cosmetic fixing spray. Dust translucent baking powder across delicate transition areas using a soft velvet puff. These industrial sealing steps ensure your jaw-dropping creation survives crowded parties and dance floors intact.
Posing for Viral Digital Impact
Photographing optical illusion makeup demands steady focus, controlled lighting, and deliberate physical posture. Avoid erratic, rapid head movements that expose the flat surface of your painted canvas. Instead, hold subtle, uncanny micro-expressions that let the painted optical distortion do the storytelling.
Position cool, diffused key lighting directly in front to prevent unwanted real-world facial shadows. Tilt your face slowly toward the camera to allow viewers to register the mind-bending reality shift. The surreal result looks like high-end CGI, guaranteeing immense engagement across social platforms.
1. The Double-Vision Twin Face Illusion
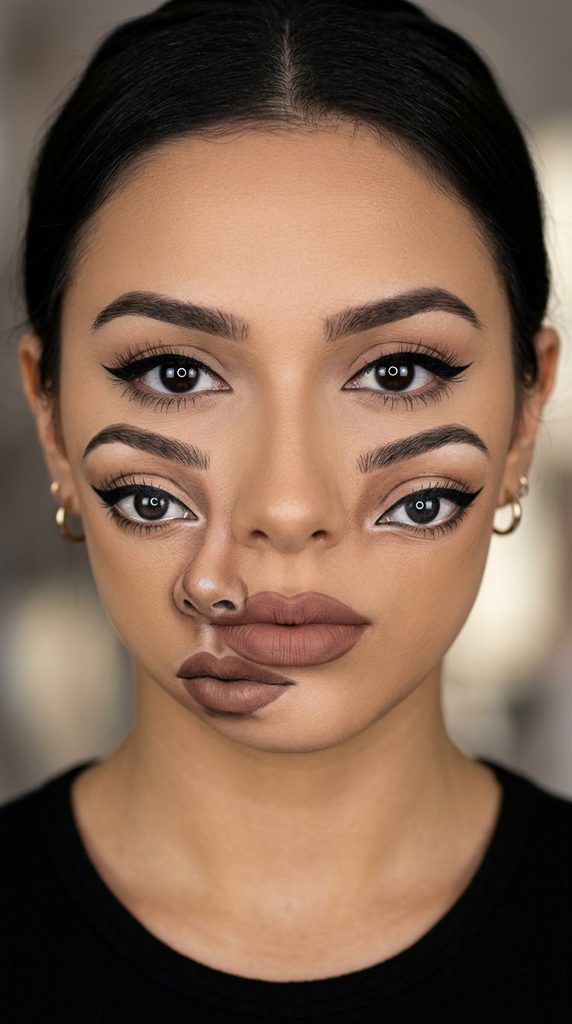
Disorienting Quadruple Feature Glitch
Induce instant dizziness and visual confusion with the legendary double-vision four-eye effect. This viral sensation duplicates your eyes, brows, nose, and lips slightly offset from your natural features. The brain struggles to resolve which set of facial features to focus on simultaneously.
Every blink and subtle head tilt multiplies the surreal, glitching optical distortion on camera. The secret lies in meticulously matching the exact color and curvature of your natural features. Viewers will instinctively rub their eyes, unable to stop staring at the hypnotic, trippy effect.
Materials You Will Need
- Neutral eyeshadow palette matching your skin tone
- Waterproof black gel eyeliner pencil
- Matte liquid lipstick matching your natural lip shade
- Ultra-fine detailing nail art brushes
- Full-coverage matte cream foundation
How to Style It
Apply your standard everyday beauty makeup across your face with clean symmetry. Using a fine brush, sketch a second set of matching eyebrows along your upper cheekbones. Paint duplicate realistic eyes beneath your natural cheek hollows, copying your iris and lash lines.
Draw a second nose profile along your lower cheek, shading nostrils with dark browns. Replicate your exact lips along the lower jawline, highlighting the painted cupid’s bow. Seal the look with translucent powder to keep all eight painted features completely matte.
2. The Unzipped Flesh & Muscle Reveal
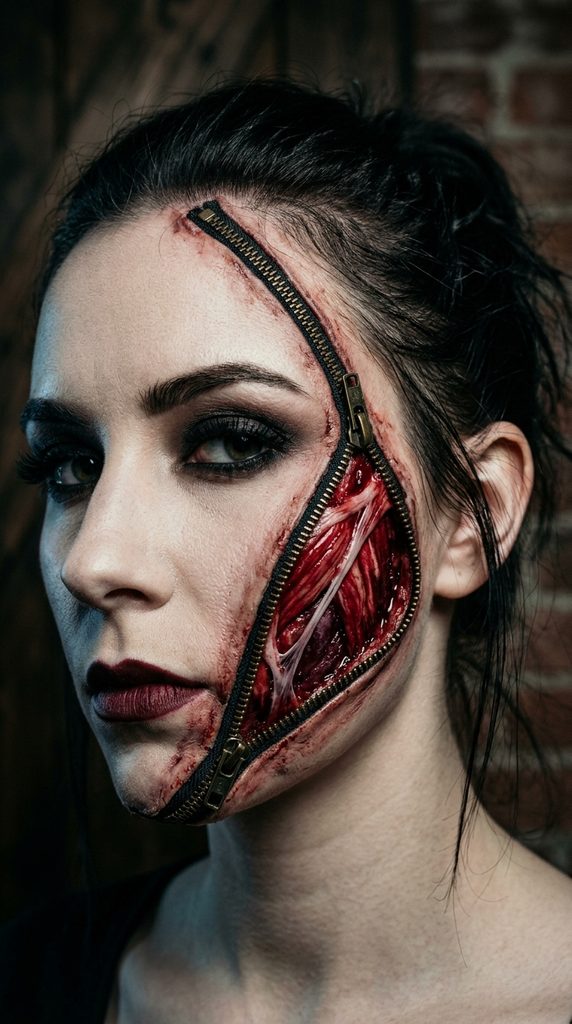
Tactical Zipper Flap Anatomy
Create the gruesome illusion of unzipping your own skin to reveal raw muscular anatomy. An open metallic zipper glued diagonally across the face provides a tangible physical edge. Inside the unzipped triangle, deep crimson reds, burgundies, and whites depict striated muscle tissue.
The stark contrast between smooth porcelain skin and raw organic tissue looks startlingly visceral. The real metal teeth of the zipper catch room light, anchoring the hyper-realistic illusion. It remains one of the most reliable, jaw-dropping Halloween illusions that never fails to shock.
Materials You Will Need
- 1 metallic coat zipper matching your skin length
- Skin-safe spirit gum or liquid latex adhesive
- Crimson, dark burgundy, and stark white face paint
- High-coverage matte foundation matching your skin
- Coarse stipple sponge for texturing tissue layers
How to Style It
Separate the zipper teeth partially, leaving the bottom pull tab closed at the jaw. Adhere the zipper fabric tracks diagonally from forehead to cheek using spirit gum. Blend the outer fabric borders into your face using full-coverage foundation and powder.
Fill the exposed skin triangle between the open zipper tracks with vibrant crimson paint. Paint fine, parallel white and dark burgundy lines to simulate fibrous striated muscle strands. Tap a stipple sponge soaked in dark scab blood over the muscle for wet, realistic texture.
3. The Sliced Floating Head Disconnection
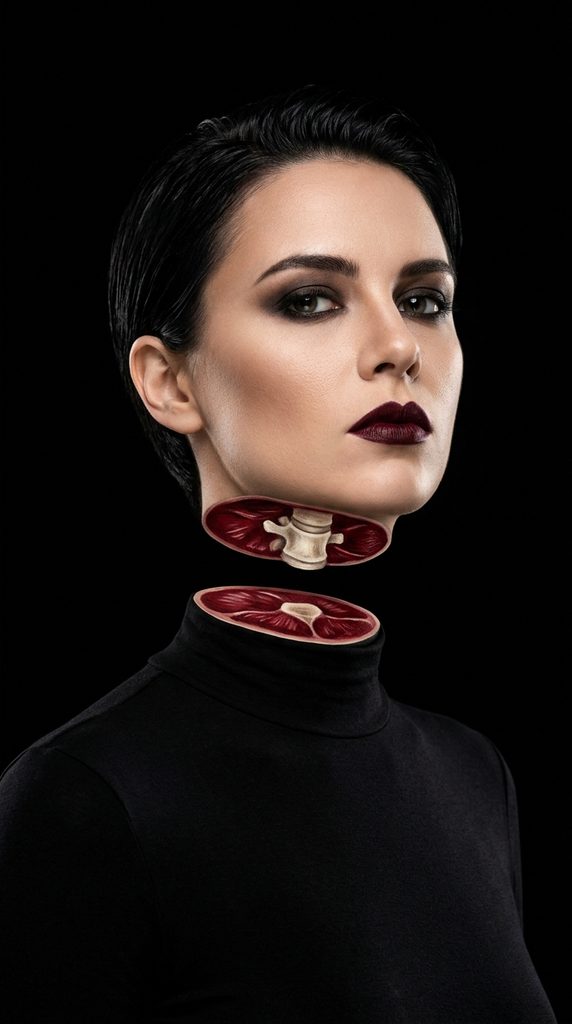
Levitation Neck Sever Illusion
Make your head appear completely severed and hovering inches above your floating shoulders. This mind-bending trick uses pitch-black paint on the neck to create an invisible spatial gap. Realistic painted cross-sections of a severed spine and red tissue cap the illusion.
When viewed against a dark backdrop, your neck disappears entirely from human perception. The painted top and bottom cuts appear three-dimensional, as though hovering in mid-air. It produces a surreal, cinematic visual that looks like high-budget visual effects wizardry.
Materials You Will Need
- High-opacity water-activated jet black face paint
- Crimson, bone white, and dark maroon face paints
- Medium flat synthetic shading brushes
- Black velvet turtleneck shirt or dark background
- Setting powder and black matte eyeshadow
How to Style It
Paint a wide, four-inch band of jet-black paint entirely around your middle neck. Set the black paint with matte black eyeshadow to eliminate all specular room reflections. Along the upper edge near the jaw, paint an elliptical slice of exposed red meat.
Detail a realistic ivory vertebrae bone in the center of the upper neck slice. Repeat the matching red meat and bone cross-section along the lower neck collar line. Stand against a dark backdrop, letting your illuminated severed head float weightlessly in space.
4. The Wooden Marionette Carved Doll
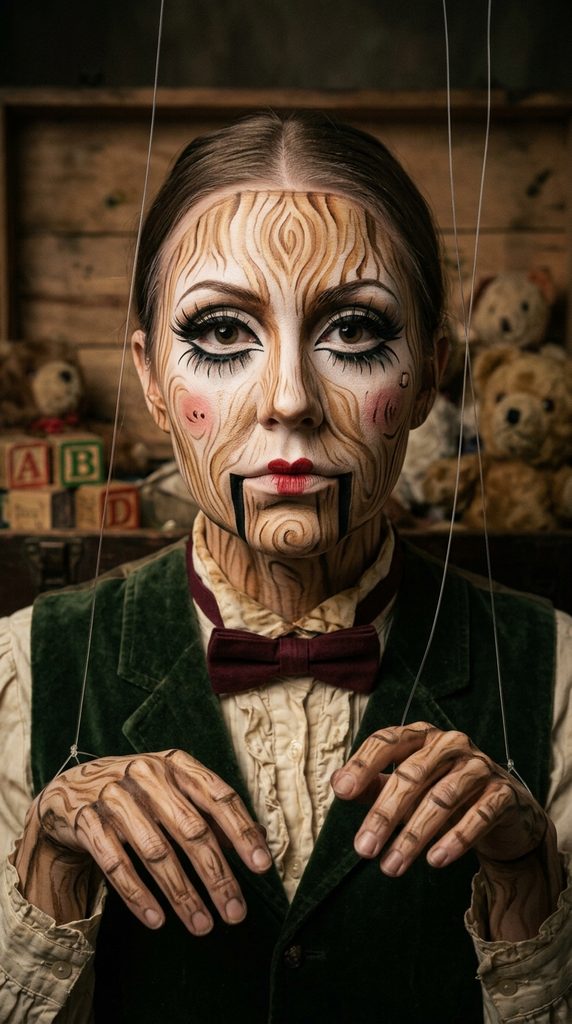
Articulated Puppet Ball-Joint Distortion
Transform yourself into an antique, handcrafted wooden ventriloquist puppet or vintage marionette doll. This look uses trompe l’oeil woodgrain textures and deep, carved jawline hinge slots. The mouth appears as a separate, movable wooden block controlled by backstage strings.
Adding painted circular ball joints at the collarbones and shoulders sells the toy illusion. Wide, doll-like painted eye circles make your natural facial proportions look completely unnatural. It provides an unsettling blend of childhood innocence and sinister, uncanny valley horror.
Materials You Will Need
- Warm caramel, tan, and dark espresso brown face paints
- Flat angled contouring brush for woodgrain streaks
- Liquid white highlight paint and matte black paint
- Faux freckle pen or brown liquid eyeliner
- Pair of oversized false strip eyelashes
How to Style It
Coat your face in a pale, porcelain-smooth foundation base, powdering down all shine completely. Draw two vertical black lines dropping down from your lip corners to frame the jaw. Shade the interior of the lines with deep brown to create deep wooden hinge slots.
Paint subtle swirling woodgrain rings across your cheeks and forehead using watered-down espresso paint. Enlarge your lower eyes by lining under tear ducts with white, adding lower lashes. Attach clear fishing lines to your wrists and chin to simulate real marionette control strings.
5. The Hollow Cracked Porcelain Mask
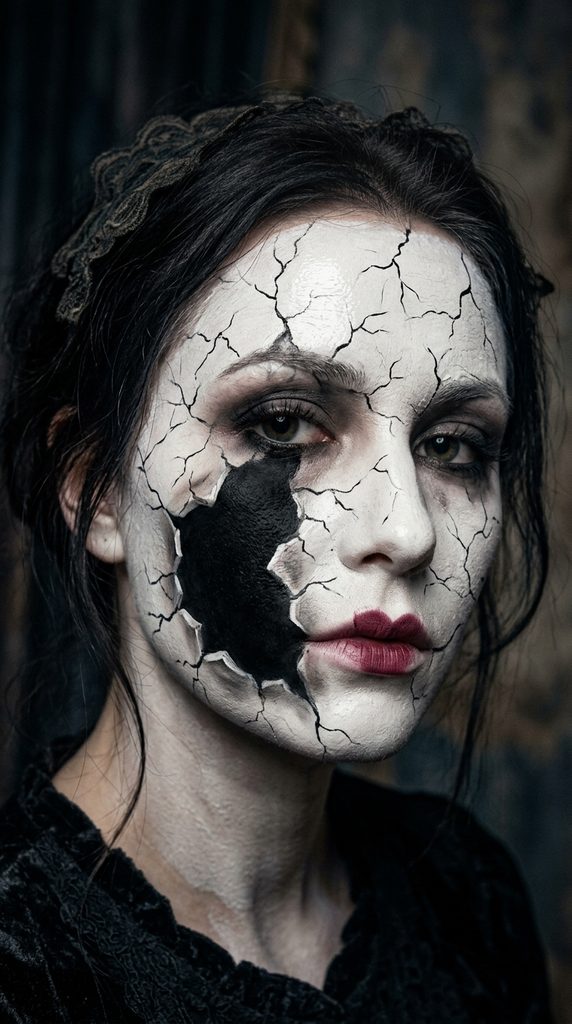
Shattered Ceramic Void Transformation
Create the fragile illusion that your human face is a hollow porcelain mask shattering apart. Deep black voids painted across sections of the face reveal empty, cavernous space behind. Crisp white highlights along jagged fracture borders simulate razor-sharp, broken ceramic edges.
A single intact eye peering through a jagged hole looks haunting, emotional, and poetic. The contrast between pale glazed porcelain and pitch-black inner emptiness captivates viewers instantly. It stands as an artistic, editorial masterpiece that balances eerie tragedy with beauty.
Materials You Will Need
- Pure stark white matte face paint or cream foundation
- High-density matte jet black water-activated paint
- Fine detail striper brush for delicate hairline cracks
- Medium neutral brown eyeshadow for drop shadows
- Translucent setting powder to lock down white porcelain
How to Style It
Cover the outer perimeter of your face with stark white paint, powdering it smooth. Sketch jagged, irregular broken puzzle-piece borders cutting diagonally across your cheeks and forehead. Fill the interior void completely with opaque jet-black paint to create bottomless hollow space.
Highlight the jagged white edges with pure white paint to mimic the thickness of porcelain. Blend a soft gray-brown drop shadow inside the black void along the broken white edge. Draw delicate, branching spiderweb cracks traveling outward across the intact porcelain skin.
6. The 3D Peeling Sticker Face Glitch
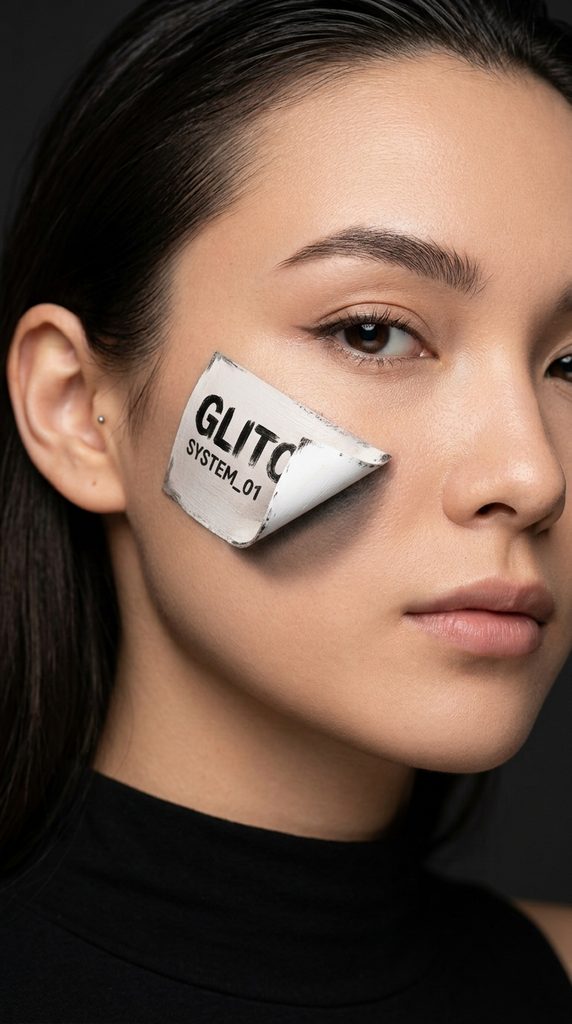
Adhesive Peel-Away Reality Warp
Trick the human mind into seeing your facial skin as a thin, peeling adhesive decal. This hyper-modern illusion depicts a corner of your face curling forward into three-dimensional space. Beneath the curled sticker edge, painted pitch-black shadows or a second painted face peek out.
The curling flap utilizes flawless gradient shading to appear physically lifted off the cheeks. When viewed from the front, the painted paper curl looks astonishingly solid and tactile. It feels like an edgy, surreal modern art piece pulled straight from a high-fashion runway.
Materials You Will Need
- Flesh-toned face paint matching your skin tone
- Pure chalk white paint for the sticker underside
- Deep charcoal and warm brown contouring powders
- Ultra-fine round synthetic detail brushes
- Neutral lip liner for pre-mapping angled peel curves
How to Style It
Map out a triangular peel line starting from your cheekbone curling inward toward lips. Paint the underside of the curled triangular flap in clean, opaque white paint. Shade a curved, dark charcoal drop shadow directly onto the skin beneath the white curl.
Blend the drop shadow softly outward, keeping the edge directly under the curl razor-sharp. Add a fine white highlight along the curved outer ridge of the curled paper edge. View the face straight-on in the camera monitor, watching the painted skin peel forward.
7. The Meltdown Dripping Wax Candle
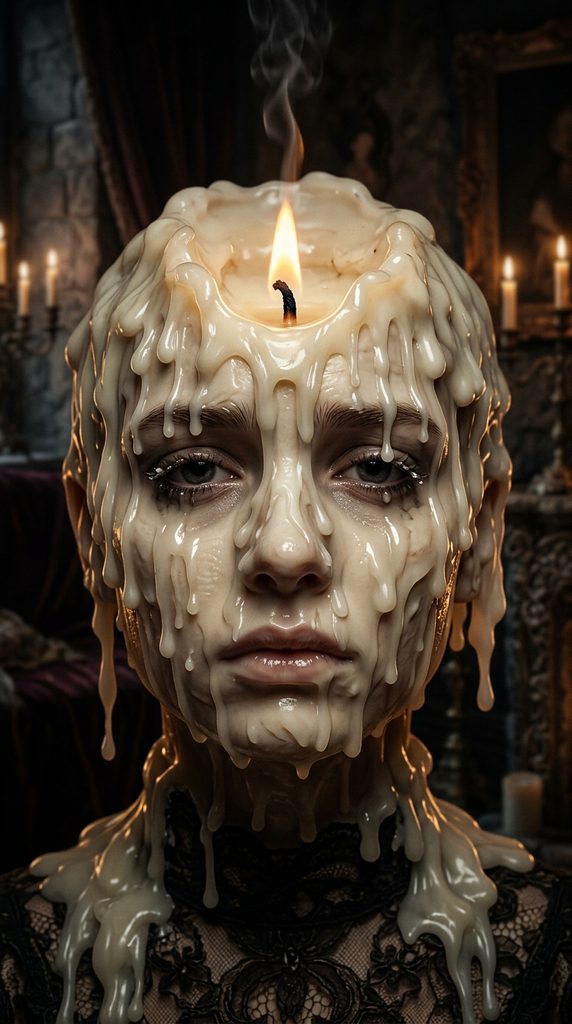
Melting Human Wax Sculptural Cascade
Transform your face into a slowly suffocating, melting wax candle burning down into ruins. Thick, cascading paint drips pool across your eyes, nose, and mouth like liquid paraffin. A realistic flickering flame painted atop the forehead anchors the surreal thermal transformation.
Strategic white highlights on the curved edges of each drip create glossy liquid weight. The look feels melancholic, gothic, and mesmerizingly grotesque without relying on typical gory tropes. It challenges your artistic patience while delivering undeniable viral showstopper appeal on camera.
Materials You Will Need
- Creamy ivory, pale beige, and stark white face paints
- Fiery orange, golden yellow, and deep crimson paints for flames
- Fluffy angled shading brush and micro-detail brush
- Rich black water-activated paint for candle wick details
- Glossy transparent lip gloss for wet dimensional accents
How to Style It
Base your face in a pale, waxy ivory foundation, setting it with translucent powder. Map heavy, rounded wax drip trails cascading downward from your brows and forehead. Shade the underside of every rounded drip bulb with soft tan and brown eyeshadow.
Paint crisp white highlight lines along the top ridges of drips to simulate glossy wax. Sketch a smoking black wick and a glowing teardrop flame centrally on your forehead. Tap clear gloss onto the tips of the painted drips to reflect real room light.
8. The Spiral Warp Hypnotic Vortex

Twisting Funnel Face Distortion
Turn your entire head into a twisting, dimensional vortex spinning inward toward an abyss. Concentric curved geometric bands radiate outward from your nose across cheeks, eyes, and chin. The alternating black and skin-toned spirals warp natural facial features into a hypnotic black hole.
Looking directly at the center of the face creates a dizzying, psychedelic optical pull. The alternating widths of the curving stripes create the illusion of rotational torque and depth. It represents a bold, graphic triumph of pure optical geometry over organic facial anatomy.
Materials You Will Need
- High-pigment jet black water-activated cake paint
- Full-coverage skin-toned foundation or contrasting color
- Long-bristle striping brush for smooth continuous curves
- White detailing paint for reflective stripe ridge highlights
- Setting spray to ensure razor-sharp graphic line borders
How to Style It
Paint your face in a smooth, uniform foundation base, powdering away all shine completely. Choose the tip of your nose or center lips as the central vortex anchor point. Using a thin striper brush, sketch expanding spiral arms radiating outward in continuous curving loops.
Fill alternating spiral bands with high-opacity jet-black paint, keeping all edges razor-sharp. Apply a thin line of stark white paint along one edge of the black bands. Blend the opposite edge with soft gray shadow to simulate the inward funnel curve.
9. The Displaced Floating Block Puzzle
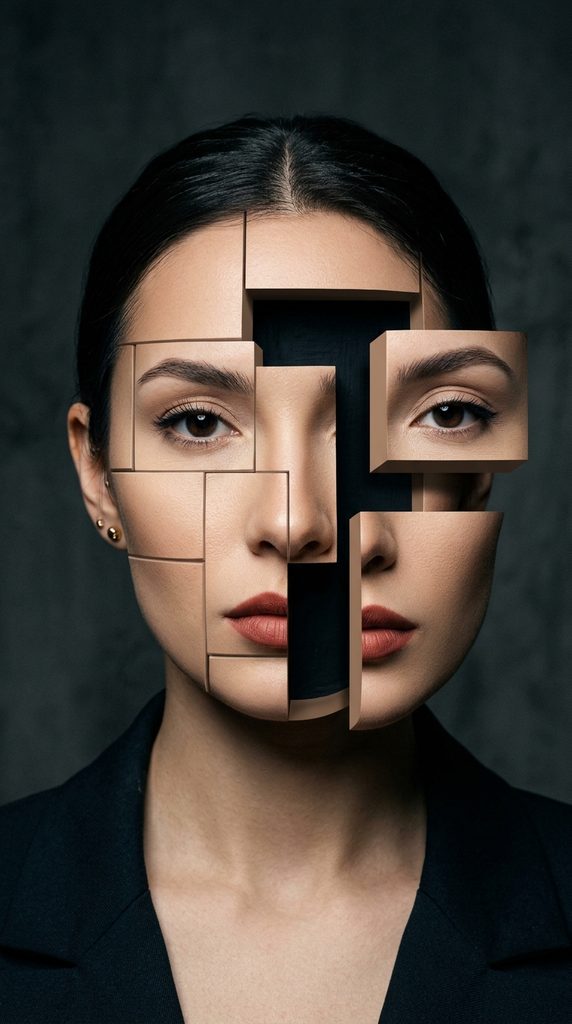
Geometric Architectural Face Shift
Deconstruct your face into sliding cubical puzzle blocks shifting out of physical alignment. Rectangular sections of your cheeks, nose, and forehead appear pushed sideways into open space. Realistic painted drop shadows behind each displaced block make the floating skin look inches thick.
The crisp architectural lines contrast dramatically with the soft, organic curves of human lips and eyes. Viewers will pause their screens to examine how the shifted facial puzzle pieces align. It is an intellectual, high-precision illusion that showcases elite structural brush control.
Materials You Will Need
- Crisp straight-edge card or ruler for drafting lines
- Neutral skin-toned paints, deep espresso, and matte black
- Flat square synthetic shader brushes
- White highlight pencil for marking block corners
- Matte setting powder to prevent edge transfer
How to Style It
Use a straight-edge card to map horizontal and vertical block cuts across your face. Select two rectangular segments, shifting their painted boundaries one inch to the left
Paint deep matte black rectangles where the displaced blocks originally sat to show voids. Paint faux block side panels in shaded skin tones to give each piece physical depth. Blend deep drop shadows along the base of the floating blocks over the skin beneath.
10. The Hollow Ribcage Chest Cavity

Skeletal Subterranean Torso Void
Extend your optical illusion makeup below the neck by turning your chest into a hollow cavern. Paint a detailed, three-dimensional ribcage arching over an endless, pitch-black interior abyss. Curved white bones appear to hover forward over deep, empty space where organs should be.
The dramatic scale of painting the entire décolletage captivates viewers instantly in wide-angle photos. As you breathe, the painted bones move with your ribcage, enhancing the dynamic horror. It forms an unforgettable centerpiece that pairs effortlessly with simple black clothing and slicked hair.
Materials You Will Need
- High-coverage jet black body paint (water-activated)
- Bone white and ivory cream body makeup
- Soft blending sponge and medium flat shader brushes
- Dark charcoal eyeshadow for skeletal bone contouring
- Large powder puff and industrial-grade setting spray
How to Style It
Paint your entire neck, chest, and collarbones down to the sternum in solid black. Trace realistic, curved human rib profiles arching across the black chest with white paint. Fill the traced ribs with ivory paint, leaving the spaces between them solid black.
Contour the underside of each rib bone using dark brown and gray to create roundness. Paint bright white specular highlights along the top curved crests of every single rib. Dust the black interior gaps with matte black powder to ensure zero light reflects.
11. The Classic Zipper Eye Socket
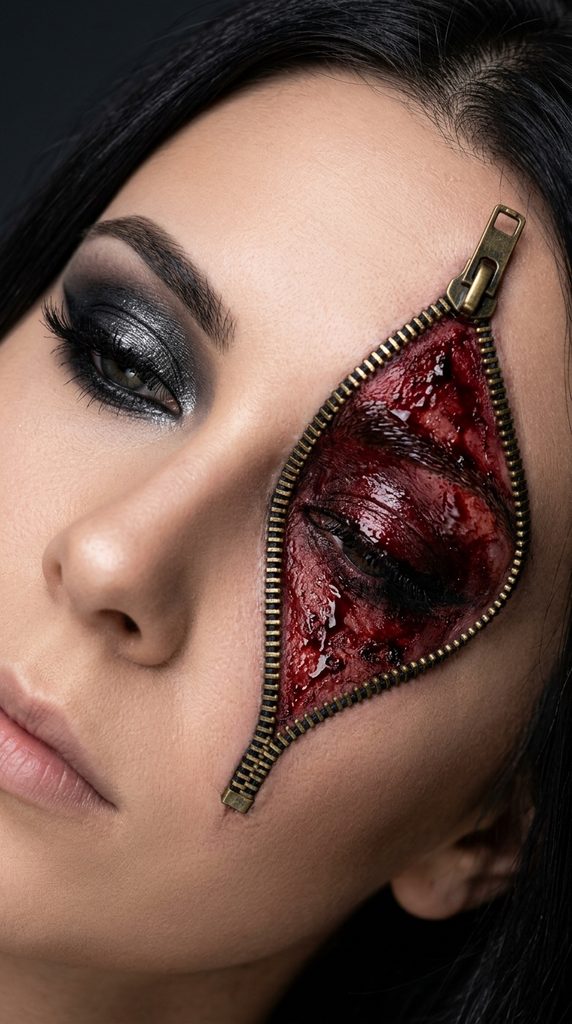
Unzipped Ocular Surrealist Wound
Blend classic beauty makeup with grotesque optical surrealism by framing one eye in metal. An open zipper glued around the eye socket creates an unzipped biological window. Inside the unzipped eye frame, hyper-saturated gore, darkness, or celestial cosmos look exposed.
The opposing eye remains finished in flawless, glamorous everyday smokey-eye beauty makeup. This high-contrast pairing emphasizes the shocking, tactile nature of the unzipped metallic hardware. It remains an absolute viral staple across social channels for its striking simplicity.
Materials You Will Need
- 1 small brass or silver zipper unzipped halfway
- Skin-safe eyelash adhesive or spirit gum glue
- Deep black, burgundy, and crimson theatrical paints
- Thick coagulated scab blood gel
- Glamorous false lashes and everyday eye makeup products
How to Style It
Complete a gorgeous, high-glam makeup look across your entire face, focusing on beauty. Position the open teeth of a separated zipper track around one eye socket comfortably. Secure the zipper fabric borders firmly to the skin using spirit gum or latex.
Blend the outer fabric edges smoothly into surrounding foundation using concealer and translucent powder. Paint the skin inside the zipper border with deep crimson, black, and maroon tones. Dab thick, glossy coagulated scab gel along the zipper teeth for fresh dimensional gore.
12. The Creepy Carved Jack-O’-Lantern Cutout
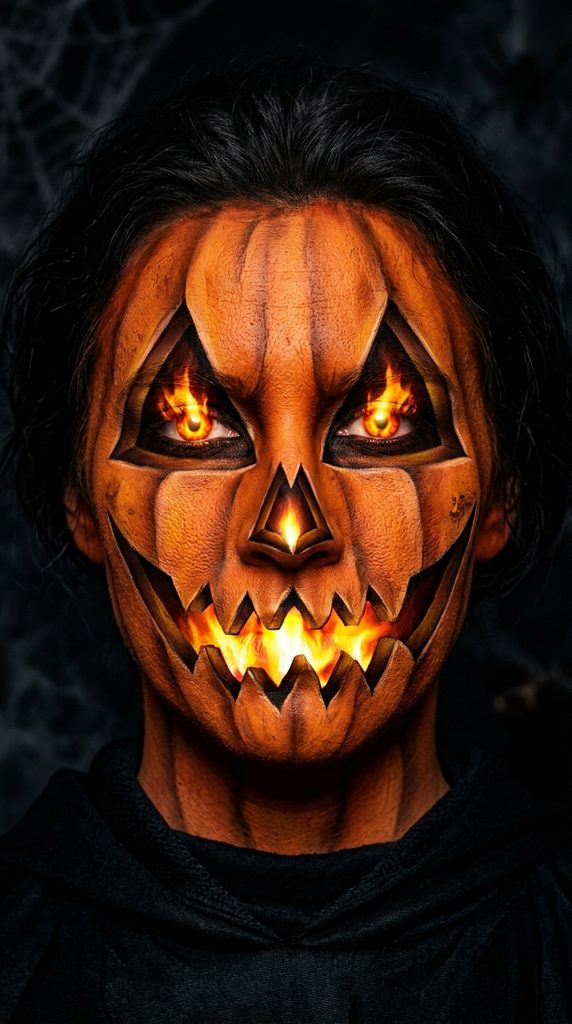
Glowing Inner Pumpkin Luminescence
Transform your face into a hollow, carved wooden jack-o’-lantern glowing brilliantly from within. Deep triangular eye and mouth sockets are painted with vibrant yellow, orange, and white cores. Realistic painted drop shadows along socket walls make the outer skin look two inches thick.
The bright fiery interior appears to emit real, radiant heat and flickering candlelight outward. Framing the face with rich matte orange tones and carved vertical pumpkin ribs sells the illusion. It merges timeless Halloween folklore with jaw-dropping, viral three-dimensional optical painting mastery.
Materials You Will Need
- Vibrant pumpkin orange, burnt sienna, and espresso paints
- Radiant neon yellow, bright gold, and pure white paints
- Flat synthetic shader brushes for cutting clean geometric edges
- Black face paint for deep interior perspective drops
- Yellow shimmer eyeshadow or UV-reactive pigment for glowing cores
How to Style It
Base your entire face in rich, matte pumpkin orange paint, contouring vertical rib grooves. Map classic geometric triangle cutouts across both eyes, the nose, and the mouth. Paint the interior side walls of the cutouts in deep brown to establish carved thickness.
Fill the deep centers of the carved holes with blazing, bright yellow and white paint. Blend bright orange around the outer carved rims to simulate warm, escaping candlelight glow. Dust the yellow centers with UV-reactive pigment to make the inner core radiate under lights.