15 Lazy-Girl Halloween Makeup Hacks for A Stunning Costume
Halloween makeup does not need complex artistry. In fact, simple tricks create maximum impact quickly. Many people stress over intricate costumes every single October. However, quick beauty shortcuts deliver show-stopping results instantly. You can easily bypass hours of detailed blending.
Instead, focus on clever, high-impact aesthetic techniques. These easy methods require minimal daily cosmetics. You likely already own most essential beauty products. Therefore, creating spooky looks becomes totally stress-free now. Even complete beginners can master these dramatic transformations.
Unlock Stunning Looks Without Professional Skills
Time constraints often ruin Halloween costume preparation plans. Fortunately, smart shortcuts offer brilliant, rapid visual solutions. You do not need expensive theatrical face paints. Instead, standard drugstore makeup works remarkably well today. Everyday lipsticks, eyeliners, and shimmers provide endless creativity.
Consequently, anyone can craft iconic seasonal looks effortlessly. Smart placement creates the illusion of intricate artistry. Thus, your costume feels deliberate, chic, and polished. Pinterest loves practical beauty routines that save time. These clever tricks guarantee viral-worthy Halloween beauty results.
Maximize Your Everyday Vanity Essentials
Let us look closer at smart product repurposing. A simple brown lip liner creates faux freckles. Meanwhile, vibrant eyeshadows double as eerie contour shades. Black liquid liner transforms into sharp spider webs. Additionally, clear lip gloss yields instant wet-shine effects.
Therefore, you spend far less money on costumes. You also avoid buying single-use novelty cosmetic kits. Furthermore, these smart hacks prevent irritating skin breakouts. Sensitive skin thrives when using familiar everyday formulas. Thus, comfort meets high-fashion spooky creativity seamlessly.
Quick Transformations for Busy Schedules
Last-minute party invitations no longer cause sudden panic. Because these routines take less than ten minutes. You simply select one striking focal point area. Then, keep the rest of your complexion neutral. This balance ensures your overall aesthetic stays elevated.
Moreover, you avoid looking messy or overly cluttered. Minimalist aesthetics currently dominate top beauty trends everywhere. Hence, clean lines and subtle shading work best. You achieve gorgeous drama without heavy, cakey layers. Now, getting ready feels completely enjoyable and fun.
Essential Tools for Fast Spooky Results
Having the right basic tools speeds up application. A pair of textured fishnet stockings works wonders. Also, keep standard cotton swabs within easy reach. They clean up minor smudges in mere seconds. Additionally, clear eyelash adhesive secures glitter and gems.
A sturdy setting spray guarantees all-night long wear. As a result, your look stays fresh outdoors. Sweat and movement will not ruin your makeup. So, you can celebrate without constant mirror checks. Everything remains flawlessly locked into place all evening.
Elevate Simple Concepts with Creative Contrast
Striking makeup relies on smart tonal visual contrast. For instance, pair dark eyes with pale skin. Alternatively, choose blood-red lips against matte velvet skin. This thoughtful contrast catches camera flashes beautifully indoors.
Consequently, your party photos will look completely stunning. Friends will assume you hired a professional artist. Yet, you barely spent any real time preparing. That is the true magic of lazy beauty. Simplicity always creates the most memorable visual style.
1. The Fishnet Mermaid Scale Method
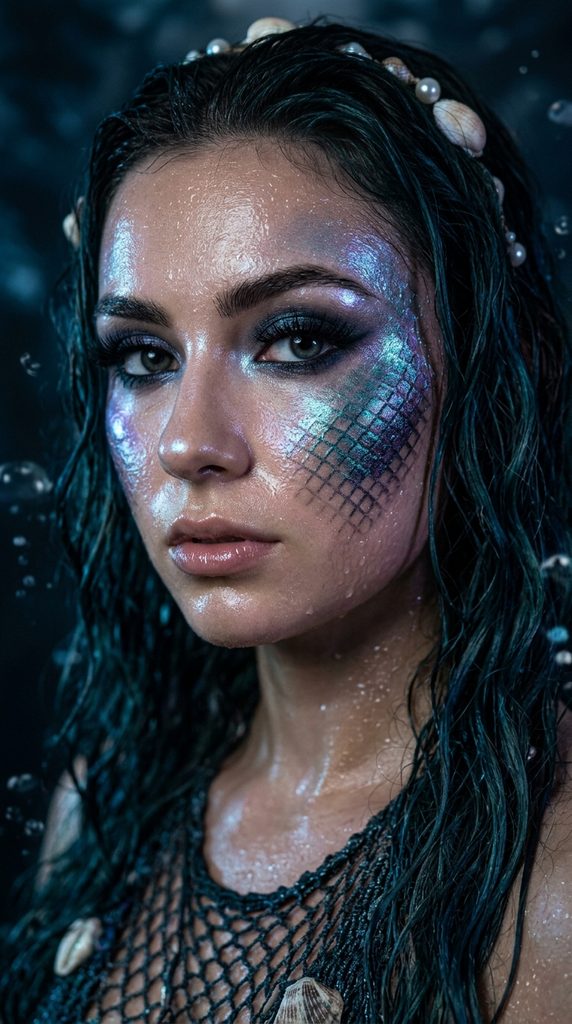
The Easiest Shortcut to Ethereal Siren Scales
Creating intricate fish scales manually takes far too long. Luckily, a pair of textured fishnets solves this. This viral beauty hack delivers crisp, layered dimension. It transforms your cheekbones into sparkling aquatic art instantly.
Furthermore, you need zero advanced hand-painting skills here. The stretched stocking grid acts as your stencil. Therefore, vibrant shimmer pigment transfers across skin evenly. The final finish looks remarkably detailed and professional. It perfectly suits mermaids, sirens, or cosmic creatures.
How to Create Textured Mermaid Scales Step-by-Step
First, pull a clean fishnet stocking over your face. Position the diamond pattern tightly over your cheekbones. Next, hold the stocking completely still using one hand. Then, dip a fluffy brush into teal shimmer eyeshadow. Gently pat the vibrant pigment directly over the netting.
Afterward, layer deep purple shadow along the lower edge. This dual-tone application adds instant three-dimensional depth. Finally, carefully peel the fishnet away from your skin. Set the vibrant scales immediately with a fine mist.
Required Materials for Mermaid Scales
- One pair of clean fishnet stockings
- Shimmering teal and purple pressed powder eyeshadows
- Fluffy dense eyeshadow packing brush
- Long-lasting makeup setting spray
- Iridescent cream highlighter
2. Instant Vampire Bite Marks with Lip Liner
Classic Gothic Drama with Zero Theatrical Glue
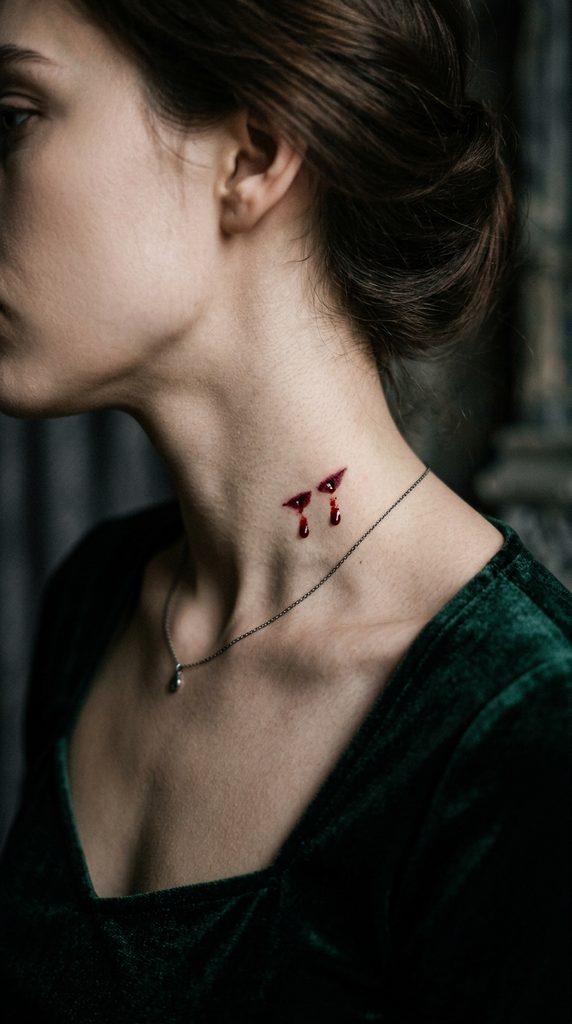
Vampire costumes remain an eternal Halloween party favorite. However, gluing heavy plastic bite prosthetics feels uncomfortable. Instead, you can draw hyper-realistic puncture wounds quickly. This lightweight makeup hack uses ordinary creamy lip pencils.
Consequently, your skin stays comfortable all night long. The illusion relies entirely on strategic shadow depth. Anyone can master this optical trick in minutes. It adds dark elegance to any simple black outfit.
How to Draw Realistic Vampire Punctures Step-by-Step
Start by selecting a deep burgundy lip liner pencil. Next, draw two small, distinct dots on your neck. Ensure both dots sit roughly one inch apart. Then, use a fine angled brush to smudge edges. Apply a tiny dot of black liner inside.
This black center creates realistic visual puncture depth. Afterward, drag a drop of red gloss downward. Let the gloss drip naturally along your collarbone. Finally, dust translucent powder lightly around the wound edges.
Required Materials for Vampire Punctures
- Deep burgundy creamy lip liner pencil
- Matte black gel eyeliner pencil
- Glossy deep red liquid lip stain
- Fine angled detail makeup brush
- Translucent setting powder
3. Spiderweb Winged Eyeliner Extension
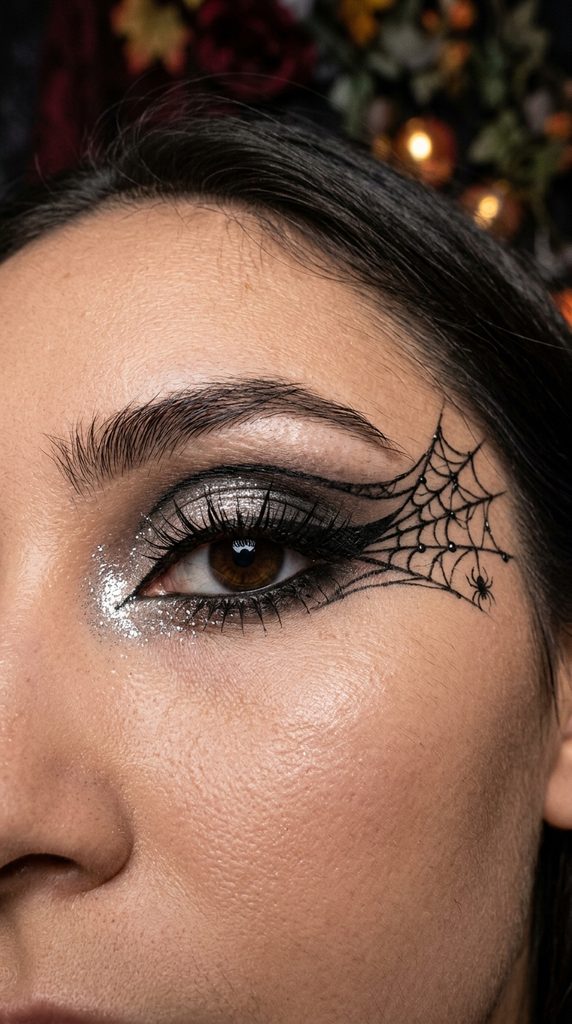
Elevate Basic Cat Eyes into Creepy Elegance
Winged eyeliner is already a staple daily beauty technique. Therefore, extending it into festive spiderwebs feels effortless. This clever hack instantly upgrades your standard signature wing. It looks remarkably intricate yet requires minimal extra drawing.
Additionally, sharp black lines frame your eyes gorgeously. You maintain a classic glamorous aesthetic while staying festive. It pairs perfectly with casual black clothing pieces. Thus, you achieve an instant costume without extra shopping.
How to Draw Spiderweb Wings Step-by-Step
First, draw your regular sharp black winged eyeliner flick. Next, extend three thin lines upward toward your brow. Ensure these radiating lines spread outward like subtle spokes. Then, connect each spoke using small, downward curved arches.
Take your time creating soft, scalloped connecting strokes. Afterward, highlight the inner eye corners with silver pigment. This bright pop makes the dark web stand out. Finally, apply two generous coats of volumizing black mascara.
Required Materials for Spiderweb Wings
- Waterproof black felt-tip liquid eyeliner pen
- Volumizing black mascara
- Silver metallic shimmer eyeshadow
- Fine-tip precision cotton swabs
- Micellar cleansing water for corrections
4. Smoky Faux Skull Nose and Cheeks

Instant Skeletal Structure Using Matte Eyeshadow
Full skull face paint feels heavy and easily cracks. However, a minimalist half-skull look remains incredibly chic. You only need a single dark matte eyeshadow pan. By shading strategic hollows, your face appears instantly sculpted.
Moreover, this technique flatters natural cheekbone bone structure. It blends high-fashion contouring with spooky Halloween themes seamlessly. You avoid thick white face paint entirely with this. Hence, your pores stay clean, clear, and breathable.
How to Contour a Skeletal Face Step-by-Step
Begin by applying your regular foundation and concealer base. Next, load a small blending brush with black shadow. Draw an upside-down ‘M’ shape across your nose tip. Fill in the nostrils completely with dark black pigment.
Then, locate the deep hollows beneath your cheekbones. Sweep matte charcoal eyeshadow from ears toward your mouth. Blend the lower edges thoroughly downward for realistic depth. Finally, sketch thin vertical lines over lips using pencil.
Required Materials for Skeletal Contouring
- Highly pigmented matte black eyeshadow
- Matte charcoal gray contour powder
- Small tapered eyeshadow blending brush
- Dense angled contour face brush
- Black wooden lip or eyeliner pencil
5. Floating Pearl & Rhinestone Fairy Eyes
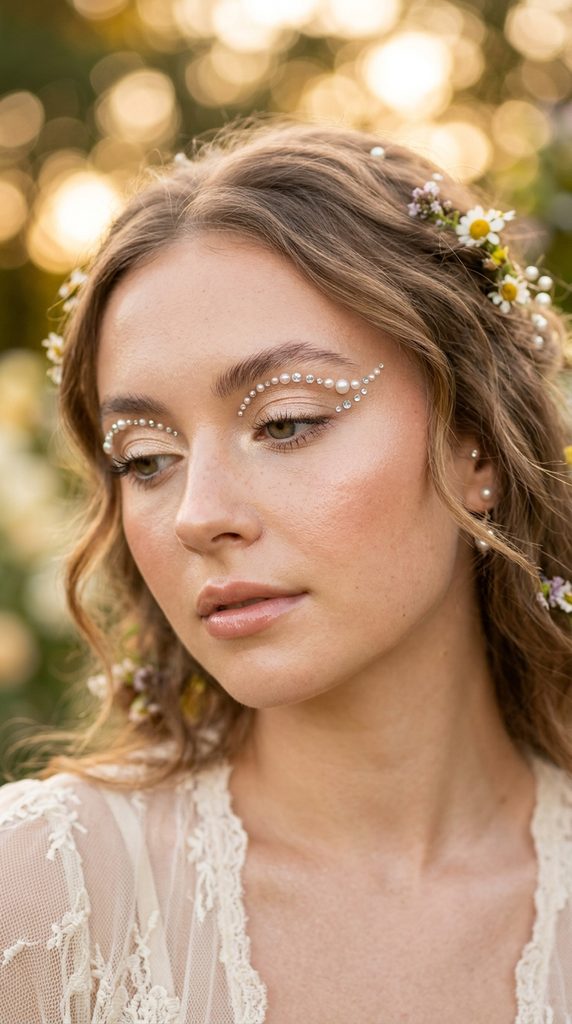
Ethereal Whimsical Glamour Using Adhesive Gems
Fairy and nymph costumes always trend heavily on Pinterest. Fortunately, flat-back craft pearls create instant magical beauty. You do not need complex blending or color theory. Instead, strategic gem placement catches festival light effortlessly.
Furthermore, self-adhesive pearls stay secured for many hours. They lift your eye area while looking exceptionally polished. This clean aesthetic works wonderfully for all skin tones. It provides high visual impact with barely any effort.
How to Apply Floating Pearl Makeup Step-by-Step
First, apply a soft wash of champagne shimmer shadow. Sweep the glowing shade evenly across both upper eyelids. Next, place a tiny dab of lash glue above. Position glue drops along your natural upper eyebrow arch.
Then, use beauty tweezers to pick up individual pearls. Gently press each pearl directly onto the glue drops. Alternate pearl sizes to create an organic floating pattern. Finally, add a coat of clear gloss to lips.
Required Materials for Pearl Fairy Eyes
- Flat-back self-adhesive beauty pearls or rhinestones
- Clear latex-free eyelash adhesive glue
- Precision beauty tweezers or wax pencil
- Champagne metallic cream eyeshadow
- High-shine clear lip gloss
6. Smeared “Joker” Red Lip Illusion

Edgy Chaotic Glamour Without Precise Line Work
Sharp lipstick application often demands steady, patient hands. However, this distressed clown aesthetic welcomes intentional messiness. It completely eliminates the stress of drawing crisp borders.
Consequently, anyone can pull off this edgy, artistic look. Deep red hues provide classic cinematic villain energy instantly. It looks delightfully theatrical, striking, and modern on camera. Best of all, touch-ups throughout the night are unnecessary.
How to Blend a Distressed Lip Step-by-Step
Start by applying a rich crimson red cream lipstick. Fill in your entire lip surface area thoroughly first. Next, press your lips together firmly to spread pigment. Then, take a clean fluffy brush along outer corners.
Gently smudge the lipstick outward toward both your cheeks. Drag the color slightly upward into an exaggerated smile. Afterward, pat deep burgundy shadow into the lip center. This dark core creates a stunning, moody ombre gradient.
Required Materials for Distressed Lips
- Creamy crimson red traditional lipstick
- Deep burgundy matte powder eyeshadow
- Fluffy small smudge blending brush
- Translucent face setting powder
- Tissue paper for blotting
7. Faux Galaxy Freckles with Metallic Pigments
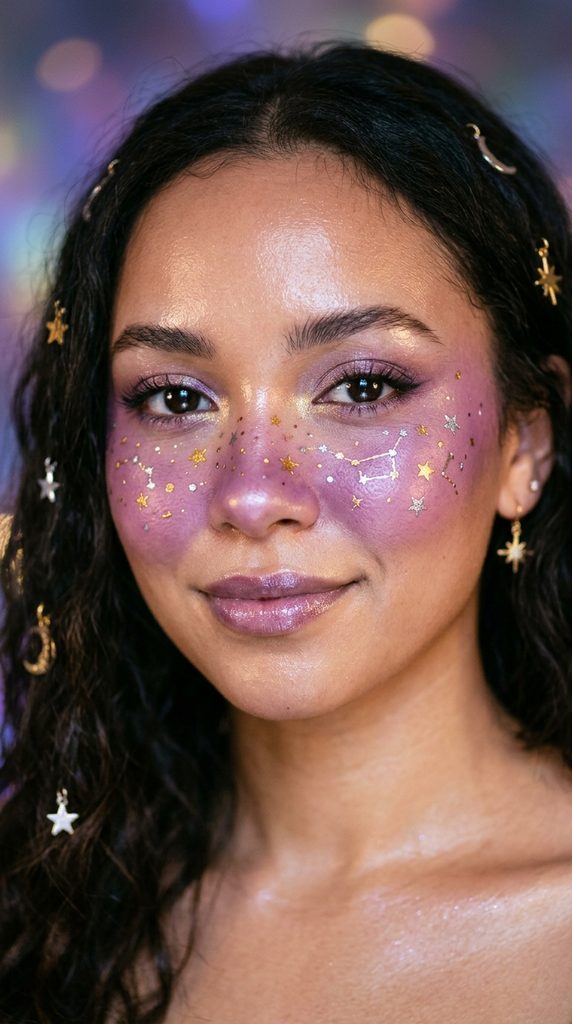
Cosmic Celestial Beauty with Everyday Shimmer
Galaxy-inspired makeup usually requires intricate airbrushing tools. Nevertheless, metallic celestial freckles offer an easier alternative. This technique scatters gold, purple, and silver across cheeks. It turns ordinary complexion makeup into a sparkling universe.
Moreover, this celestial look feels distinctly modern and stylish. It suits alien, fortune teller, or starry night costumes. The scattered metallic dots mask any minor skin blemishes. Thus, you achieve a luminous, camera-ready glow effortlessly.
How to Stamp Metallic Galaxy Freckles Step-by-Step
Begin by applying a luminous base foundation and bronzer. Next, sweep rich violet blush across your nose bridge. Then, dip a damp, clean sea sponge into gold. Lightly stipple shimmering gold liquid highlighter over your cheeks.
Afterward, take a wooden toothpick dipped in white liner. Dot tiny, crisp faux freckles across the highlighted zone. Connect several white dots into small four-point star shapes. Finally, mist your face with dewy setting spray generously.
Required Materials for Galaxy Freckles
- Metallic gold liquid highlighter or pigment
- White liquid waterproof eyeliner pen
- Deep violet or magenta powder blush
- Small textured stippling sponge
- Dewy-finish makeup setting spray
8. The 2-Minute Cute Bambi Deer Face

Adorable Forest Aesthetic Using Everyday Bronzer
Bambi makeup remains one of the coziest costumes ever. It looks incredibly sweet, charming, and effortlessly put-together. Furthermore, you primarily use products from your daily routine. Warm bronzers and white eyeliners do all the work.
Therefore, you avoid spending extra money on new products. This hack softens facial features while adding playful personality. It pairs seamlessly with brown sweaters and simple headbands. Consequently, it solves last-minute costume dilemmas instantly.
How to Create the Deer Look Step-by-Step
First, apply your deepest warm bronzer heavily on foreheads. Sweep that same bronzer down the cheekbones generously too. Next, take a white gel liner along your waterline. Extend the white pencil slightly onto lower eyelid skin.
Then, draw a small black button nose with liner. Fill in your top lip entirely with black pencil. Afterward, place distinct white circular dots along your cheeks. Use a creamy white concealer pencil for these spots.
Required Materials for Bambi Makeup
- Warm-toned matte powder bronzer
- Pure white creamy gel eyeliner pencil
- Matte black waterproof eyeliner pen
- Opaque white cream concealer pencil
- Nude matte liquid lipstick
9. Bleeding Eyes Mascara Tear Hack

Melodramatic Vintage Horror with Simple Setting Spray
Crying mascara creates instant vintage horror movie vibes. This look works wonders for gothic brides and ghosts. Best of all, it intentionally utilizes messy, runny cosmetics. You never need to worry about neat, perfect lines.
Additionally, liquid tears catch room lighting in dramatic ways. The smudged dark pigment emphasizes your eyes remarkably well. It feels dark, dramatic, and delightfully theatrical all evening. You achieve maximum spooky atmosphere with minimal physical effort.
How to Make Running Mascara Tears Step-by-Step
Start by coating your lower eyelashes heavily with mascara. Choose a non-waterproof black mascara formula for this step. Next, load a flat brush with black gel liner. Line your lower lash line with a thick stroke.
Then, hold a facial mist bottle very close beneath. Spray a direct blast of water onto your eyes. Allow the wet black pigment to run down freely. Tilt your head slightly to guide the dramatic drips. Finally, let the runs air dry completely without touching.
Required Materials for Running Tears
- Non-waterproof classic black mascara
- Black creamy gel eyeliner pencil
- Pure water or face mist spray bottle
- Matte black powder eyeshadow
- Flat eyeliner packing brush
10. Glamorous Green Witch Contour Illusion

High-Fashion Wicked Vibes Using Emerald Powder
Traditional green witch face paint feels heavy and suffocating. Instead, high-fashion contouring gives an updated modern twist. You keep your base foundation completely clean and neutral. Then, you chisel cheekbones using rich emerald green eyeshadow.
Consequently, your makeup stays lightweight and wearable all night. This technique channels sleek editorial runway vibes effortlessly. It looks incredibly stylish while clearly honoring classic Halloween themes. You achieve instant villain energy without any green mess.
How to Contour Like a Witch Step-by-Step
Begin by applying a full-coverage matte foundation base. Next, load an angled contour brush with emerald eyeshadow. Sweep the green pigment firmly underneath your cheekbone hollows. Blend the green powder upward into your natural hairline.
Then, dust a touch of green along jawline edges. Add deep forest green shadow into your eye creases. Afterward, apply a bold matte black liquid lip color. Finally, highlight high cheekbone planes with luminous lime shimmer.
Required Materials for Witch Contour
- Rich emerald green matte eyeshadow
- Deep forest green powder pigment
- Luminous lime or gold highlighter
- Bold matte black liquid lipstick
- Angled cheek contour makeup brush
11. Subtle Pop-Art Comic Book Accents
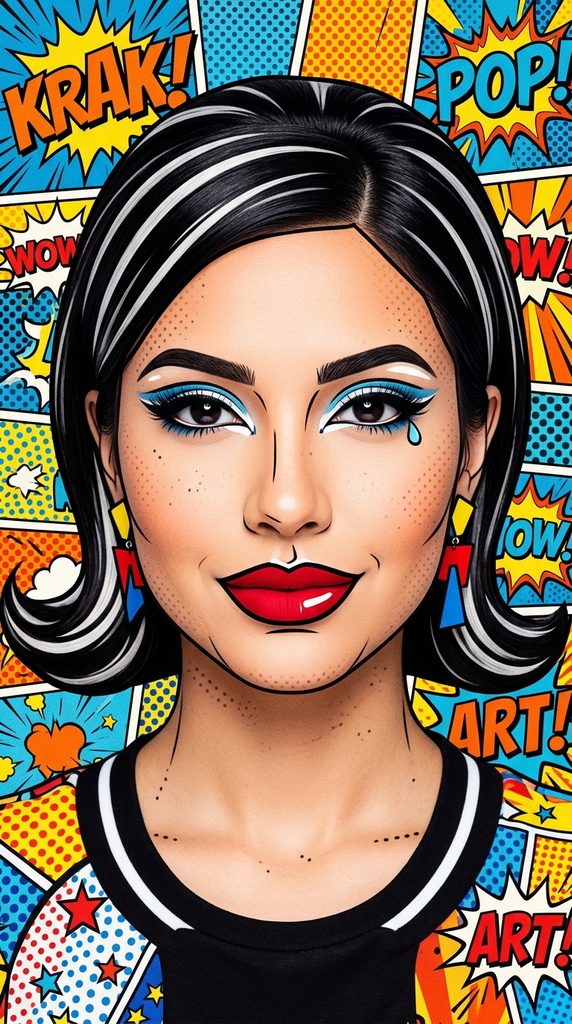
Graphic Cartoon Features with Minimalist Black Lines
Full comic book makeup takes hours of meticulous painting. However, a minimalist pop-art accent creates the same illusion. You simply outline key facial contours with black ink. This technique makes your face appear two-dimensional on camera.
Furthermore, you keep your standard daily makeup underneath completely intact. This contrast makes the graphic black cartoon lines pop dramatically. It delivers fantastic visual payoff with very few strokes. Party guests will immediately recognize the iconic comic style.
How to Draw Comic Book Accents Step-by-Step
First, apply your daily glam makeup, including bold red lipstick. Next, take a sharp black liquid felt-tip liner pen. Draw a thin black line straight down your nose. Trace along the outer perimeter of your jawline cleanly.
Then, outline the exact outer borders of your lips. Draw a small vertical white line on your lip. This white stroke simulates an animated shiny light reflection. Finally, draw exaggerated cartoon arches directly above natural brows.
Required Materials for Pop-Art Makeup
- Precision black felt-tip liquid eyeliner
- Pure white liquid eyeliner pen
- Matte bright red liquid lipstick
- Neutral liquid foundation base
- Precision correcting cotton buds
12. Celestial Sun & Moon Gold Foil Accents

Luxurious Mystic Glamour with Inexpensive Leafing
Sun and moon mystic aesthetics trend perpetually during autumn. Fortunately, craft gold foil sheets make this look cheap. You do not need expensive body paints or airbrushes. The shiny metallic gold leaf bonds directly to skin.
Consequently, you achieve a radiant, gilded aesthetic in minutes. It catches golden-hour party lighting in absolutely breathtaking ways. This hack looks extremely high-end and artistically complex. Yet, it takes less effort than a standard smokey eye.
How to Apply Gold Leaf Accents Step-by-Step
Start with a warm bronze eyeshadow look across lids. Next, apply tiny dabs of skin balm across cheekbones. Then, gently tear small flakes of thin gold leaf. Use dry tweezers to place gold onto the balm.
Press the delicate metallic flakes down softly with fingertips. The foil crinkles naturally into stunning, organic textured patterns. Afterward, sketch a subtle golden crescent moon on foreheads. Finally, lock the edges using a gentle setting spray.
Required Materials for Gold Accents
- Ultra-thin craft gold leaf sheets
- Clear beauty balm or facial oil
- Fine-point crafting tweezers
- Warm bronze powder eyeshadow
- Metallic gold liquid eyeliner pen
13. Seductive Cat Whisker & Nose Precision

The Ultimate Last-Minute Classic Done Right
Cat costumes are the definitive lazy-girl Halloween safety net. However, clumsy thick whiskers can look messy and unrefined. By using micro-precision placement, you elevate this classic style. It becomes a sharp, feline, high-fashion statement instantly.
Moreover, this entire application takes roughly three minutes total. You rely on standard liquid liner you already master. It flatters every face shape and complements simple outfits. Thus, you look completely ready without any costume stress.
How to Draw Feline Features Step-by-Step
First, apply a crisp, elongated cat-eye liquid winged liner. Next, color the very tip of your nose black. Draw a clean horizontal line across the nostril base. Then, draw a thin black line down your philtrum.
Connect that line directly into your upper lip perimeter. Fill the top lip completely with matte black lipstick. Afterward, press three delicate whisker dots into each cheek. Draw three ultra-thin, flicked lines extending smoothly outward.
Required Materials for Cat Makeup
- Ultra-fine waterproof liquid eyeliner pen
- Matte black liquid lipstick
- Nude beige lip liner for bottom lip
- High-volume faux strip eyelashes
- Clear lash adhesive glue
14. Doll-Like Freckles and Button Nose
Playful Vintage Toy Aesthetic with Cream Blushes
Porcelain doll costumes offer a wonderfully eerie, sweet balance. Achieving this vintage toy look requires very little time. You focus primarily on dramatic circular cheek blush placement. This draws attention directly to the center of faces.
Additionally, faux freckles add delightful innocence to the character. It works wonderfully for cute or creepy doll concepts alike. You bypass heavy foundation layers while achieving total transformation. It pairs adorably with simple braided hair and dresses.
How to Apply Doll Makeup Step-by-Step
Begin by applying a very smooth, matte pale base. Next, take a vibrant candy-pink powder or cream blush. Apply the blush in distinct circles on cheek apples. Do not blend the edges outward toward your ears.
Then, use brown eyeliner to stamp scattered dark freckles. Keep freckle clusters concentrated directly over the pink blush. Afterward, coat bottom eyelashes heavily with black mascara clumps. Finally, dab pink lip stain only onto the lip center.
Required Materials for Doll Makeup
- Bright candy-pink powder blush
- Fluffy small circular blush brush
- Medium brown felt-tip brow or freckle pen
- Intense black volumizing mascara
- Cherry red hydrating lip tint
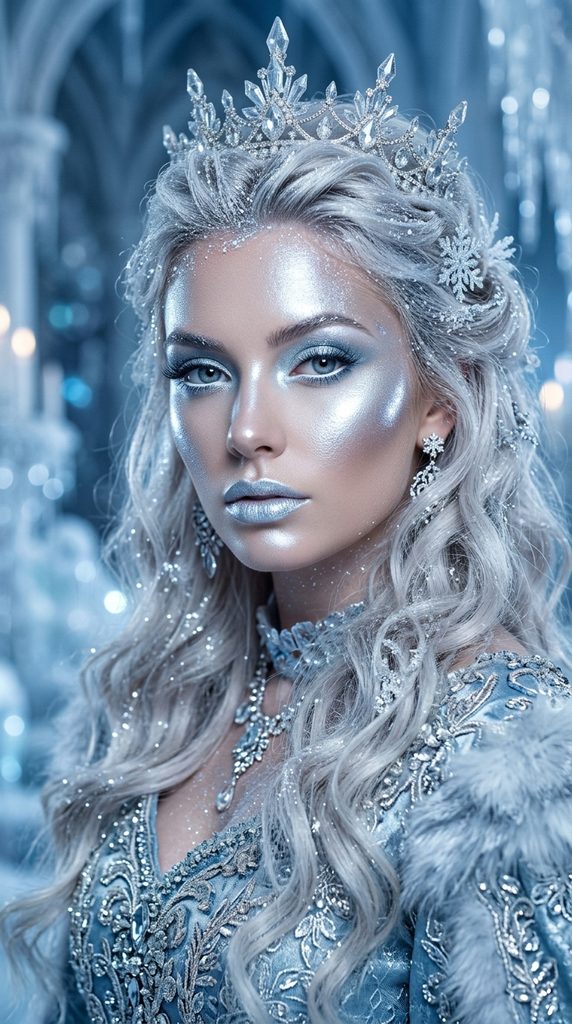
15. The Frostbitten Ice Queen Highlighter Hack

Shimmering Winter Royalty Using Cool Silver Pigments
Ice Queen makeup looks exceptionally striking and icy cool. Yet, it relies almost entirely on intense monochrome shimmer. You do not need any complex color transitions here. Simply swapping warm highlighter for frosty silver achieves the effect.
Furthermore, cool tones look luminous in low party lighting. The bright silver accents make your bone structure pop. It creates an aura of regal, frozen elegance effortlessly. You transform into an icy enchantress in mere moments.
How to Apply Ice Queen Makeup Step-by-Step
First, apply your standard base makeup with cool-toned undertones. Next, dust an icy blue eyeshadow across both eyelids. Then, load a highlighting brush with intense silver pigment. Apply this silver heavily across high cheekbones and brows.
Dust the silver highlighter down your nose bridge too. Afterward, apply pure white eyeliner across your lower waterline. Paint your lips with a pale metallic nude gloss. Finally, dust cosmetic silver glitter over temples and hair.
Required Materials for Ice Queen Look
- Ultra-reflective silver powder highlighter
- Icy pale blue shimmer eyeshadow
- Pure white creamy eyeliner pencil
- Metallic silver loose cosmetic glitter
- Pale shimmer lip gloss topper