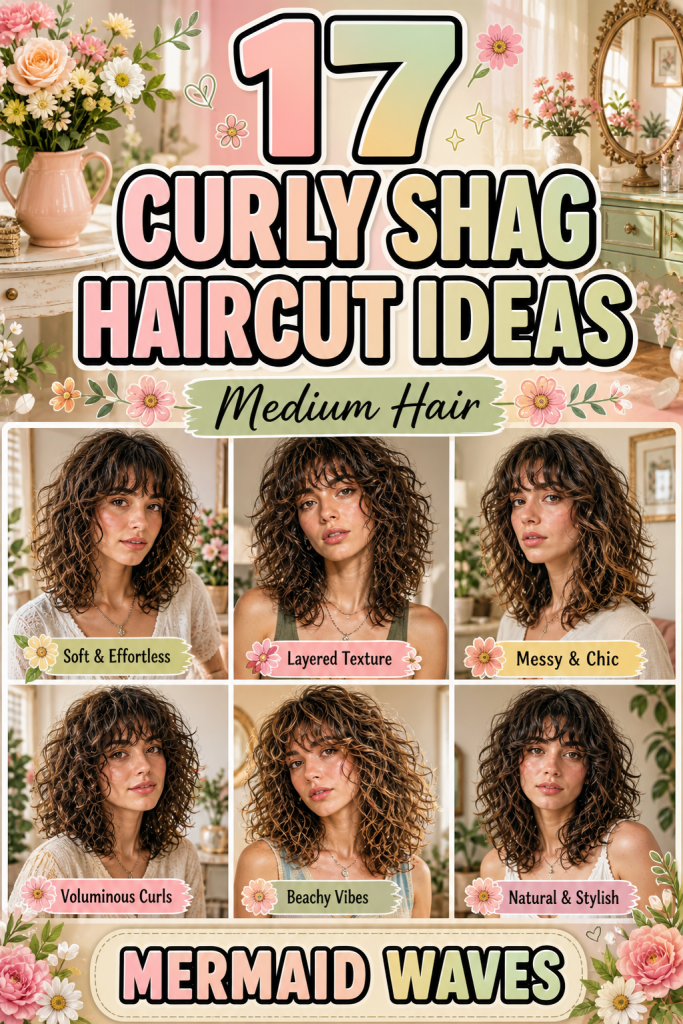
17 Curly Shag Haircut Ideas For Medium Hair
If you’ve been searching for a hairstyle that feels effortlessly cool, full of personality, and actually works with your natural texture instead of against it, the curly shag haircut might be exactly what you need. Especially for medium-length hair, this style hits the perfect balance—it’s long enough to give you styling flexibility, yet short enough to maintain volume, shape, and movement without feeling heavy.
Curly hair has its own set of challenges. One day it looks defined and bouncy, and the next it feels flat, frizzy, or uneven. Many people struggle to find a haircut that enhances their curls instead of making them harder to manage. Traditional blunt cuts can make curls look bulky at the bottom, while overly layered styles can sometimes leave hair looking thin or unstructured. That’s where the curly shag comes in—it’s designed specifically to solve these problems.
At its core, the shag haircut is all about layers—but not just any layers. It uses strategic, well-placed layers to create volume at the crown, reduce heaviness at the ends, and allow curls to fall naturally into shape. For medium-length hair, this works especially well because the length supports the curls without weighing them down. The result is a hairstyle that looks lively, balanced, and full of movement.
If you have a small room… think about how important it is to create dimension without clutter. You don’t want everything packed into one area—you want flow, openness, and structure. The curly shag works in a similar way. It removes unnecessary weight while keeping enough volume to make your hair feel full and dynamic. Instead of your curls sitting flat or forming a triangle shape, they’re distributed evenly, creating a more flattering silhouette.
Another reason this style has become so popular is its versatility. The curly shag can be adapted to suit different curl types—from loose waves to tighter coils—and it can be customized based on your face shape and personal style. Whether you prefer something soft and natural or bold and edgy, there’s a version of the shag that can match your vibe.
One of the biggest benefits of a curly shag haircut is how low-maintenance it can be—when it’s done right. Unlike styles that require constant heat styling or precise brushing, the shag actually looks better when it’s a little imperfect. It embraces natural texture, which means you don’t have to fight your curls every day. This works best when you want a hairstyle that fits into your routine rather than demanding extra time and effort.
But here’s where many people go wrong—they assume all layered cuts will work the same way. With curly hair, the placement and technique of the layers matter a lot. Poorly done layers can lead to frizz, uneven volume, or a shape that’s difficult to control. That’s why understanding the structure of a curly shag is so important before deciding to try it.
In this article, you’re not just going to see a list of curly shag haircut ideas—you’re going to understand how each one works and why it might be the right choice for you. Each style will be explained in detail, including how to achieve it, how to style it, and who it’s best suited for. This isn’t about following trends blindly—it’s about making a smart, informed decision that actually improves your hair.
You’ll also learn practical tips for maintaining your curly shag, from choosing the right products to keeping your layers looking fresh between salon visits. These small details can make a big difference in how your hair looks day to day. This works best when you combine the right haircut with the right care routine.
Medium-length hair is often overlooked, but it’s actually one of the most versatile lengths for curly styles. It gives you enough room to experiment with layers, bangs, and texture without becoming overwhelming to manage. The curly shag takes full advantage of this length, turning it into something stylish, modern, and easy to wear.
By the end of this guide, you’ll have a clear understanding of different curly shag haircut ideas and how to choose one that fits your hair type, lifestyle, and personal style. Instead of guessing or relying on inspiration photos that don’t always translate to real life, you’ll be able to confidently move forward with a style that truly works for you.
So if you’re ready to upgrade your look with a haircut that enhances your natural curls, adds volume in the right places, and makes your hair easier to manage, you’re in the right place. The curly shag isn’t just a trend—it’s a practical, stylish solution that continues to prove why it’s one of the best choices for medium-length curly hair.
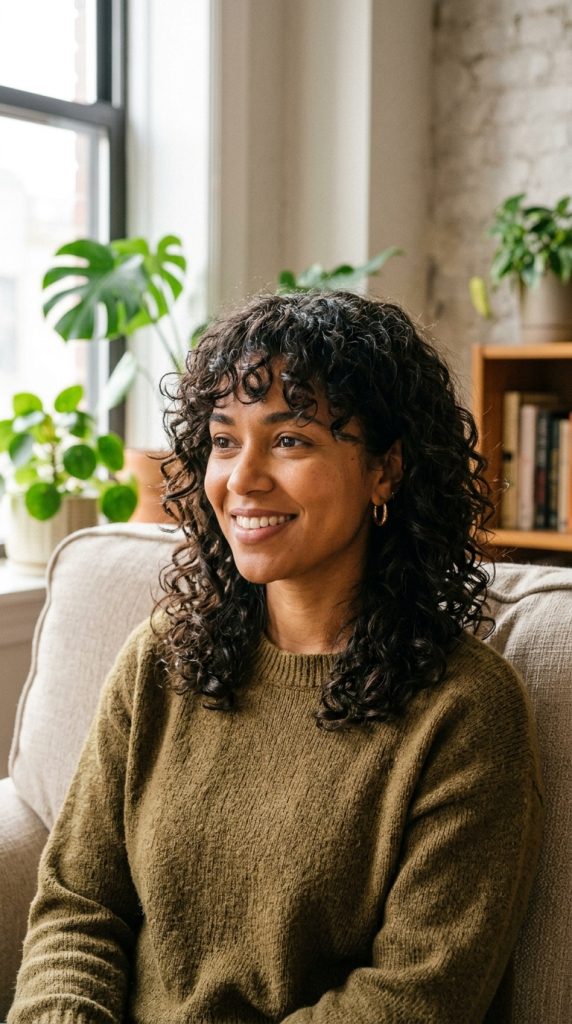
1. Classic Curly Shag (Balanced & Timeless)
Explanation (What it is)
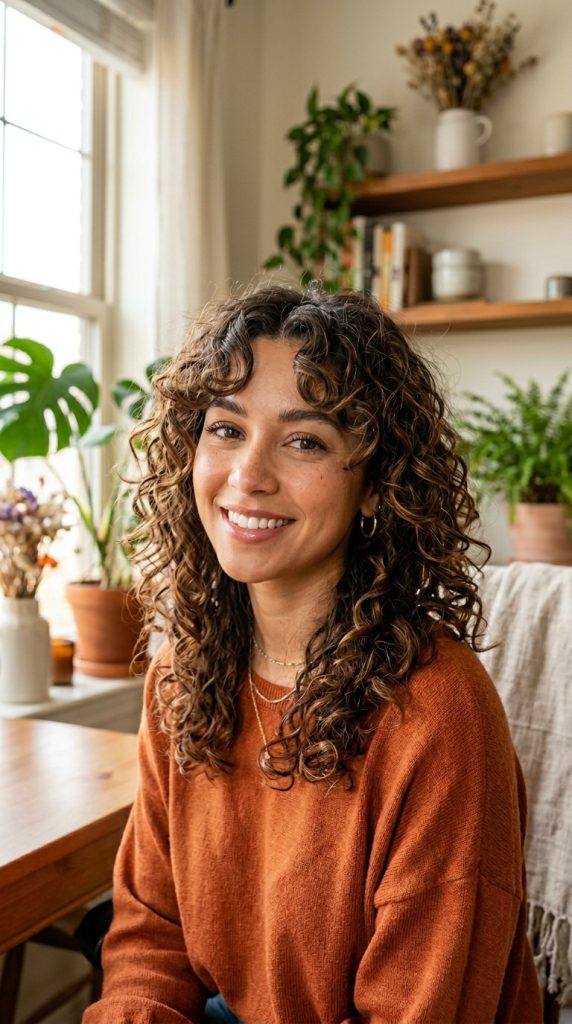
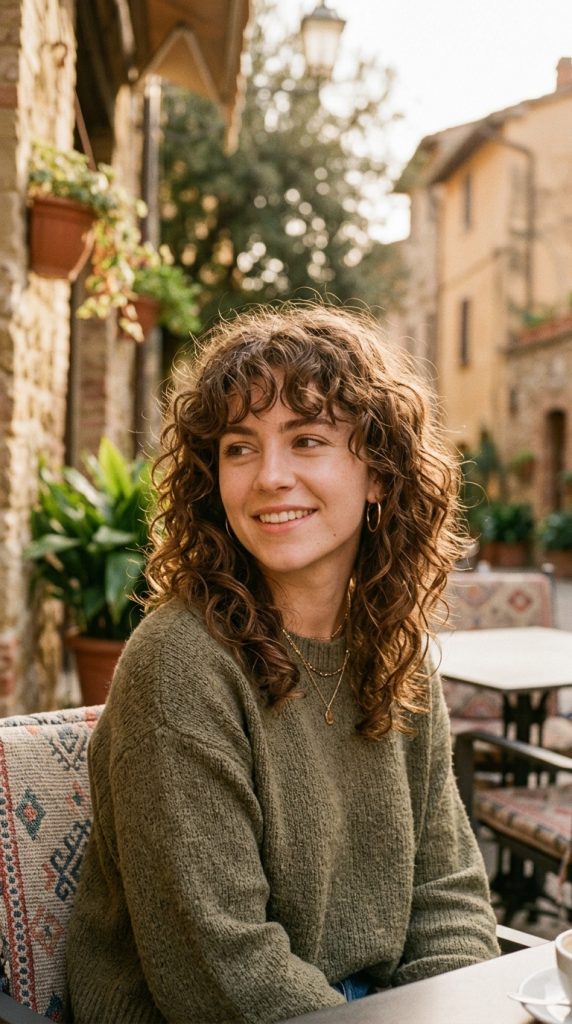
The classic curly shag is the foundation of all shag variations. It features evenly distributed layers throughout the hair, with slightly shorter layers at the crown and longer layers toward the ends. The goal is to create a natural, balanced shape where your curls can move freely without looking bulky or flat.
For medium-length hair, this style works especially well because it removes excess weight while still maintaining enough length to keep your curls defined. Instead of forming that common “triangle shape” (flat at the top, wide at the bottom), your curls are lifted at the crown and softened at the ends.
This works best when you want a natural, everyday hairstyle that enhances your curls without requiring too much styling effort.

How to Implement (Practical Steps)
- Ask your stylist for a curly shag with soft, blended layers
- Request more volume at the crown and lighter ends
- Ensure the cut is done on dry or slightly damp curls for accuracy
For styling:
- Apply curl cream or leave-in conditioner on damp hair
- Scrunch gently to enhance curl formation
- Air-dry or use a diffuser for added volume
- Avoid brushing dry curls
Maintenance:
- Refresh curls with water + leave-in spray between washes
- Trim every 8–10 weeks to maintain shape
Best For (Who should use it)
- People with medium-density curly hair
- Those who want a balanced, low-maintenance look
- Anyone new to shag haircuts
If you have a small room… this is like organizing everything evenly—it creates balance without overcrowding any area.
Pro Tip (Expert Advice)
Ask your stylist to shape the cut based on how your curls naturally fall, not just a standard pattern.
Mistake to Avoid
Don’t over-layer the ends. Too much thinning can make your curls look weak and frizzy.
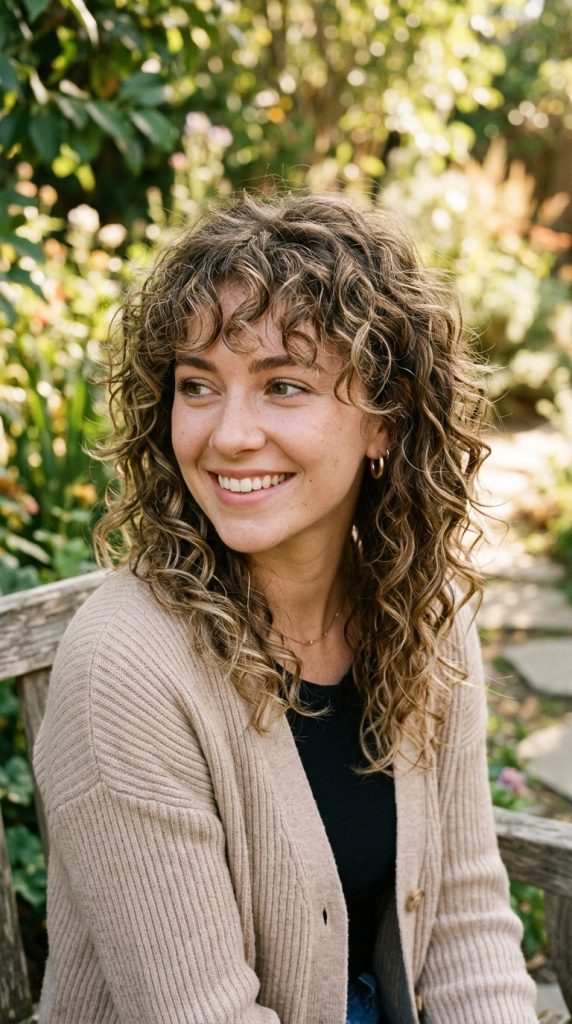
2. Curly Shag with Curtain Bangs (Soft & Face-Framing)
Explanation (What it is)
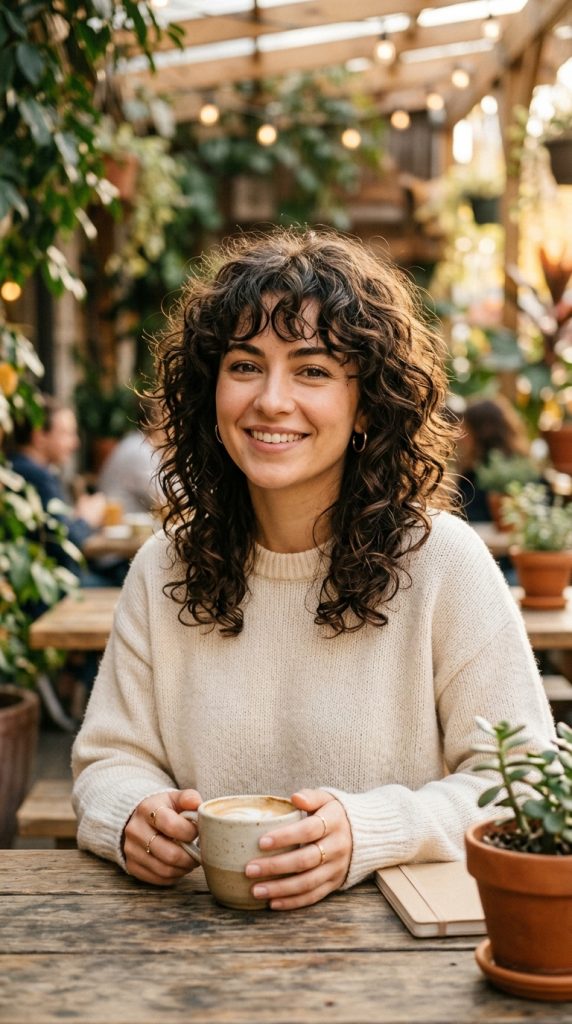
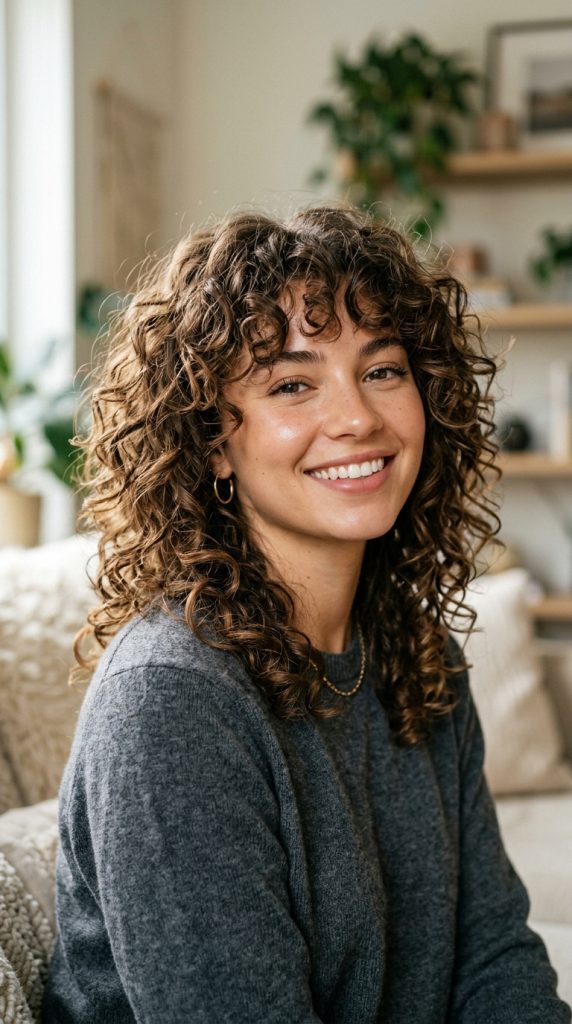
This version of the curly shag adds curtain bangs, which are soft, parted bangs that blend into the rest of your layers. These bangs frame your face while maintaining the overall flow of the shag haircut.
For curly hair, curtain bangs are a great alternative to heavy blunt bangs. They feel lighter, more natural, and easier to manage. They also help balance the volume by adding shape at the front, which is especially helpful if your curls tend to look flat near your face.
This works best when you want a noticeable change without losing the softness of your curls.
How to Implement (Practical Steps)
- Ask for a curly shag with long curtain bangs starting around cheekbone level
- Ensure the bangs blend seamlessly into the side layers
- Keep the bangs slightly longer to account for curl shrinkage
For styling:
- Apply curl cream evenly
- Finger-coil the bangs for definition
- Diffuse lightly to maintain shape
- Separate curls gently once dry
Maintenance:
- Trim bangs more frequently than the rest of your hair
- Refresh bangs daily with a light mist of water
Best For (Who should use it)
- People who want face-framing volume
- Those with longer or oval face shapes
- Anyone looking for a trendy yet soft style
If you have a small room… this is like adding curtains—they frame the space and make everything look more complete.
Pro Tip (Expert Advice)
Keep bangs slightly longer than you think you need. Curly hair shrinks as it dries.
Mistake to Avoid
Don’t cut bangs too short when wet. This can lead to uneven or overly short curls once dry.
3. Voluminous Curly Shag (Maximum Lift & Body)
Explanation (What it is)
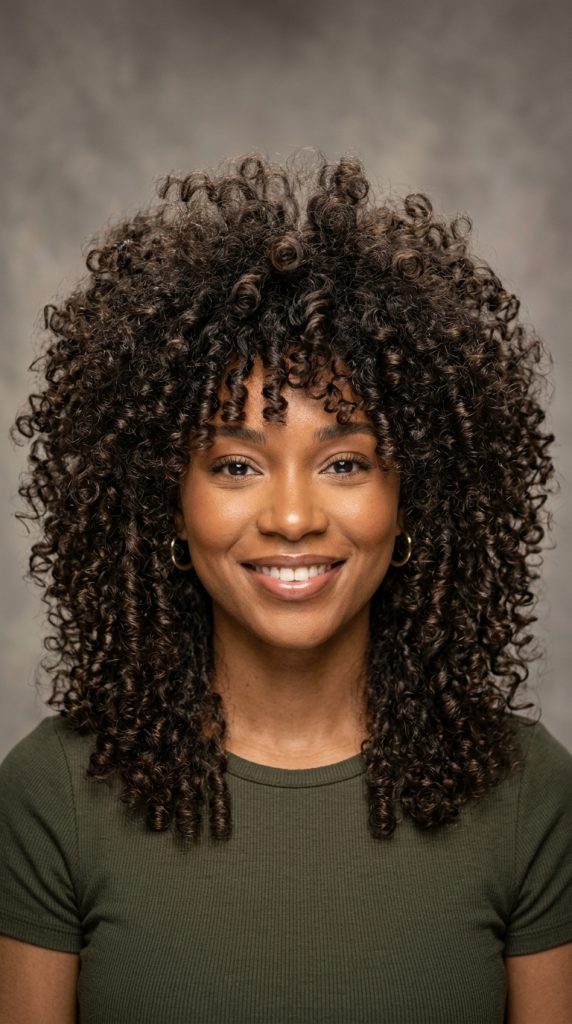
The voluminous curly shag focuses on maximum height and fullness, especially at the crown. It uses shorter layers on top and gradually longer layers underneath to create a lifted, rounded shape.
This style is ideal if your curls tend to fall flat at the roots or lack body. The layered structure encourages your curls to stack on top of each other, creating natural volume without heavy styling.
For medium-length hair, this cut prevents your curls from being weighed down while still maintaining a full, lively look.
This works best when you want your hair to look bold, full, and full of life.
How to Implement (Practical Steps)
- Ask for shorter crown layers with gradual length toward the ends
- Avoid heavy weight at the bottom
- Focus on shaping the top for lift
For styling:
- Apply volumizing mousse at the roots
- Use a diffuser while flipping your head upside down
- Lift roots gently while drying
- Finish with a light hold spray
Maintenance:
- Use lightweight products to avoid flattening volume
- Refresh roots with dry shampoo
Best For (Who should use it)
- People with flat roots or low-volume curls
- Those who want a bold, statement hairstyle
- Anyone who loves big, voluminous hair
If you have a small room… this is like using vertical space—it makes everything feel bigger and more open.
Pro Tip (Expert Advice)
Dry your hair upside down for extra root lift—it makes a noticeable difference.
Mistake to Avoid
Don’t use heavy creams or oils at the roots. They can weigh your curls down and reduce volume.
4. Soft Layered Curly Shag (Subtle & Natural)
Explanation (What it is)
The soft layered curly shag is a more subtle version of the traditional shag. Instead of dramatic layers, it uses gentle layering to create movement while keeping the overall shape smooth and controlled.
This style is perfect if you’re hesitant about going too bold. It gives you the benefits of a shag—movement and lightness—without making your hair look overly layered or edgy.
For medium-length hair, this creates a polished, everyday look that still feels natural and easy to manage.
This works best when you want a low-key, wearable shag style.
How to Implement (Practical Steps)
- Ask for long, soft layers with minimal crown lift
- Keep the shape rounded and balanced
- Avoid short or choppy layers
For styling:
- Use a lightweight curl cream
- Air-dry for a natural finish
- Scrunch gently to enhance curls
Maintenance:
- Keep hair hydrated with regular conditioning
- Trim occasionally to maintain softness
Best For (Who should use it)
- People who want a subtle change
- Those with looser curls or waves
- Anyone who prefers a natural, understated look
If you have a small room… this is like using soft decor—it enhances the space without overpowering it.
Pro Tip (Expert Advice)
Focus on hydration. Well-moisturized curls always look better with soft layers.
Mistake to Avoid
Don’t expect dramatic volume from this style—it’s designed to be soft and natural, not bold.
5. Curly Shag with Tapered Ends (Defined & Lightweight)
Explanation (What it is)
This version of the curly shag focuses on tapered ends, meaning the hair gradually becomes lighter toward the bottom. This reduces bulk and allows curls to form more defined shapes instead of clumping together.
For medium-length curly hair, this is especially helpful if your ends tend to feel heavy or undefined. By removing excess weight, your curls can bounce more freely and maintain better shape.
This style creates a clean, structured look while still keeping the softness of a shag haircut.
This works best when you want defined curls with a lightweight feel.
How to Implement (Practical Steps)
- Ask for a curly shag with tapered, lightly thinned ends
- Keep layers balanced throughout the hair
- Avoid removing too much density
For styling:
- Apply curl-defining cream
- Use finger-coiling for extra definition
- Diffuse or air-dry
Maintenance:
- Use leave-in conditioner to prevent dryness
- Avoid over-manipulating curls
Best For (Who should use it)
- People with dense or bulky curly hair
- Those who want more defined curl patterns
- Anyone struggling with heavy ends
If you have a small room… this is like removing unnecessary clutter—it makes everything feel lighter and more organized.
Pro Tip (Expert Advice)
Use lightweight styling products to keep curls defined without weighing them down.
Mistake to Avoid
Don’t over-thin the ends. Too much tapering can make your hair look thin instead of defined.
6. Curly Shag with Face-Framing Layers (Defined & Flattering)
Explanation (What it is)
This version of the curly shag focuses specifically on face-framing layers, which are shorter pieces around the front that highlight your facial features. Instead of all the attention being on overall volume, this style brings balance and structure to the front of your hair.
For medium-length curly hair, this is especially useful because the front sections can sometimes fall flat or look disconnected from the rest of the shape. Face-framing layers solve that by blending everything together, making your curls look more intentional and styled.
This works best when you want a haircut that enhances your face shape while still keeping the relaxed feel of a shag.
How to Implement (Practical Steps)
- Ask for a curly shag with shorter layers around the face
- Keep the front layers starting around cheekbone or jaw level
- Blend them smoothly into the rest of your hair
For styling:
- Apply curl cream evenly
- Finger-coil the front sections for better definition
- Diffuse gently or air-dry
Maintenance:
- Refresh front pieces more often as they’re more visible
- Keep them hydrated to avoid frizz
Best For (Who should use it)
- People who want more structure around the face
- Those with round or square face shapes
- Anyone who feels their curls look undefined at the front
If you have a small room… this is like placing focus decor near the entrance—it immediately draws attention in the right way.
Pro Tip (Expert Advice)
Always style the front sections separately. Small effort here makes a big difference in the final look.
Mistake to Avoid
Don’t cut face-framing layers too short—they can shrink more than expected and become hard to blend.
7. Messy Curly Shag (Effortless & Lived-In)
Explanation (What it is)
The messy curly shag embraces an intentionally undone, relaxed look. Instead of trying to make every curl perfect, this style focuses on natural texture, slight frizz, and irregular movement to create a carefree vibe.
This is ideal if you don’t want to spend too much time styling your hair every day. The beauty of this look is that it actually looks better when it’s not overly polished. For medium-length hair, it creates a soft, airy feel without looking heavy.
This works best when you prefer a low-effort, casual hairstyle that still looks stylish.
How to Implement (Practical Steps)
- Ask for a curly shag with light, uneven layering
- Avoid overly structured or precise cuts
- Keep the shape loose and natural
For styling:
- Use a light curl cream or mousse
- Scrunch hair while damp
- Let it air-dry or diffuse lightly
- Avoid over-defining every curl
Maintenance:
- Refresh with water and leave-in spray
- Embrace slight frizz as part of the style
Best For (Who should use it)
- People who prefer a natural, relaxed look
- Those with wavy to curly textures
- Anyone who dislikes strict styling routines
If you have a small room… this is like a relaxed, cozy setup—it’s not perfect, but it feels comfortable and inviting.
Pro Tip (Expert Advice)
Less is more. Use minimal product to keep the texture light and natural.
Mistake to Avoid
Don’t confuse messy with unkempt. Skipping hydration can lead to dryness instead of a styled “messy” look.
8. Curly Shag with Short Crown Layers (Lift & Shape)
Explanation (What it is)
This style emphasizes shorter layers at the crown to create height and structure at the top of your head. It’s designed to lift your curls upward rather than letting them fall flat.
For medium-length curly hair, this is a great solution if the top of your hair lacks volume. The shorter crown layers create a natural lift, making your overall shape look more balanced and less bottom-heavy.
This works best when you want volume at the top without sacrificing length.
How to Implement (Practical Steps)
- Ask for a curly shag with shorter layers at the crown
- Keep the rest of the layers gradually longer
- Avoid making the crown too short
For styling:
- Apply volumizing mousse at the roots
- Diffuse while lifting the crown
- Avoid flattening the top during drying
Maintenance:
- Keep roots clean to maintain lift
- Use dry shampoo for volume refresh
Best For (Who should use it)
- People with flat roots or heavy lower sections
- Those who want a more balanced hair shape
- Anyone looking for extra height and lift
If you have a small room… this is like using vertical storage—it makes the space feel taller and more open.
Pro Tip (Expert Advice)
Focus airflow from the diffuser directly at the roots for better lift.
Mistake to Avoid
Don’t cut crown layers too short—they can stick up awkwardly and be hard to manage.
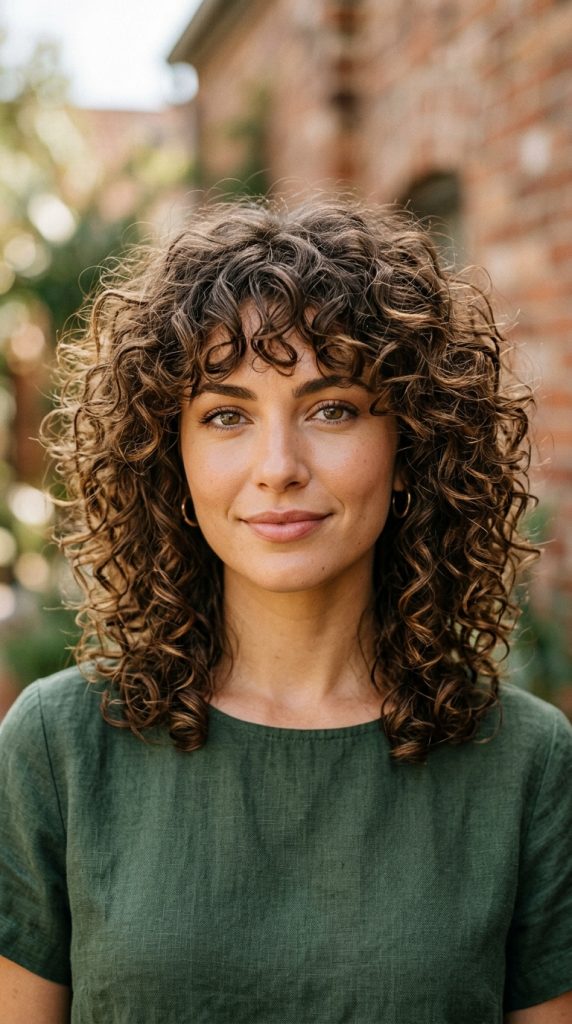
9. Curly Shag with Defined Ringlets (Structured & Polished)
Explanation (What it is)
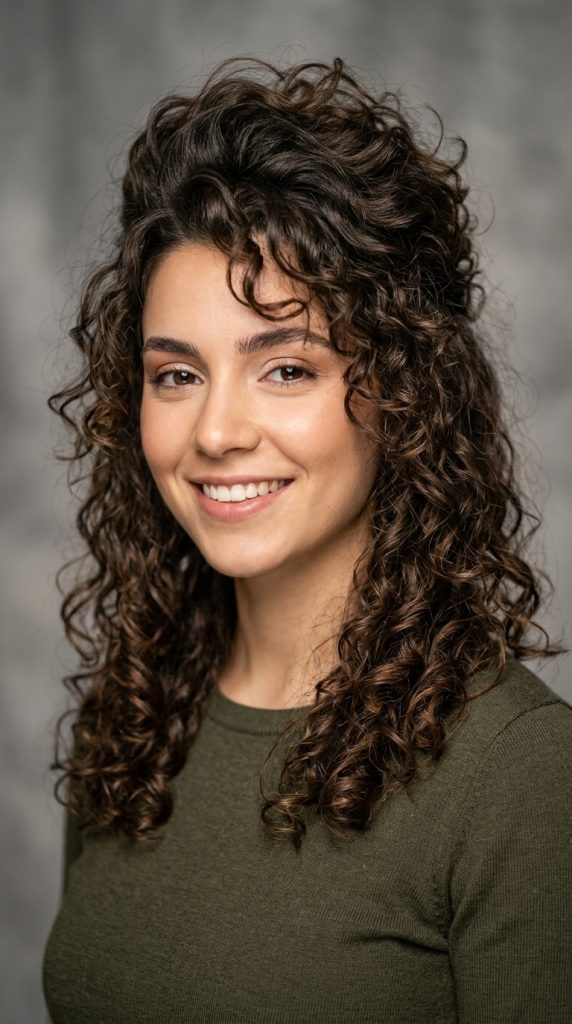
This variation focuses on enhancing curl definition while maintaining the shag structure. Instead of a messy or soft finish, the curls are more controlled and shaped into clear, defined ringlets.
For medium-length hair, this creates a polished look while still keeping the movement and layering of a shag. It’s a great balance between natural texture and refined styling.
This works best when you want your curls to look neat, glossy, and well-defined.
How to Implement (Practical Steps)
- Ask for a curly shag with balanced layering
- Keep enough length to support curl formation
- Avoid over-thinning
For styling:
- Apply curl-defining cream or gel
- Use finger-coiling or twist methods
- Diffuse gently without disturbing curls
- Let curls set before touching them
Maintenance:
- Refresh curls with a light mist and product
- Avoid brushing dry hair
Best For (Who should use it)
- People who love defined, structured curls
- Those with naturally tight curl patterns
- Anyone who prefers a polished look
If you have a small room… this is like organizing everything neatly—it looks clean, structured, and intentional.
Pro Tip (Expert Advice)
Let your curls fully dry before separating them. This prevents frizz and maintains definition.
Mistake to Avoid
Don’t overload with product. Too much can weigh curls down and reduce bounce.
10. Curly Shag with Medium Layers (Balanced & Versatile)
Explanation (What it is)
This style uses medium-length layers throughout the hair, creating a balanced look that isn’t too dramatic or too subtle. It sits perfectly between bold and natural shag variations.
For medium-length hair, this is one of the most versatile options. It gives you movement and shape without going too extreme, making it suitable for everyday wear.
This works best when you want a flexible hairstyle that can be styled in multiple ways.
How to Implement (Practical Steps)
- Ask for a curly shag with evenly distributed medium layers
- Keep the overall shape rounded
- Avoid overly short or long layering extremes
For styling:
- Use a mix of curl cream and mousse
- Diffuse or air-dry depending on preference
- Style naturally or define curls as needed
Maintenance:
- Keep hair hydrated
- Trim regularly to maintain balance
Best For (Who should use it)
- People who want a balanced, everyday style
- Those unsure about going too bold
- Anyone looking for a versatile shag haircut
If you have a small room… this is like choosing a balanced layout—it works in every situation without feeling too much or too little.
Pro Tip (Expert Advice)
This style is perfect for experimenting—try different styling techniques to see what works best for your curls.
Mistake to Avoid
Don’t expect extreme volume or extreme softness—it’s designed to sit comfortably in the middle, not at either extreme.
11. Curly Shag with Wispy Ends (Light & Airy Finish)
Explanation (What it is)
This variation focuses on wispy, lightweight ends that create a soft and airy finish. Instead of thick or heavy ends, the hair gradually tapers off, allowing each curl to move freely and separately.
For medium-length curly hair, this is especially helpful if your ends tend to feel dense or clumped together. By softening the ends, your curls gain more definition and bounce, making the overall style look lighter and more dynamic.
This works best when you want a soft, flowing hairstyle that doesn’t feel heavy or bulky.
How to Implement (Practical Steps)
- Ask for a curly shag with lightly feathered or wispy ends
- Keep layers balanced throughout
- Avoid aggressive thinning
For styling:
- Use a lightweight curl cream
- Scrunch gently to enhance separation
- Air-dry or diffuse lightly
Maintenance:
- Keep ends hydrated to avoid dryness
- Trim regularly to maintain the soft finish
Best For (Who should use it)
- People with dense or heavy ends
- Those who want a lighter, airy look
- Anyone who prefers soft movement over structure
If you have a small room… this is like using light fabrics—it keeps everything feeling open and breathable.
Pro Tip (Expert Advice)
Use lightweight products only. Heavy creams can ruin the airy effect.
Mistake to Avoid
Don’t over-thin the ends. Too much can make your hair look weak instead of soft.
12. Curly Shag with Rounded Shape (Full & Balanced)
Explanation (What it is)
This style focuses on creating a rounded silhouette, where the volume is evenly distributed around the head. Instead of having too much width at the bottom, the layers are shaped to form a balanced, circular look.
For medium-length curly hair, this is a great way to avoid uneven volume. It ensures your curls look full without appearing bulky or flat in certain areas.
This works best when you want a well-structured, symmetrical hairstyle.

How to Implement (Practical Steps)
- Ask for a curly shag shaped into a rounded silhouette
- Keep layers consistent throughout
- Avoid sharp or uneven cuts
For styling:
- Apply curl cream evenly
- Diffuse while shaping hair with your hands
- Avoid flattening any section
Maintenance:
- Maintain hydration for even curl formation
- Trim regularly to keep the shape intact
Best For (Who should use it)
- People who want a balanced, full look
- Those with uneven curl distribution
- Anyone who prefers a structured shape
If you have a small room… this is like arranging everything symmetrically—it feels complete and harmonious.
Pro Tip (Expert Advice)
Shape your hair while drying to maintain the rounded form.
Mistake to Avoid
Don’t ignore one side while styling. Uneven drying can ruin the balanced look.
13. Curly Shag with Long Layers (Length & Movement)
Explanation (What it is)
This version keeps longer layers throughout the hair, allowing you to maintain more length while still benefiting from the shag structure. It’s less dramatic but still adds movement and flow.
For medium-length hair, this is ideal if you’re not ready to lose too much length but still want a noticeable improvement in shape and texture. The long layers prevent heaviness without making the style feel too short or choppy.
This works best when you want a softer shag that preserves length.
How to Implement (Practical Steps)
- Ask for a curly shag with long, blended layers
- Keep the ends fuller compared to shorter-layered styles
- Avoid excessive crown shortening
For styling:
- Use a hydrating curl cream
- Scrunch gently for natural definition
- Air-dry or diffuse
Maintenance:
- Keep ends moisturized
- Trim lightly to maintain shape
Best For (Who should use it)
- People who want to keep their length
- Those with looser curls or waves
- Anyone transitioning into a shag style
If you have a small room… this is like keeping larger furniture but rearranging it—it improves flow without removing key elements.
Pro Tip (Expert Advice)
Focus on hydration—longer layers need moisture to maintain definition.
Mistake to Avoid
Don’t expect dramatic volume at the crown—this style prioritizes length over lift.
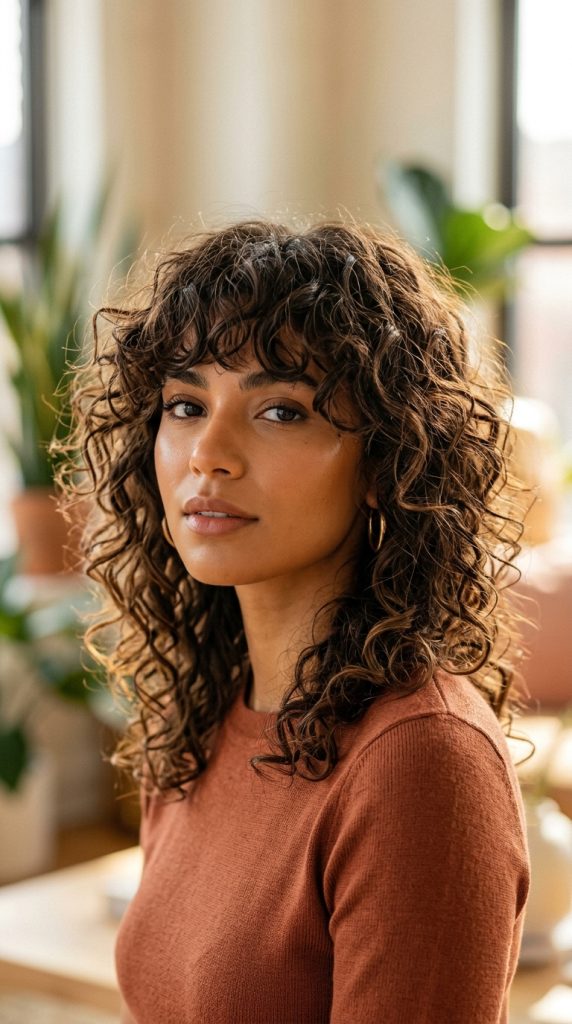
14. Curly Shag with Fringe Bangs (Bold & Stylish)
Explanation (What it is)
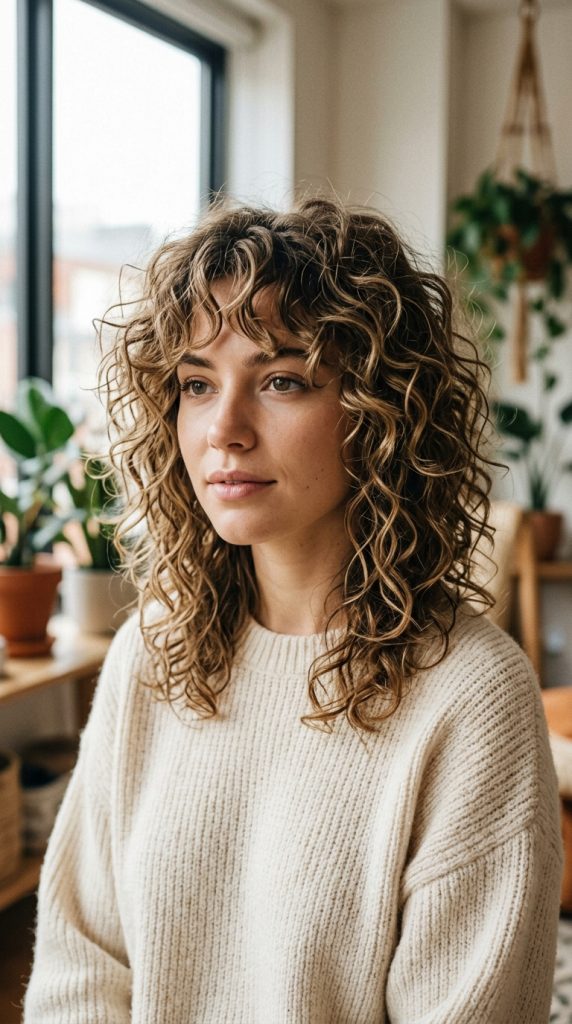
This variation adds fringe bangs to the curly shag, creating a bold and stylish look. Unlike curtain bangs, fringe bangs sit more directly on the forehead, giving a stronger visual impact.
For curly hair, this style can completely change your appearance. It draws attention to your eyes and adds a unique edge to your overall look. When combined with shag layers, it creates a modern, fashion-forward hairstyle.
This works best when you want a bold, statement look.
How to Implement (Practical Steps)
- Ask for a curly shag with curly fringe bangs
- Keep bangs slightly longer to allow for shrinkage
- Blend bangs into side layers
For styling:
- Apply curl cream to bangs separately
- Use finger-coiling for definition
- Diffuse gently
Maintenance:
- Trim bangs regularly
- Refresh them daily with water spray
Best For (Who should use it)
- People who want a dramatic, stylish change
- Those with defined curl patterns
- Anyone comfortable with regular bang maintenance
15. Curly Shag with Defined Layers (Structured & Dimensional)
Explanation (What it is)
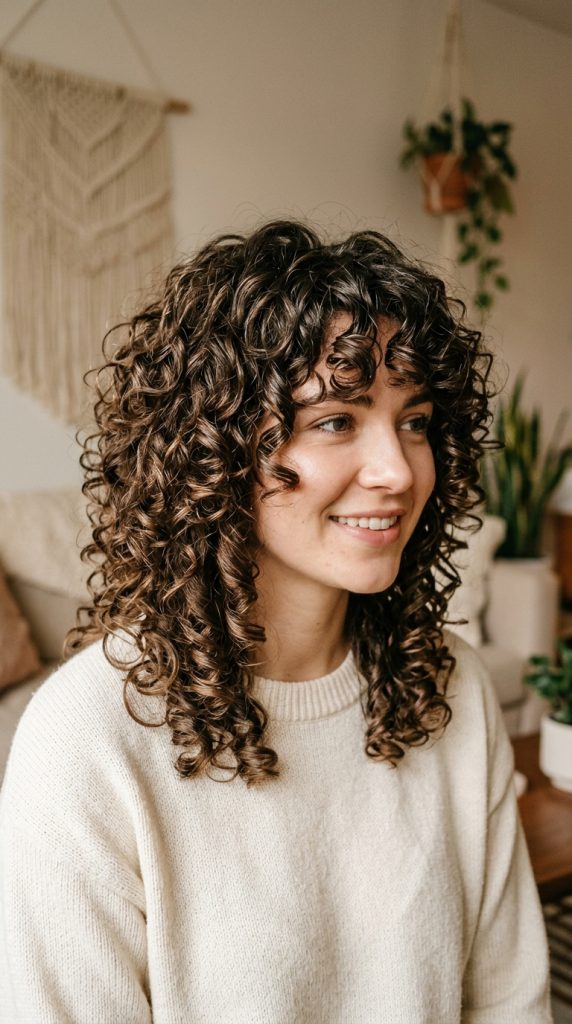
The curly shag with defined layers focuses on creating clear, visible layering throughout the hair, rather than soft or subtle blending. Each layer is intentionally placed so your curls stack in a structured way, giving your hair a more dimensional and sculpted look.
Unlike softer shag styles, this version has a bit more definition in the shape. You’ll notice distinct levels in your curls, which helps create depth and prevents the hair from looking flat or overly blended. For medium-length hair, this works really well because it gives enough space for each layer to stand out without becoming overwhelming.
This works best when you want a well-defined, structured shag that still keeps natural curl movement.

How to Implement (Practical Steps)
- Ask for a curly shag with clearly defined layers throughout
- Keep layers evenly spaced for balance
- Avoid over-thinning so the structure remains visible
For styling:
- Apply curl-defining cream or light gel
- Use finger-coiling to enhance layer separation
- Diffuse carefully without disturbing the curl pattern
- Let curls fully set before touching
Maintenance:
- Keep curls hydrated to maintain definition
- Trim regularly to keep layers sharp and visible
Best For (Who should use it)
- People who want a structured, dimensional look
- Those with medium to thick curly hair
- Anyone who prefers visible layering over soft blending
If you have a small room… this is like using clearly defined sections—it creates order and makes everything feel intentional.
Pro Tip (Expert Advice)
Style your hair in sections instead of all at once. This helps each layer stand out and keeps the structure visible.
Mistake to Avoid
Don’t rush styling. If curls aren’t properly defined, the layered structure can get lost and look messy instead of intentional.
16. Curly Shag with Layered Volume Sides (Wide & Balanced Look)
Explanation (What it is)
This variation focuses on creating volume at the sides of your hair, rather than just the crown. The layers are strategically placed to expand outward, giving your curls a fuller, more balanced appearance from all angles.
For medium-length curly hair, this is especially helpful if your hair tends to look narrow or flat on the sides. Instead of all the volume sitting at the bottom or top, this style distributes it evenly, creating a more flattering shape that frames your face naturally.
This works best when you want a fuller, wider silhouette without losing control or structure.

How to Implement (Practical Steps)
- Ask for a curly shag with side-focused layering
- Keep layers around cheekbone to jaw level for width
- Avoid removing too much weight at the sides
For styling:
- Apply curl cream evenly
- Use a diffuser while lifting hair outward at the sides
- Avoid pressing hair flat against your head
Maintenance:
- Keep curls hydrated to maintain shape
- Refresh side sections with water spray and scrunching
Best For (Who should use it)
- People with narrow face shapes
- Those who feel their hair lacks side volume
- Anyone wanting a balanced, fuller look
If you have a small room… this is like using wall space effectively—it makes everything feel more complete and proportioned.
Pro Tip (Expert Advice)
While diffusing, tilt your head slightly side to side to build natural width without frizz.
Mistake to Avoid
Don’t flatten the sides while drying. This can undo the entire purpose of the cut.
17. Curly Shag with Defined Ends & Soft Crown (Balanced Contrast)
Explanation (What it is)
This style creates a contrast between a soft, slightly relaxed crown and more defined, structured ends. Instead of focusing only on volume or only on definition, it combines both elements to create a balanced, modern look.
For medium-length curly hair, this works beautifully because it prevents the top from becoming too puffy while still keeping the ends detailed and lively. The result is a hairstyle that feels controlled at the top and expressive at the bottom.
This works best when you want a refined yet natural curly shag that isn’t too bold or too subtle.
How to Implement (Practical Steps)
- Ask for a curly shag with softer crown layers and slightly more defined ends
- Keep the crown less layered than traditional shags
- Maintain enough length at the bottom for curl definition
For styling:
- Use a lighter product at the roots
- Apply curl-defining cream or gel to the ends
- Diffuse gently without over-lifting the crown
Maintenance:
- Keep ends hydrated for definition
- Avoid heavy buildup at the roots
Best For (Who should use it)
- People who want a balanced, controlled look
- Those with medium-density curls
- Anyone who prefers definition without too much volume at the top
If you have a small room… this is like balancing bold and minimal design—it keeps things interesting without overwhelming the space.
Pro Tip (Expert Advice)
Use different products for roots and ends. Lightweight at the top, defining at the bottom.
Mistake to Avoid
Don’t overload the crown with product. It can make the top look flat instead of softly lifted.