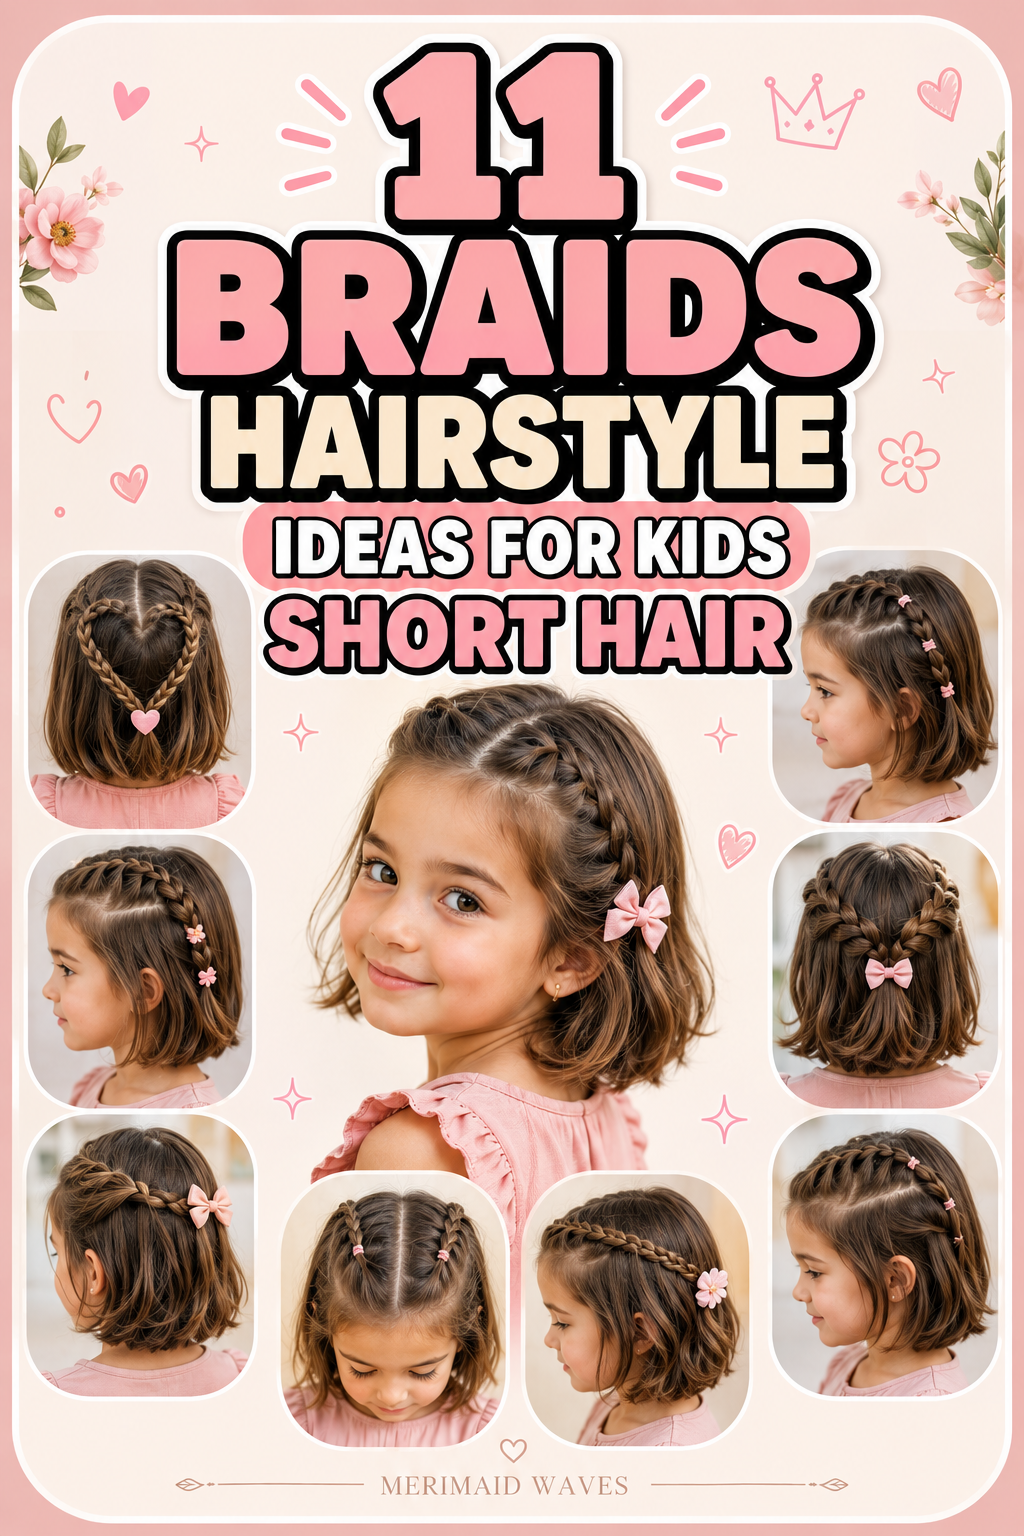
11 Braids Hairstyle Ideas For Kids Short Hair
Finding the perfect hairstyle for kids with short hair can feel more challenging than it should be. If you are a parent, caregiver, or even a hairstylist, you already know the daily struggle—hair that doesn’t stay in place, styles that don’t last through school, and kids who want something cute but also comfortable. And when it comes to braids, many people assume they only work well on long hair. That’s simply not true.
In reality, short hair can be just as versatile, stylish, and creative when it comes to braided hairstyles. In fact, short hair often allows for neater sections, quicker styling, and more playful designs that highlight a child’s natural beauty without causing tension or discomfort. The key is choosing the right braiding techniques, understanding how to work with shorter strands, and using styles that are both practical and kid-friendly.
Today, braided hairstyles for kids are not just about appearance—they are about convenience, protection, and confidence. Parents want styles that last through school days, playground activities, sports practice, and even naps without needing constant fixing. At the same time, kids want something fun, pretty, and sometimes even expressive—something that makes them feel special when they look in the mirror.
This is exactly where braided styles for short hair come in. They offer a perfect balance between beauty and functionality. Whether your child has a pixie cut, a bob, or shoulder-length short hair, there are many braid-based styles that can transform their look without requiring extensions or complicated tools.
In this guide, you will explore 11 carefully chosen braid hairstyle ideas specifically designed for kids with short hair. These are not just random styles—they are practical, tested, and suitable for everyday wear as well as special occasions. Each style is designed to work with shorter lengths while still giving a polished, adorable finish.
You will also learn how to adapt each hairstyle depending on your child’s hair texture—whether it is straight, wavy, or curly. Short hair behaves differently based on texture, and understanding this makes styling much easier and more successful. For example, curly short hair often holds braids better, while straight hair may need a bit more grip and light product support to keep styles in place.
Another important thing to keep in mind is comfort. Kids are sensitive to tight hairstyles, and braids should never feel painful or heavy. A good braided hairstyle for short hair should feel secure but gentle, allowing the child to move freely without discomfort. That’s why most of the ideas in this guide focus on lightweight, scalp-friendly braiding techniques that don’t pull too tightly at the roots.
You will also discover how braids can actually protect short hair. Short strands are often more prone to dryness, tangling, and breakage, especially in active children. Braided styles help keep hair organized and reduce daily combing stress, which in turn supports healthier hair growth over time. This makes braids not just a style choice but also a protective hair care strategy.
If you have ever struggled with morning routines, you will also appreciate how time-saving these styles can be. Many of the braids included in this guide can be done in under 10–15 minutes once you get the hang of them. That means less stress before school and more time for your child to start the day calmly and confidently.
This article will also give you practical styling tips, including how to section short hair properly, how to keep braids from slipping, and how to make styles last longer without needing constant touch-ups. You don’t need to be a professional hairstylist to achieve beautiful results—just a bit of patience, the right techniques, and simple guidance.
Most importantly, this guide is designed to inspire creativity. Short hair should never limit styling options. Instead, it should open the door to playful experimentation—mixing small braids, adding tiny accents, or combining braids with ponytails, buns, and twists. With the right approach, even the shortest hair can be transformed into something stylish and Pinterest-worthy.
By the end of this article, you will not only have 11 practical braid hairstyle ideas for kids with short hair, but also a clear understanding of how to make each style work in real life—comfortably, quickly, and beautifully.
So whether you’re preparing for school mornings, family events, birthdays, or just everyday cute looks, these braid ideas will help you turn short hair into a canvas of creativity, confidence, and charm.
1. Double Mini Side Braids for Short Hair
What it is
Double mini side braids are one of the easiest and most practical braided styles for kids with short hair. This style involves creating two small braids on either side of the head, usually starting from the front hairline and working slightly backward toward the ears. The rest of the hair is left natural, which makes it perfect for short hair that cannot fully support complex braided updos.
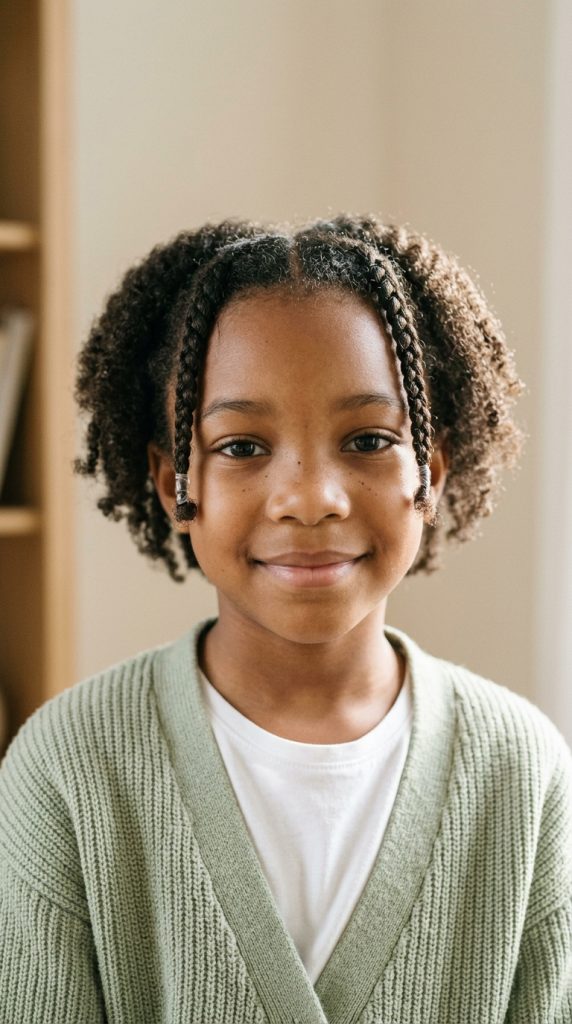
What makes this style so popular is its simplicity combined with its cute and clean look. Even on very short hair like pixie cuts or short bobs, these mini braids can still be created by taking small sections and securing them neatly. It gives a soft, playful appearance while also keeping hair out of the face.
How to implement (step-by-step)
Start by gently detangling the child’s hair using a wide-tooth comb or soft brush. If the hair is very fine or slippery, lightly mist it with water or a leave-in conditioner spray to add grip. Then create a clean middle or side part depending on your preference.
Take a small section of hair from one side of the front hairline. Divide it into three equal parts and begin a simple three-strand braid. Keep the braid loose enough so it does not pull on the scalp, but tight enough so it stays in place. Braid only a short section—usually until just above or behind the ear—and then secure it with a small elastic band.
Repeat the same process on the other side to create symmetry. You can leave the rest of the hair natural, or lightly curl or fluff it depending on texture.
Best for
This style works best for school-going kids, toddlers with short hair, and active children who need a no-fuss hairstyle. It is especially useful for kids who don’t like hair falling into their eyes during play or study time.
It is also ideal for parents who want a quick morning routine because it can be done in under 10 minutes once practiced.
Pro tip
If you want the braids to stand out more, gently tug the edges of the braid after finishing it. This creates a fuller, more “Pinterest-style” soft braid effect even on short hair. You can also add colorful rubber bands for a playful touch.
Mistakes to avoid
Avoid starting with dry, tangled hair because it makes braiding uneven and uncomfortable. Also avoid making the braids too tight, as kids’ scalps are sensitive and tight styles can cause discomfort throughout the day.
2. Front Crown Braids for Short Hair
What it is
Front crown braids are a beautiful and slightly more styled option for kids with short hair. This hairstyle focuses on braiding along the front hairline, creating a crown-like effect that frames the face. Even though the hair is short, this style works by using small sections and following the natural curve of the head.
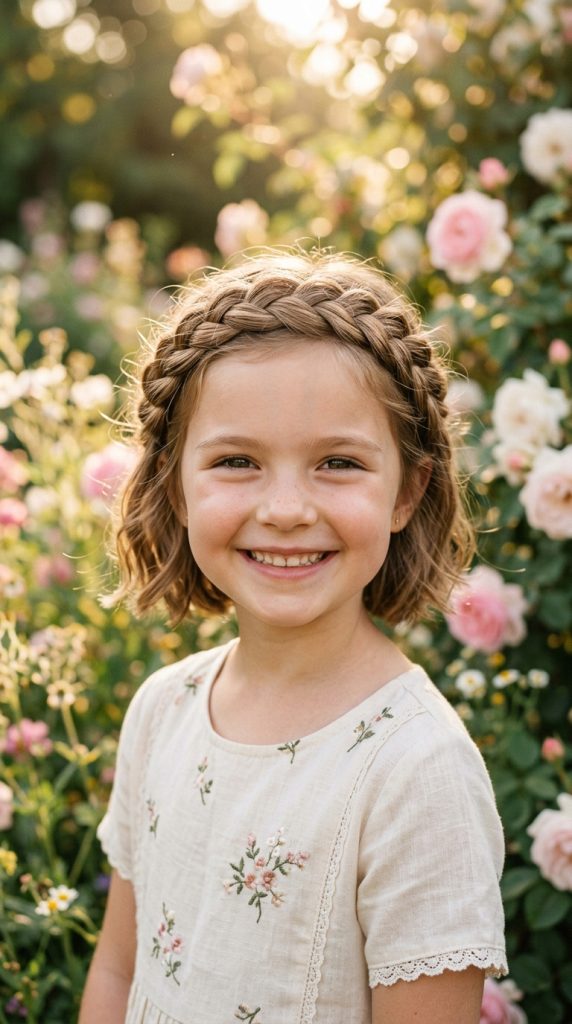
The result is a soft, princess-like look that feels special but still comfortable enough for everyday wear. It is often chosen for school events, birthdays, or family gatherings because it looks more dressed up without requiring heat or extensions.
How to implement (step-by-step)
Begin with clean, slightly damp hair for better control. Create a deep side part or middle part depending on your preference. Starting from one side of the front hairline, take a small section of hair near the forehead.
Begin a French braid by adding small pieces of hair as you move along the hairline. Since the hair is short, you may only be able to braid until the ear area, which is completely fine. Secure the braid with a small elastic.
Repeat the same process on the opposite side if you want a double crown effect, or leave it as a single braided crown for a minimalist look. You can also pin the braid slightly toward the back for a more polished finish.
Best for
This hairstyle is best for kids attending special occasions such as school parties, family photos, weddings, or cultural events. It is also great for kids who like a more “styled” appearance without spending too much time on their hair.
It works especially well for short wavy or slightly thick hair because the texture helps the braid hold better.
Pro tip
To make the crown braid look fuller on short hair, gently loosen the braid by pulling it outward after securing it. This creates a soft, voluminous effect that looks more advanced than it actually is.
Mistakes to avoid
Avoid trying to braid too much hair at once, especially on short strands. This can make the braid uneven or cause slipping. Also avoid skipping edge control or light styling cream if the hair is very fine, as it may cause flyaways.
3. Zig-Zag Part Mini Braids with Pony Puff
What it is
This is a fun, modern hairstyle that combines creativity with practicality. Zig-zag part mini braids involve creating a zig-zag sectioning pattern on the scalp, followed by small braids along each section. The remaining hair is gathered into a small pony puff or mini ponytail at the back.
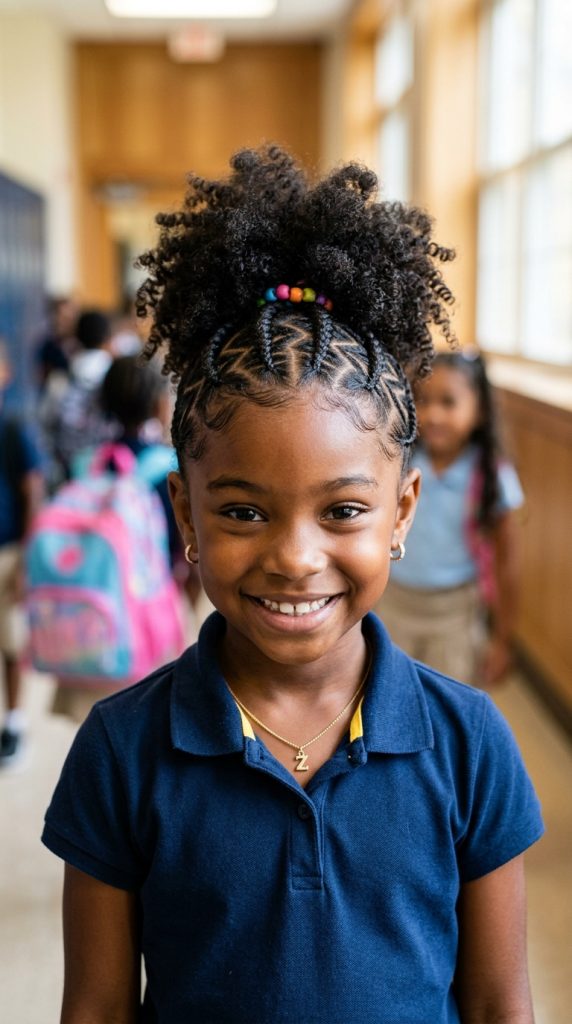
This style is especially popular among kids because it looks playful and stylish at the same time. The zig-zag pattern adds visual interest, while the braids help keep the hair neat and controlled throughout the day.
How to implement (step-by-step)
Start by detangling the hair thoroughly. Using a tail comb, create a zig-zag part starting from the front of the head toward the back. The pattern does not need to be perfect—slight irregularity actually makes it look more natural and stylish.
Next, take each section created by the zig-zag parts and braid small cornrow-style or simple three-strand braids close to the scalp. Since the hair is short, you may only braid halfway down each section before securing it.
Once all sections are braided, gather the remaining loose hair at the back into a small pony puff. Secure it with a soft elastic band. You can also fluff the puff slightly to add volume.
Best for
This hairstyle is best for energetic kids who are always on the move. It is perfect for school days, sports activities, and casual outings. It also works well for parents who want a long-lasting style that doesn’t require daily restyling.
It suits all hair textures but especially works well for curly and coily short hair because the texture helps the braids stay in place longer.
Pro tip
For extra hold, apply a small amount of lightweight gel or styling cream before braiding. This helps reduce frizz and keeps the zig-zag pattern clean and defined for several days.
Mistakes to avoid
Avoid making the zig-zag parts too complicated or tight, especially for younger kids. Also avoid overloading the hair with heavy products, as short hair can quickly look greasy or weighed down.
4. Two Cornrow Braids with Curly Ends
What it is
Two cornrow braids with curly ends is a classic, protective, and super practical hairstyle for kids with short hair. This style features two neat cornrows that start from the front of the head and go straight or slightly curved toward the back. Instead of braiding all the way to the ends, the braids stop mid-length and the remaining short hair is left loose in its natural curly or wavy texture.

What makes this hairstyle special is the balance between structure and softness. The cornrows keep the hair neat and controlled, while the curly ends give a playful, natural finish. It works especially well for kids whose short hair is too short for long braids but still has enough length for small plaits.
This style is often chosen because it looks clean, lasts several days, and is gentle on the scalp when done correctly.
How to implement (step-by-step)
Start with clean, detangled hair. Lightly dampen the hair if needed to make sectioning easier. Use a tail comb to create a straight middle part from the front to the back of the head, dividing the hair into two equal sections.
Take the first section and begin a cornrow braid at the front hairline. Add small amounts of hair as you move backward along the scalp. Keep the braid smooth and consistent, but not too tight.
Once you reach a point where the hair becomes too short to continue neatly, stop braiding and secure it with a small elastic band. Allow the remaining hair to fall naturally in curls or waves.
Repeat the same process on the other side.
You can finish by lightly oiling the scalp to keep it healthy and shiny.
Best for
This style is best for school-going kids, especially those with naturally curly or wavy short hair. It’s also ideal for busy mornings because it stays neat for several days without needing much maintenance.
It works well for active children because it keeps hair away from the face and reduces tangling during play.
Pro tip
If you want a neater and longer-lasting result, apply a small amount of styling gel or edge control before braiding. This helps keep the cornrows smooth and reduces frizz around the parting lines.
Mistakes to avoid
Avoid braiding too tightly, as this can cause discomfort on the scalp. Also avoid over-braiding the short ends—forcing very short hair into tight braids can cause breakage.
5. Side Swept Mini Braided Bangs
What it is
Side swept mini braided bangs are a cute and trendy hairstyle that works perfectly for kids with short hair and front layers or bangs. In this style, the front section of the hair is divided into small pieces and braided diagonally toward one side of the head. The rest of the hair is left natural, creating a soft, side-swept look.
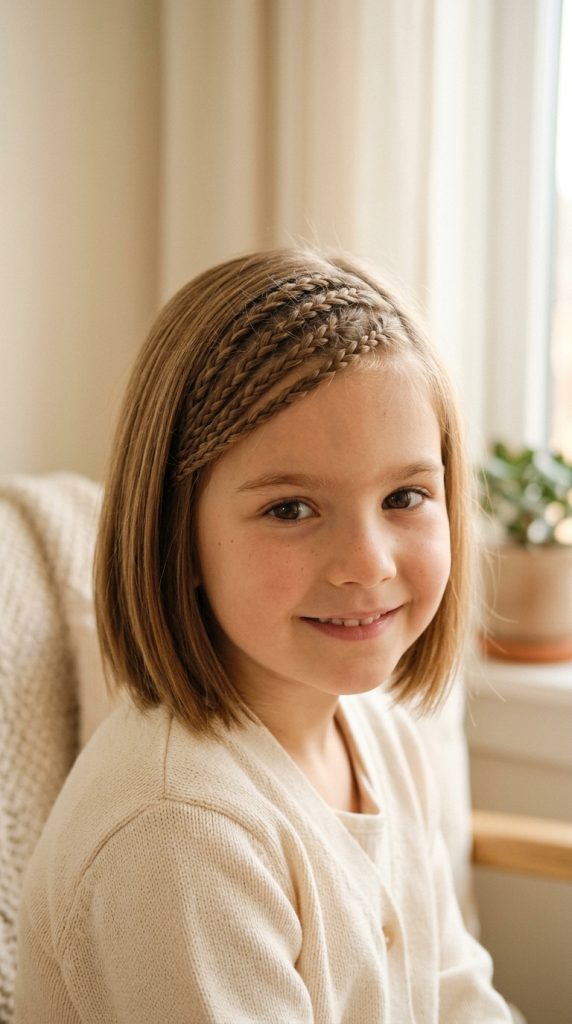
This hairstyle gives a gentle framing effect around the face, making it look soft, neat, and slightly playful. It is especially good for kids who have hair that naturally falls into their eyes or needs a bit of control at the front.
Even on very short hair, this style works because it only focuses on the front section, not the entire head.
How to implement (step-by-step)
Start by brushing the hair forward and separating the front section—this is usually the area from temple to temple. Divide this section into 2–4 small parts depending on thickness.
Take the first small section and begin a simple braid, moving it diagonally toward one side (usually toward the ear). Keep adding small strands if possible, but for very short hair, a simple braid is enough.
Secure the braid near the side of the head using a small elastic or pin if needed.
Repeat with the remaining front sections, laying each braid in the same direction so they blend together into a soft swept effect.
Leave the rest of the hair loose or lightly styled.
Best for
This style is best for kids with short hair who dislike hair falling into their eyes. It is also great for school days, casual outings, and photoshoots because it looks neat but still natural.
It works especially well for straight and slightly wavy hair textures where the braids can lie flat and smooth.
Pro tip
To enhance the look, gently loosen each braid slightly after finishing to create a fuller, softer appearance. You can also tuck the ends behind the ear for a cleaner finish.
Mistakes to avoid
Avoid making the braids too thick, as this can overpower short hair and make the style look bulky. Also avoid skipping detangling before braiding, because small knots can ruin the smooth diagonal flow.
6. Mini Halo Braid for Short Hair
What it is
The mini halo braid is a delicate and elegant hairstyle that creates the illusion of a “crown” wrapped around the head. Even though it is usually seen on long hair, it can be beautifully adapted for kids with short hair by using smaller sections and a partial halo effect.
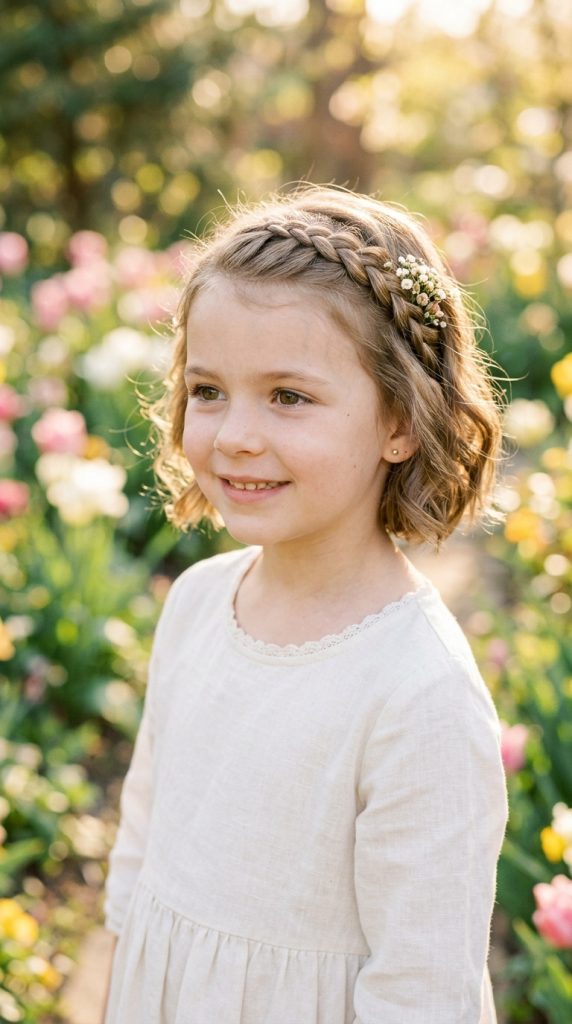
Instead of wrapping a full braid around the entire head, the mini halo braid typically starts from one side and curves around the top or back portion of the head. The result is a soft, angelic look that is both practical and visually charming.
This hairstyle is often chosen for special occasions, but it can also be worn casually depending on how simple you keep it.
How to implement (step-by-step)
Begin with brushed, slightly damp hair for easier control. Create a side part to decide where the braid will start.
Take a small section near the front hairline on one side. Begin a Dutch or French braid, adding small pieces of hair as you move along the curve of the head.
As you continue, follow the natural shape of the head toward the back. Since the hair is short, you may only be able to braid halfway or three-quarters around—this is completely fine and still gives the halo effect.
Secure the end with a small elastic and tuck it behind the head using bobby pins.
You can leave the rest of the hair loose, curly, or slightly puffed for balance.
Best for
This hairstyle is best for special events like birthdays, school celebrations, weddings, or family photos. It is also great for kids who enjoy more “princess-style” looks without needing long hair or extensions.
It works best on slightly textured short hair because the grip helps the braid hold better.
Pro tip
To make the halo look fuller on short hair, gently pull apart the braid after finishing it. This adds volume and makes the style look more detailed and polished.
Mistakes to avoid
Avoid trying to force a full circular halo on very short hair, as it can look uneven or slip out. Also avoid using too much product, which can make short strands heavy and harder to braid neatly.
7. Four Cornrow Mini Braids into Low Puff
What it is
Four cornrow mini braids into a low puff is a neat, structured, and highly practical hairstyle designed specifically for short hair that needs both control and style. This look combines small cornrows at the front or top of the head with a soft puff gathered at the nape. It creates a clean “styled but still natural” appearance that works beautifully for kids.
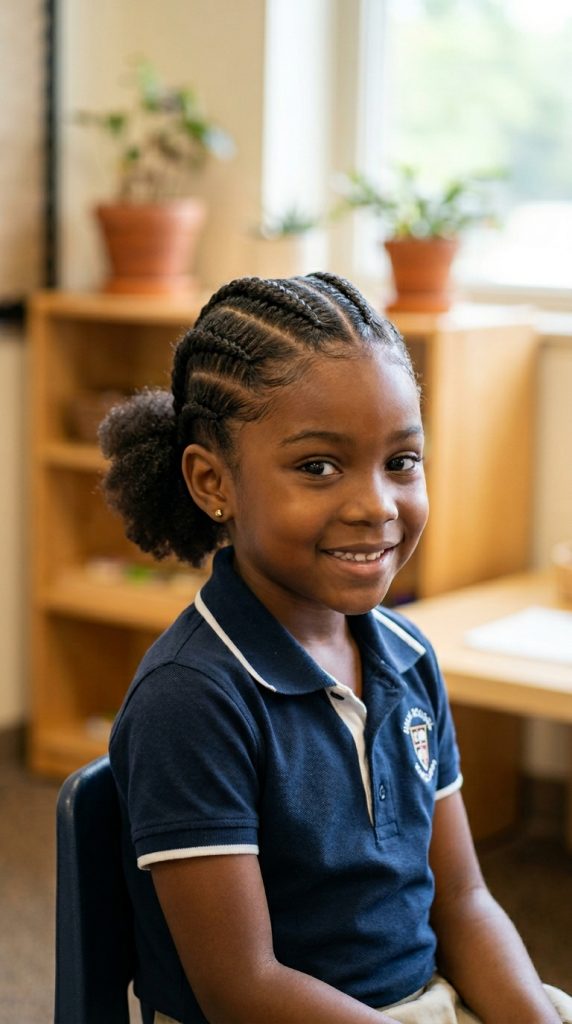
The front section usually has 3–4 small cornrows, while the back hair is left loose and gathered into a tiny puff. Even if the hair is very short, the puff gives the illusion of volume while the braids keep everything sleek and organized.
This style is popular because it lasts well, reduces daily combing stress, and keeps hair away from the face throughout the day.
How to implement (step-by-step)
Start with clean, moisturized hair. Detangle gently so there are no knots, especially near the scalp. Use a tail comb to section the front/top part of the head into four equal parts.
Take the first section and begin a small cornrow braid, feeding in tiny strands as you move backward. Keep the braid close to the scalp but not tight. Repeat this process for all four sections.
Once all braids are completed, gather the remaining back hair into a low puff using a soft elastic band. If the hair is very short, simply fluff it slightly instead of forcing a tight ponytail.
You can finish by smoothing edges lightly and applying a small amount of oil to the scalp.
Best for
This style is best for school days, daycare, and active kids who need a long-lasting hairstyle. It is also ideal for parents who want a low-maintenance option that still looks polished.
It works especially well for curly and coily hair textures because they naturally hold the puff shape better.
Pro tip
If you want the puff to look fuller, gently stretch the hair with your fingers before securing it. This adds volume without heat or damage.
Mistakes to avoid
Avoid making the cornrows too tight, especially on young children, as this can cause scalp discomfort. Also avoid over-smoothing the puff, which can make short hair look flat instead of soft and natural.
8. Criss-Cross Braided Headband Style
What it is
The criss-cross braided headband style is a creative and eye-catching hairstyle that uses small braids to form a criss-cross pattern across the front or top of the head. It looks like a decorative hairband made entirely from braids, making it perfect for kids with short hair who want something stylish but still practical.
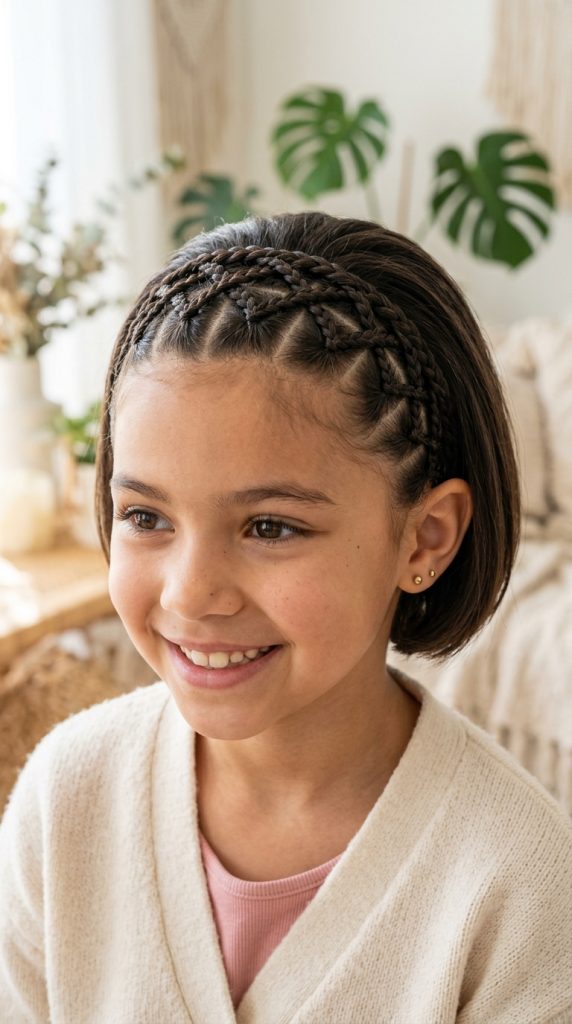
This style is especially loved because it keeps the front hair neatly secured while adding a unique design element. It works well even when the rest of the hair is very short because the focus is mainly on the braided structure at the front.
It gives a trendy, Pinterest-inspired look without requiring extensions or complicated tools.
How to implement (step-by-step)
Start with detangled hair and create a clean front section from ear to ear. Divide this section into small triangular or diagonal parts depending on how detailed you want the pattern.
Take the first section and braid it diagonally toward the opposite side of the head. Secure it lightly with a small elastic or pin.
Repeat this process with the next section, but cross it in the opposite direction so the braids form an “X” or criss-cross pattern.
Continue this alternating pattern until all front sections are braided and crossed. The rest of the hair can be left natural or styled into a small puff.
Best for
This hairstyle is best for special school days, birthdays, photoshoots, or events where a more decorative hairstyle is desired. It is also great for kids who like unique, fun hairstyles that stand out.
It works well on straight, wavy, or lightly curly hair because the pattern is the main focus.
Pro tip
For a more defined look, gently stretch each braid after completing it. This makes the criss-cross pattern more visible and gives a fuller, more stylish appearance.
Mistakes to avoid
Avoid making the sections uneven, as this can disrupt the symmetry of the criss-cross design. Also avoid braiding too loosely, because the pattern may not hold properly throughout the day.
9. Half-Up Braided Space Buns
What it is
Half-up braided space buns are a fun, playful, and modern hairstyle that works surprisingly well for kids with short hair. This style involves braiding small sections from the front or sides of the head and then twisting or wrapping them into two mini buns at the top or back of the head. The rest of the hair is left loose or naturally styled.
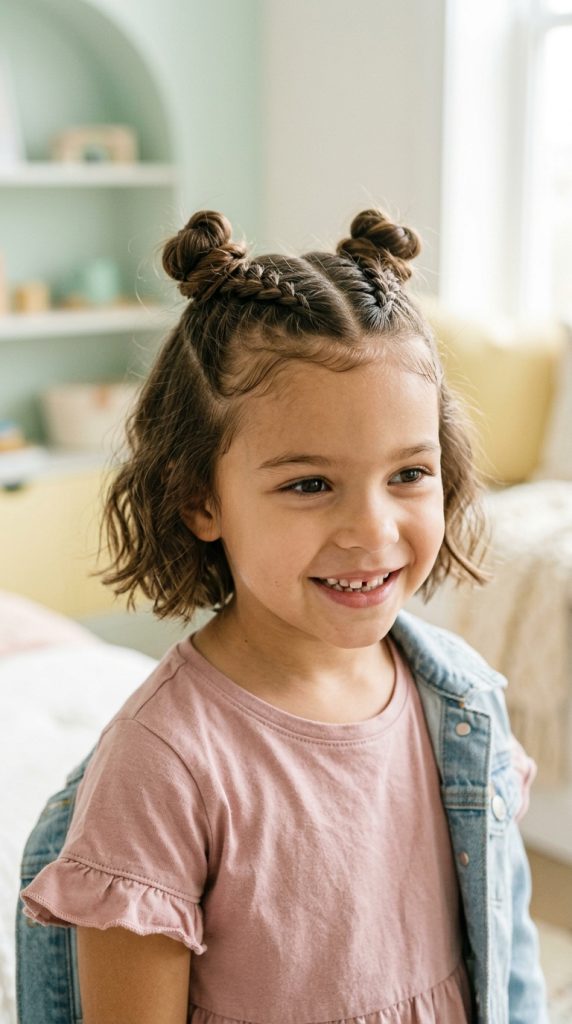
Even with short hair, this style creates a cute “double bun” effect that feels trendy and youthful. It is especially popular among kids because it looks fun and expressive while still being practical for everyday wear.
This hairstyle combines braids and buns, giving both structure and creativity in one look.
How to implement (step-by-step)
Start by parting the hair down the middle into two equal sections. Take the front portion of one side and create a small braid going upward or backward toward the crown area.
Once braided, twist the remaining hair from that section into a small bun and secure it with a soft elastic or pins. Repeat the same process on the other side to create a matching bun.
If the hair is too short to form full buns, you can create mini twisted knots instead, which still give the same space bun effect.
Leave the remaining back hair loose or lightly styled depending on length.
Best for
This style is best for casual outings, playdates, weekends, and fun school events. It is ideal for kids who like playful hairstyles and enjoy something different from basic braids or ponytails.
It works best on thick or medium-density short hair because it holds buns more easily.
Pro tip
For extra cuteness and hold, gently pancake (loosen) the braids before forming the buns. This makes them look fuller and more decorative even on short hair.
Mistakes to avoid
Avoid trying to make large buns on very short hair, as this can cause slipping or discomfort. Also avoid using tight elastics that pull too much on the scalp, especially for younger kids.
10. Tiny Feed-In Braids with Beaded Ends
What it is
Tiny feed-in braids with beaded ends are a detailed, stylish, and protective hairstyle that works beautifully for kids with short hair. This look involves creating very small braids that gradually “feed in” hair as you braid, starting from the front or scalp and moving backward. Even with short hair, the technique allows you to build neat, structured braids without needing length.

The standout feature of this hairstyle is the beaded ends. Once the braids reach the shortest workable length, small beads are added to the ends, giving the style a fun, playful, and expressive finish. Kids especially love this style because the beads add movement, color, and personality.
This hairstyle is both practical and decorative—it keeps hair secure while allowing creativity through bead choices and braid patterns.
How to implement (step-by-step)
Start with clean, detangled, and slightly moisturized hair. Use a rat-tail comb to create very small, even sections across the head depending on how many braids you want. Precision is important here because small sections create a cleaner final look.
Begin the first braid by dividing the section into three parts and gradually feeding in small amounts of hair as you braid down the scalp. Since the hair is short, you may only feed in a small amount before continuing with a simple braid.
Once you reach the end of the natural hair length, secure the braid with a small elastic. Then carefully add beads to the end of each braid using a bead tool or looped thread. Secure the beads with a small rubber band underneath to keep them from slipping.
Repeat this process across all sections.
Best for
This hairstyle is best for kids who enjoy expressive and stylish looks. It is perfect for school events, birthdays, cultural celebrations, and weekends.
It works especially well for coily and curly short hair because the texture helps the feed-in braids hold more securely and last longer.
Pro tip
Choose lightweight, plastic beads instead of heavy ones to avoid pulling on the scalp. You can also mix bead colors to match outfits, holidays, or school themes for extra fun.
Mistakes to avoid
Avoid making sections too large, as this reduces the neatness of the feed-in effect. Also avoid overloading braids with too many beads, which can make the hairstyle heavy and uncomfortable for kids.
11. Twisted Braided Bun Crown for Short Hair
What it is
The twisted braided bun crown is a soft, elegant, and protective hairstyle that gives a crown-like appearance using small twists and braids. It is specially adapted for short hair by working in sections and forming mini twisted braids that are pinned or gathered into small bun shapes around the head.

Instead of requiring long hair to wrap fully around the head, this style creates a “broken crown effect,” where multiple small braided buns or twists are arranged in a circular pattern. The result is a graceful, princess-inspired look that still works perfectly on short hair.
This hairstyle is often chosen for special occasions but can also be simplified for everyday wear depending on how tightly or loosely it is styled.
How to implement (step-by-step)
Start with detangled, slightly damp hair to make twisting easier. Divide the hair into several small sections around the head—usually 6 to 8 sections depending on thickness and length.
Take the first section and either twist it tightly or create a small three-strand braid. Once completed, roll it into a small bun and secure it with bobby pins or a soft elastic.
Repeat this process for each section, placing the buns in a circular or crown-like arrangement around the head. If the hair is too short to form a bun, simply twist and pin the section flat against the scalp to maintain the crown shape.
Once all sections are complete, lightly adjust each bun to ensure balance and symmetry.
Best for
This hairstyle is best for formal occasions like weddings, family gatherings, school performances, or photoshoots. It is ideal for parents who want a more elegant and polished hairstyle for their child without using heat or extensions.
It works well on all short hair textures, especially slightly thick or textured hair that can hold twists better.
Pro tip
For a more defined crown effect, gently loosen each twisted bun slightly after pinning. This creates a fuller, softer look that appears more detailed and stylish without extra effort.
Mistakes to avoid
Avoid making sections too large, as this can cause uneven buns and a messy crown shape. Also avoid pulling the twists too tightly, since short hair needs gentle handling to prevent breakage and discomfort.